Want to share your immersive Meta Quest gameplay or 180° recordings with the world? Uploading VR videos to standard platforms can be a formatting nightmare, but DeoVR makes it incredibly simple. This step-by-step creator guide walks you through the entire publishing process. Learn how to configure your video formats, set up Passthrough transparency, and upload Sbs2l recordings captured directly on your headset using Quest Games Optimizer (QGO). Stop struggling with video conversion and start sharing your VR content globally today.
Introduction
This article is part three of the DeoVR guide series, and the main focus this time is how to upload VR videos to DeoVR.
Meta Quest headsets don’t support VR video recording by default, so if you want to capture VR footage, you’ll usually need a dedicated camera. A beginner-friendly option like the Insta360 X4 costs roughly the same as a Quest 3.
That said, if you have Quest Games Optimizer installed on your Meta Quest, you can enable VR recording directly on the headset. This lets you record in-game footage as VR video and share it with friends in the same format.
For a deeper look at QGO, along with more detailed explanations of DeoVR, check out the two related articles below.
DeoVR Complete Guide
AI Passthrough, 8K Videos & Mixed Reality Setup
Quest Games Optimizer Guide
Unlock Better Graphics & 4K Recording
Once you’ve recorded a VR video, the next step is uploading it to DeoVR so your friends can watch it. I’ll walk through the process step by step from here.
Video Upload
You can upload VR videos to YouTube, but you have to convert the format on your PC first before posting. That conversion process is a hassle, and even after uploading, the VR playback experience honestly isn’t great.
DeoVR is different. It’s one of the largest VR video platforms in the world, and it handles format conversion automatically on the site. You just upload your video, and it’s ready to play right away. Let’s go through the steps in order.
Step 1: Open the DeoVR Official Website
First, open the DeoVR official website from your PC or phone.
If this is your first time visiting the site, you’ll see a message asking you to download the app. Since the app is already installed on your Meta Quest headset, you can simply close this message by tapping the X.

Step 2: Sign in
Click SIGN IN in the top-right corner of the official website to start logging in.

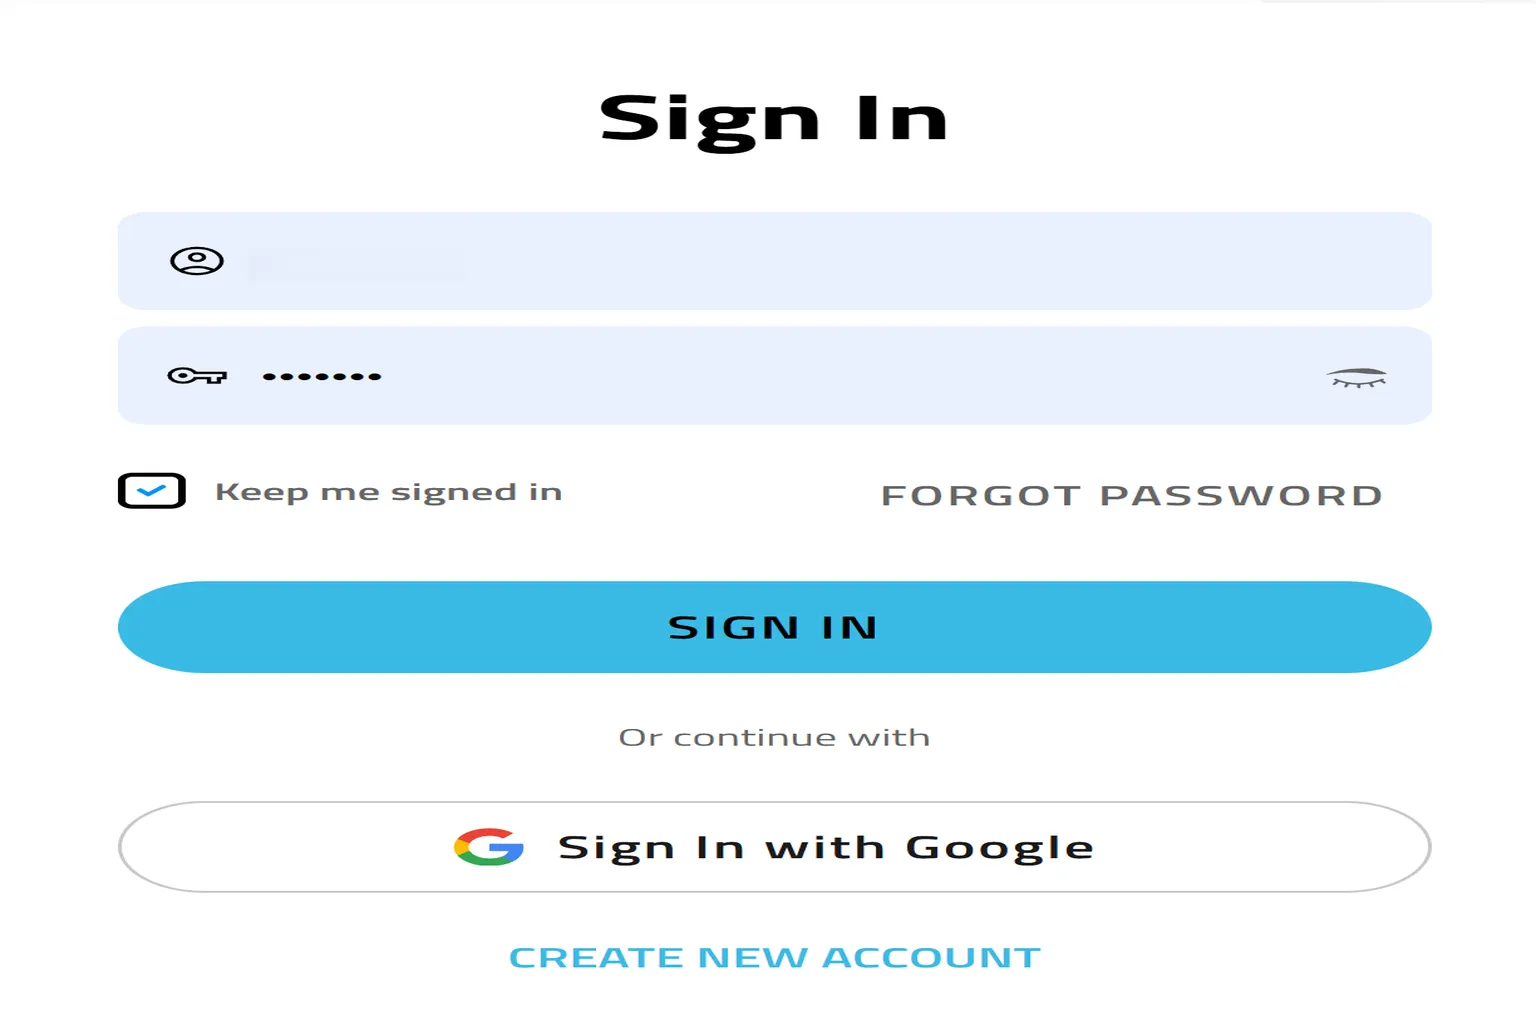
Step 3: Log into your account
You can sign in by entering your email address and password, or just use your Google account for a quick login.
Step 4: Upload
Once you’re logged in, go back to the homepage and click the red UPLOAD button at the top of the screen. This takes you to the upload page.

Step 5: Create a channel
The first time you upload a video, you need to create your own channel. You only have to fill in two fields here, so just set them however you like.
- Name: Channel name
- Channel description: Channel description

Step 6: Upload your video
Click Select File from your device to choose the video file you want to upload from your PC.
If you want to upload a 3D photo instead, press Back to return to the upload selection screen.

Note: Upload selection screen
Here, you can choose whether to upload a video or a photo. The supported file formats are:
- Video: mp4, m4v, mov, wmv, avi, mpg, mkv, divx, webm, flv
- Photo: jpg, jpeg, png

Step 7: Enter video details
On this page, you enter information that helps viewers understand what your video is about. The available fields are:
- Title: The video title. This is shown on your channel and in search results, so adding some English words makes it easier for international viewers to find.
- Description (optional): A short description of the video. It’s a good idea to briefly mention the content, scenes, characters, or setting.
- Category (optional): The video genre, such as gameplay, movie, or art. This helps with categorization and recommendations.
- Camera type (optional): The name or model of the camera you used, such as Insta360 Pro or Meta Quest 3. This can also help improve search visibility.

Step 8: Technical settings
This screen is where you set things like the video format, field of view, and thumbnail. The available options are:
- Video format: The video format. Choose how the VR video is laid out, such as side-by-side (SBS) or over-under (OU).
- View angle: The field of view. Specify whether the video is 180° or 360°.
- Thumbnail (optional): The thumbnail image used as the video cover. It’s better to pick something that looks good. If you don’t choose one, the system automatically grabs a frame from the video.
- Subtitles (optional): Subtitles. You can use subtitle files in SRT format.
- Passthrough (optional): Passthrough background mode. If the background was separated during recording, this lets you make the background transparent during playback.
- Automatic interpolation: Automatic frame interpolation. Converts 30 FPS videos to 60 FPS to make playback smoother.

Note 1: Video format
Under Video format, the following formats are supported.
For reference, videos recorded on Meta Quest using QGO are all saved in Sbs2I (side-by-side interlaced) format.

Note 2: Passthrough feature
When this feature is enabled, the video background becomes transparent, making the character look like they’re standing right in your room. The available settings are:
- Alpha: Used when the video already includes an alpha channel (transparent background).
- Custom Parameters: Manually sets background removal parameters. This is for videos without an alpha channel.
Keep in mind that videos recorded with Meta Quest + QGO do not support passthrough, so you won’t be able to use this option for those videos.

Step 9: Publishing settings
This is the final step. Here, you choose whether the video is private or public. It works almost the same way as YouTube. Once you’re done, click Done at the bottom.
- Private: Private. Only you can watch it. It won’t appear on your channel or in search results, and it won’t go through review.
- Unlisted: Unlisted. Only people with the link can watch it. The video still needs to pass review before it can be played.
- Public: Public. Anyone can watch it. You can publish it right away or schedule a specific release date and time.
Where will the content be published
Here, you choose which platform your uploaded video will be published on:
- DeoVR: Supports general-audience content only, roughly up to PG-12 level.
- JillVR: Adult content is allowed, but it’s not as explicit as SLR.
On JillVR, the allowed content level is roughly up to swimsuit-level material. Content that shows full nudity is restricted.
Extreme content (optional)
If your video includes effects like the ones below, it’s a good idea to add warnings so viewers don’t feel uncomfortable or dizzy:
- Flashing Light Warning: Flashing lights, strobe effects, or sudden light bursts.
- Motion Warning: Intense shaking, fast rotations, or aggressive camera movement.

Step 10: Video encoding and review
After you upload the video, DeoVR handles encoding and review on their side. This process takes much longer than YouTube. For example, a 5-minute gameplay video might finish processing on YouTube in about 5 minutes, but on DeoVR it can take around an hour.
After uploading, the video goes through three status stages. Once it reaches Published, everything is complete.
- Video is being processed: Processing is queued.
- Processing: The video is currently being encoded and reviewed.
- Published: The video is fully published and available to watch.

Step 11: Play the video
Go back to the DeoVR app inside your headset and open My Videos from the menu on the left. You should see the video you just uploaded there. Select it, and it will start playing right away.

If you don’t plan on uploading videos to DeoVR, take a look at the VR players introduced next. All of them support local playback and are solid options for comfortable viewing.
Skybox VR Player Complete Guide
Setup AirScreen, Network Streams & YouTube VR
4XVR Video Player Premium Guide
PC Streaming, WebDAV & USB Setup

Moon VR Player Ultimate Guide
PC Streaming, WebDAV & Web Theater DLC
FAQ – Common Questions
Can I record VR videos directly on a Meta Quest headset?
Not by default. However, if you install Quest Games Optimizer (QGO), you can enable native VR recording. This lets you record stereoscopic VR videos in Sbs2l format.
What video format works best for proper playback on DeoVR?
The recommended format is .mp4, with a resolution of at least 3840 × 1920. Videos recorded on Quest are usually in Sbs2l (side-by-side stereo), which is one of the most widely compatible formats on DeoVR.
How long does it take before an uploaded video can be watched?
It depends on the video length and server load, but processing and review usually take about 10 minutes to 2 hours. If you choose Public, you also need to wait for platform approval.
Can I publish slightly adult content?
You can’t upload it to DeoVR, but JillVR is okay. JillVR accepts 18+ situation-style videos, but everything still goes through platform review. Content that violates laws or terms of service is not allowed.
Is there another way to watch VR videos without uploading them?
Yes. Skybox VR Player, 4XVR, and Moon VR are excellent apps for local playback. They also support streaming, handle many formats, and let you watch VR videos without uploading anything online.