
Looking for the best budget video player for Meta Quest? Moon VR Player packs incredible value at a fraction of the cost of its competitors. This complete guide walks you through every feature step by step, from setting up SMB network sharing and WebDAV cloud storage to streaming PC videos effortlessly with Moon Link. We also dive deep into its exclusive DLCs, including the game-changing Web Theater that lets you watch Plex, Disney+, and YouTube directly in a massive virtual cinema. Read on to find out if this affordable app is the perfect fit for your headset.
Introduction to Moon VR Player
The video player that comes preinstalled on Quest has pretty limited format support, and the screen feels small. When you watch Netflix or YouTube in VR, the experience is more like a big outdoor theater, maybe around a 150-inch screen. It’s fine, but nothing special. Once you buy a dedicated VR video player from the Meta store, the difference is obvious. It feels much closer to having a private IMAX theater right in front of you.
On Meta Quest, the VR video players people use most often are usually grouped into a few well-known options.

MOON VR Player
Cheapest player after discounts
Price: 🌟🌟🌟
Solid features with clean visuals
SKYBOX VR Player
Affordable and easy to use
Price: 🌟🌟
Feature-rich and simple controls
4XVR Video Player Premium
Great features, but expensive
Price: 🌟
Excellent audio presentation
HereSphere
More trouble than it’s worth
Price: 🌟
Very complex setup, not beginner-friendly
Moon VR Player stands out as a strong value pick. It supports common video formats like MKV and MP4 with x264 and x265 encoding, and it also handles VR video without issues. The controls are straightforward, and it supports several different ways to play your content:
- Network sharing (SMB)
- Cloud storage (WebDAV, Baidu Cloud, Alibaba Cloud)
- Local storage
- And videos shared using the MOON PC software
Because it covers what most people actually want for everyday video watching, this player does a solid job meeting basic needs. From here on, I’ll go through how each part works in detail.
Video Connection Setup
After you buy this app on the Meta store and launch it, you’re dropped into a space that feels like a luxury penthouse in a high-rise. The walls are mostly glass so you can see the starry sky outside, and the interior looks really modern. The fireplace, though, feels a little fake—and somehow that actually adds to the vibe.
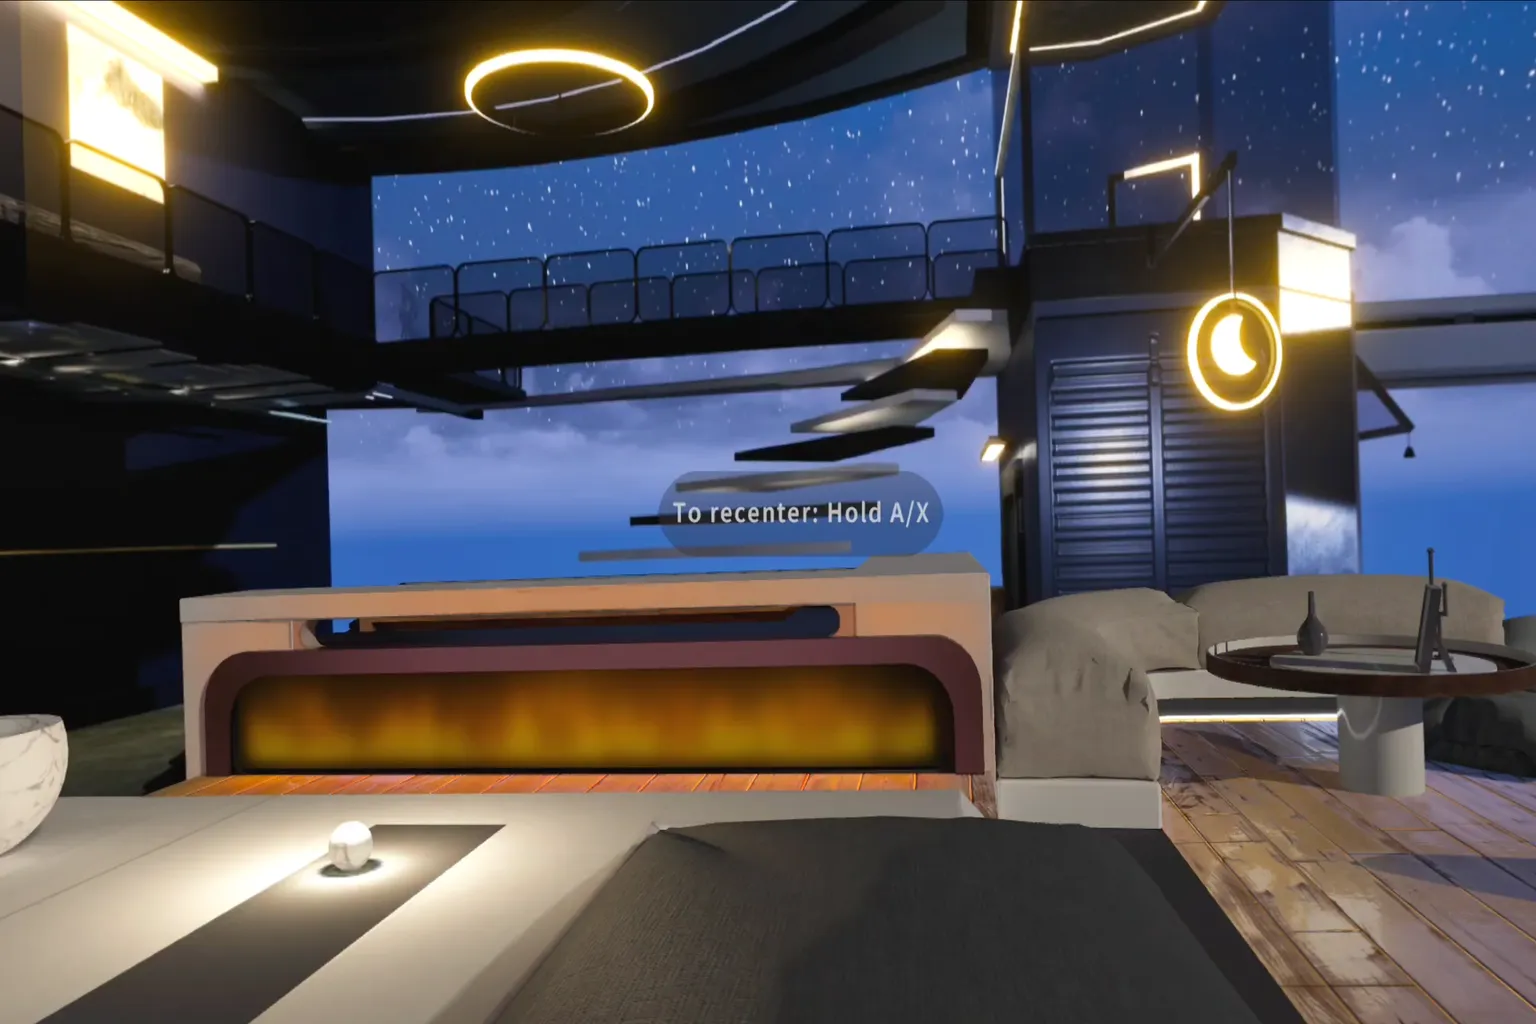
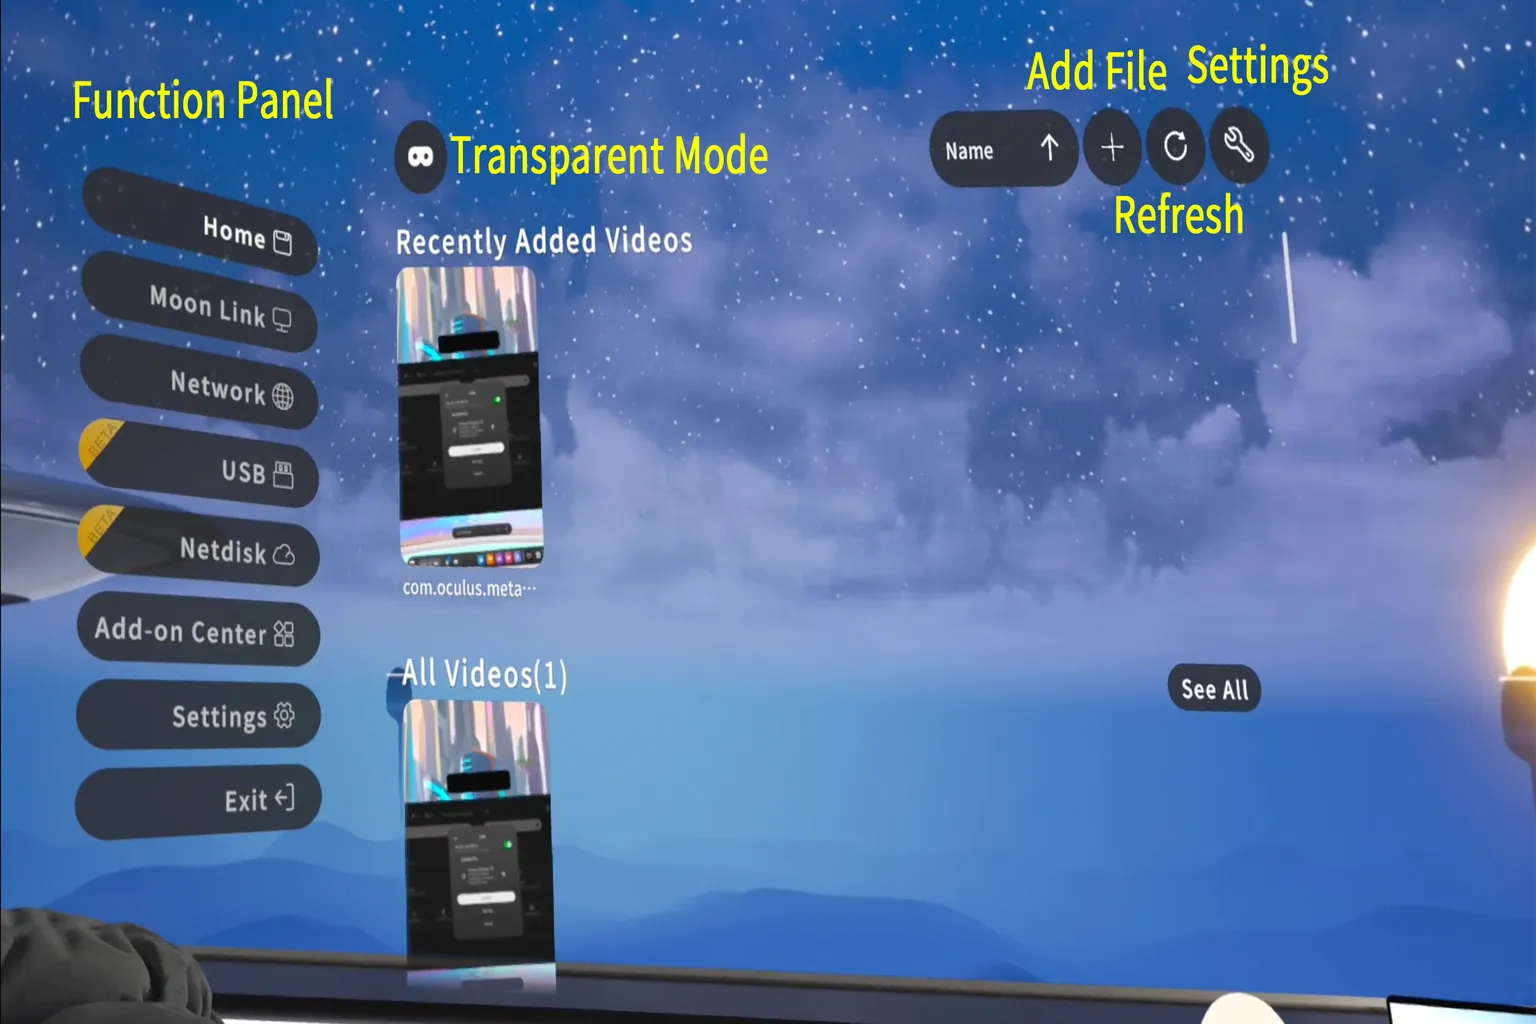
When you first get in, you’ll see a pop-up showing what’s new in the latest update. On the left side of the screen, there’s a menu. Here’s what each section does:
- Home: Go back to the main penthouse space
- Moon Link: Use the Moon Link feature from your PC
- Network: Use network sharing (SMB)
- USB: Access files on the headset or via a USB-C connection
- Netdisk: Use WebDAV, Baidu Cloud, or Alibaba Cloud
- Add-on Center: DLC download area
- Settings: Adjust app settings
- Exit: Close the app
That’s the basic way you’ll navigate.
Near the top of the screen, you’ll also see a few buttons:
- 🕶️ Passthrough Mode: Switch the background to a view of your real room
- ✚ Add File: Add files to the Home screen
- 🔄 Refresh: Re-scan the files on the Home screen
- 🔧 Settings: Choose whether to include the system core files during scans (I recommend not touching this)
Now I’m going to walk through each feature one by one. I’ll keep it simple and clear so even if you’re brand new, you won’t get lost.
Moon Link
This feature lets you connect to your PC easily. Once you install the dedicated software on your computer, you can access videos stored on your PC right away, without dealing with complicated setup. The only requirement is that your headset and PC must be connected to the same Wi-Fi router.
Here’s how it works.
Step 1: Download the Moon Link client
Go to Moon’s official website and click the Download button to get the Moon Link client software.
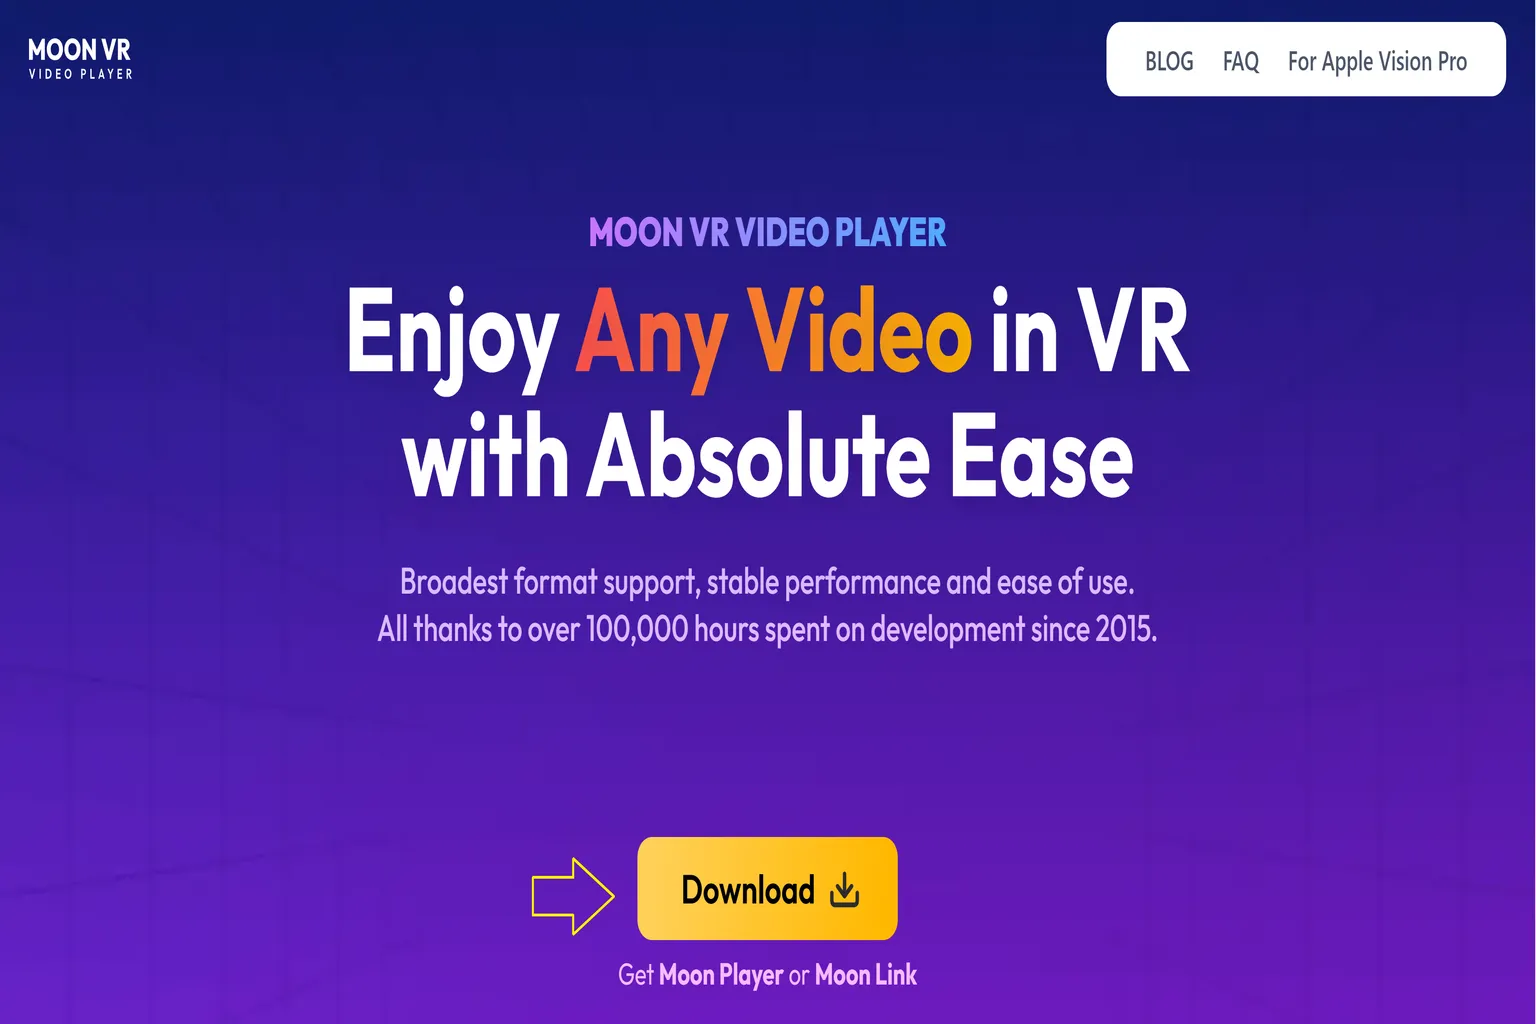
On the download page, choose either Windows or Mac depending on your computer, then download and install it.

Step 2: Set up the videos you want to share
After installation, launch the software. You’ll be asked for permission at first, so select Agree. Once the app opens, click the + button in the top-right corner and add the video files or folders you want to share.

After adding them, you’ll see those videos listed in the sharing list, so you can confirm everything is there.

Step 3: Launch Moon Link
Put the headset back on and select Moon Link from the main menu. The headset will start connecting to your PC automatically.

Step 4: Play your videos
With the default settings, thumbnails of your shared videos will appear. Just pick the one you want, and it starts playing.

Network Sharing
This method uses network sharing (Samba, usually called SMB) to connect to your PC. To use it, both your headset and your computer need to be connected to the same router, and your PC must already have user login and shared folders set up.
For how to configure network sharing on the PC side, follow the steps explained in the related article.
Step 1: Open Network
From the left side of the main menu, select Network.
Moon VR Player will automatically scan for PCs on the same network that have SMB sharing enabled. When your PC shows up, select it to go inside.

Step 2: Set it up and start using it
Enter your PC username and password, then press Add.

Once that’s done, you’ll be able to see your shared folders. Open a folder and play any video you want.

Disk Playback
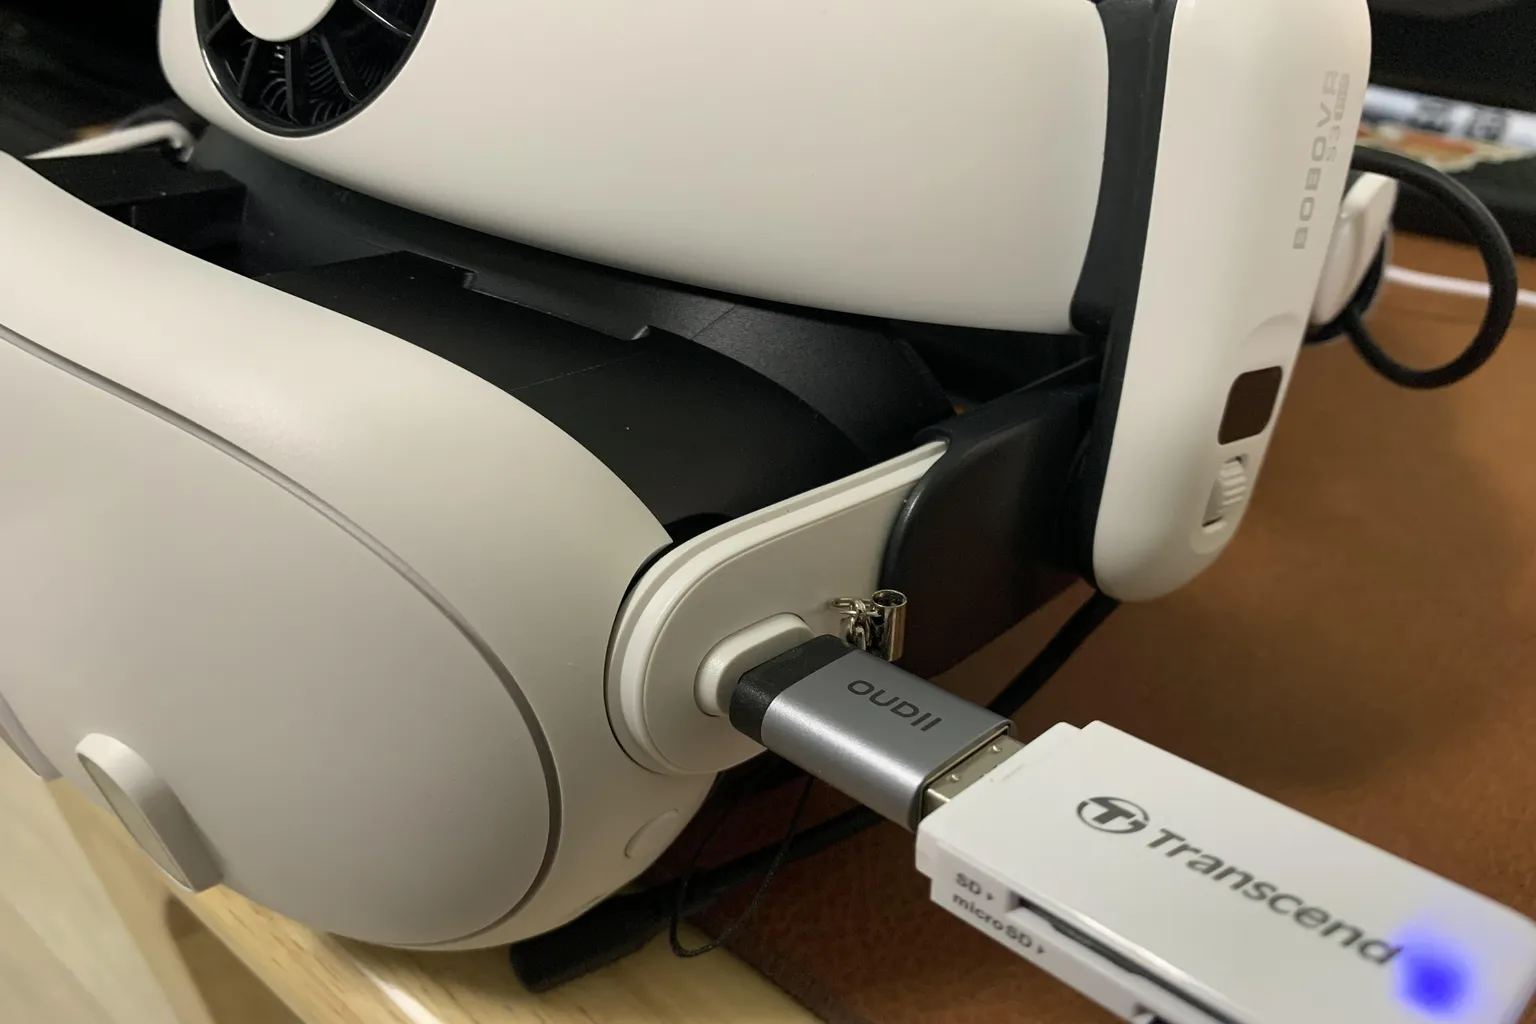
This feature lets you play videos stored directly on the Meta Quest headset or on an external drive connected through USB-C. That said, if the USB cable catches or gets pulled while it’s plugged in, there’s a real risk of damaging the USB-C port. I don’t really recommend using this method, but if you do, handle it carefully.
Step 1: Using the Disk feature
Plug a USB drive into the headset’s USB-C port, then select Disk from the main menu.
You’ll see a permission request pop up. Select OK to continue.

Step 2: Playing videos
The first time you use the Disk feature, press the 🔄 button on the screen to re-scan the disk.

Once the scan finishes, your videos will appear on the screen. Just select one and start playback.

In older versions of Moon VR Player, a white watermark would appear on the screen during disk playback, which was pretty distracting and honestly killed the mood a bit.

In the latest version released in August 2025, Moon VR Player 29.11.1, this issue has been properly fixed. The white watermark is gone, and the image now looks much cleaner and nicer.

Netdisk (Cloud Storage)
This feature lets you play videos stored in the following three cloud services:
- WebDAV (for example, PikPak)
- Baidu Netdisk (Baidu Cloud)
- Aliyun Driver (Alibaba Cloud)
Baidu and Aliyun are hard to use smoothly unless you’re on a VIP plan. PikPak, on the other hand, is the method I recommend. Below, I’ll explain how to create a PikPak account and how to set it up in Moon VR Player. If you don’t have an account yet, you can register for PikPak from the link. Just note that using the WebDAV feature requires a paid subscription. If you sign up through the link, you’ll get a 5-day trial, which is enough time to test WebDAV properly. If you’re using an iPhone or iPad, you’ll need to enter the invite code “44502139” to receive the trial eligibility.
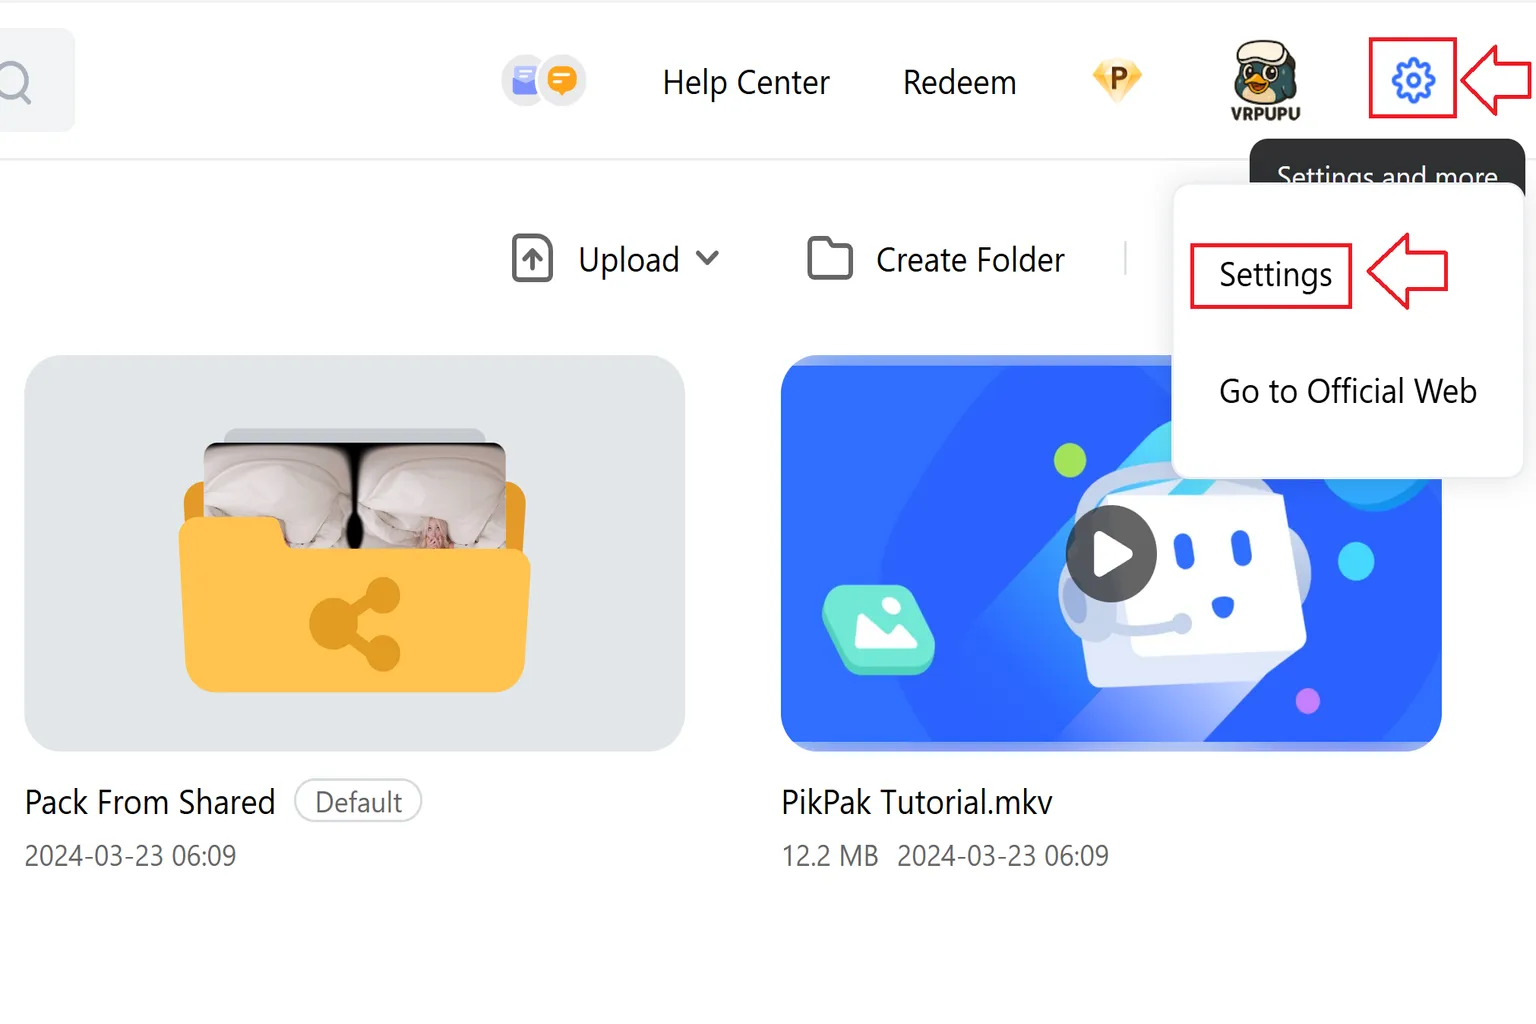
Step 1: Open Settings
Tap the gear icon in the top-right corner of the screen and select Settings.
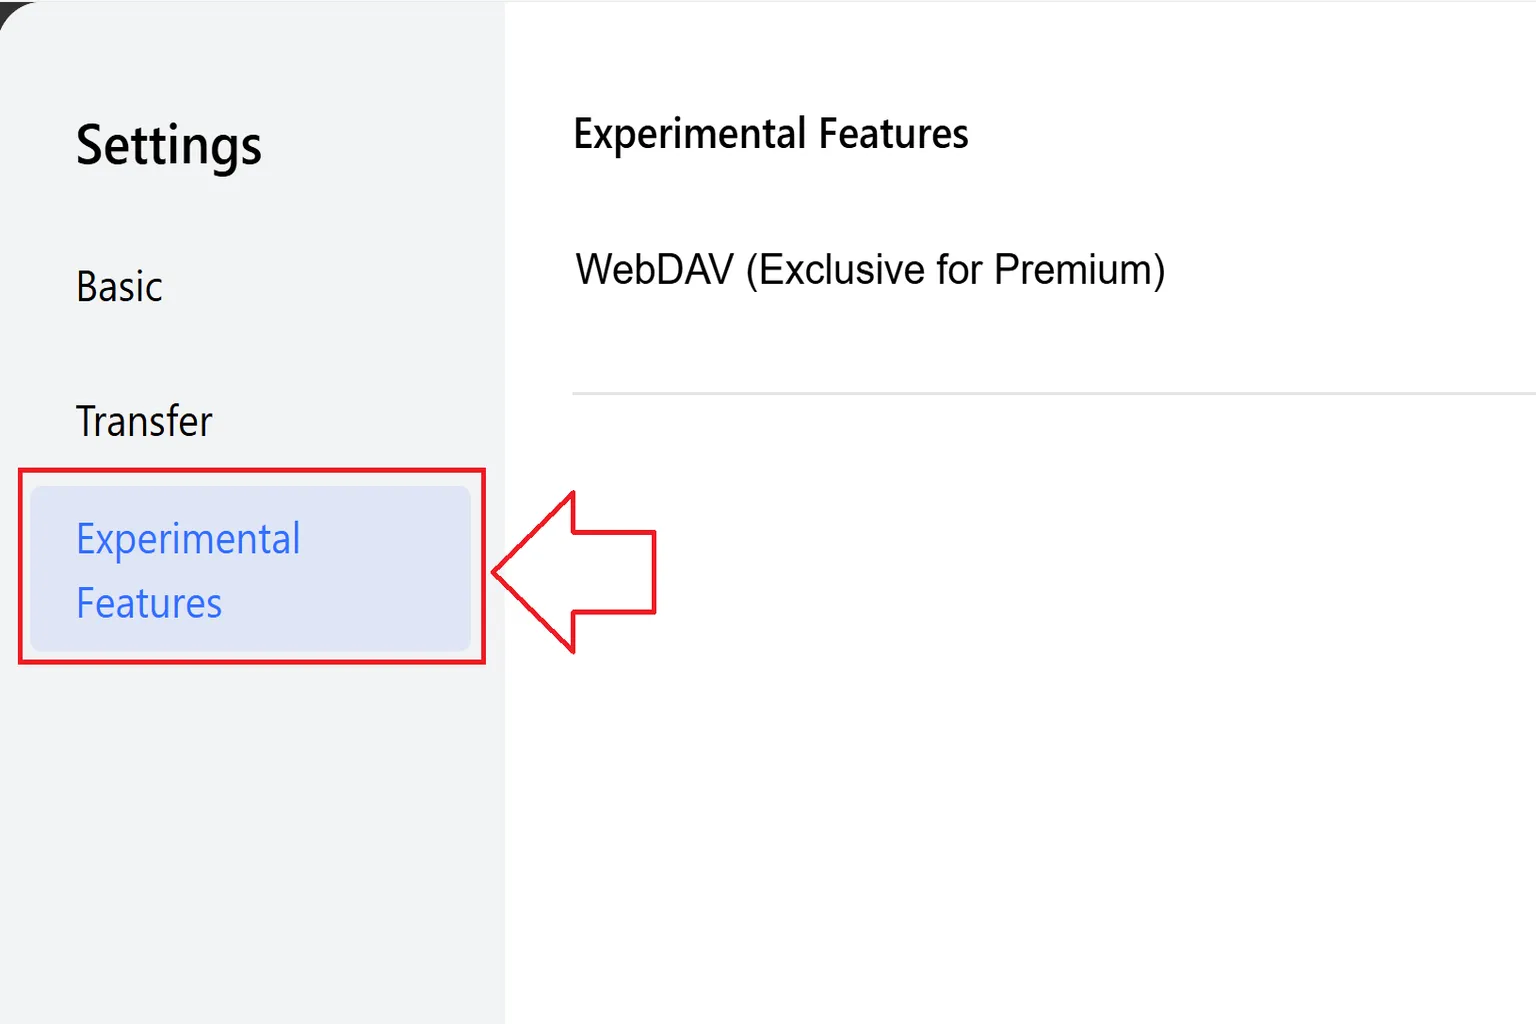
Step 2: Go to Experimental Features
Inside Lab Features, look for WebDAV (Members Only) and open it. You’ll see the URL, account name, and password there.
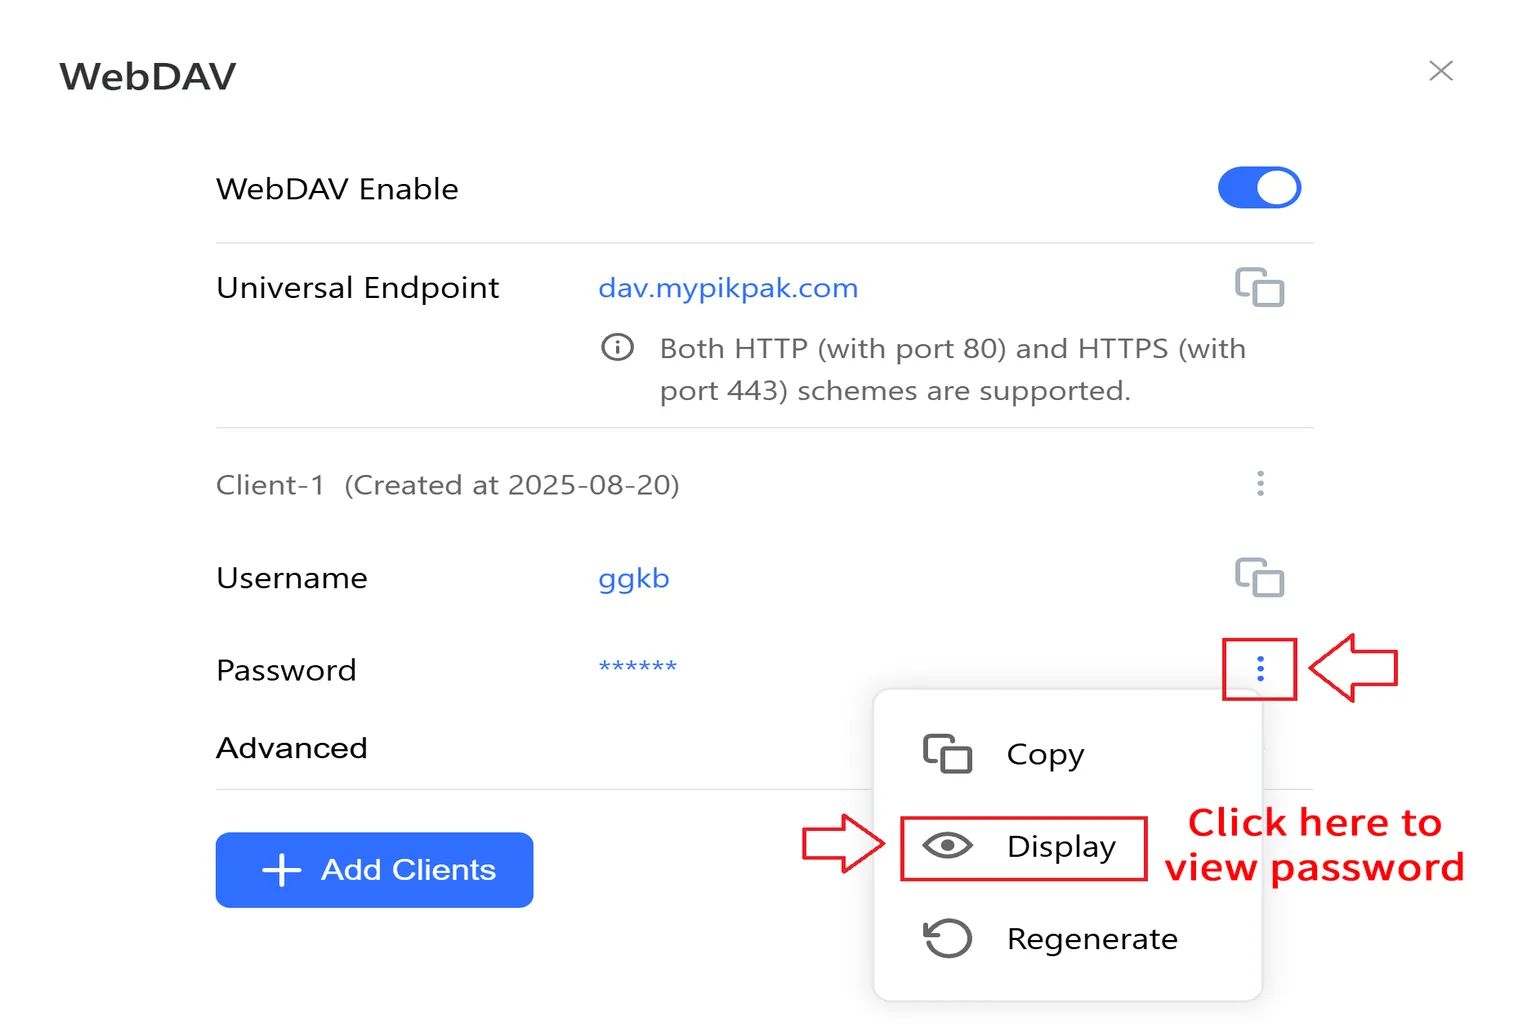
Step 3: Get your WebDAV account details
Once WebDAV is enabled, make a note of three things: the unified endpoint (URL), the username, and the password. The password is hidden by default, so tap the ⋮ button and choose Show to reveal it.
Step 4: Access WebDAV cloud storage
From the left-side menu on the Home screen, select Netdisk (Cloud), then choose WebDAV.

Step 5: Connect to WebDAV
Enter the URL, username, and password you wrote down in Step 3, then select Add.

After that, you’ll be able to see everything in your cloud storage. Just pick a video and start playing.

If you’re using Baidu Cloud or Alibaba Cloud instead, you’ll need to log in with your account and password as well. Since video streaming uses a lot of data, having a VIP subscription is recommended if you want smooth playback.

Settings
Honestly, you can leave most of Moon’s settings alone. The only one I use a lot is Head Tracking Control. When you turn it on, a small pointer shows up on the screen, and you can look at things to select them, which makes navigation a lot easier.
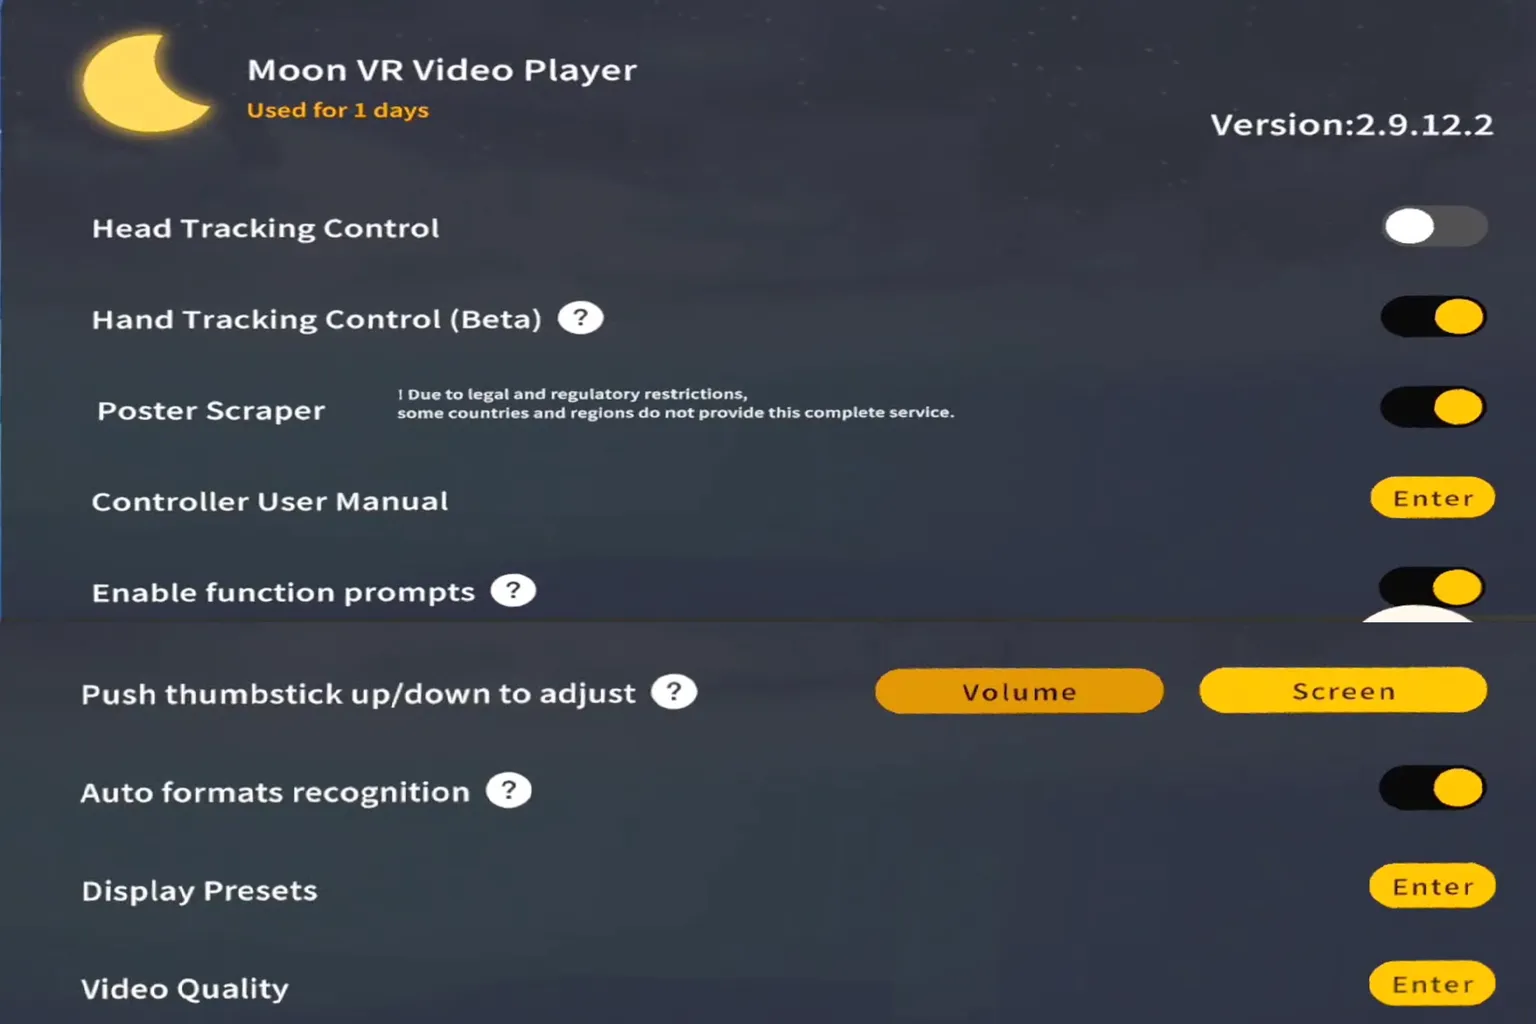
By default, the display quality is set to Best. In general, you don’t need to change anything there either. Leaving it as-is is fine.

Video Playback Features
Once a video starts playing, a control menu pops up along the bottom of the screen. From there, you can switch audio tracks, adjust subtitle settings, choose your viewing environment, and tweak 3D video options.
I’ll go through each of these one by one next.

Audio Tracks and Subtitles
Depending on the video, this can be the most important part. If a file has multiple audio tracks, you can switch to the language you want, or choose formats like 5.1ch or 7.1ch surround sound. Subtitle tracks are also clearly listed, so it’s easy to pick the one you actually want to watch with.
Using this properly makes a big difference in overall viewing comfort.

Scenes
In the standard version, you get access to these five scenes:
- Private Cinema
- MoonMax
- Moon Villa
- Dark Mode
- Passthrough Mode
Special scenes, like artist-designed environments, need to be purchased separately as DLC. Personally, MoonMax feels the most comfortable to me. It really gives off that private, reserved movie theater vibe.

3D View
This is where you choose how VR videos are displayed. Moon VR’s video detection is pretty solid, so in most cases the default mode works just fine without changing anything.
There are three modes available:
- YouTube Mode
- Normal Mode
- Fisheye Mode (the image spreads outward like a convex lens)
YouTube Mode is a bit unusual. It feels like you’re inside a small room where the floor, ceiling, and all four walls turn into screens playing the video. A flat video wraps all around you, almost enclosing the space. Honestly, it might even work as practice for getting used to enclosed spaces if you’re sensitive to that kind of thing.

Video Settings
The video settings screen is split into three tabs.
- The right side is for passthrough settings.
- The left side is for adjusting color tone and brightness.
- The center is for things like aspect ratio and turning HDR on or off.
Out of all of these, the one you’ll actually use is HDR. The other settings are best left alone in most cases.
There’s also a Background Removal option on the right. I tried using it to cut out just the person and place them into the room, but the result was pretty rough and honestly felt more like a gimmick.

HDR, on the other hand, works properly. When you turn it on, contrast improves a lot and the image looks much clearer overall, so this is something I do recommend using.


Overall Evaluation
When I tried Moon VR back then, this was my impression.
Older versions of Moon VR Player had a few issues, like:
- A watermark appearing during USB playback
- Dolby Vision videos not playing at all
- 5.1 and 7.1 surround audio tracks not being recognized correctly
Those problems were definitely there.
But the Moon VR development team actually saw this article and fixed everything in the latest version, 29.11.1. The watermark is gone, Dolby Vision videos now play properly, and overall the player feels much smoother and more comfortable to use.
Before the update, Dolby Vision videos would just stay stuck loading and never play, so this was a huge improvement.

When I tried Moon VR again after the update, the difference was obvious.
Dolby Vision videos played smoothly, and the whole experience felt completely different in a good way.
I honestly just sat back and enjoyed watching videos.

With this update, Moon VR Player now handles all kinds of video playback smoothly, and the controls are simple and easy to use. The standard price is $9.99, the same as Skybox Player.
After reading this article, the Moon VR team realized where the weak points were and improved them through updates. As a thank-you, they prepared a special discount code just for VRPUPU readers.
With this code, you can buy it for $5.99 at 40% off. At that price, it’s hard to find another player on the Meta store that’s this cheap and still this full-featured.
DLC Features
Moon VR Player offers three DLC options on the Meta Horizon store:
- Penthouse at Stellacropolis City ($4.99, adds a new scene)
- Ἄρτεμις Station (Artemis Station, $9.99, adds a new scene)
- Web Theater ($4.99)
In the latest version of Moon VR Player, a new menu called Add-on-Center has been added to the Home screen. From there, you can jump directly to the DLC download pages.

Each DLC focuses on either adding new scenes or expanding how you can watch content.
Inside the Expansion Center, you’ll find the two scene add-ons, Penthouse at Stellacropolis City and Ἄρτεμις Station, under the scene section. The Web Theater shows up under the tools section.
That said, if you’re planning to buy any DLC, it’s easier to just purchase them directly through the Meta Horizon app.

Penthouse at Stellacropolis City DLC
With this DLC, it feels like you’re watching a 150-inch TV inside a luxury high-rise apartment. The atmosphere is calm and relaxed, and if you look around, you can even spot a cat sleeping on a shelf.
It’s a great scene for anyone who just wants to kick back and enjoy videos at a slow, comfortable pace.

The viewing vibe is pretty nice overall. It’s priced at $4.99, so if this kind of setting appeals to you, it’s worth considering. That said, personally, I still find the built-in Moon Max theater more comfortable and easier to settle into.

Ἄρτεμις Station (Artemis Station) DLC
This DLC lets you watch movies in a vast outer space setting. You can think of it as the Moon Max theater, but with the background swapped out for open space.

The viewing experience in the Ἄρτεμις Station scene feels comfortable and grand at the same time. In the background, you can see small spacecraft slowly moving around, which adds a strong sense of immersion.
That said, it’s priced at $9.99, which is on the higher side. If it really clicks with you, it’s better to pick it up during a sale or when there’s a discount.

Web Theater
On the Meta Quest store, video playback is usually centered around playing files from your own PC or from WebDAV cloud storage. But services like YouTube, Disney+, Netflix, and Plex are already part of what we use every day for entertainment.
Lately, more VR video players have started adding online streaming support. For example, Skybox supports YouTube, and Plex support is planned for the future.
Among them, the most aggressive approach comes from Moon VR Player’s Web Theater feature. Aside from Netflix, it lets you access most major international streaming services in one place.
Here’s how it works.
After you purchase Web Theater, a laptop appears on the desk in front of you.

Click on the laptop, and you’ll see a list of available streaming apps. By default, YouTube and Prime Video are included. Plex shows up here because I added it myself for testing.

Some of the commonly supported streaming services include:
- Disney+: Popular movies and series from Disney, Marvel, Pixar, and Star Wars.
- Max (formerly HBO Max): HBO dramas, Warner Bros. movies, and original productions.
- Hulu: A major US-focused TV streaming platform, with some overlap with Disney+ content.
- Paramount+: Content from CBS, MTV, Nickelodeon, and Paramount movies.
- Apple TV+: Apple’s original series and films. Sometimes includes a 3-month free trial with Apple device purchases.
- Twitch: Live streaming platform focused on gaming and live broadcasts.
- Tubi: Free, ad-supported streaming with a large library of older movies and TV shows.
- Red Bull TV: Sports and extreme event content from Red Bull.
- IMAX: Mainly used for watching trailers.
- Spotify: Music and podcast streaming service.
- YouTube Music: Music-focused version of YouTube.
Having all of these accessible through Web Theater in one place is pretty convenient.

There are also several sites that are commonly used in China. For example:
- Bilibili: One of the largest video and anime platforms in China, with a lot of animation and creator-made content. You can think of it as the Chinese version of YouTube.
- iQIYI: Offers a wide range of TV dramas, variety shows, and movies.
- Tencent Video: Focuses mainly on TV series, movies, and variety programs.
- Youku: Specializes in Chinese video content and variety shows.
All of these Chinese streaming services can also be accessed through Moon VR Player’s Web Theater, so if any of them interest you, they’re definitely worth checking out.

This is actually the largest list of supported services among the major VR video players right now. Unfortunately, Netflix—which has the biggest user base—still isn’t officially supported by any player, so the only option is to watch it through Meta’s built-in browser.
In Web Theater, you’ll notice there are two screens. The large screen in front is for watching videos, while the smaller screen nearby is used for controls. It seems like the video is played through an internal web player and then mirrored onto the big screen.
That said, using two screens for control can feel a bit awkward at times. If direct control on the large screen were possible, the experience would be much smoother.
Watching YouTube.
Before using YouTube, it’s a good idea to log in to your account. That way, you can quickly access your subscribed channels, which makes things more convenient.
To log in, just enter your Google account email address and tap Next.

Watching YouTube in the Penthouse at Stellacropolis City scene feels especially comfortable. The screen is huge, and it really gives off the vibe of a luxury private theater.

In the Ἄρτεμις Station scene, YouTube feels even more impressive. The massive screen combined with the outer space background creates a much more immersive viewing experience.

Plex Playback
Plex is a streaming app I personally like a lot. It lets you stream videos stored on your own PC over your home network, and even when you’re away from home. It automatically shows thumbnails, cast information, and summaries, so your personal video library ends up looking clean and organized, almost like Netflix.
Before using Plex, you’ll need to log in to your account. Just press the Log In button on the screen and enter your username and password.

The first time you log in, you’ll also need to agree to Plex’s privacy policy. Just press I Agree, and you’re good to go.
After that, your video library will be available.

From the second time onward, you can simply press the yellow Open Plex button in the top-right corner to jump straight into your library.

Plex playback is very smooth, and both the audio and video quality feel solid. You can really feel that the streaming is stable, which makes it a player you can use with confidence.

That said, Plex does have a small downside. The navigation bar at the bottom of the screen can’t be hidden, and sometimes it gets in the way of the video. Some people may find this distracting, so it’s definitely an area that could be improved.

Overall, the combination of Moon VR Player and Web Theater actually goes beyond what Skybox offers in terms of playback features. If you use the VRPUPU reader discount code, the total price for the base app plus Web Theater ends up being about $1 more than Skybox. Still, you get access to far more streaming options in return. If you’re trying to decide which player to buy, this one is absolutely worth considering.
If you want to compare with other players, there are a few more detailed guides linked further down the page. And if downloading VR videos feels like a hassle, online streaming apps like SLR or DEO VR are also good alternatives. They offer a smooth experience as well, so they’re worth checking out.
Best Meta Quest VR Video Players 2026
Skybox vs Moon vs 4XVR

SexLikeReal Ultimate Guide
Hidden Discounts, Japanese VR & Passthrough Review
DEO VR Complete Guide
AI Passthrough, 8K Videos & Mixed Reality Setup
FAQ – Common Questions
What video formats does Moon VR Player support?
It supports most commonly used formats, including mkv, ogg, avi, av1, MTS, M2TS, TS, mov, wmv, rm, rmvb, mp4, and mpg. Of course, 180-degree and 360-degree VR videos are supported as well.
Can Moon VR Player play videos stored on a PC?
Yes. You can stream videos from your PC using either the Moon Link client or SMB network sharing. It’s recommended that both your PC and headset are connected to the same router.
Can Moon VR Player play videos from a USB drive?
Yes. You can play videos from a USB drive, but you need to plug it into the USB-C port and make sure you grant the required access permission.
Can I play PikPak cloud videos via WebDAV?
Yes. If you enable PikPak’s WebDAV feature and get your account details (username, password) along with the connection URL, you can register it in Moon VR Player and play your cloud videos.
What’s the difference between Moon VR Player, 4XVR, and Skybox?
Moon offers a very complete feature set, and image quality is roughly similar across all players. However, when you combine Moon VR Player with Web Theater, its streaming capabilities clearly stand out. If you’re only buying the base player, Skybox VR Player is still recommended because it supports more services. 4XVR Player focuses more on advanced audio features.
How did you know the issues were fixed through updates?
The Moon VR Player development team contacted me after reading this article and explained that the watermark issue had been resolved. I also tested it myself and confirmed that previously reported problems, like Dolby Vision playback, were properly fixed.