Stop waiting for official VR ports. Learn how to use the free UEVR tool to transform your favorite Unreal Engine PC games into full, immersive VR experiences in minutes. From basic setup to fixing mod conflicts for games like FF7 Rebirth and DBZ Kakarot, this step-by-step guide has you covered.
Features Overview
The world of PC games is insanely diverse. Close your eyes for a second and picture this.
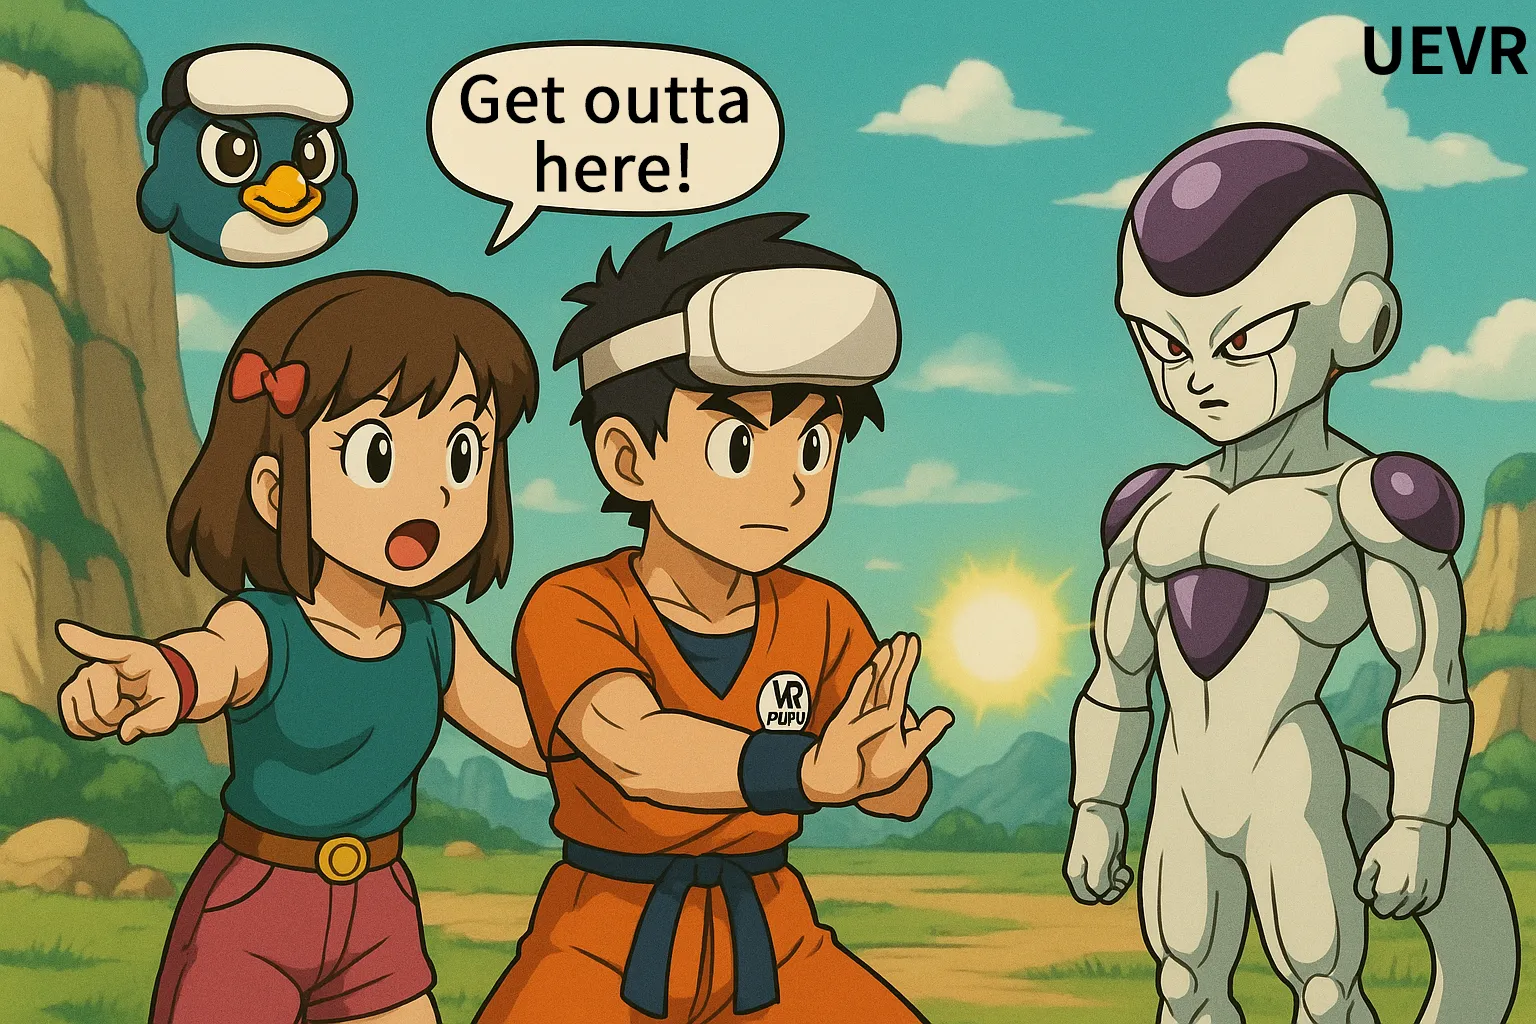
- What would it feel like to fire a Kamehameha straight at Frieza in Dragon Ball?
- How intense would that split second be when a Metal Slime darts past you in the Dragon Quest world?
- Or in FF7, lining up Tifa on your left and Aerith on your right, striking a heart pose together for a screenshot… just imagining it feels good.
But in reality, those kinds of “shut up and take my credit card” dream VR games don’t exist. Not on the Meta Quest Store, and not on SteamVR either.
PC games and VR games on Meta Quest actually work on the same basic idea. Both create a 3D space through software modeling, and you move around, look around, and play inside that space.
So if the underlying concept is the same, why can’t PC games just run in VR as they are? There are two main reasons.
Display output. Standard PC games render a single flat view. They’re not designed to generate the slightly different left and right eye images that VR needs.
Input methods. PC games are built around keyboards, mice, or controllers. VR requires real-time tracking of your head and both hands.
If you can solve those two problems, a PC game can turn into VR instantly. And a few years ago, a talented developer named Praydog released something wild. UEVR, a tool that can turn Unreal Engine games into VR on the spot, almost like magic.
Games built with Unreal Engine are everywhere. Just from the examples we mentioned earlier…
- Dragon Quest XI: Echoes of an Elusive Age
- Final Fantasy VII Remake
- Dragon Ball Z: Kakarot
- Dead by Daylight
…and a huge number of big-name titles sitting in your Steam and Epic game libraries are supported too.
UEVR itself is completely free software (if you end up loving it, consider donating to the creator, Praydog). The moment you install it, your Steam and Epic game libraries effectively become VR-ready. From here on, I’ll walk you through how to install UEVR and how to use it, step by step.
Once setup is done—how about we head over to Frieza tonight and see him up close?
Installation Method
UEVR setup is very straightforward. First, head to the official site.
Step 1: Go to GitHub
In the center of the official UEVR site, you’ll see three options:
Download: Stable release. This is the stable version. It has been tested, stays more reliable, and is less likely to run into major issues.
Nightly: Test build. It includes the latest features and fixes, but it can also be unstable.
Donate: A support option for the developers.
If this is your first time using it, it’s better to go with the stable release.
Just press Download.

Step 2: Download UEVR
GitHub is a platform where developers from around the world publish their software, and you can even view the source code.
On the page, you’ll see the UEVR version listed. Version 1.05 has been in use since 2024, and as of 2026, it’s still the latest.
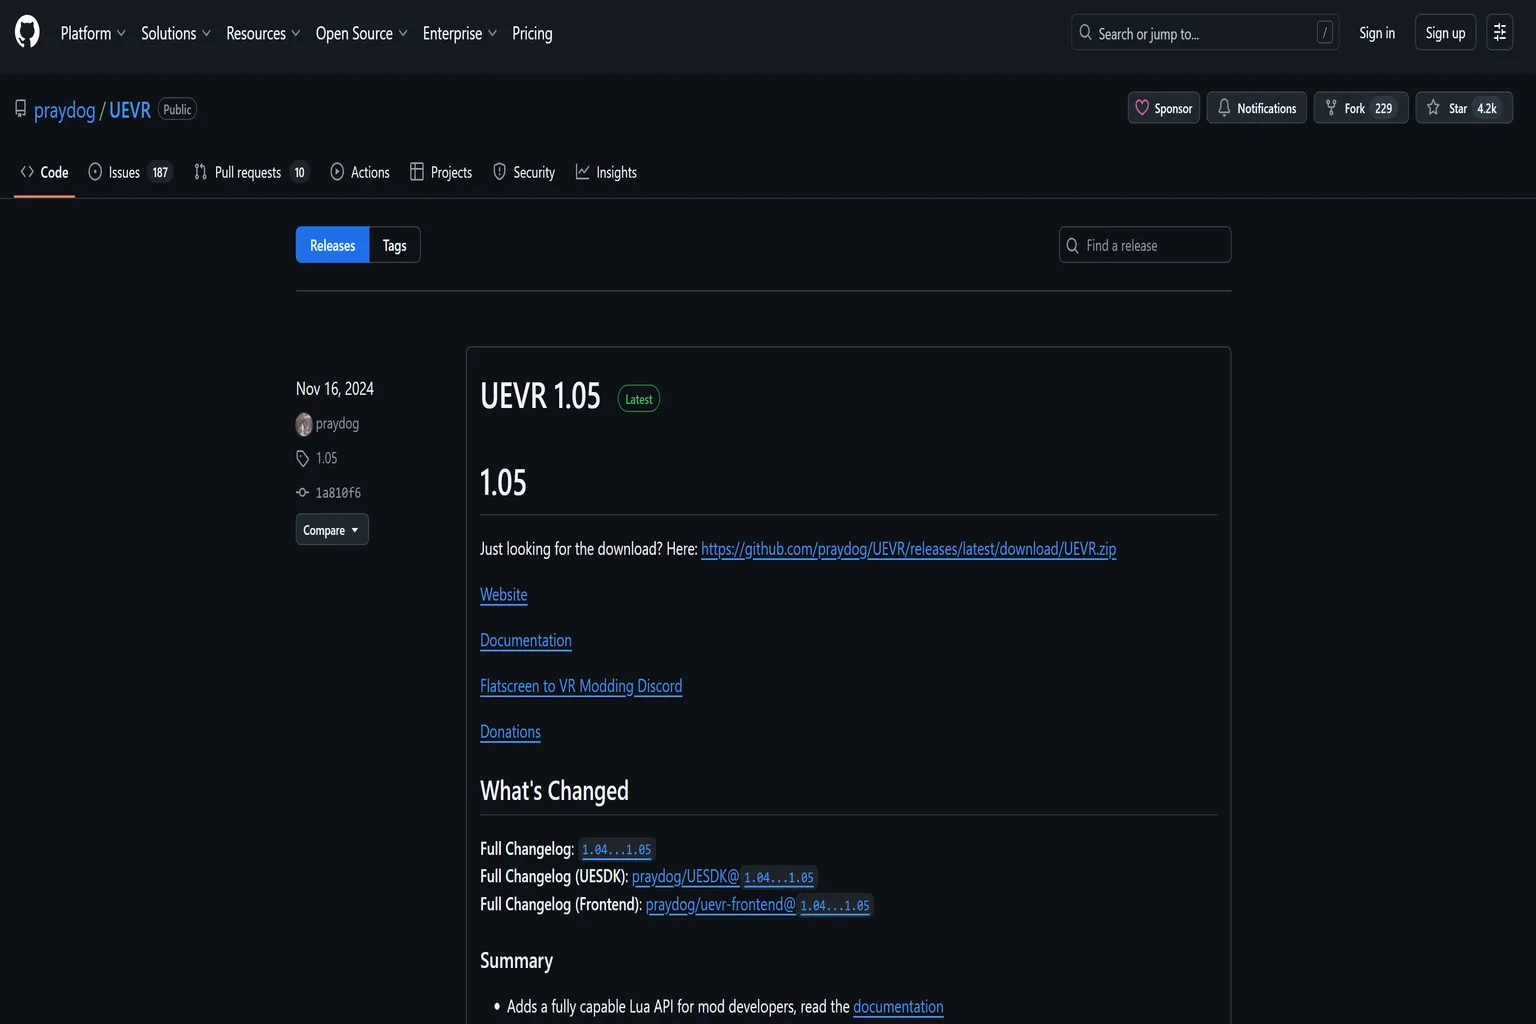
What you need on the player side is the executable file, so scroll down the page.
Under Assets, you’ll find UEVR.zip. That’s the stable version of UEVR, so just download it to your PC.

If you want to play newer games, trying the Nightly build is also an option. For games that have been out for more than six months, the Stable build is usually enough.
Personally, it’s better to have both installed. Use Stable for everyday use, and switch to Nightly when you want to try newer features.
Once you’ve decided, click uevr.zip and proceed to the download page.

Step 3: Extract the files
Extract uevr.zip using WinRAR or any other unzip tool. You’ll get a folder named UEVR. Inside it, you’ll find UEVRInjector, which is the main executable. Double-click it to launch.

If Microsoft .NET 6.0 is not installed on your system, UEVR won’t start. In that case, it will automatically ask if you want to download it. Just choose Yes and let it proceed.

Step 4: Install Microsoft .NET 6.0
You’ll be redirected to Microsoft’s official site, and the download should start automatically. If it doesn’t, scroll to the bottom of the page and click the download link manually.

The file you’re downloading is Microsoft Windows Desktop Runtime. Click the Install button at the bottom of the installer window and proceed.

Once installation is complete, UEVR should launch normally.

How to Use
To start playing VR games, you first need to make sure your PC and headset are properly connected.
UEVR converts PC games into VR games that run through SteamVR, so using SteamVR is the most recommended setup. For SteamVR installation and basic operation, refer to the related guide linked here.
Before using UEVR, make sure the following are ready:
- Meta Quest headset
- PC: A dedicated graphics card is required, and an RTX 2070 or higher is recommended.
- Wi-Fi router: Use a high-speed router with Wi-Fi 5 (802.11ac) or better, and connect both your Meta Quest and PC to the same router.
- Administrator access on your PC: You must be using an administrator account and be able to launch apps with administrator privileges.
- SteamVR running and connected: Your headset should be connected to the PC and SteamVR should be running correctly.
Step 1: Launch the UEVR program
Click the main program called UEVRInjector and the UEVR main screen will appear.
At this point, you still can’t operate it yet. Click Restart as Administrator to relaunch UEVR with administrator privileges.

If Virtual Desktop is installed on your PC, UEVR may show a warning telling you to use OpenXR. When that happens, check Hide future warnings and click OK. The message won’t show up again next time.

Once startup is complete, the Inject button will appear. That means UEVR is ready.
There are a few important things to keep in mind.
- OpenXR is recommended. If you’re using SteamVR, this gives the best compatibility.
- You can’t inject unless the game is running. The target game must already be launched.
- It’s best not to touch the parameters at the bottom of the screen. They’re already tuned by the UEVR team, and changing them can hurt stability.
Now let’s go over the main screen features.
Left panel (files and links)
- ❓ Help: Opens official tutorials and donation links.
- Open Global Dir: Opens the UEVR MOD folder.
- Export Config: Saves the current game settings for backup or sharing.
- Import Config: Loads saved settings from yourself or others.
- Cat icon (GitHub): Links to the official UEVR GitHub page.
- Red dot (donation): Opens Praydog’s Patreon page if you want to support the creator.
- Discord: Opens the Flatscreen community. If you get stuck, this is a good place to ask.
Center panel (VR launch and core options)
- ▼ Selection Game: Shows the currently running programs. You need to manually select the game you want to convert to VR.
- Inject VR: Injects the VR module into the game and switches it to VR mode.
OpenVR / OpenXR selection: Chooses the VR runtime. OpenXR is recommended and works best with Virtual Desktop and SteamVR. - Nullify VR Plugins: Disables native VR plugins built into some games, which can conflict with UEVR. Normally this stays off.
- Focus game on injection: Automatically switches focus back to the game window after injection. If this is off, you’ll need to Alt+Tab manually, so keeping it on is recommended.
Using these settings as-is will work fine for most people. The Game Settings section below is for advanced users and usually doesn’t need to be touched.
- VR_Compatibility_SkipPostInitPr: Skips part of the game’s initialization. Only try this if you run into compatibility issues. Leave it off normally.
- VR_RenderingMethod (Rendering Method)
- Native Stereo: The ideal rendering method for VR. Changing this is not recommended.
- Alternating / AFR: Lightweight mode that alternates left and right eye rendering, but image quality drops.
- Synced Sequential: Renders each eye separately while trying to sync them. Useful for specific problem titles, but usually not needed.
- VR_SyncedSequentialMethod (Sync & Rendering Details)
- Skip Tick: Reduces CPU load, but can make gameplay feel sluggish.
- Skip Draw: Reduces GPU load. Since most games are GPU-bound, this option is usually better.
- VR_UncapFramerate: Removes the frame rate cap for smoother visuals, but increases GPU load. Recommended only if you have a powerful GPU.
You can experiment with these if needed, but sticking to the default settings is the safest approach.

Extra tip
If restarting UEVR as administrator every time feels annoying, there’s an easier way.
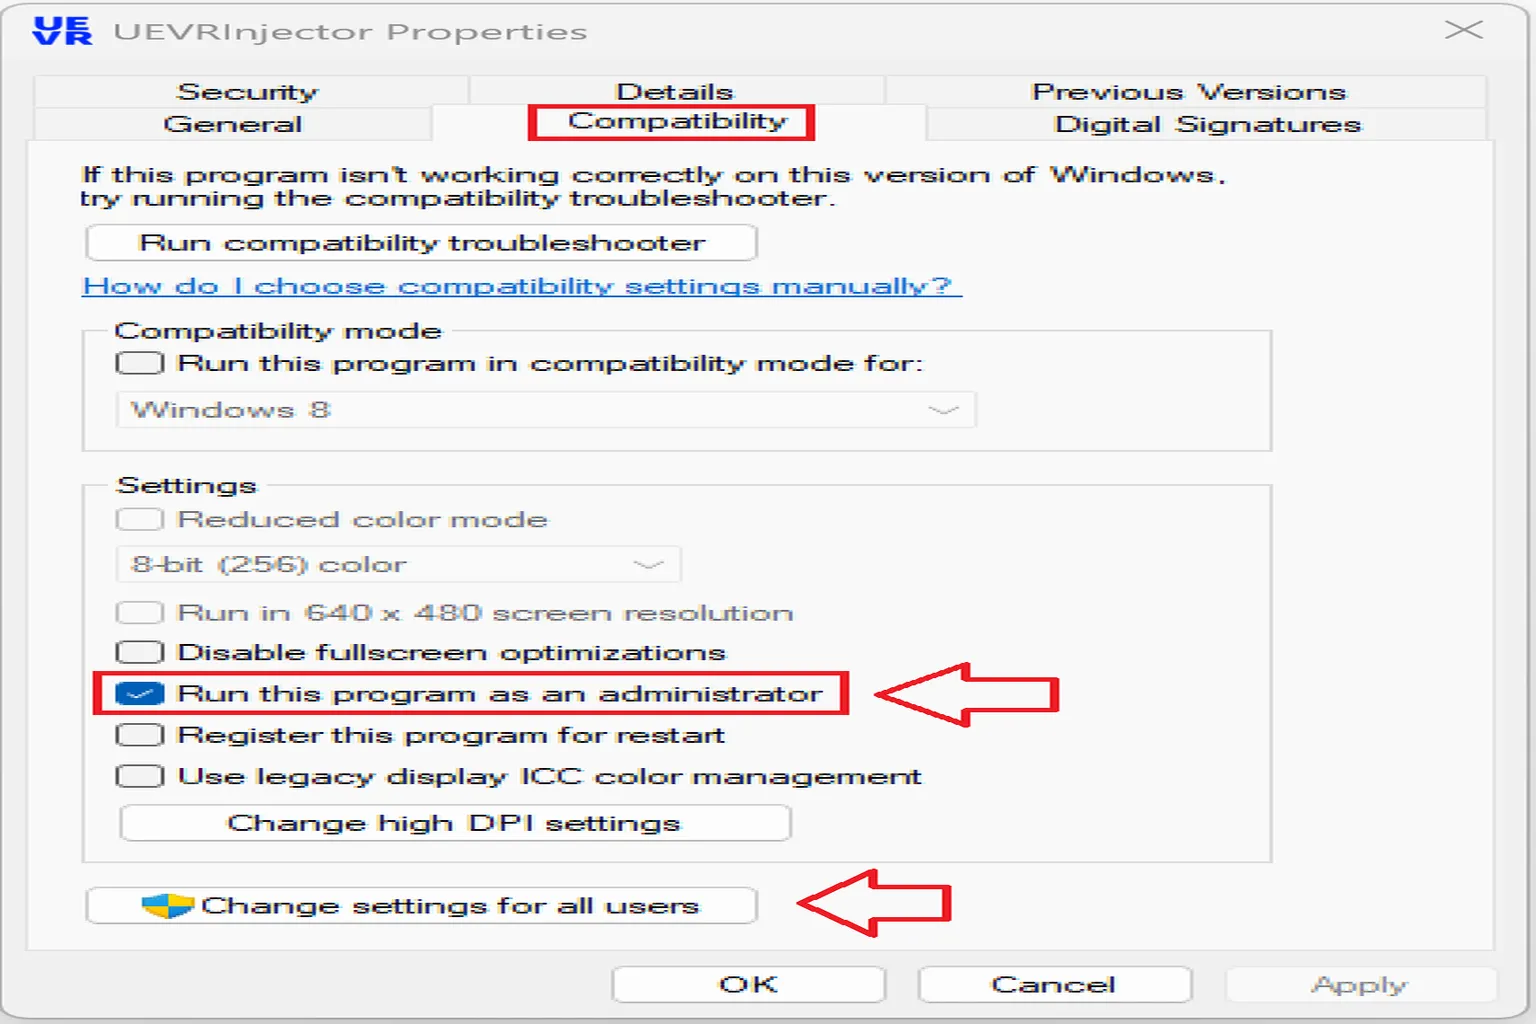
Right-click the UEVRInjector icon and choose Properties.

Open the Compatibility tab, check Run this program as an administrator, then click OK.
From now on, UEVR will always launch with administrator privileges automatically.
Step 2: Launch the game
Start the game you want to play from your usual platform, like Steam, Epic, or GOG. Just keep in mind that UEVR only works with games built on Unreal Engine. If you don’t see the Unreal Engine logo during startup, it won’t work.

Step 3: Switch to UEVR and inject the VR module
Once the opening movies or intro animations finish and the main menu appears, it’s time to inject.
Hold the Alt key on the left side of the keyboard with your left thumb, then press Tab with your ring finger to switch back to the UEVR window.
Click the ▼ button on the right and select the game you’re currently running. In the example image, Ghostwire: Tokyo is selected. When everything is ready, click Inject to convert the game to VR.
If the injection succeeds, a settings menu will appear inside the game. Click the X button in the top-right corner to close it.
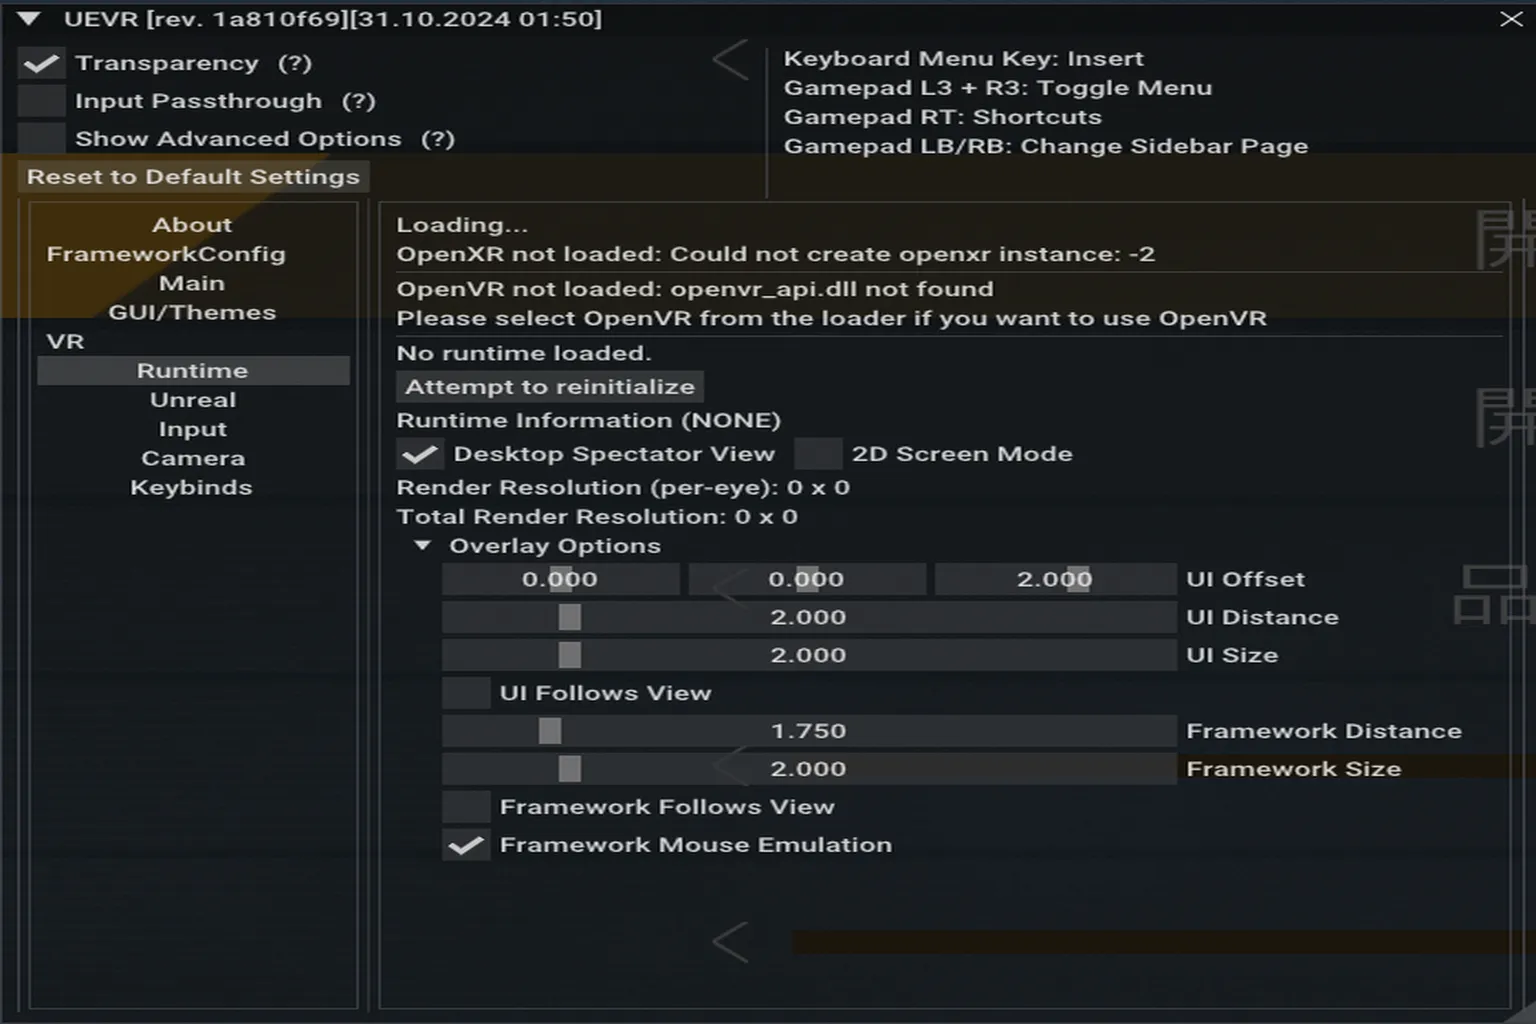
If the game isn’t built on Unreal Engine, UEVR will show an error message during injection and won’t proceed.

Step 4: Start playing
Put on your headset and launch SteamVR. You should now see the game running in VR.
Take Ghostwire: Tokyo as an example. On a monitor, it looks like a normal game. In VR, it feels like you’re actually walking through the streets of Tokyo.

The modeling quality of PC games is often far beyond what most native VR games offer. In VR, you can even see tiny details like transparent packing tape stuck to cardboard boxes.

Switching to another game like Ghostrunner, the sharpness and speed of the gameplay really stand out. It feels fast and clean, almost like being a modern-day ninja.

That said, while the visuals on PC are incredibly detailed and the game world can look almost real, they can also be very motion-sickness–inducing once you actually play.

That’s the basic workflow for using UEVR. Since this is an external tool, not official VR support, there’s no guarantee that every game will run smoothly. It’s also common for a game to stop working after an update.
For example, Sifu worked fine with UEVR up through 2023, but the latest version no longer works. If a game is running stably for you, it’s a good idea to avoid updating it until you’ve finished playing.

Troubleshooting and Fixes
Let’s go over the most common “it doesn’t work” issues you’ll run into when playing with UEVR, and how to deal with them.
To jump into your dream VR game world with UEVR, there are two common problem patterns you should know about.
Games that require a MOD swap
Example: Final Fantasy VII Rebirth
In this case, a normal Inject won’t work properly. VR only becomes possible after replacing specific MOD files. You’ll need to find a compatible MOD in advance and install it before trying to inject.
Games with VR folder conflicts
Example: Dragon Ball Z Kakarot
These games already include built-in VR plugins, and those can conflict with UEVR. In most cases, deleting or renaming the conflicting folder or plugin fixes the issue.
VR Folder Conflict
For this example, I used Dragon Ball Z: Kakarot. This game is honestly something special. When I reached the Cell Saga father-and-son Kamehameha, I had to pause for a second. Seeing Gohan power up with Goku’s presence beside him and watching them finish Cell together… yeah, that hit hard. Playing it on Steam, I was seriously close to tearing up. It wasn’t just a cool scene—it felt like stepping straight back into the excitement I had as a kid watching Dragon Ball for the first time.
Dragon Ball Z Kakarot can be injected easily with the Stable version of UEVR, but during injection you may see an error like this:
“A VR plugin was detected in the game installation folder. These may conflict with UEVR modules and must be removed or renamed.”
If that happens, delete or rename the detected VR plugin and try again.

In the case of Dragon Ball Z: Kakarot, there’s an Oculus folder inside the game directory, and that’s what causes the conflict.

All you need to do is delete that folder or rename it to disable it. That alone is enough to resolve the conflict with UEVR and allow the injection to work properly.
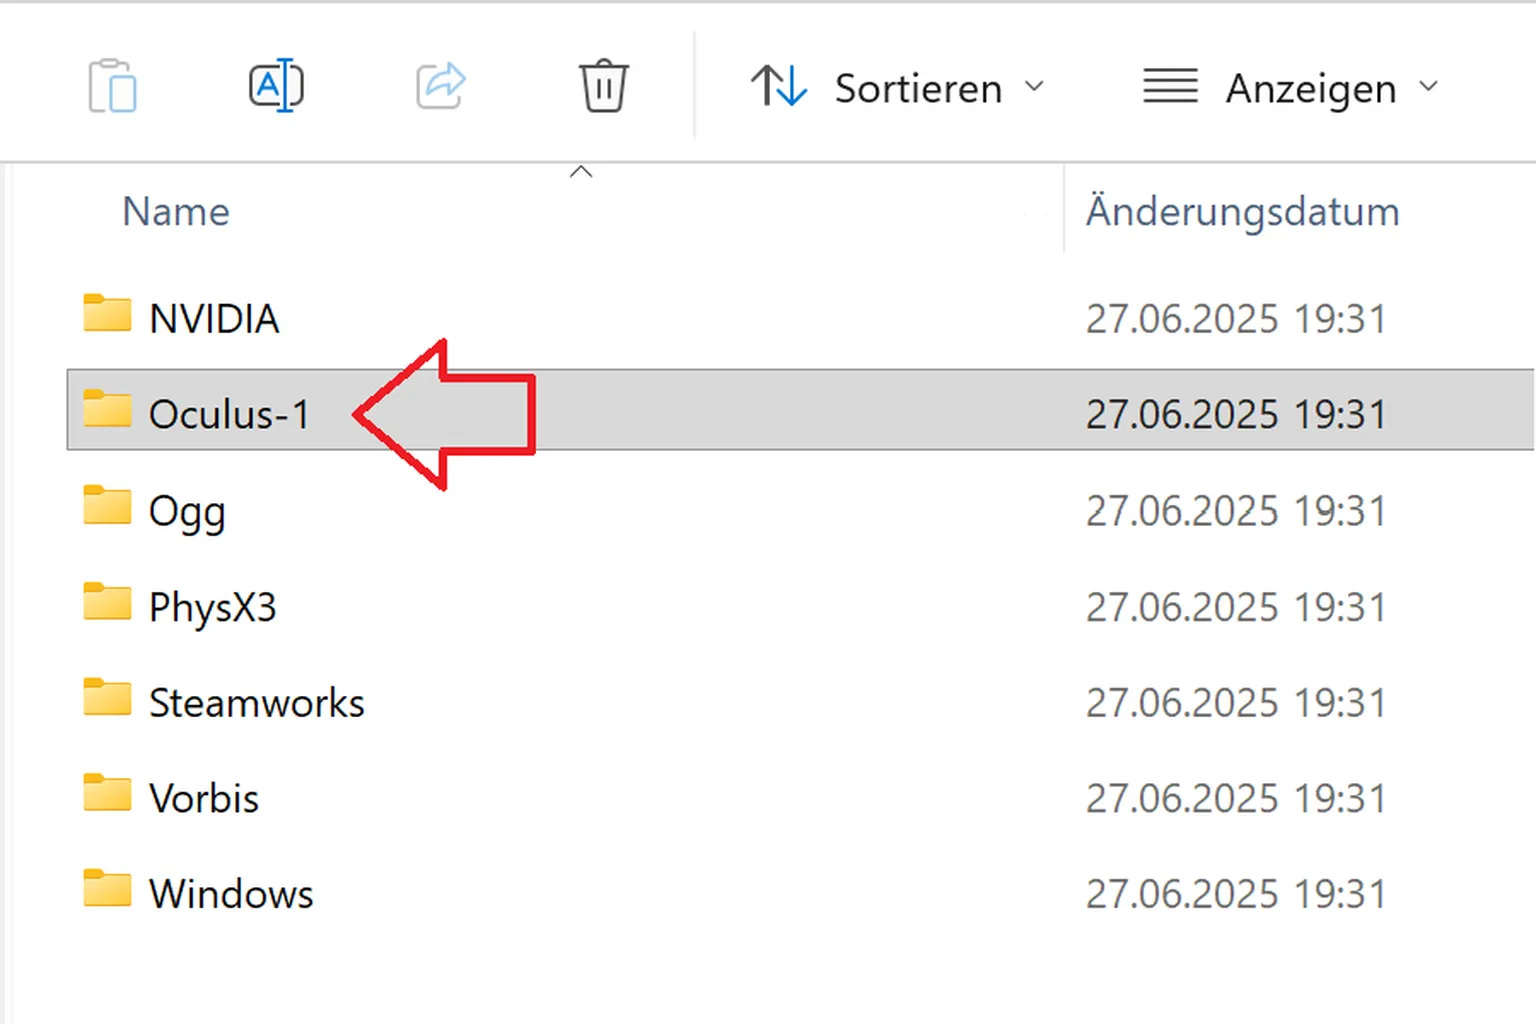
Launch UEVR once more and you’ll be able to turn Dragon Ball Z: Kakarot into VR. The moment you step into the Dragon Ball world for real, the scale and nostalgia hit hard. It feels like the memories of that boyhood era Akira Toriyama brought to life are right there in front of you again.

Once Kakarot is in VR, it’s no longer just a game where you control Goku.
It feels like you’re standing next to him, going on the adventure together. You can move your viewpoint freely and take in the world from any angle—it’s an experience that goes far beyond what a normal PC game can offer.

In the Saiyan Saga, you’re no longer just watching three characters talk through a screen.
It feels like you’re actually there as one of the fighters—
or honestly, more like a Saibaman, standing on the battlefield and waiting to be called in. The planet itself feels brutal. Lava flows everywhere, and broken debris is scattered across the ground, making the whole place feel harsh and hostile.

Dragon Ball Z Kakarot VR gameplay footage

Games That Require a MOD Swap
The game I’m using as an example here is Final Fantasy VII Rebirth. I originally played it on PS5, and honestly, that month was a blur. I was completely hooked.
Aerith’s playful charm, Tifa’s kindness and constant care for the people around her—every character just pulls you in. I kept losing track of time without even realizing it. There are a lot of mini-games, sure, but both the main story and side content are incredibly well made. The whole experience feels carefully crafted from start to finish.
First, try converting the game to VR using the Stable version of UEVR.

The game does launch in VR, but once you’re inside, the screen scale is completely off. The image feels broken, and it’s basically unplayable in that state.
When this happens, it means the game won’t work correctly with UEVR’s default setup. You’ll need a custom mod to fix the issue. Here’s how to handle it.
Step 1: Go to Praydog’s site
On the developer’s page, click Repositories.

Step 2: Find the game you’re looking for
On this page, you’ll see a list of special mods that the developer has already tuned for specific games. Titles like Final Fantasy VII Rebirth, Final Fantasy VII Remake, and Silent Hill 2 can be found directly by their game names.
Capcom games are a bit different. Many of them are built on the RE Engine, so the developer provides VR modules on a separate page called REFramework. Using that, you can run VR with well-known titles like Resident Evil, Monster Hunter, and Street Fighter.
To use these custom mods, you’ll need the Nightly release version of UEVR, so make sure you’ve already downloaded it on your PC.
Click FF7RB-UEVR to open the mod’s page.

Step 3: Download the MOD
Scroll all the way to the bottom of the page. You’ll see the text “Download the latest release of the plugin from here.”
Click Here to move to the download page.

Step 4: Download the file
Scroll to the very bottom of the page and look for the Assets section. Inside, you’ll find a file named ff7rebirth.zip. Download that file to your PC.

Step 5: Enable the MOD
Launch the Nightly version of UEVR, then click Import Config from the menu on the left. Select the MOD file you just downloaded and import it.
Just choose ff7rebirth.zip and confirm. The MOD will be loaded and activated.
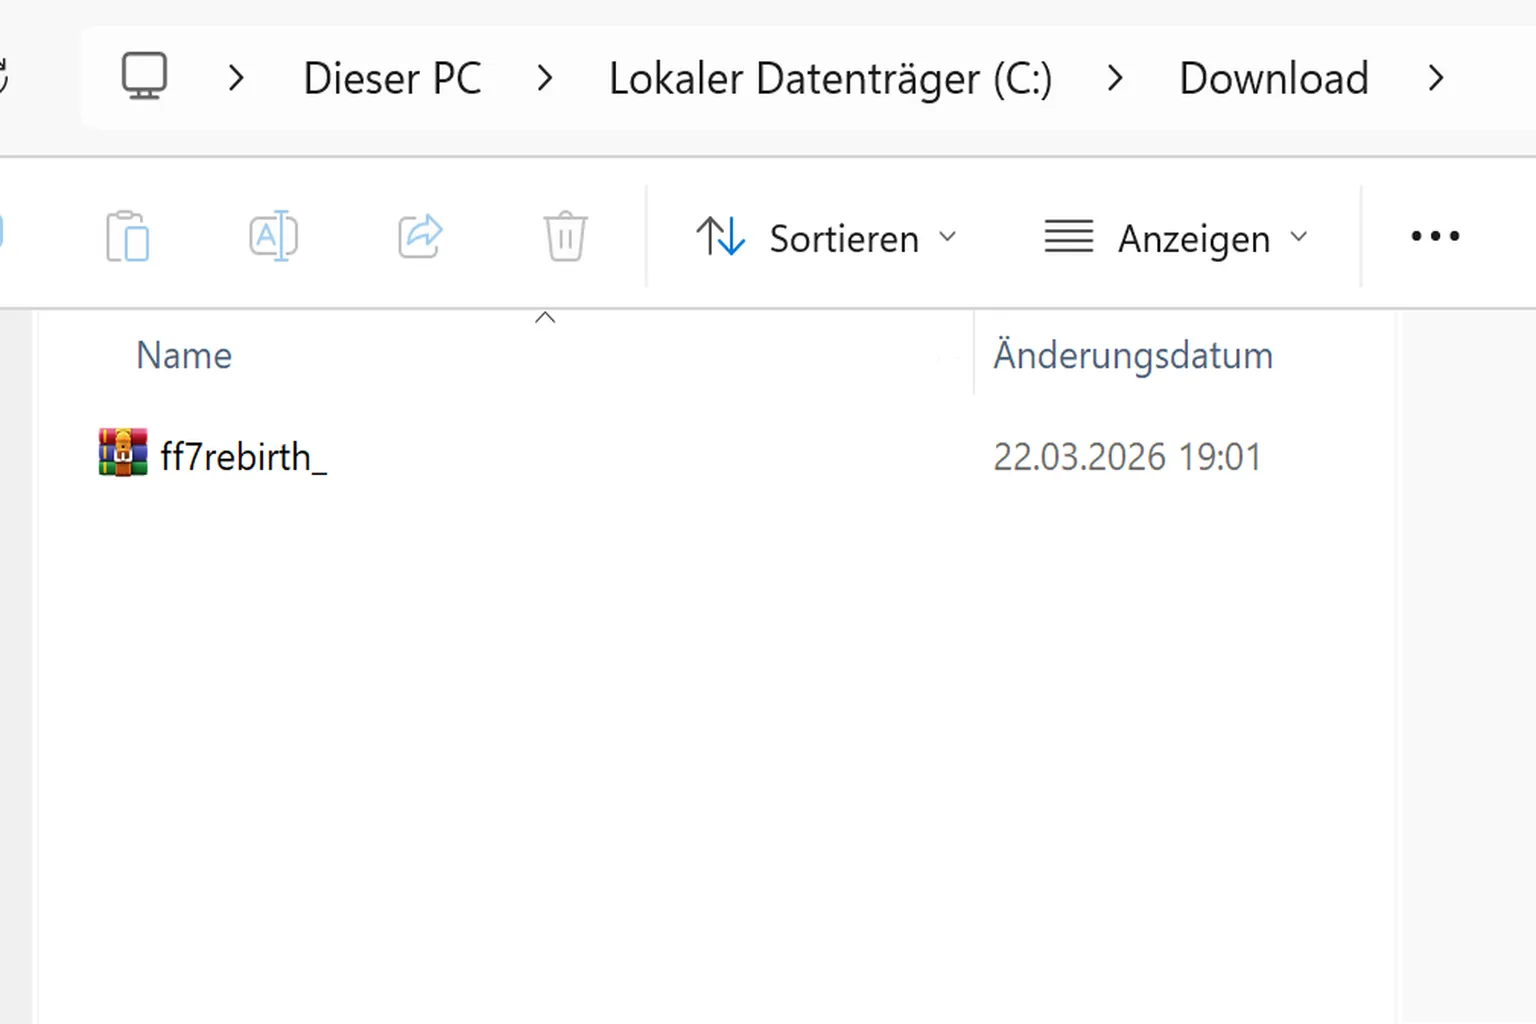
When importing the MOD, you’ll see a warning saying something like, “Please confirm that this file was downloaded from a trusted source.”
Since this file comes from the developer’s official site, you can safely click Yes and continue.

Step 6: Start the game
Just like before, launch the game first, then run Inject.
Now you’re fully inside the world of Final Fantasy. Your viewpoint is no longer locked, and you can freely look around in any direction you want.
In the opening scene, Tifa appears. When playing on a PC, you’re really just watching her from a distance on a screen.

In VR, it’s completely different. If you casually glance downward, you can see her toned abs. Tilt your head just a little more, and—
the sense of presence feels real in a way you could never experience through a flat display.

In the scene where Zack saves Aerith, it genuinely feels like you’re standing right next to them. The world of Final Fantasy surrounds you in full 360 degrees, far beyond what a normal screen can convey.

Up close, you’ll probably be surprised by the level of detail in Aerith’s outfit. You might even catch yourself thinking, “Oh… her necklace is shaped like a tiny flower.” That kind of discovery just happens naturally in VR.

In VR, you can look wherever you want.
Lower your gaze slightly and Aerith’s long legs are right there in front of you. Shift your angle just a bit more, and—
you feel her presence at a distance that would be impossible in the real world.

That iconic scene—going on the Ferris wheel date with Aerith. How do you think it would feel to experience that together in VR?
You’d probably catch yourself smiling without even realizing it.

Gameplay Footage

That wraps up the introduction to UEVR. With this tool, you can turn a huge range of PC games into VR and actually step inside those famous, unforgettable game worlds yourself.
If you want to go deeper and really master UEVR, be sure to check out the in-depth UEVR advanced guide as well.
FAQ – Common Questions
What Is UEVR?
UEVR is a free, open-source VR tool that converts Unreal Engine–based PC games into VR experiences playable on headsets like Meta Quest. It supports head tracking and full stereoscopic 6DoF movement.
What Games Does UEVR Support?
Games built with Unreal Engine 4.8 through 5.4 may be compatible. Examples include Dragon Ball Z: Kakarot, Final Fantasy VII Rebirth, Ghostwire: Tokyo, and Dead by Daylight.
What Hardware Do You Need?
A PC with a dedicated GPU is required, with an RTX 2070 or higher recommended. Pair it with a Meta Quest 2, 3, or Pro headset. For stable connectivity, use SteamVR and a Wi-Fi 5 (802.11ac) or better router.
What’s the Difference Between the Stable and Nightly Versions?
The Stable version focuses on reliability and is best for games that have been out for six months or more. The Nightly version includes the latest features and fixes. It can be unstable, but it’s better for newer games or special use cases.
What Should You Do If You See a “VR Plugin Conflict” Error at Launch?
This means the game already contains built-in VR modules. Look for folders named Oculus, SteamVR, VR, or XR inside the game directory, then delete or rename them to resolve the conflict.
What If the Screen Breaks or Looks Wrong, Like in FF7 Rebirth?
This type of issue requires a custom MOD. Download and import the dedicated MOD from GitHub as described in the article, then run the game using the Nightly version of UEVR.
Does UEVR Work with Every Unreal Engine Game?
Not necessarily. Some titles have low compatibility, and game updates can break UEVR support. It’s a good idea to check community reports and avoid updating a game until you’ve finished playing if everything is working properly.
Do You Need to Configure Controllers or Keyboard Settings?
In most cases, no. UEVR automatically applies SteamVR’s default control scheme. If a specific game needs custom inputs, you can use UEVR’s key binding feature to set up shortcuts as needed.