
Playing Steam games on your Meta Quest is easier than ever with the free Steam Link app. But navigating SteamVR’s endless PC settings can be a nightmare. This complete guide walks you through the wireless setup and decodes the most confusing options—like OpenXR and Render Resolution—so you can get maximum performance without the headache.
Feature Overview
Steam is the most widely used platform for buying PC games, and it sells both standard games and VR titles.
In the past, if you wanted to play VR games bought on Steam, you had to go through software like Meta Air Link or Virtual Desktop. Now, with the free SteamVR app, you can launch and play Steam’s regular games and VR games directly from your headset.
That said, this only applies to VR games purchased on Steam. If you bought VR games from other stores—such as the Meta PC Store or the Epic Games Store—you’ll still need to use Meta Air Link or buy Virtual Desktop (VD) to connect and play them.
Below are some of the most commonly used PC-to-VR connection tools for Meta Quest users.
| Method | Price | Description |
| Meta Air Link/Horizon Link | Free | Supports both wireless and wired streaming. Comfort is decent, but stability isn’t very high, so it’s fine if you only play occasionally. |
| Steam VR | Free | Wireless streaming only. Designed for Steam VR games, generally stable, but with fewer features. |
| Virtual Desktop | $24.99 | Wireless streaming with the richest feature set and the most stable connection. Works great for VR games, virtual desktop streaming, and video playback. |
Because it’s software built specifically for Steam, the core features are limited to just three things: playing games, viewing 3D photos, and using a virtual desktop. There aren’t many extra features beyond that.
Thanks to this simple design, it’s best used with a clear focus on gaming.

Meta Quest Air Link Setup
Play SteamVR Games Wirelessly for Free

Virtual Desktop Ultimate Guide
Best Settings for Meta Quest PCVR
Installation Guide
To use SteamVR, you need to install it on both your PC and your headset. Here’s how it works.
Step 1: Install Steam Link on your headset
Go to the Meta Horizon Store and download Steam Link for free. It will install directly on your headset.
Step 2: Install SteamVR on your PC
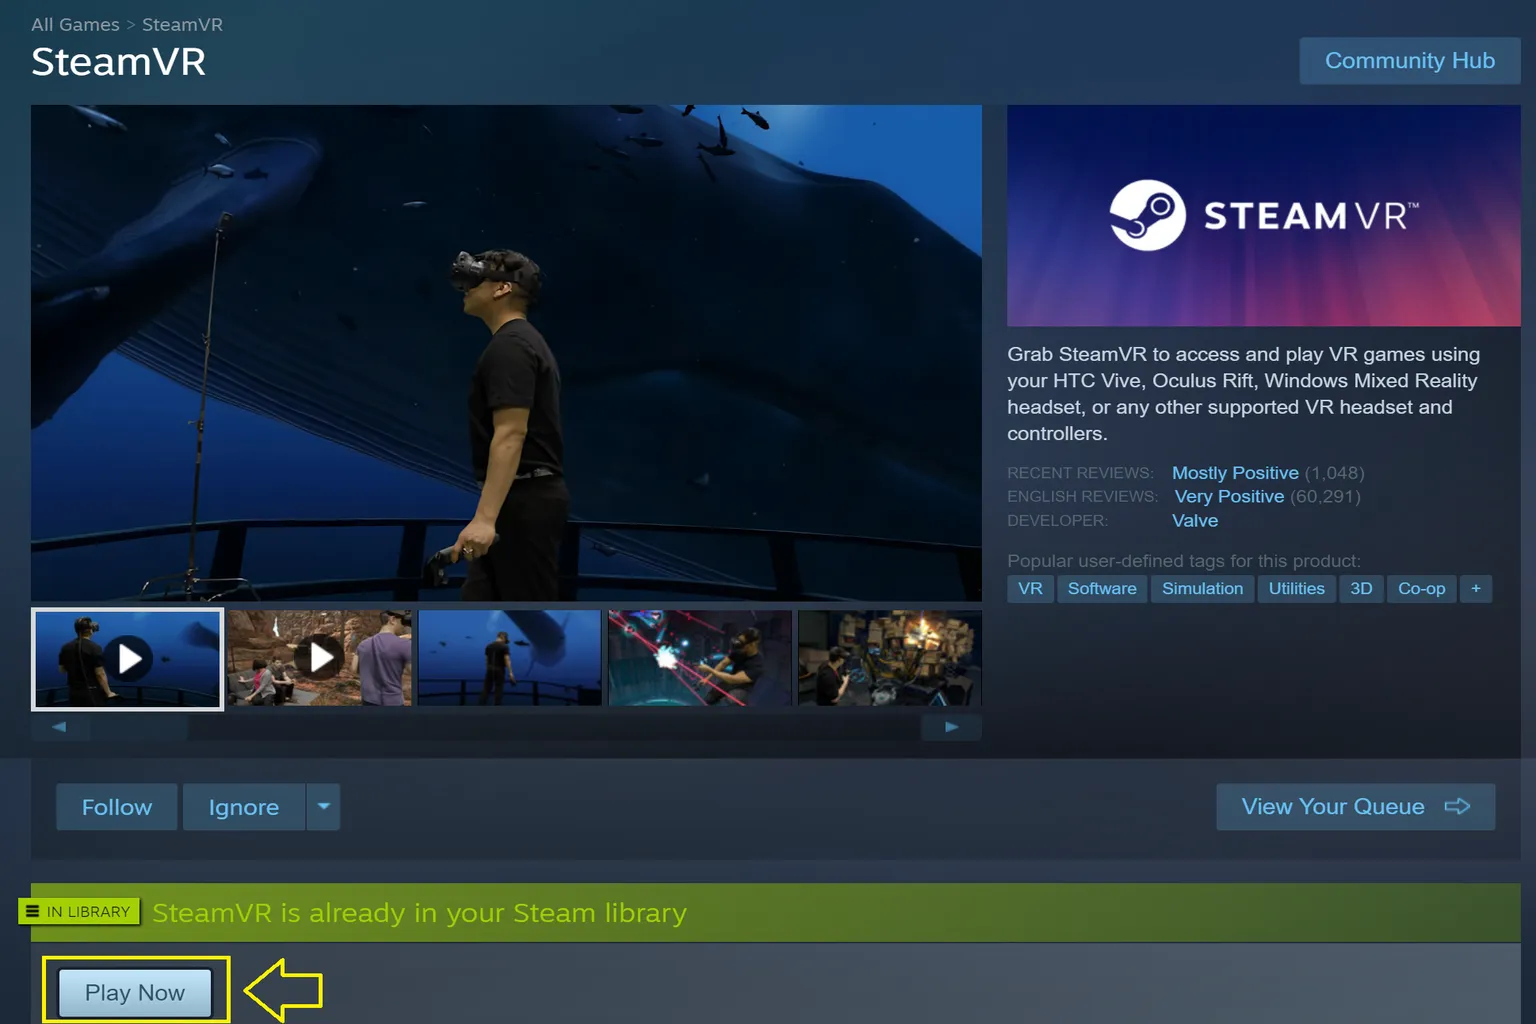
Open the Steam client on your PC and type “SteamVR” into the search bar. You’ll see an item labeled “SteamVR – Free.” Click it to open the detail page.

Step 3: Install SteamVR on your PC (continued)
Click Add to Library at the bottom of the page and proceed with the installation. Once it’s done, a SteamVR icon will appear on your PC desktop.
Click “Install” to start installing SteamVR.

Connecting the Headset
Once Steam Link is installed on the headset and SteamVR is installed on the PC, you’re ready to connect them. Here, I’ll use a wireless connection as the example. Before you start, make sure you have the following ready:
- PC: already connected to your router
- Meta Quest: connected to the same router
- Router that supports Wi-Fi 5 or higher (Wi-Fi 6 is recommended)
Next, follow the steps below. Before starting, make sure SteamVR is already running on your PC.
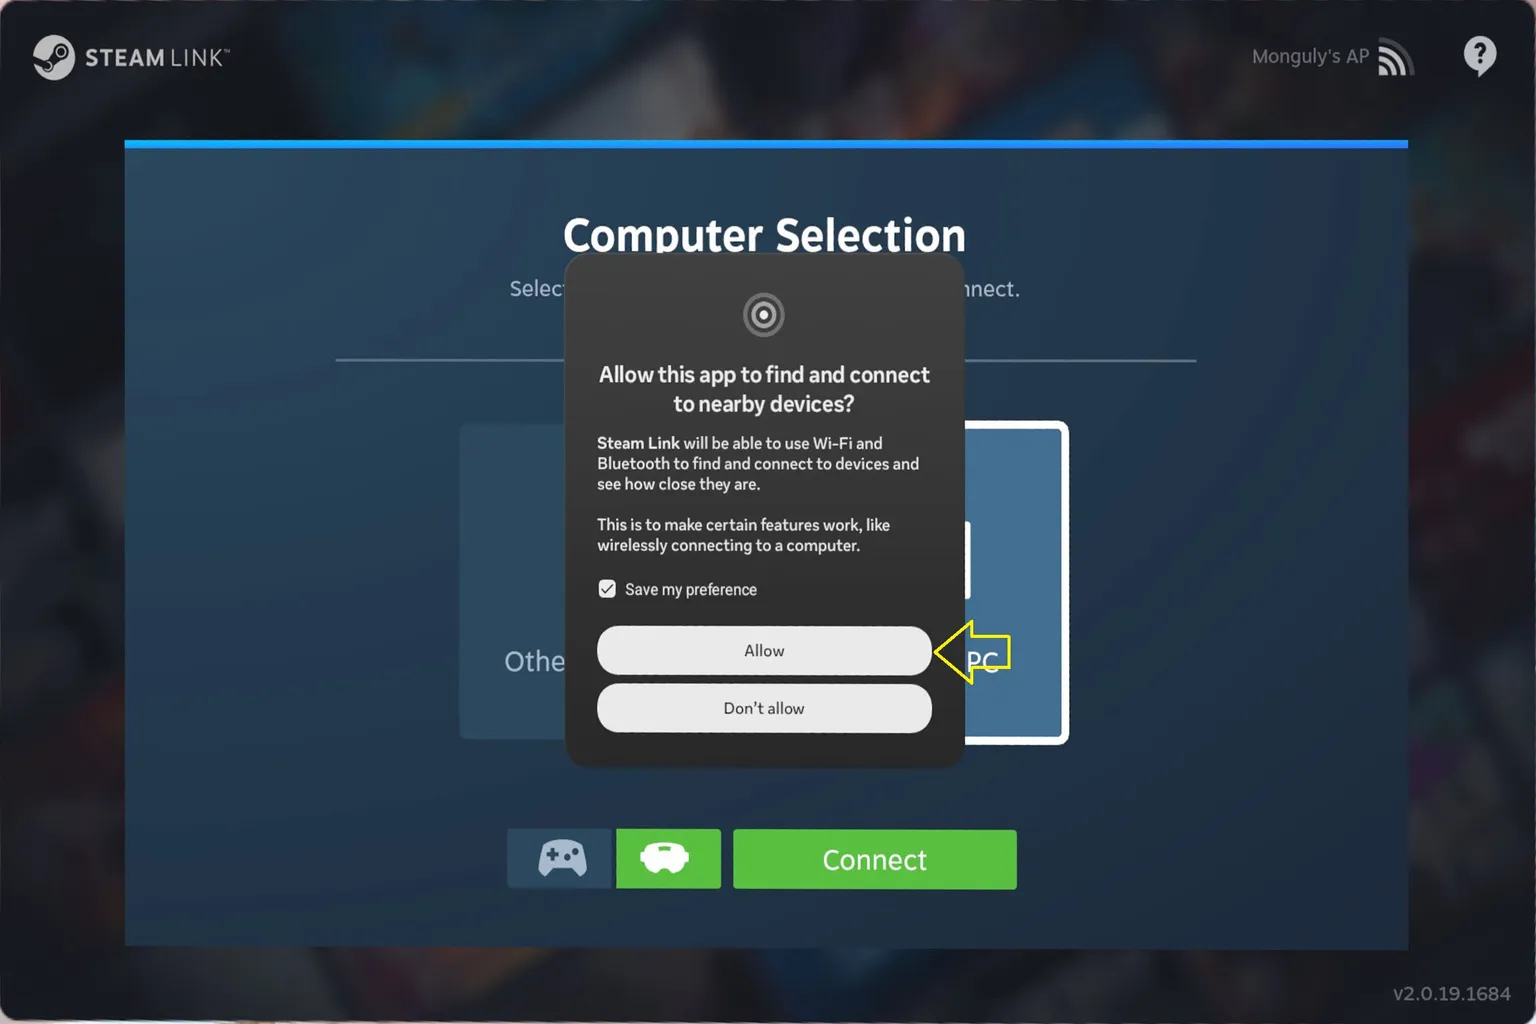
Step 1: Grant permissions
Launch Steam Link on your headset. It will ask for permission to use Wi-Fi and Bluetooth. Select Allow to grant access.
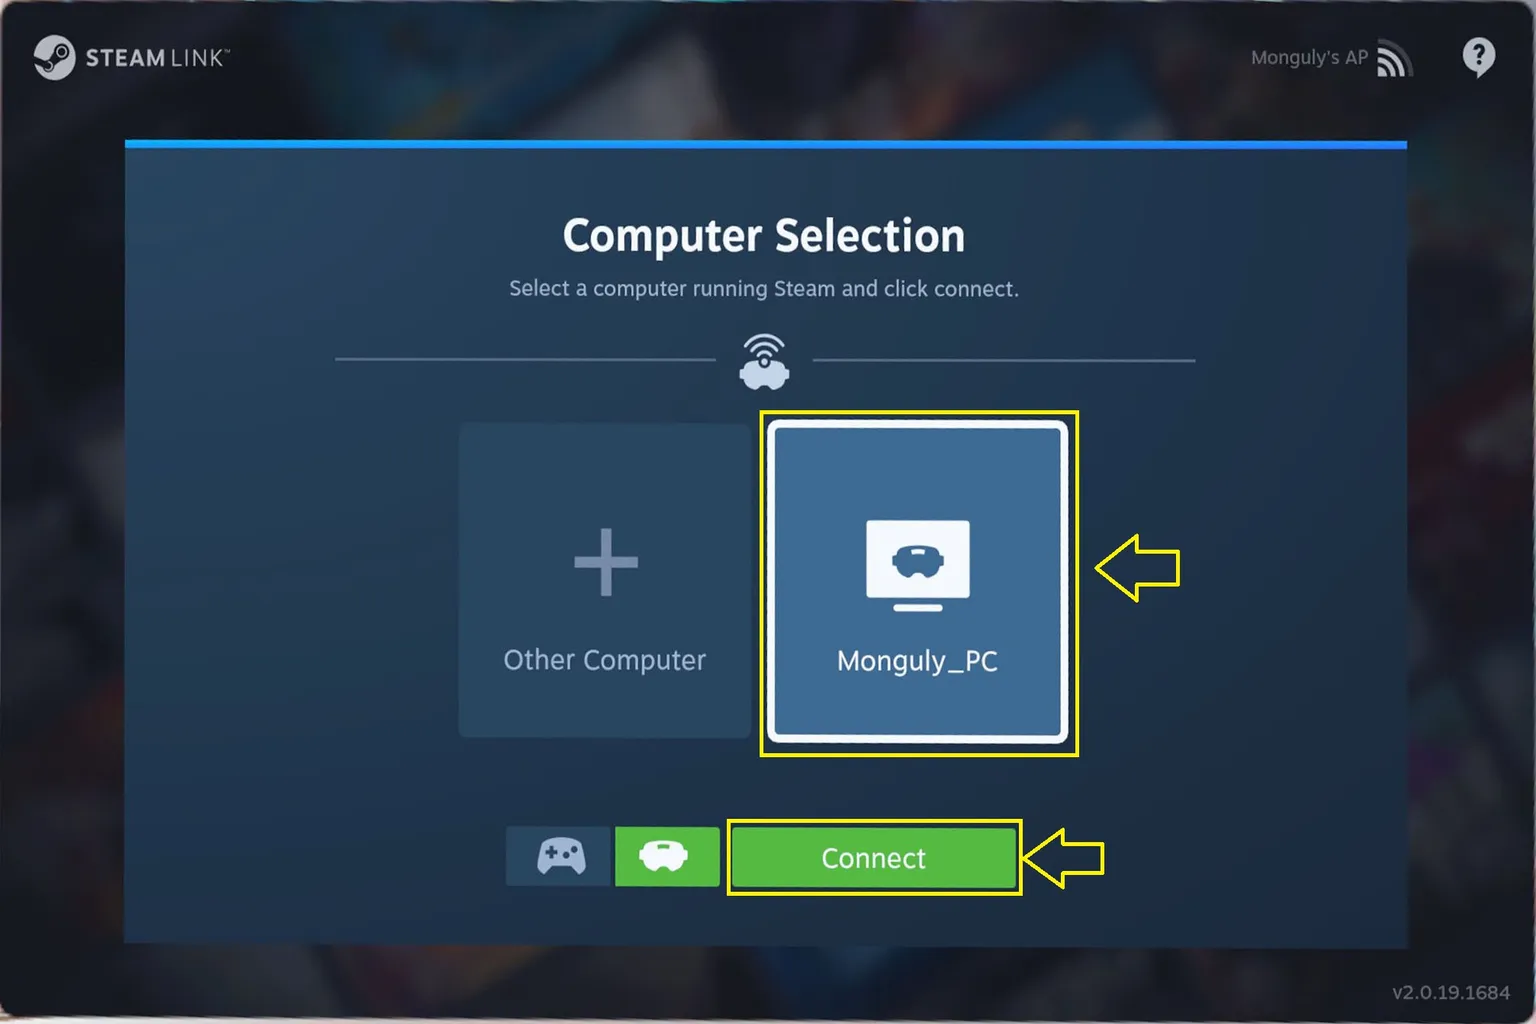
Step 2: Select the PC to connect
The system will automatically detect PCs on the same network. Find your PC name in the list and select it.
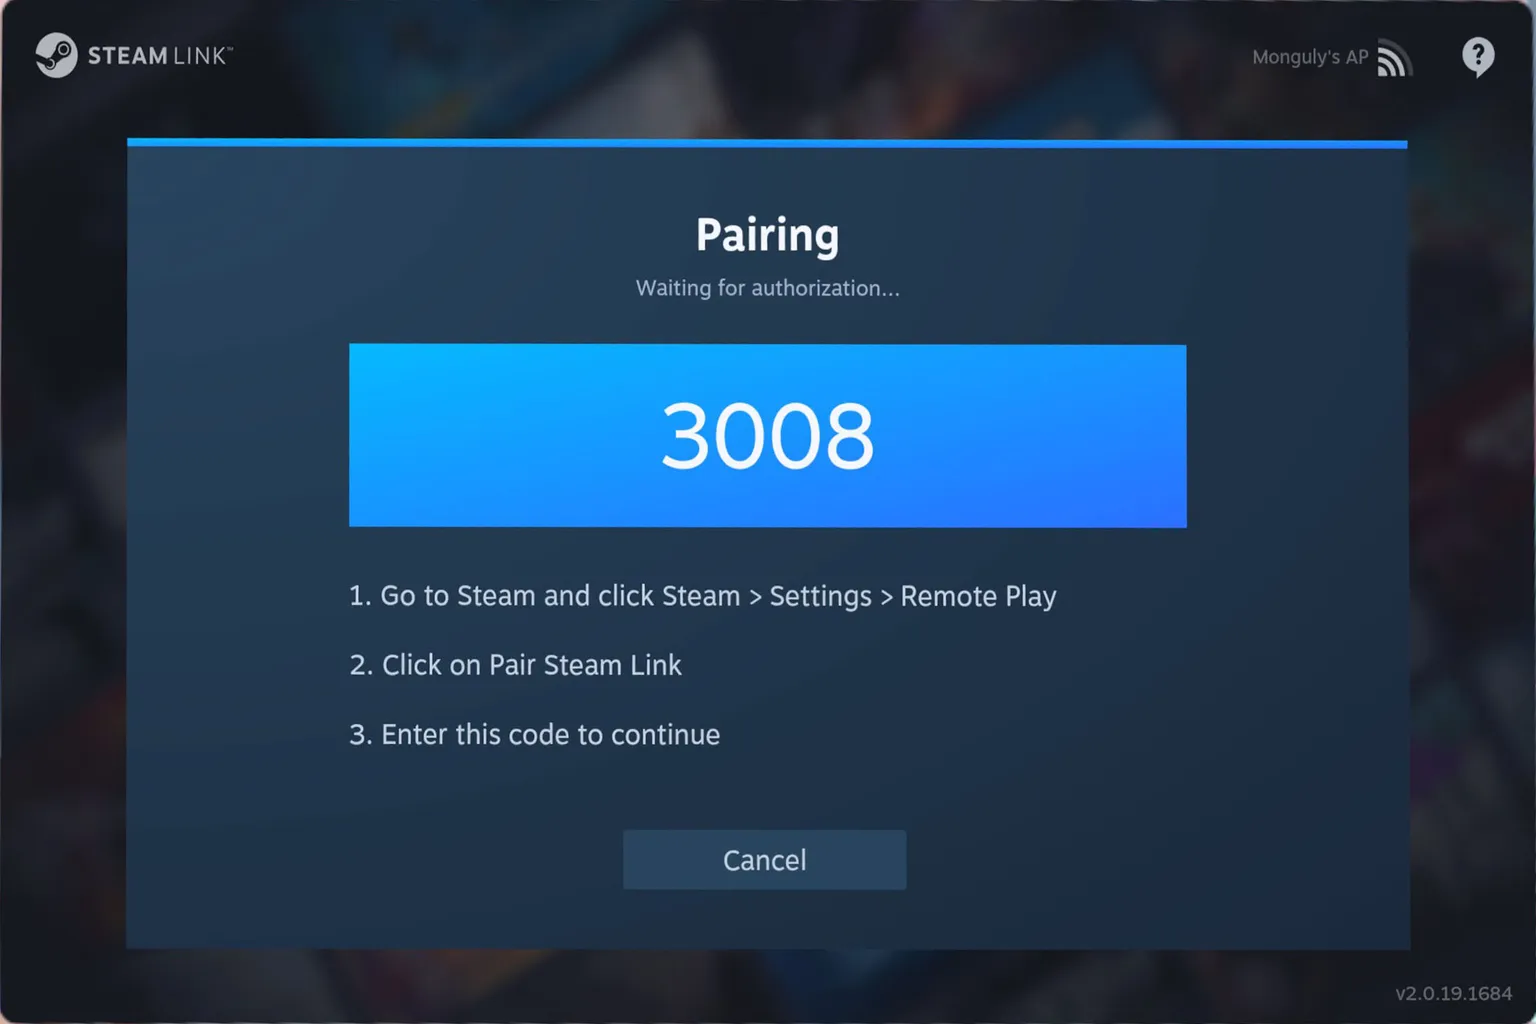
Step 3: First-time pairing
A 4-digit passcode will appear on the headset screen. Enter this code into SteamVR on your PC to complete the initial pairing.
Step 4: Final connection
Return to Steam Link on the headset and select the PC you want to connect to. Press the green Connect button to establish the connection.
Step 5: Handling the warning message
After the first connection, you may see a warning message. It basically says that a wired PC connection would be more stable. In practice, if you’re using Wi-Fi 5 or higher, performance is usually fine.
Check “Don’t warn me about this on this network again” and press Continue to proceed.

PC-Side Settings
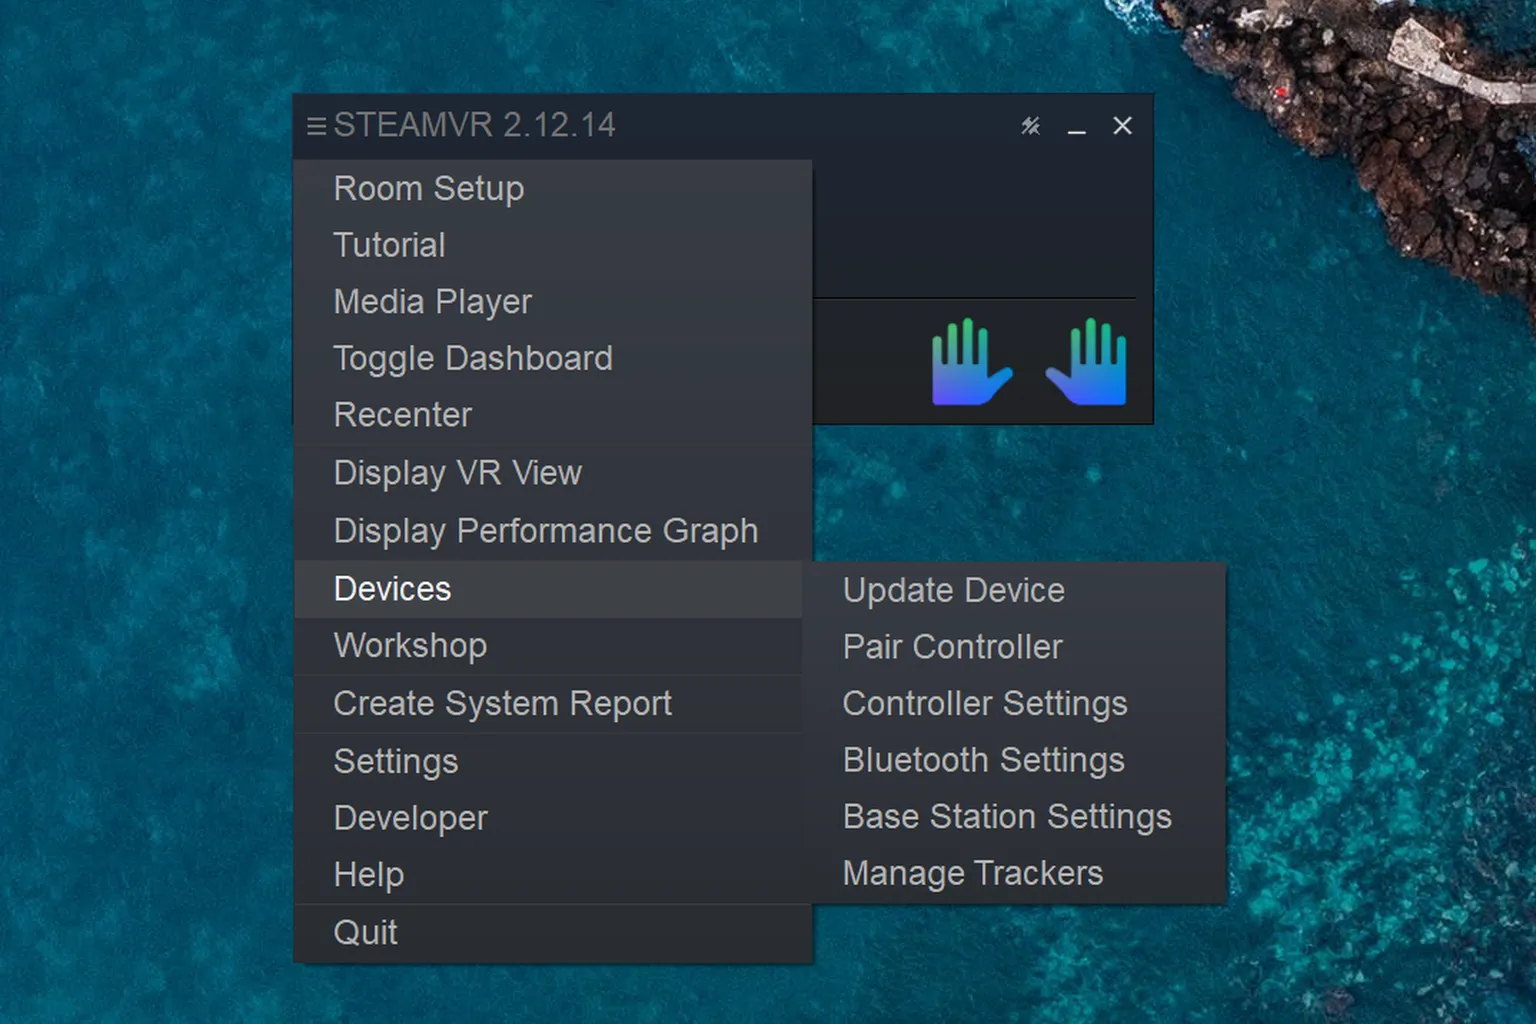
After installing SteamVR, the PC-side settings are a bit different from the standard Steam interface. Launch SteamVR, then click the ☰ icon on the left side of the screen to open the settings menu. Here’s what you’ll find:
- Room Setup: define the size of your VR play area
- Tutorial: open the official usage guide
- Media Player: launch SteamVR’s built-in media player
- Toggle Console: open or close the SteamVR console
- Recenter: reset the VR center based on your current position
- Display VR View: show a small window of the user’s first-person VR view on the monitor
- Display Performance Graph: show FPS, latency, and current system performance
- Devices: check and manage connected headsets, controllers, and base stations
- Workshop: access Steam Workshop to download user-created scenes and extensions
- Create System Report: export detailed hardware and driver information
- Settings: open the advanced SteamVR settings
- Developer: access developer tools
- Help: open the official SteamVR help page
- Quit: close SteamVR

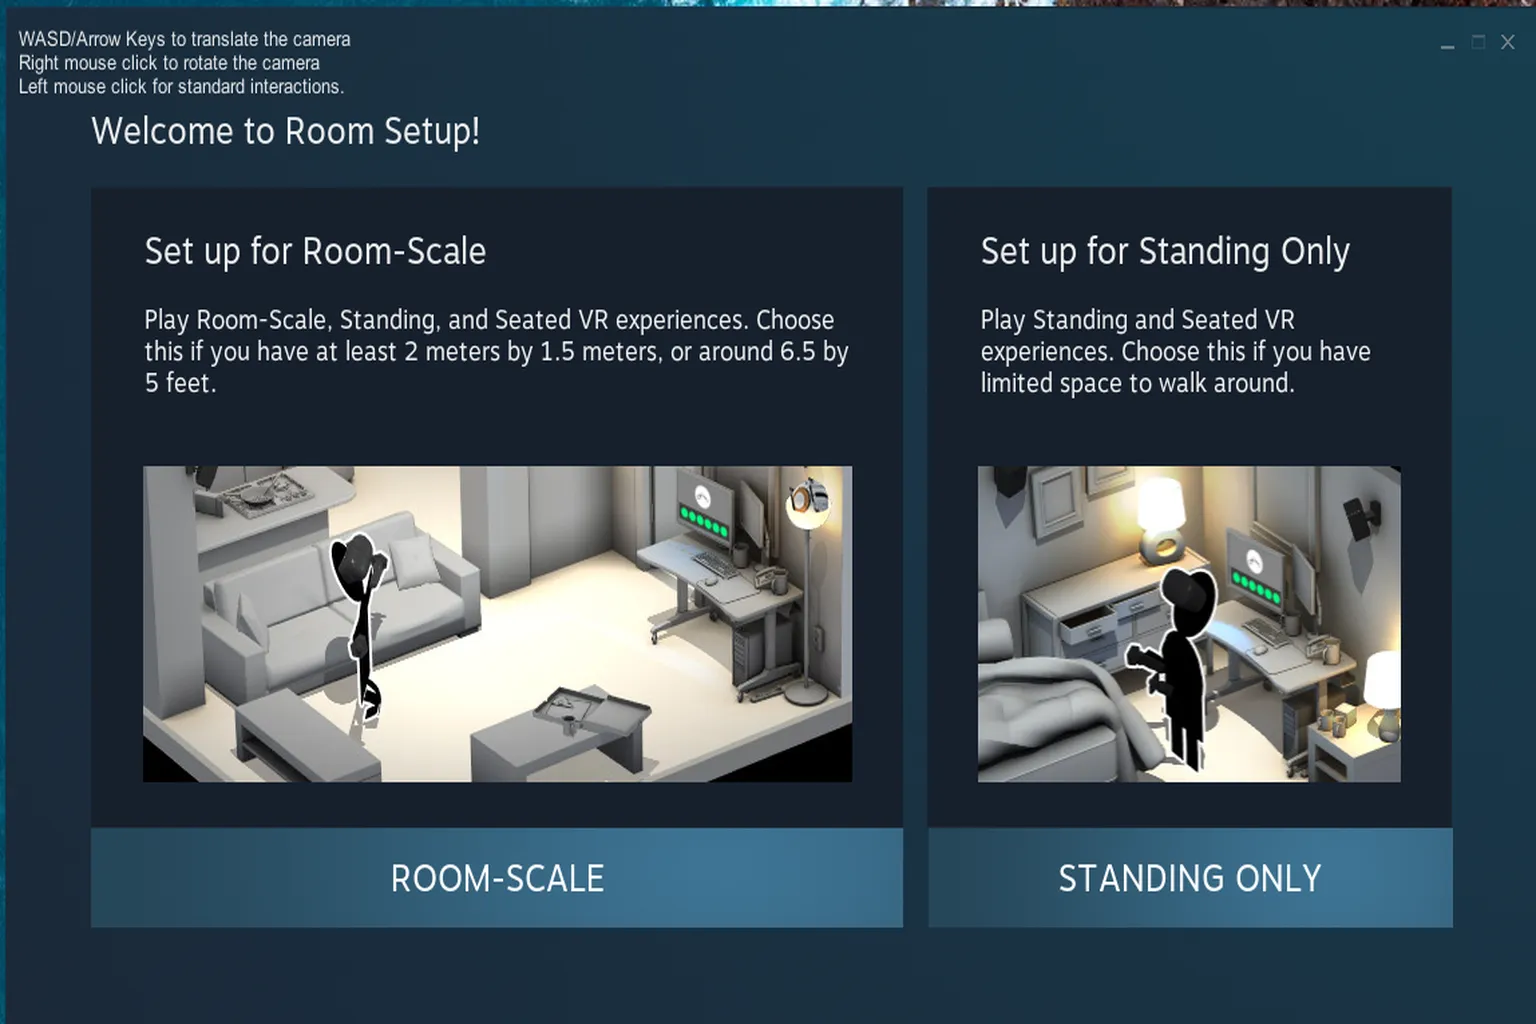
Room Setup
This process tells SteamVR how large your play area is. Setting it up properly improves tracking accuracy and controls. You can choose between two modes:
- Room-Scale Mode: choose this if you have at least a 2m × 1.5m space and want to walk around while playing
- Standing-Only Mode: choose this if you’ll be using VR while standing in place or sitting down
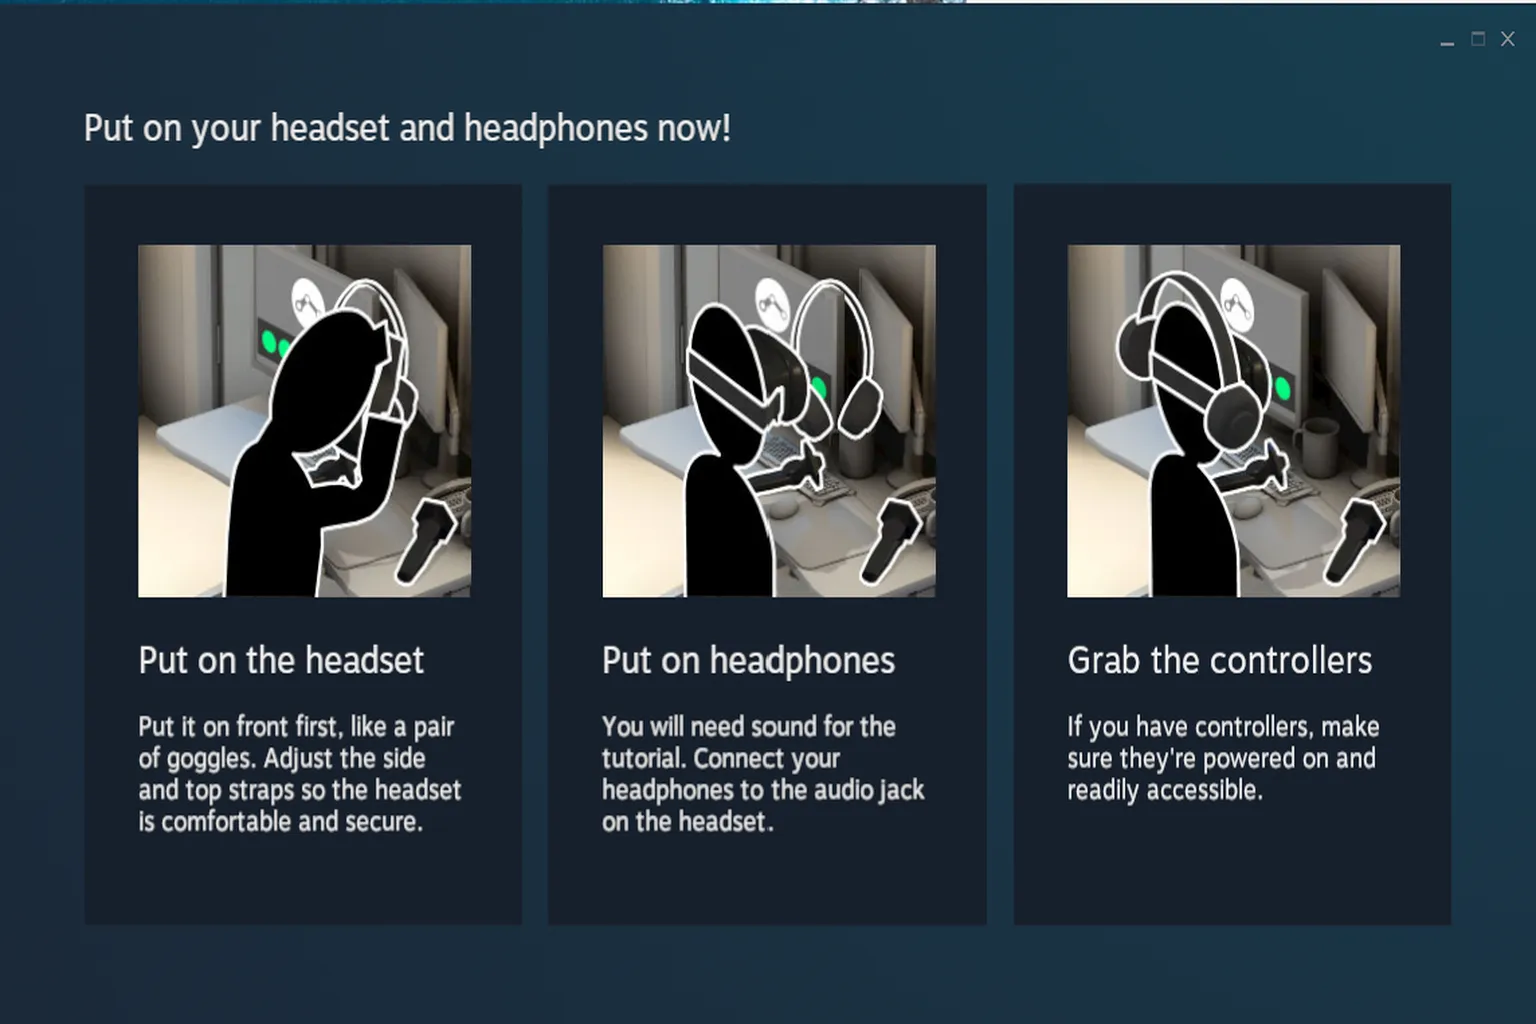
Tutorial
Before getting into full controls, SteamVR guides you through three basic actions: putting on the headset, wearing headphones, and picking up the controllers.
For Meta Quest users, simply wearing the headset and holding the controllers will start the tutorial. If you’re already familiar with VR, you can usually skip it and still understand the basics.
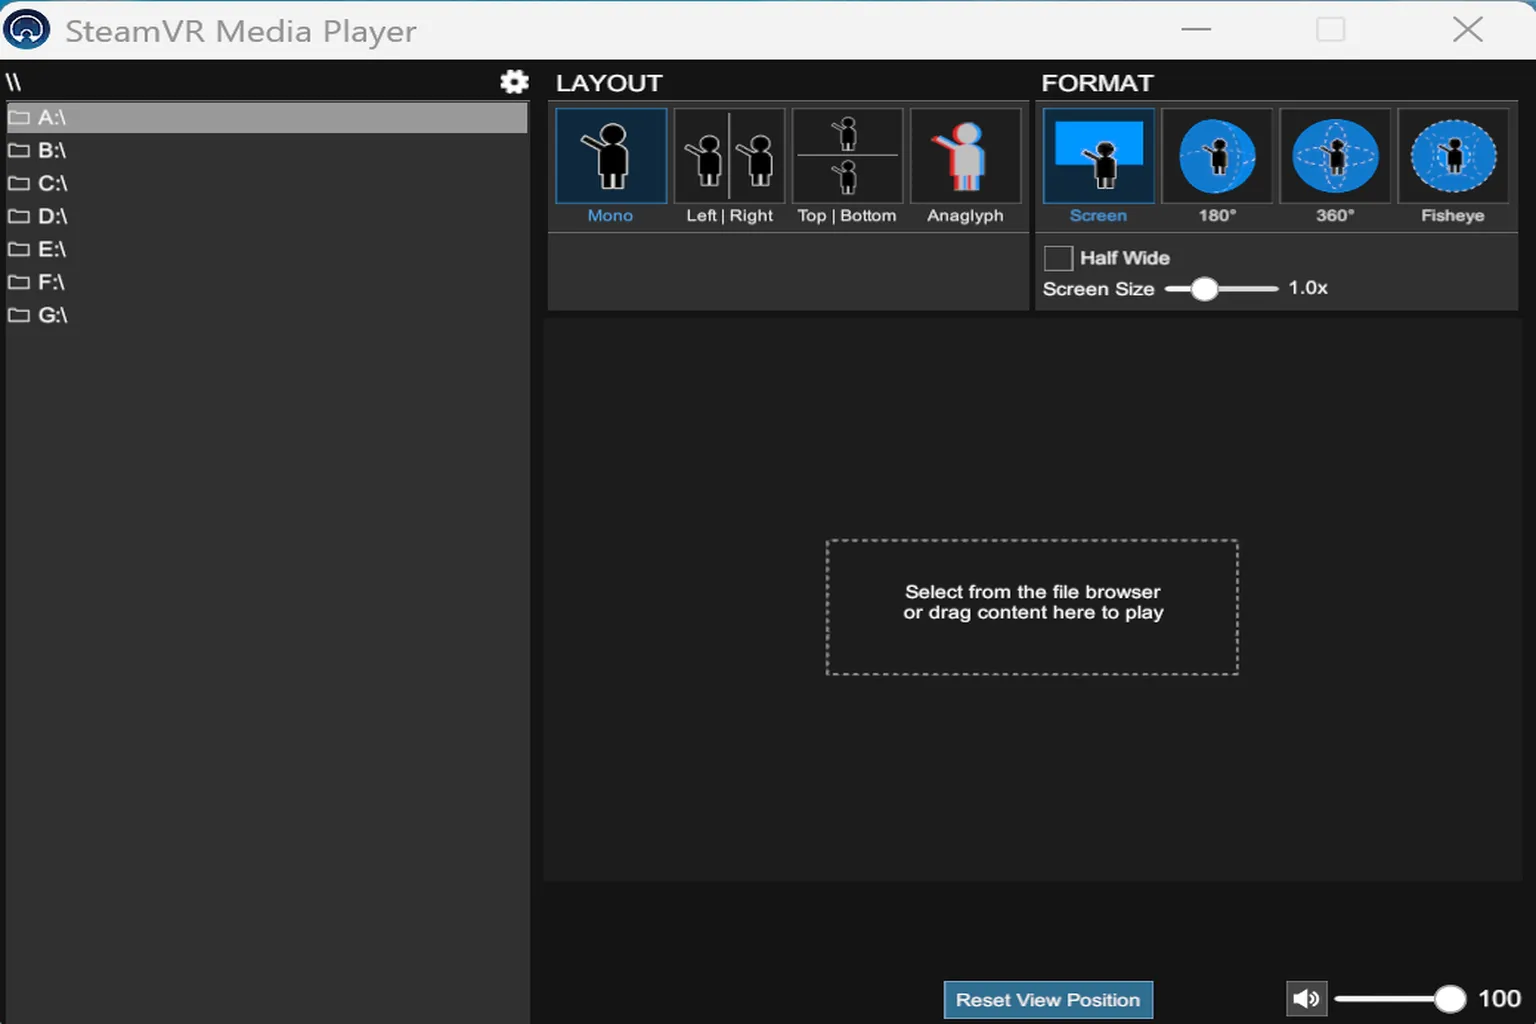
Media Player
SteamVR includes a built-in Media Player that lets you view VR files stored on your PC inside a virtual space. However, it only supports VR photos and standard photos. VR videos and regular videos are not supported.
When playing media, you can choose from these display modes depending on the file format:
- Mono: single-eye display (standard photos)
- Left | Right: side-by-side stereoscopic
- Top | Bottom: top-and-bottom stereoscopic
- Anaglyph: red-blue stereoscopic
- Screen: flat screen display (default)
- 180° / 360° / Fisheye: panoramic and spherical images that you can look around by moving your head
If you enable Half Wide, you can correct image misalignment that occurs with certain formats.
The Screen Size slider lets you freely adjust screen distance and size.
Select the photo you want to view, then choose the appropriate layout.
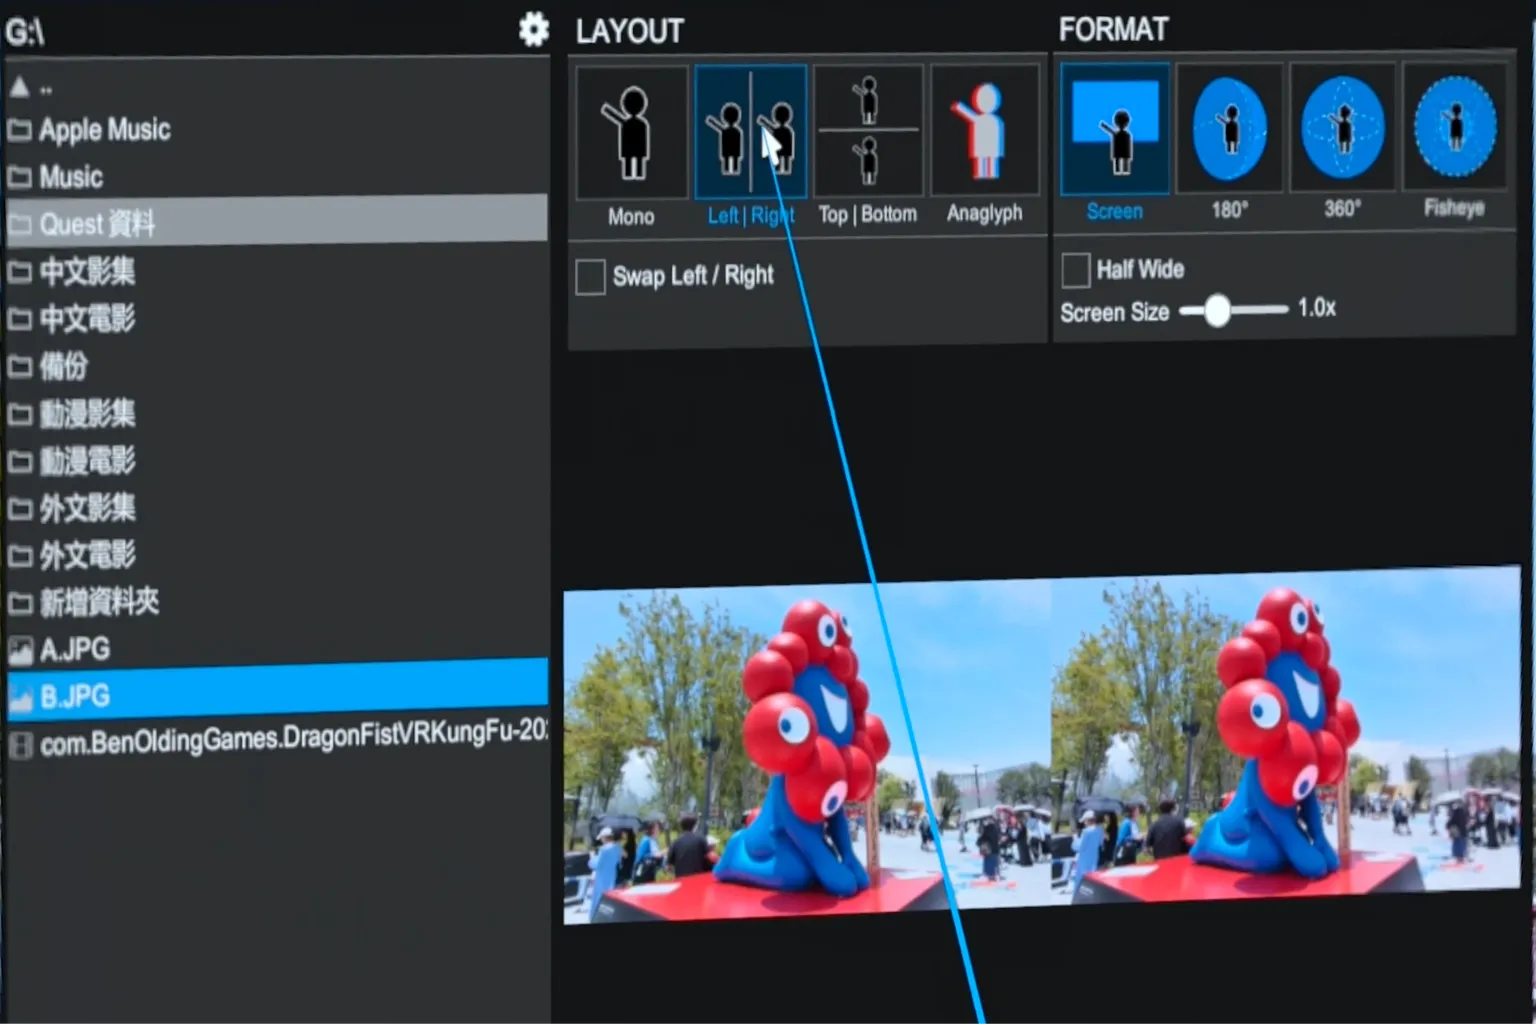
It will appear as a stereoscopic VR image inside the headset.

Devices
This section is for managing headsets, controllers, and tracking devices. Unless you’re using external trackers, Meta Quest users won’t need this much.
- Update Device : check firmware updates for headsets and controllers
- Pair Controller : manually re-pair controllers if automatic pairing fails
- Controller Settings: adjust button mappings and gesture controls
- Bluetooth Settings: enable Bluetooth, check pairing status, or pair new devices
- Base Station Settings: Check the connection and power status of base stations, and manage options like channel settings and sleep behavior.
- Manage Tracker: Manage external trackers such as Vive Trackers. This includes pairing, assigning body locations, and checking connection status and battery level.
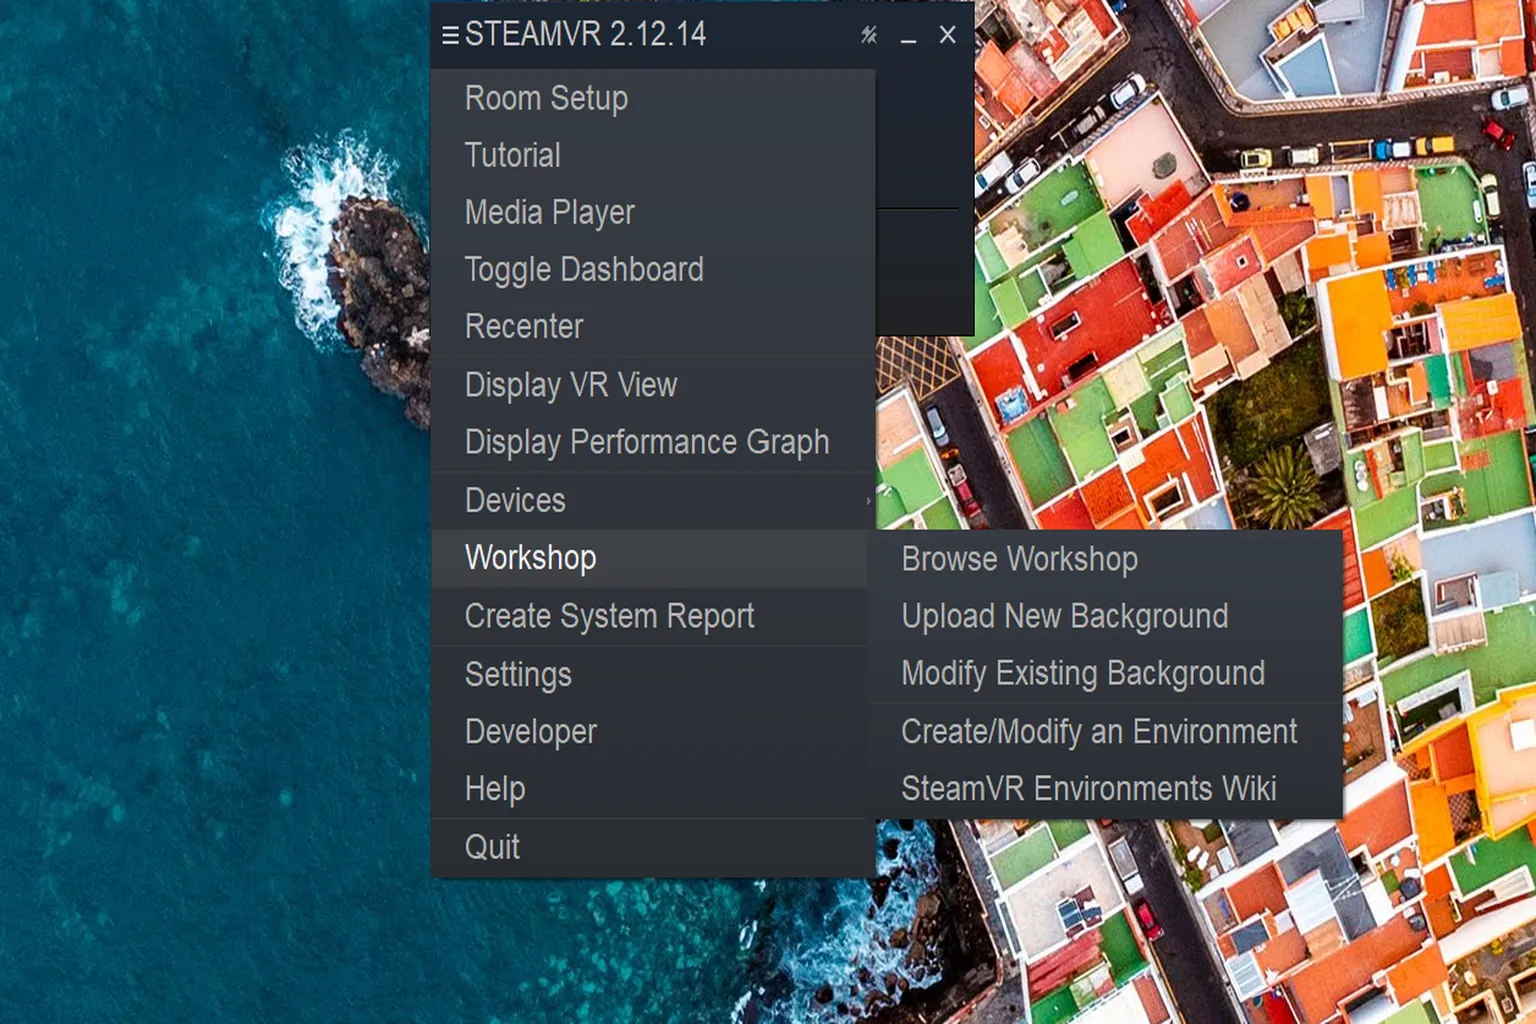
Workshop
This feature lets you customize your VR “room” or home environment. Through Steam Workshop, you can download scenes created by other users or share your own environments.
If you don’t change anything, the default Steam Link environment inside the headset is a “mountain villa” setting.
Here are the five sub-sections available inside Workshop:
- Browse Workshop: Opens the SteamVR Workshop page on Steam.
- Upload New Background: Upload a scene you created and share it with others.
- Modify Existing Background: Open and edit the scene you’re currently using.
- Create / Modify an Environment: Build a brand-new scene from scratch or update an existing one.
- SteamVR Environment Wiki: Official documentation and tutorial pages.
Create System Report
This feature exports a full report of your PC and headset parameters. It’s useful for checking your system specs or sharing detailed information when troubleshooting issues.

Setting
This is the most important section on the PC side. These settings directly affect performance and smoothness. SteamVR provides a total of 10 tabs, from General to Steam Streaming. Below is a breakdown of each one.
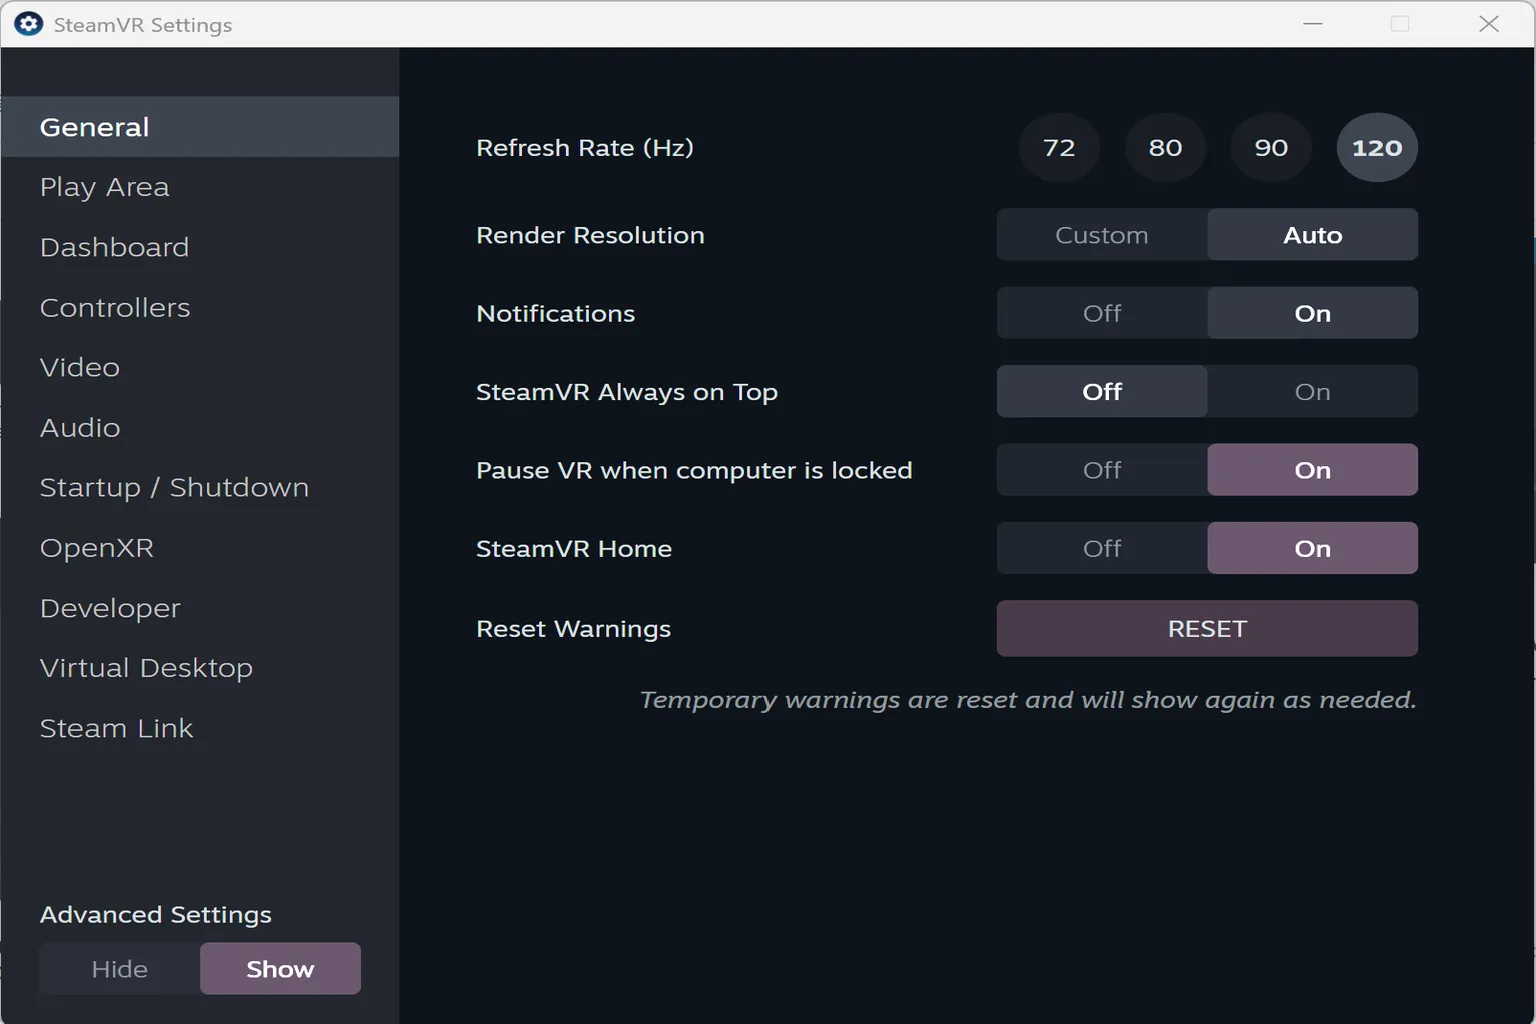
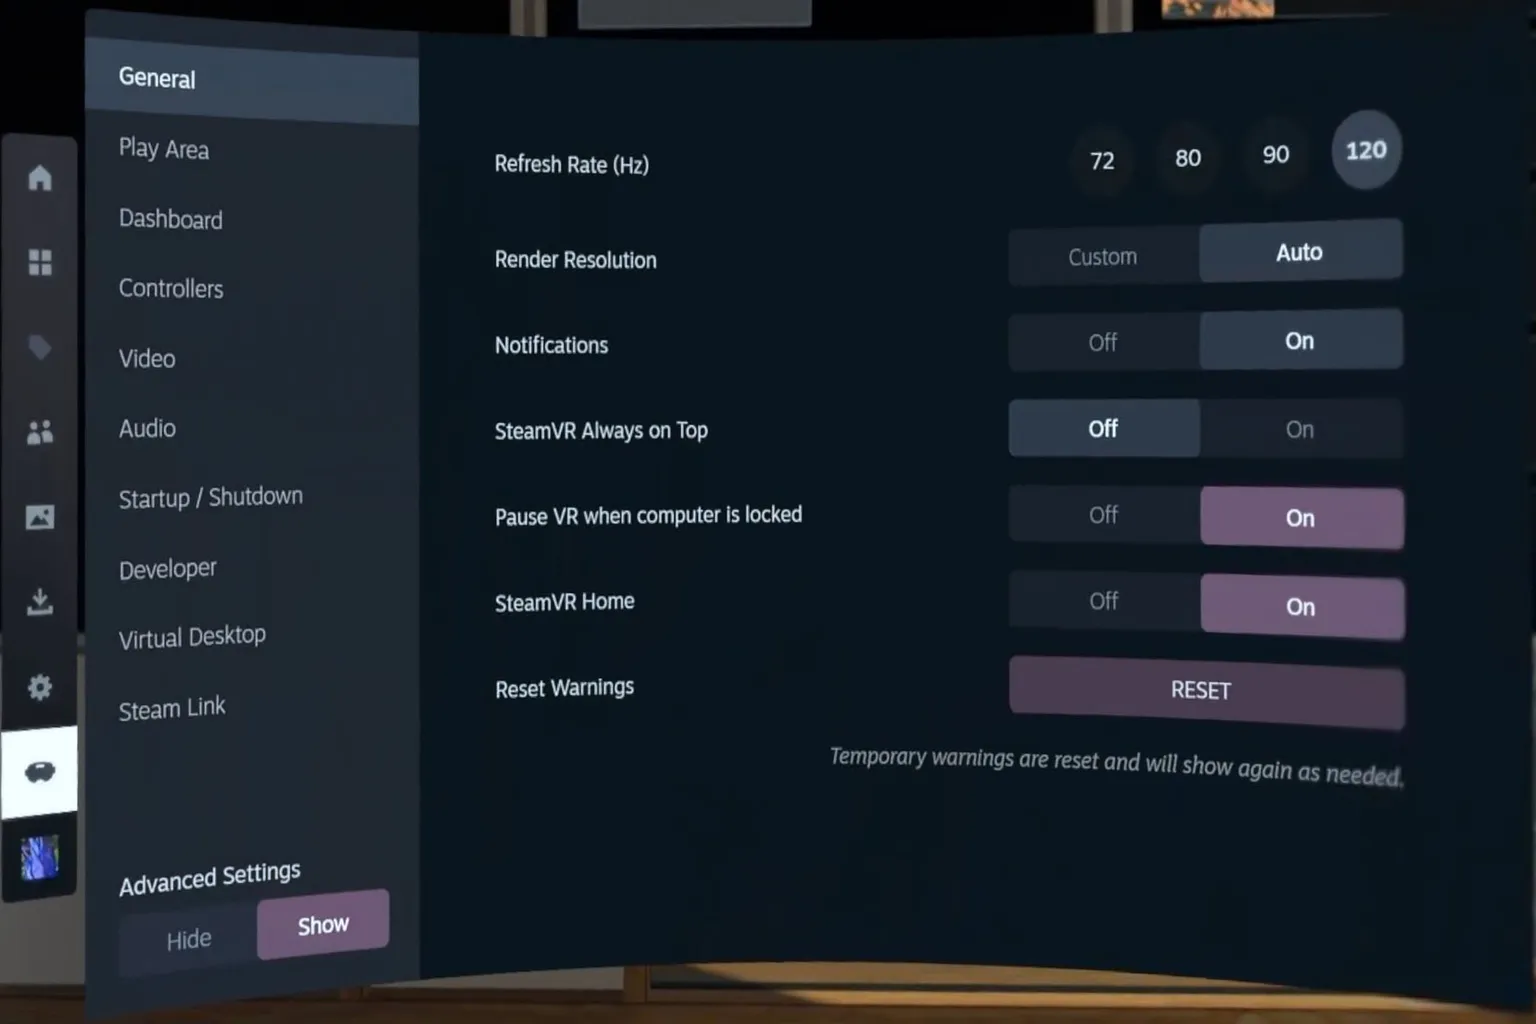
General
The General tab is the foundation of SteamVR settings. It controls overall behavior like refresh rate and notifications.
- Refresh Rate (Hz): Display refresh rate. Higher values mean smoother visuals. 120Hz is recommended for Meta Quest 2 / 3S / 3.
- Rendering Resolution: Controls image resolution and quality. Auto is recommended.
- Notifications: Toggle in-VR notifications. Turn off during recording to avoid audio interruptions.
- SteamVR Always on Top: Keeps the SteamVR window above others. Generally recommended to keep off.
- Pause VR When computer is Locked: Pauses VR when Windows is locked. On by default.
- SteamVR Home: Automatically enter SteamVR Home on launch. On by default.
- Reset Warnings: Re-enable warning messages you previously disabled.
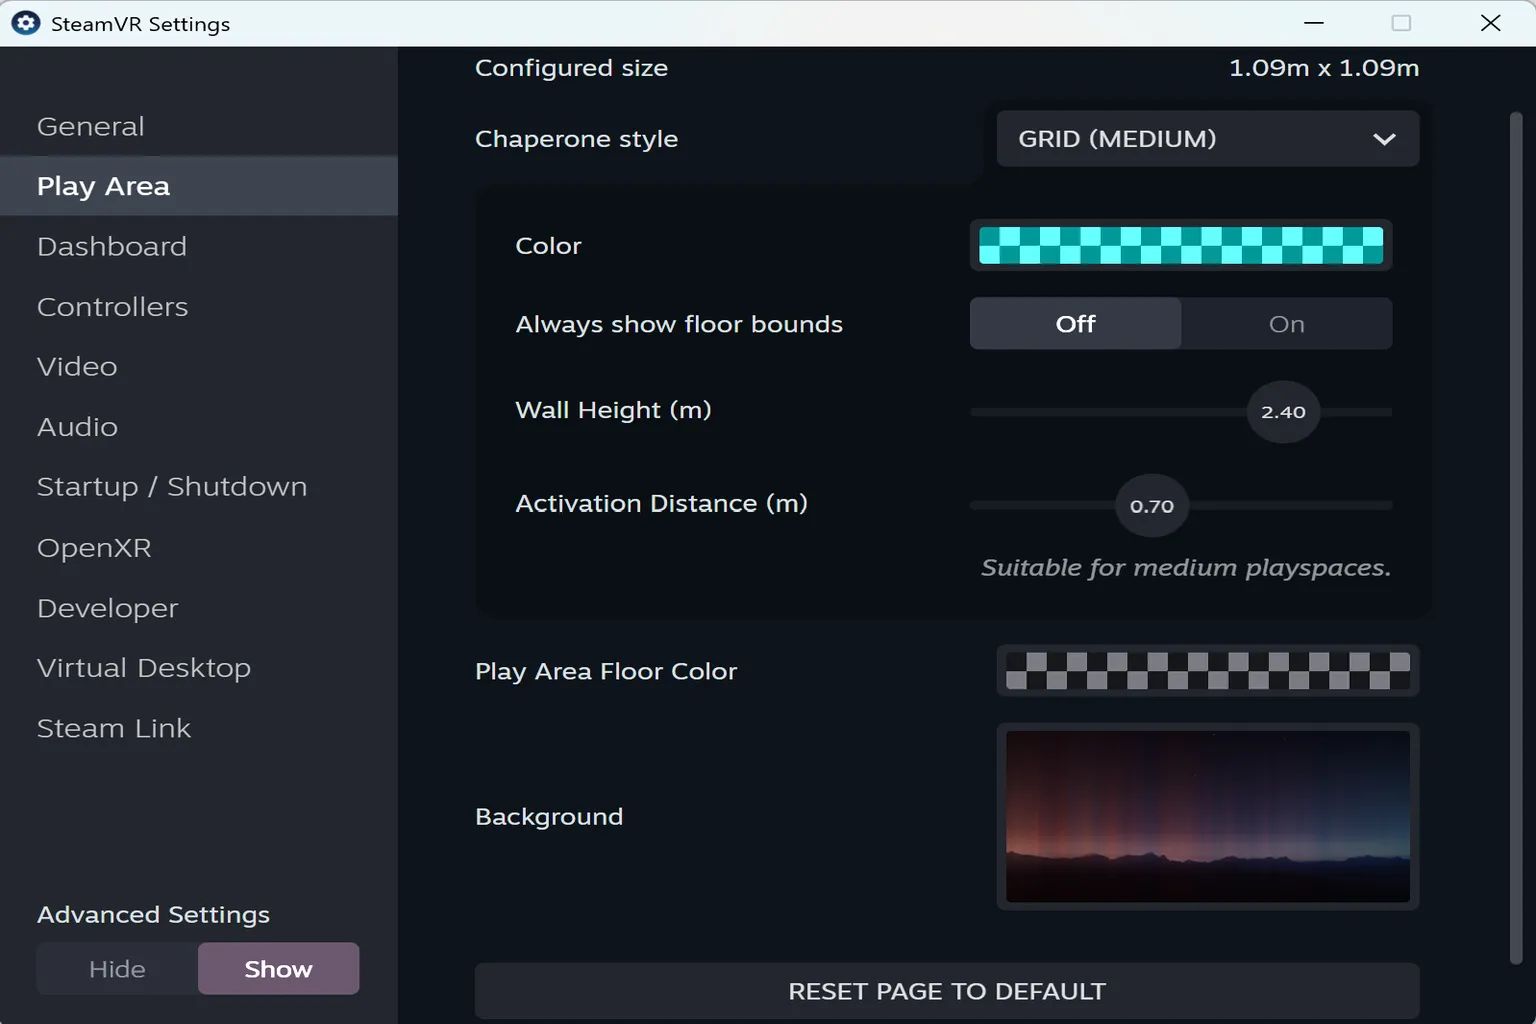
Play Area
This section lets you adjust your play area, boundary lines, guardian walls, and background display inside VR. It’s mainly focused on collision prevention and safety, and includes the following options:
- Configured Size: Current play area dimensions.
- Chaperone Style: Choose how boundary walls appear.
- Color: Boundary line color.
- Always Show Floor Bounds: Keeps floor boundaries visible at all times.
- Wall Height (meters): Height of virtual walls.
- Activation Distance (meters): How close you must get before walls appear. Around 0.5 m is ideal.
- Play Area Floor Color: Color of the virtual floor.
- Background: Background image of the VR environment.
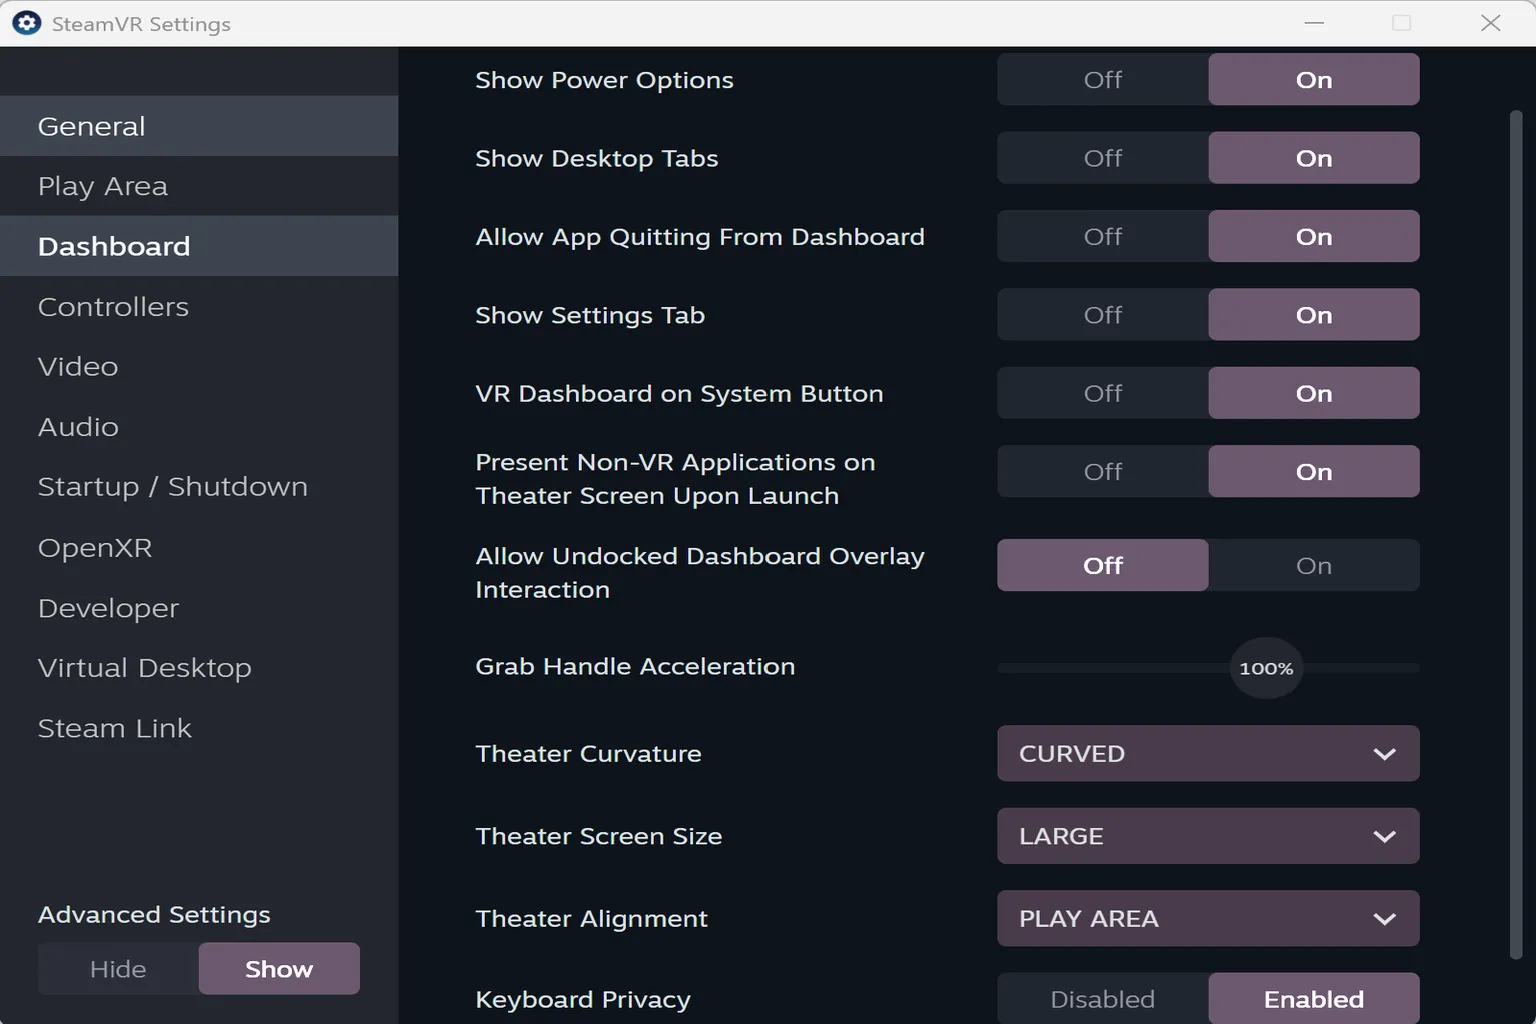
Dashboard
This section controls the SteamVR dashboard (the menu that pops up when you press the left-hand “☰” system button). It includes:
(Most of these are best left at default settings.)
- Show Power Options: Adds shutdown and restart buttons.
- Show Desktop Tab: Access your PC desktop from the console.
- Allow Apps Quitting From from Dashboard: Force-close apps from the console.
- Show Settings Tab: Toggles settings visibility in the console.
- VR Dashboard on System Button: Opens console every time the system button is pressed.
- Present Non-VR Applications on Theater Screen Upon Launch: Displays non-VR games on a cinema-style screen.
- Allow Undocked Dashboard Overlay Interaction: Enables interaction with fixed UI panels.
- Grab Handle Acceleration: Scroll speed when dragging UI. Usually fine at default.
- Theater Curvature: Flat or curved screen.
- Theater Screen Size: Larger size increases immersion.
- Theater Screen Alignment: Centered, offset, or aligned to play area.
- Keyboard Privacy: Hides typed input from others.
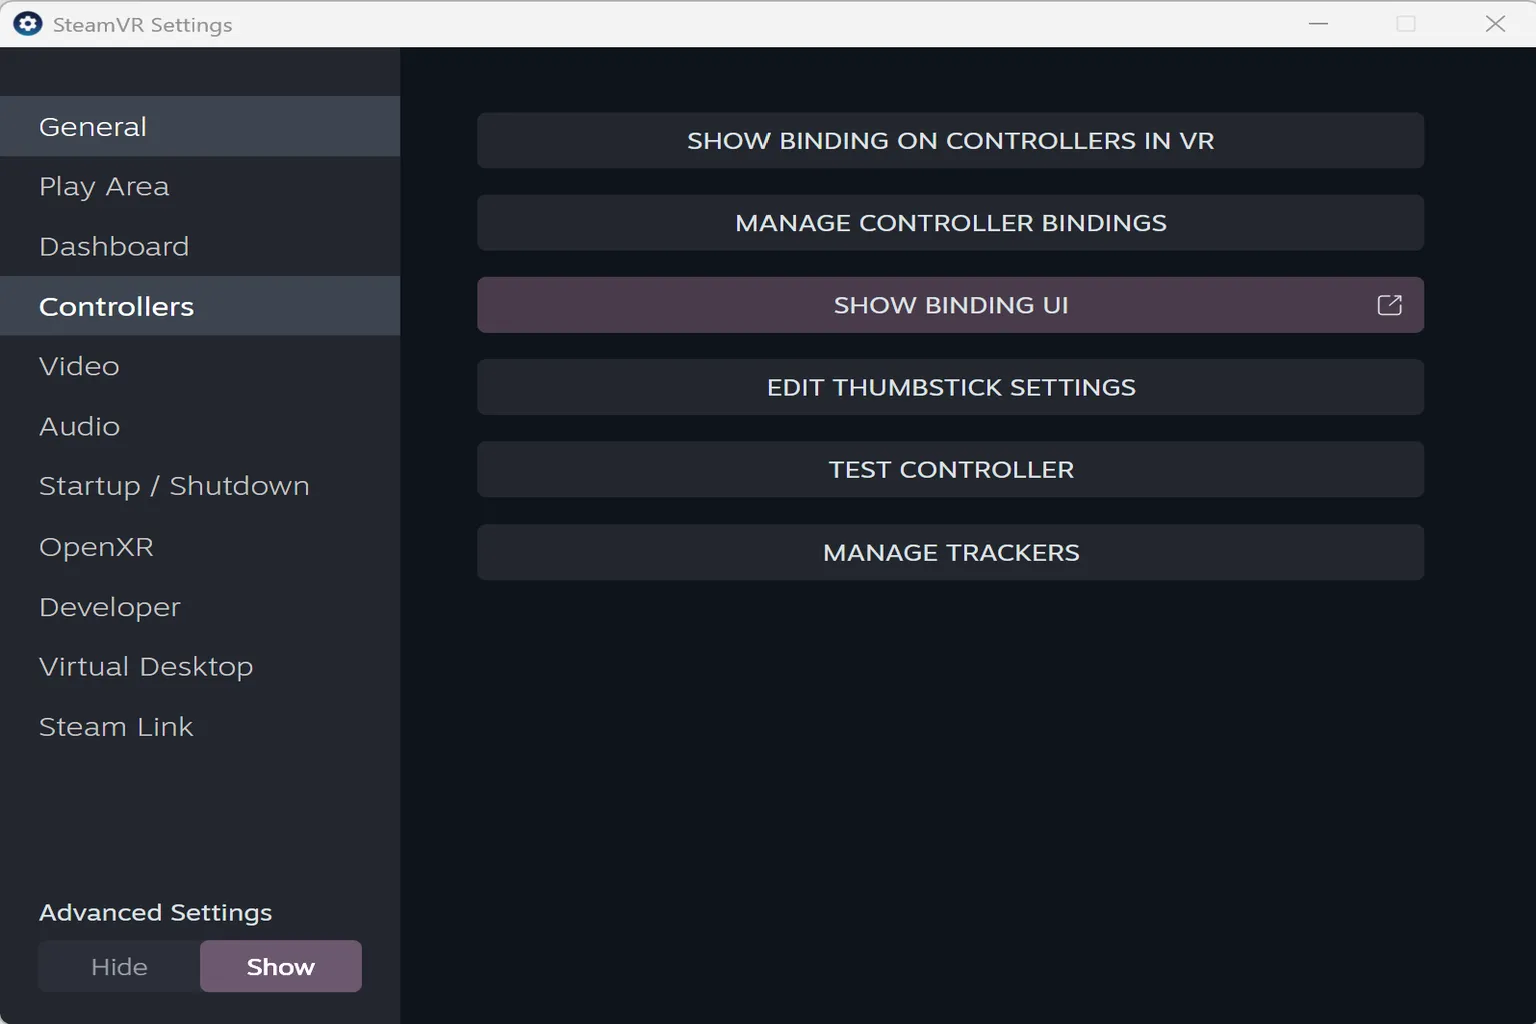
Controllers
Manages VR controller behavior and button mappings. Defaults are fine for most users.
- Show Binding on Controllers in VR: Displays button layouts and functions.
- Manage Controller Bindings: Choose official, community, or custom bindings per game.
- Show Binding UI: Manually remap buttons globally.
- Edit Thumbstick Settings: Adjust movement style and sensitivity.
- Test Controllers: Check button and stick input response.
- Manage Trackers:Used to connect external trackers such as Vive Trackers, assign them to the waist or legs, and verify that tracking is working correctly.
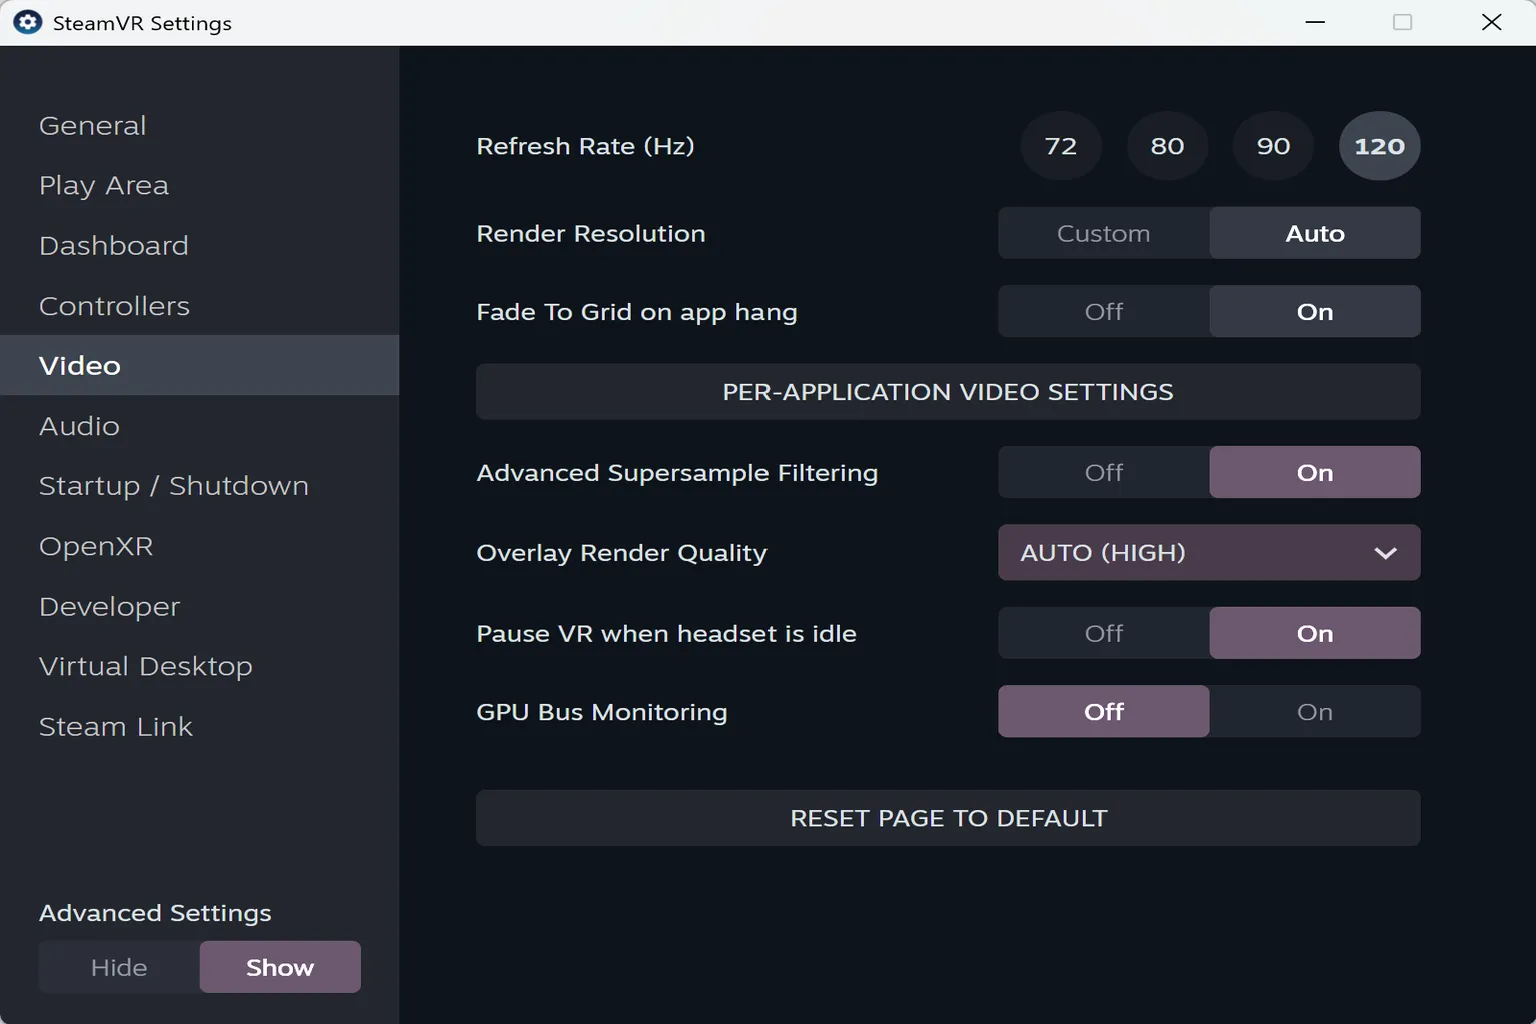
Video
This section controls VR image quality and refresh rate. Whether the visuals feel smooth or sharp is determined almost entirely here.
- Refresh Rate (Hz): Higher values mean smoother visuals. 120Hz recommended for Quest headsets.
- Rendering Resolution: Image clarity and sharpness. Auto is recommended.
- Fade to Grid on App hang: Shows grid pattern when an app crashes.
- Per-Application Video Settings: Customize visuals per game.
- Advanced Supersample Filtering: Sharpens details. Enable if GPU allows.
- Overlay Rendering Quality: Console UI quality. Auto is fine.
- Pause VR When Headset Is Idle: Saves power when headset isn’t moving.
- GPU Bus Monitoring: Performance analysis tool. Usually leave off.
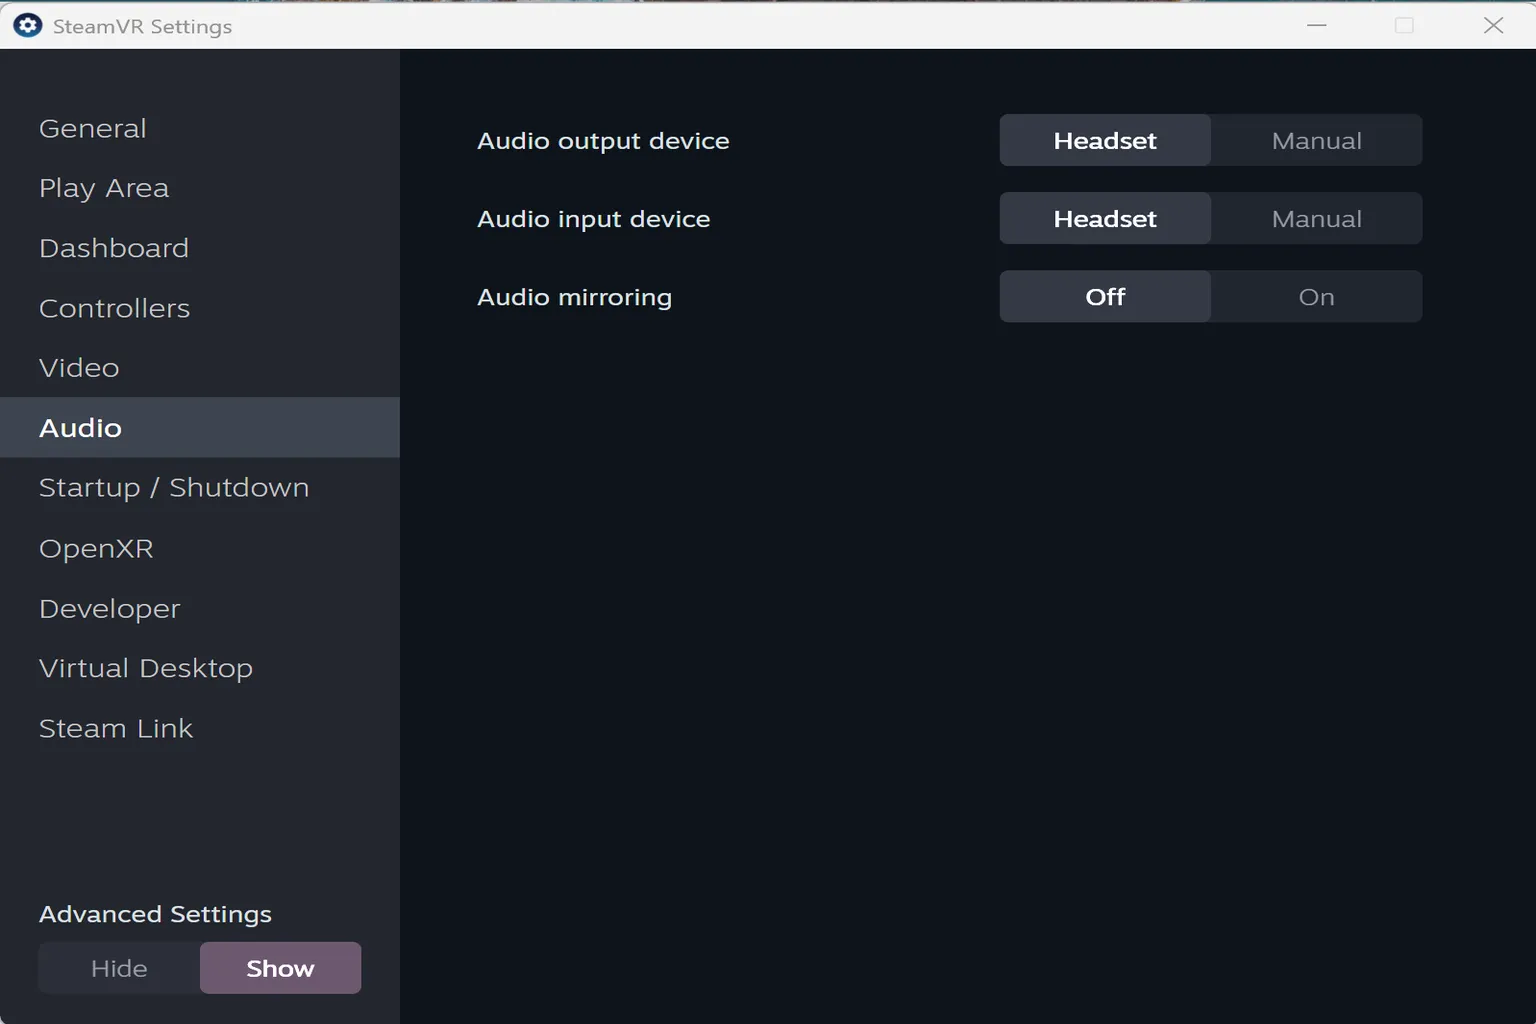
Audio
Controls speakers and microphone during VR. Defaults work well.
- Audio Output Device: Default is Quest built-in audio.
- Audio Input Device: Default is Quest microphone.
- Audio Mirroring: Outputs headset audio to PC speakers simultaneously.
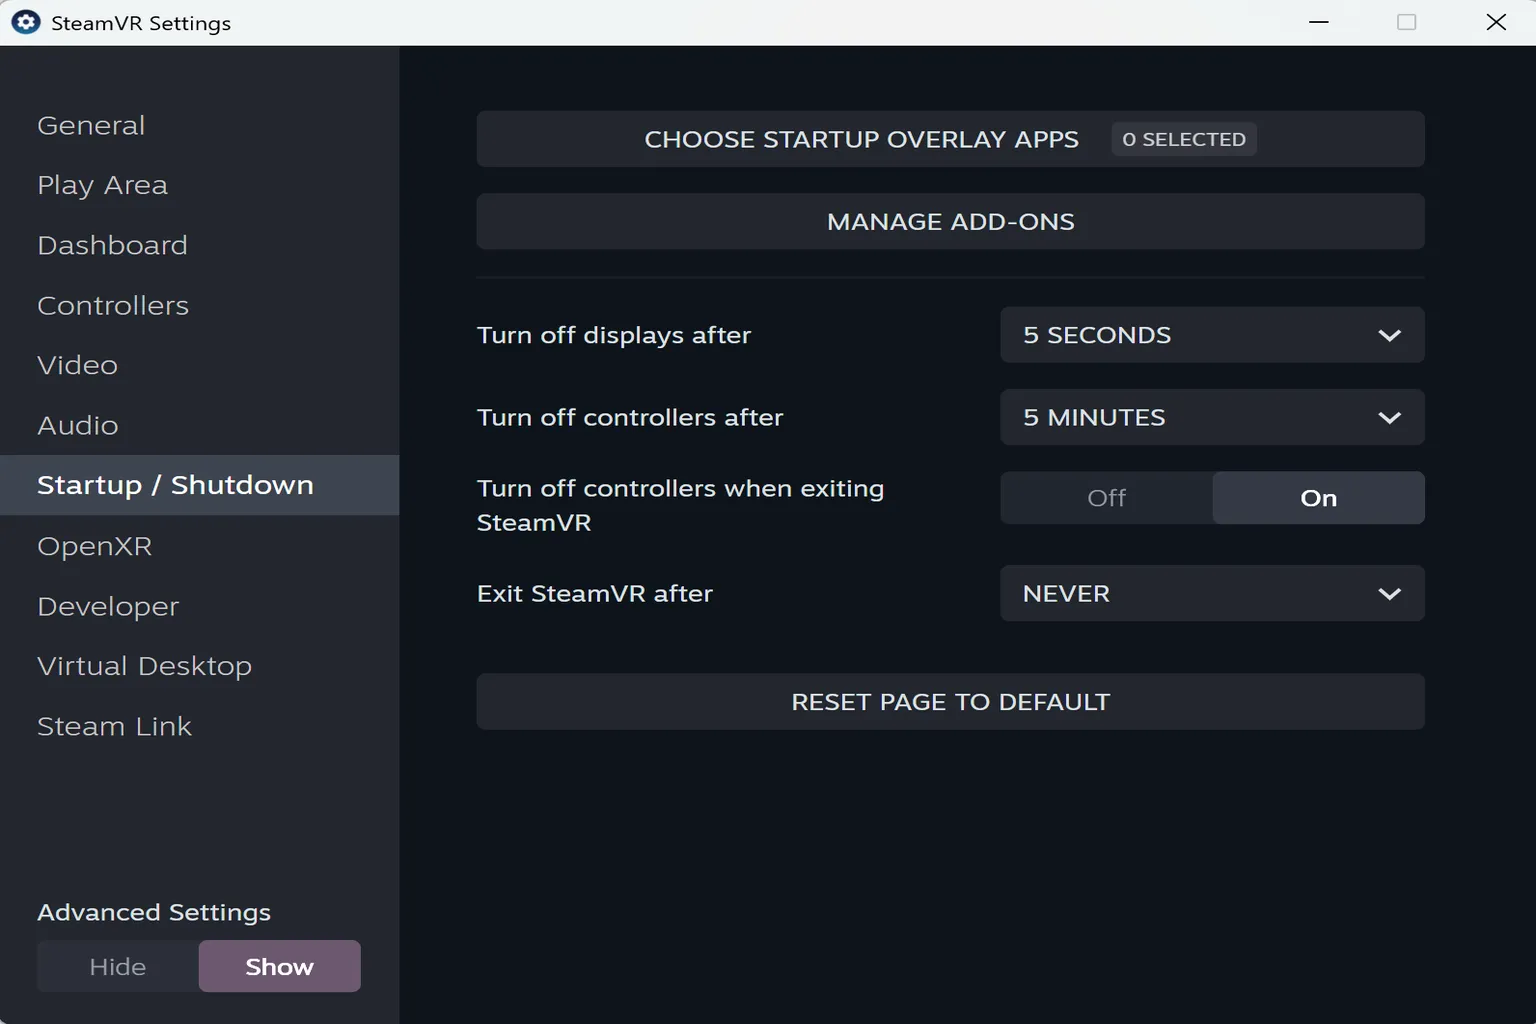
Startup / Shutdown
This section controls how SteamVR behaves when starting up and shutting down. In most cases, it’s best to leave these settings at their defaults.
- Choose Startup Overlay Apps: VR tools that launch automatically.
- Manage Add-ons: Enable or disable installed add-ons.
- Turn Off Display After: Time before headset screen turns off.
- Turn Off Controllers After: Time before controllers power down.
- Turn Off Controllers on Exit SteamVR: Powers off controllers when SteamVR closes.
- Exit SteamVR After: Automatically closes SteamVR after inactivity.
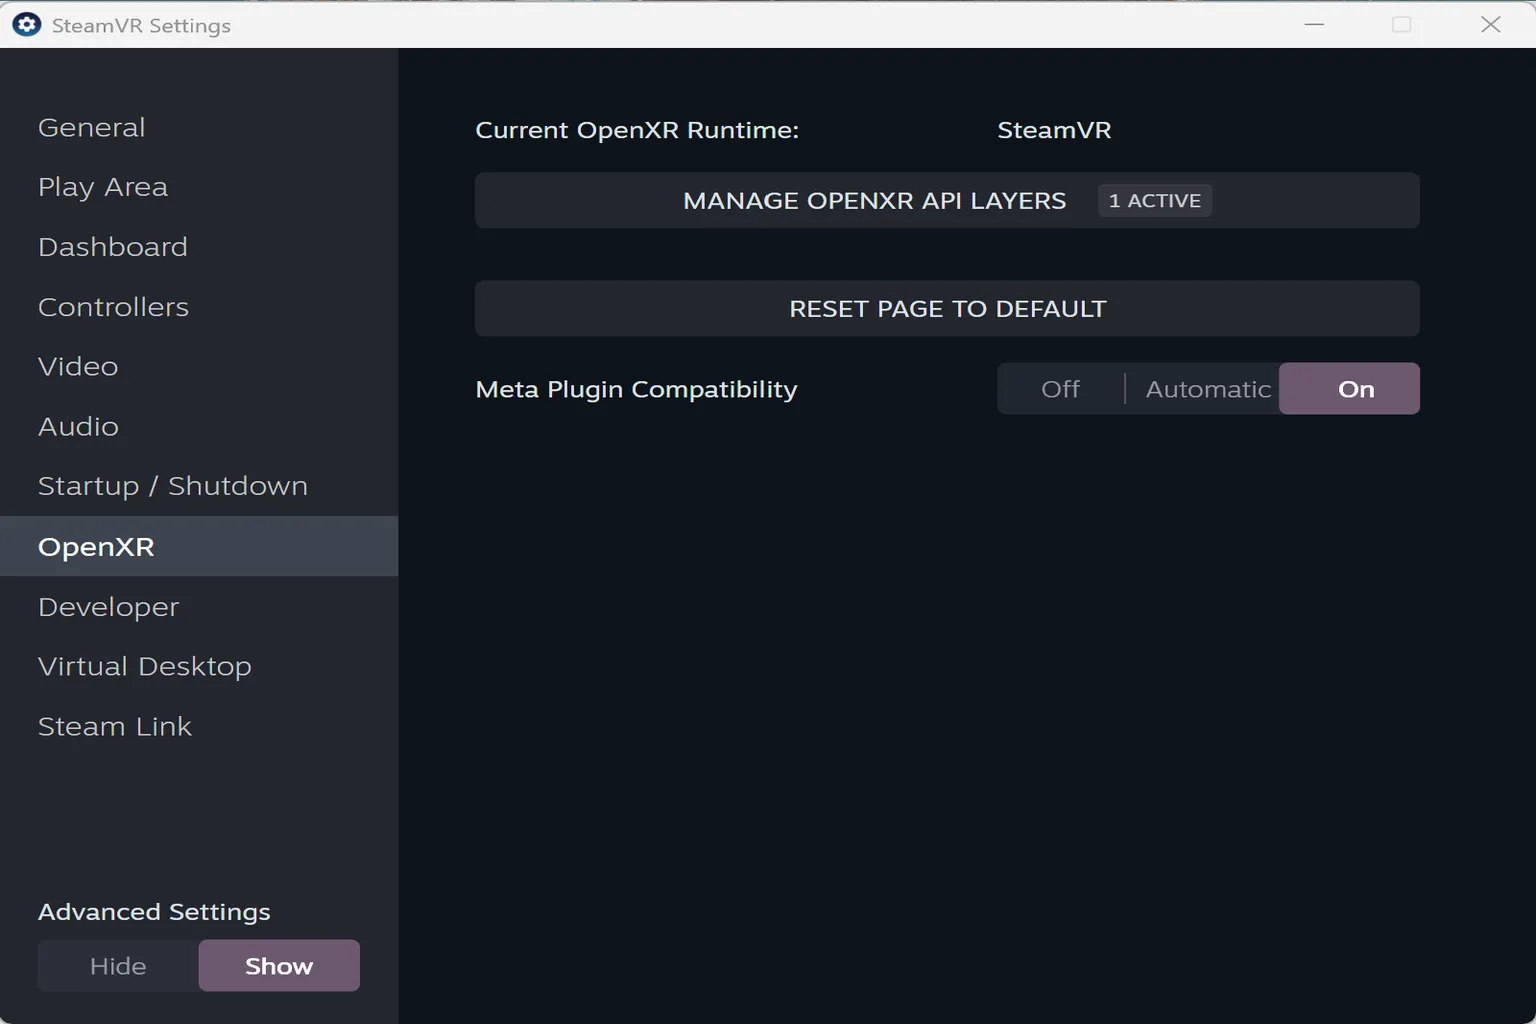
OpenXR
This part relates to the underlying system that games rely on, so it’s generally best not to change anything here.
- Current OpenXR Runtime: Shows which platform is currently running OpenXR (for example, SteamVR or Meta).
Even if you open this, you still can’t run PC games purchased from the Meta Store through SteamVR. - Manage OpenXR API Layers (Active: 1): Check and manage whether external plugins are integrated into the OpenXR system.
- Meta Plugin Compatibility: When enabled, SteamVR attempts to support Meta-specific features such as hand tracking and mixed reality passthrough. This is generally recommended to keep on.
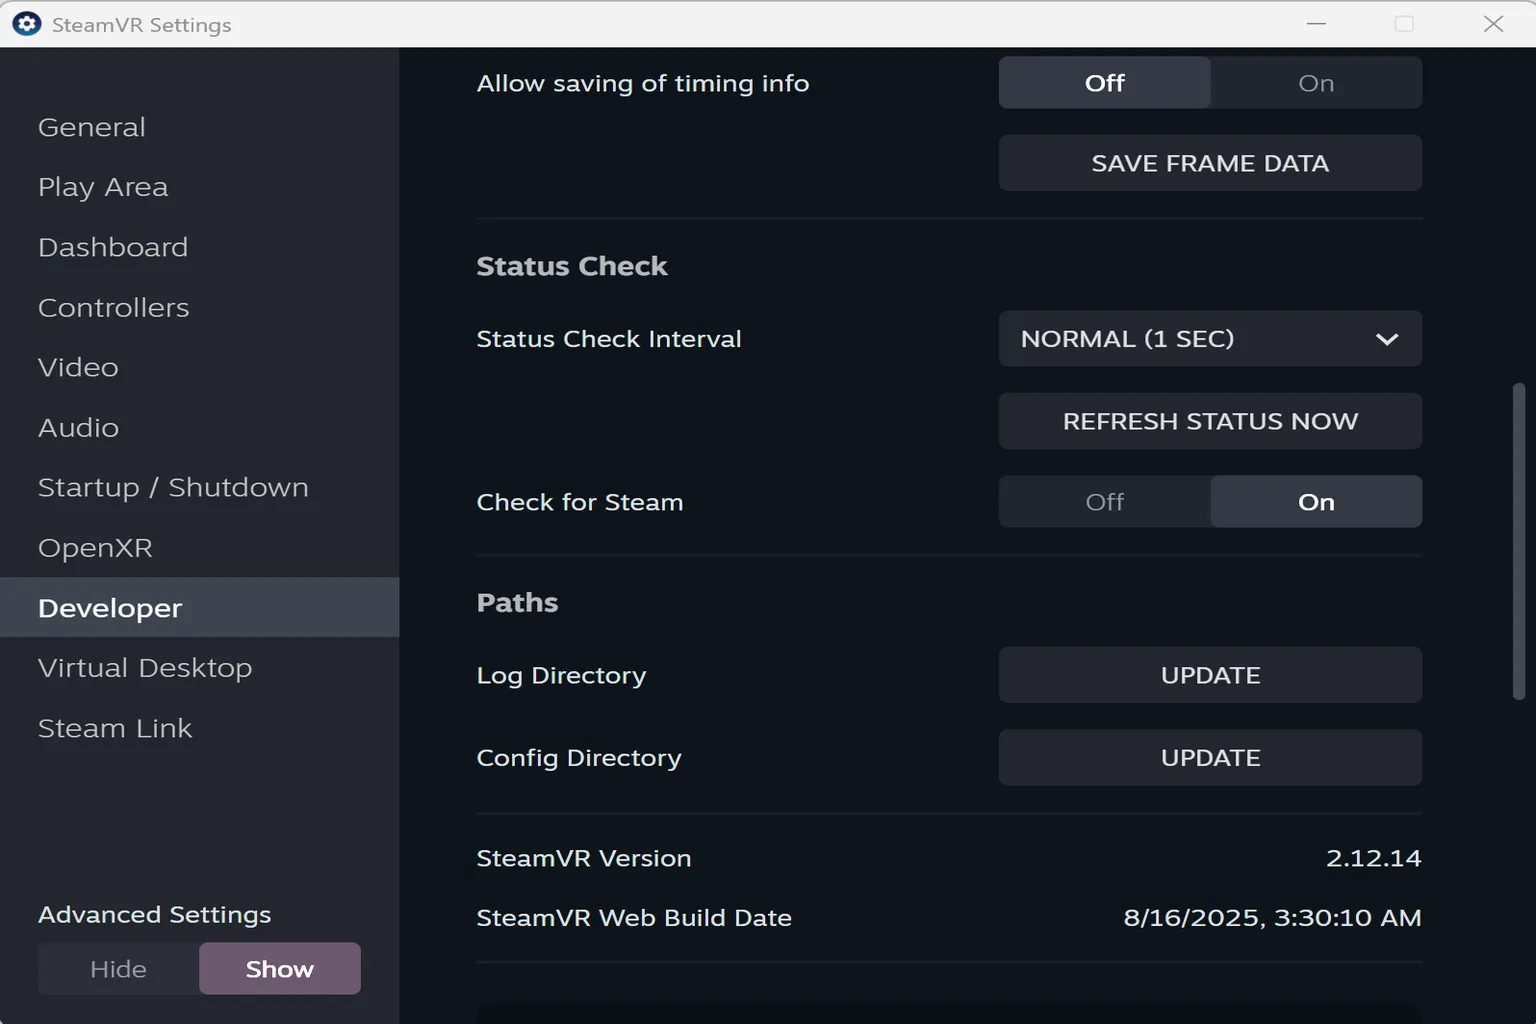
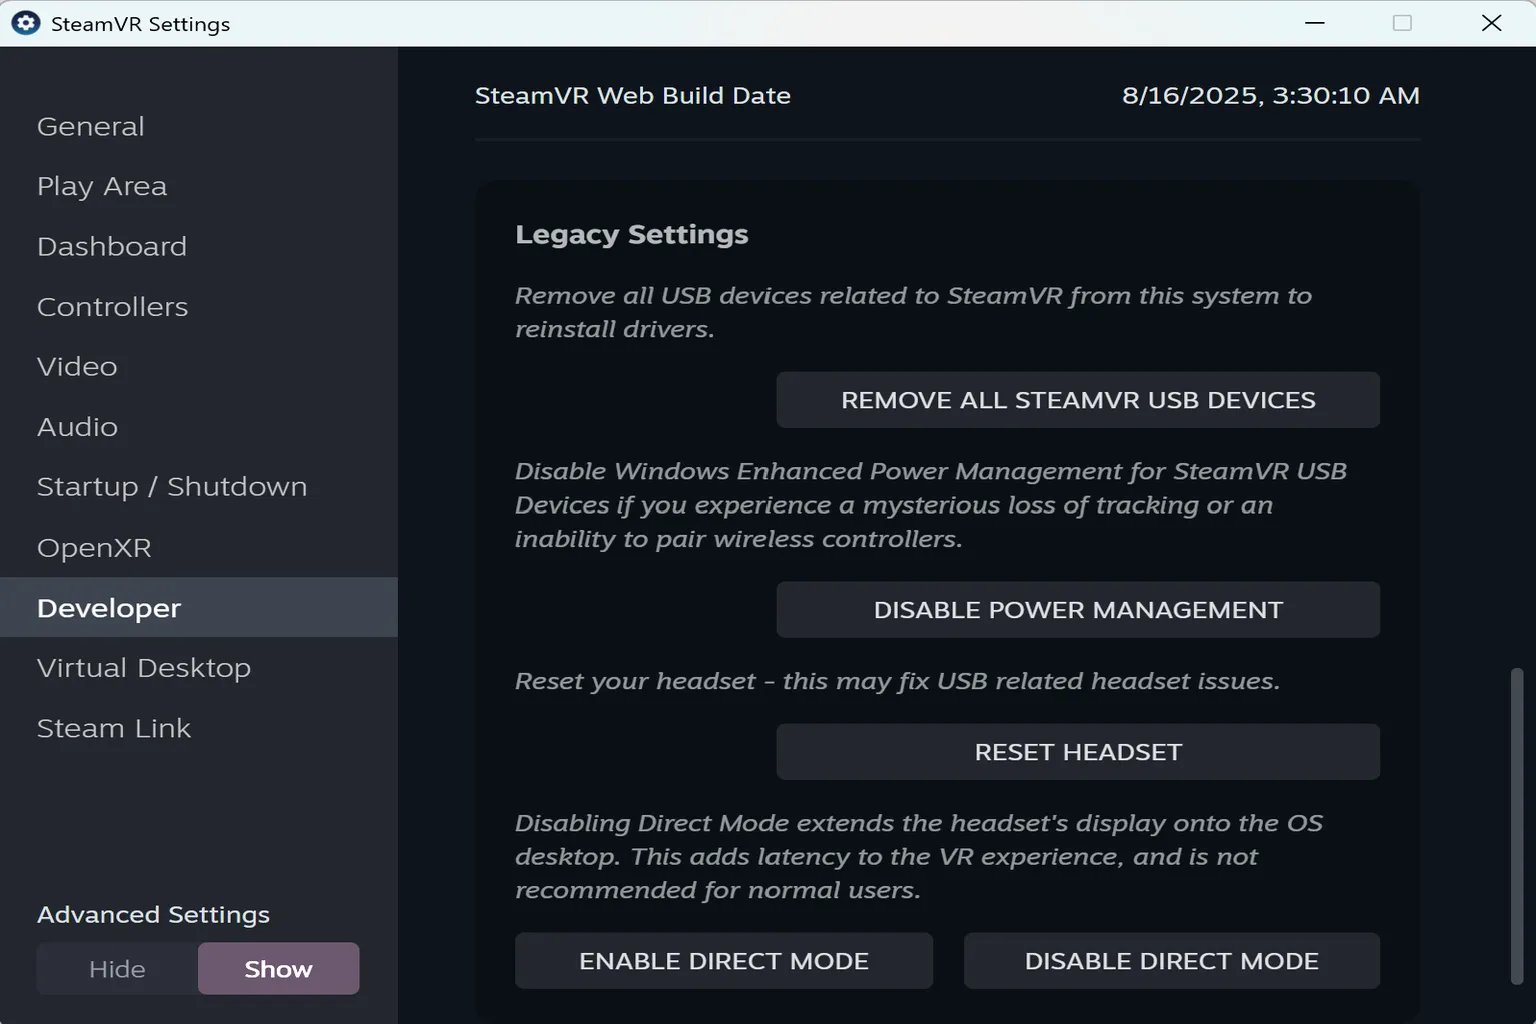
Developer
This section is almost entirely aimed at developers. If you change things carelessly, you may run into strange issues, so it’s best to leave it alone unless you know what you’re doing.
- Enable Debug Options in Input Binding user Interface: Adds more controller customization options. Intended for advanced users or developer testing.
- Enable Global Input from Overlays (Experimental): An experimental feature that allows embedded tools or overlays to send input directly to games.
- Arcade Mode: Hides all settings and pop-ups, leaving only the core gameplay screen. Designed for arcade or demo setups.
- Quick Calibrate: Instantly resets the center of the play space based on your current floor position.
- Medium Space: Default space scale setting. Medium is usually sufficient.
- Record Tracking Data: Starts recording tracking data.
- Show GPU Performance Graph in Headset: Displays GPU load inside the headset for performance monitoring.
- Auto-Save Timing info on Exit: Automatically saves per-frame performance data when exiting, useful for troubleshooting.
- Allow saving of Timing info: Enables performance data recording. Must be used together with auto-save.
- Save Frame Data: Saves per-frame performance information to files. Used when detailed debugging is needed.
- Status Check Interval: Sets how often device status is checked. The default is once per second.
- Refresh Status Now: Immediately rechecks the status of all devices. Useful when something isn’t working and you want to force a refresh.
- Check for Steam: Verifies whether Steam is running properly. If Steam stops, some VR functions may stop working as well.
- Log Directory / Config Directory: Shows the locations where log files and configuration files are stored. You can open these directories manually to view or edit the files.
- Remove All SteamVR USB Devices: Disconnects and removes all USB devices related to SteamVR. Use this only when you’re having issues with trackers or the headset.
- Disable Power Management: Prevents Windows power-saving features from disconnecting wireless devices. Useful in environments where frequent disconnections occur.
- Reset Headset: Restarts the VR headset drivers. Effective when the display doesn’t turn on or tracking behaves abnormally.
- Enable / Disable Direct Mode
- Enable: Outputs video only to the VR headset. This gives the best performance and the lowest latency.
- Disable: Outputs video to both the PC monitor and the headset, which increases latency.
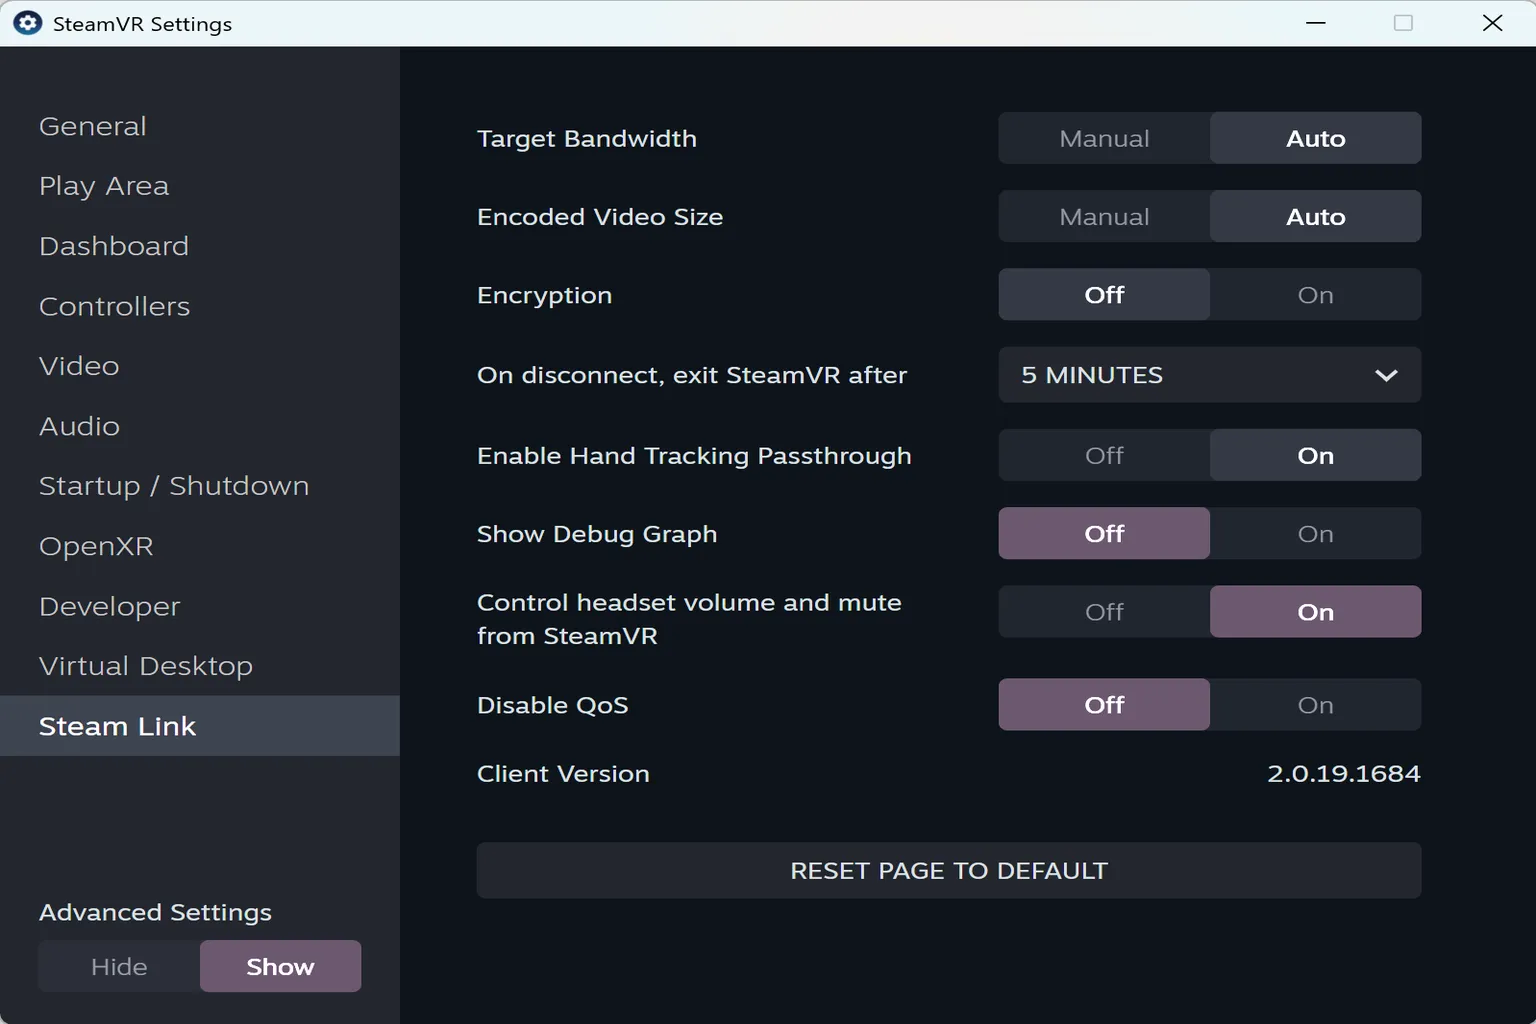
Steam Streaming
These settings control how SteamVR handles streaming. In most cases, it’s best to leave everything at the default.
- Target Bandwidth: The amount of video data sent to the headset. Higher values improve image quality, but Auto is recommended.
- Encoded Video Size: The resolution of the streamed video. Auto is also recommended here.
- Encryption: Encrypts the stream to prevent eavesdropping. Realistically, no one is spying on your VR session, so turning this off can avoid unnecessary performance loss.
- On disconnect, Exit SteamVR after: Sets how many minutes after the headset disconnects before SteamVR automatically shuts down.
- Enable Hand Tracking Passthrough: Displays your real hands directly inside the VR view.
- Show Debug Graph: Displays debugging information for development and testing.
- Control Headset Volume and Mute from SteamVR: Allows you to adjust volume and mute the headset directly from SteamVR.
- Disable QoS: Turns off automatic streaming quality adjustments.
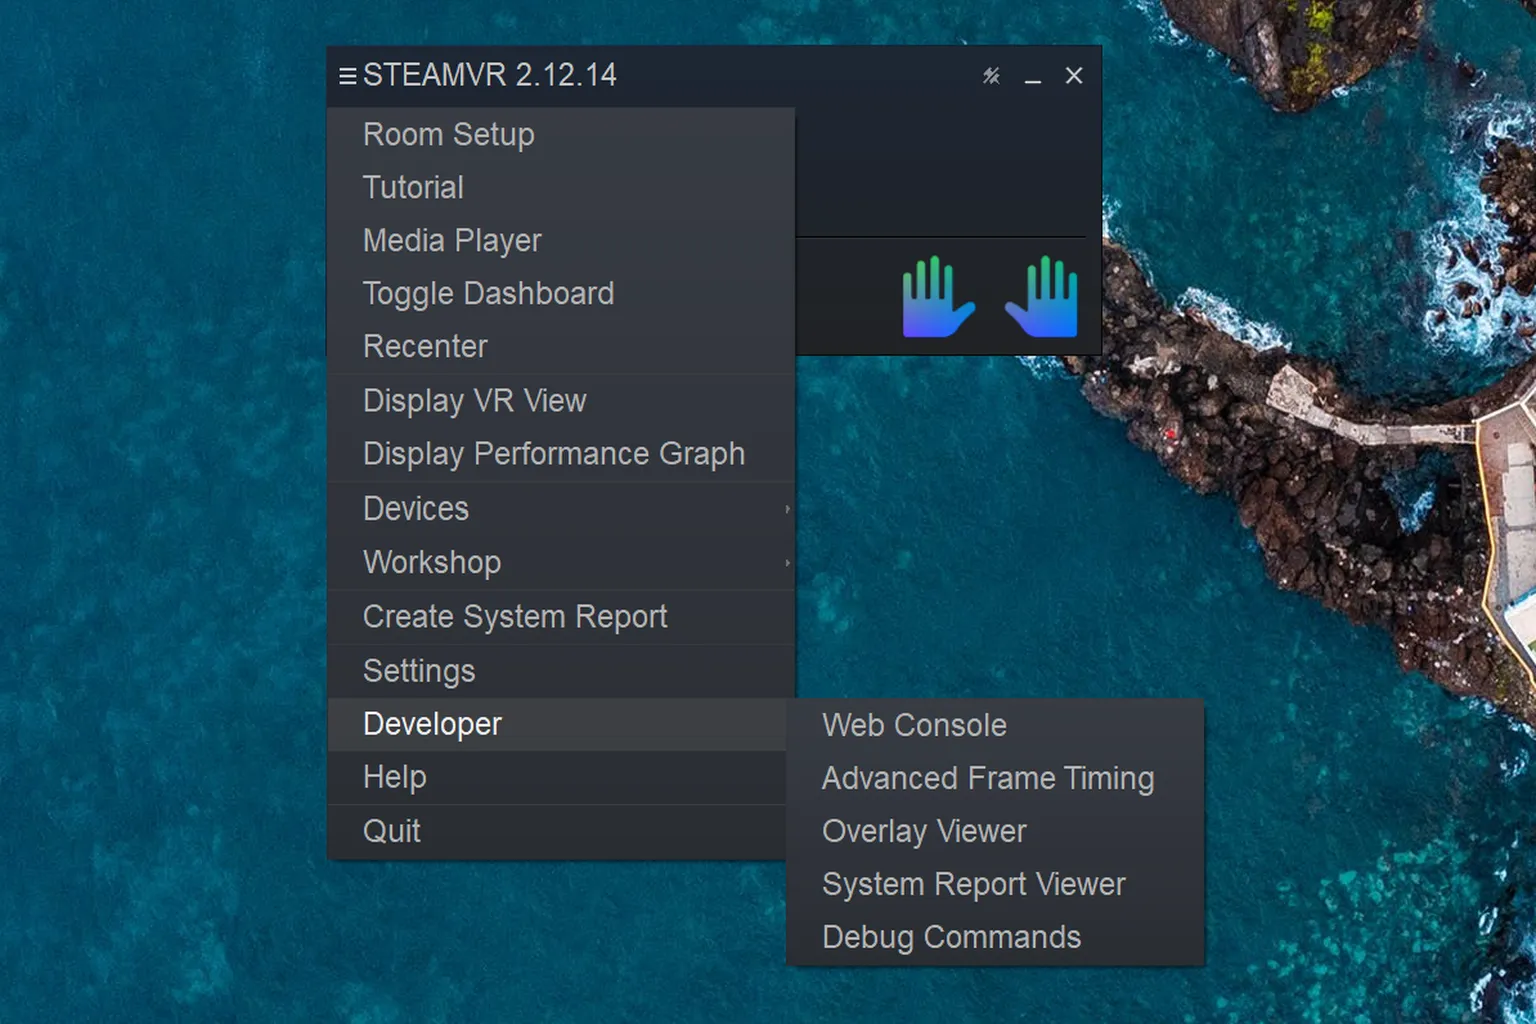
Developer
The Developer menu has five items, all mainly for debugging. (It is best not to touch these.)
- Web Console: Opens command-line tools in a browser. Intended for developers.
- Advanced Frame Timing: Shows detailed processing time for each frame, making it easier to analyze the cause of latency.
- Overlay Viewer: Lets you inspect SteamVR’s internal screens and UI element layout. Used for debugging.
- System Report Viewer: Opens and displays the system report for review.
- Debug Commands: Opens a command-line window where you can manually enter commands to control SteamVR. For development use only.
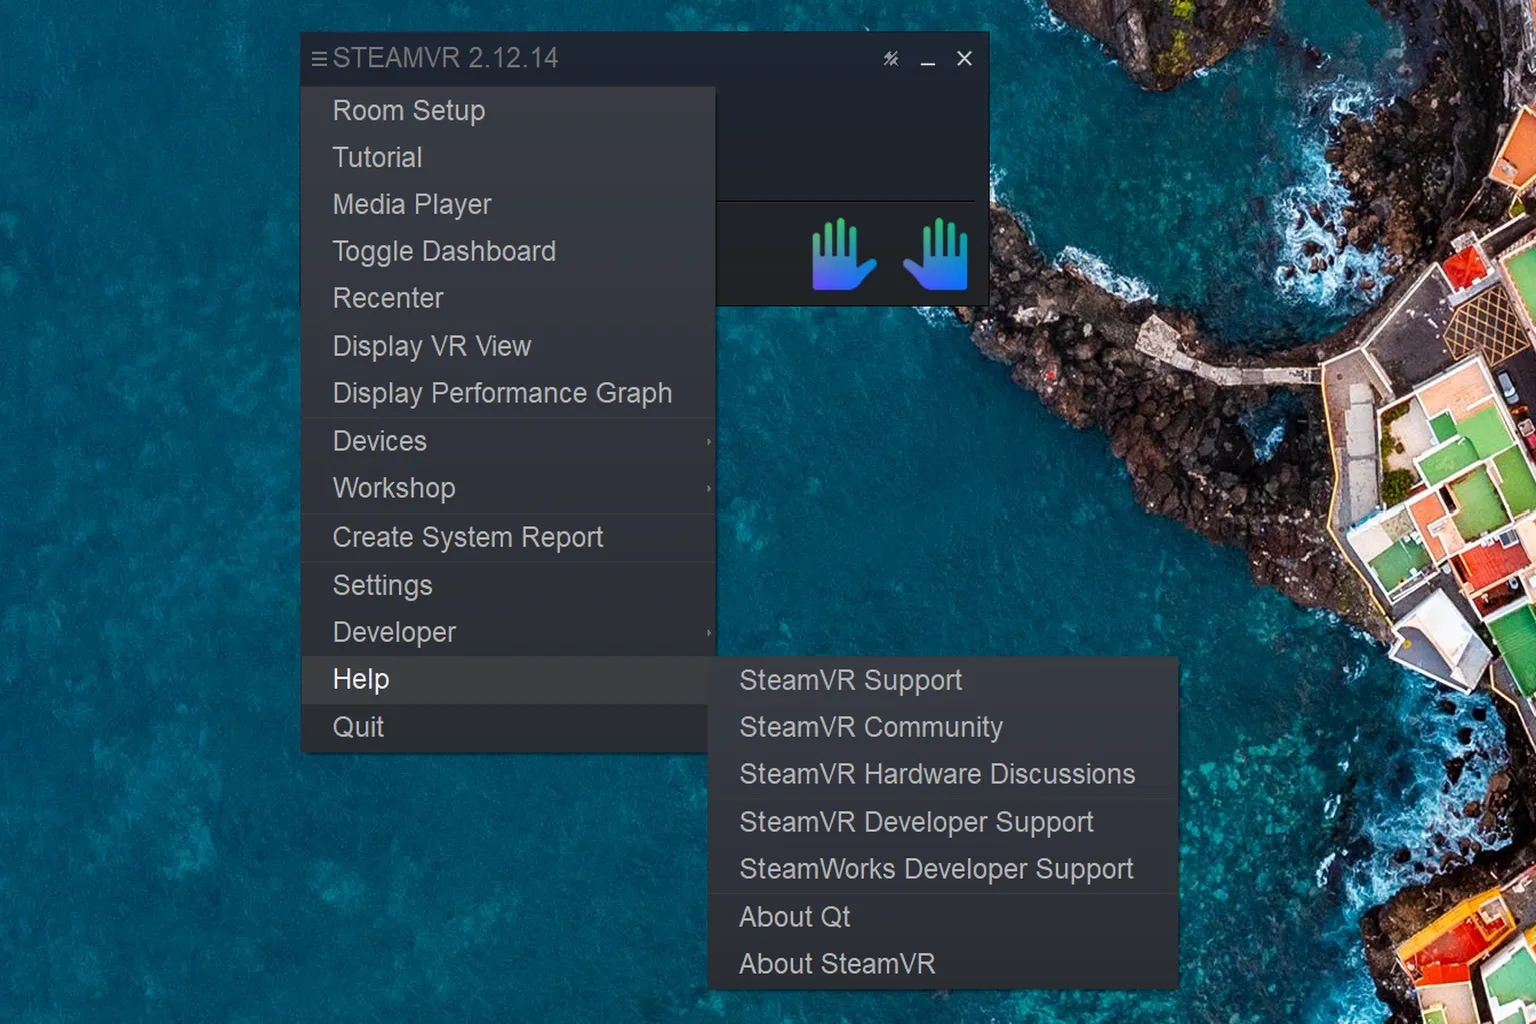
Help
This section is a collection of links to official support resources. You only really need it if you’re a developer or you run into bugs.
Headset Settings and Basic Use
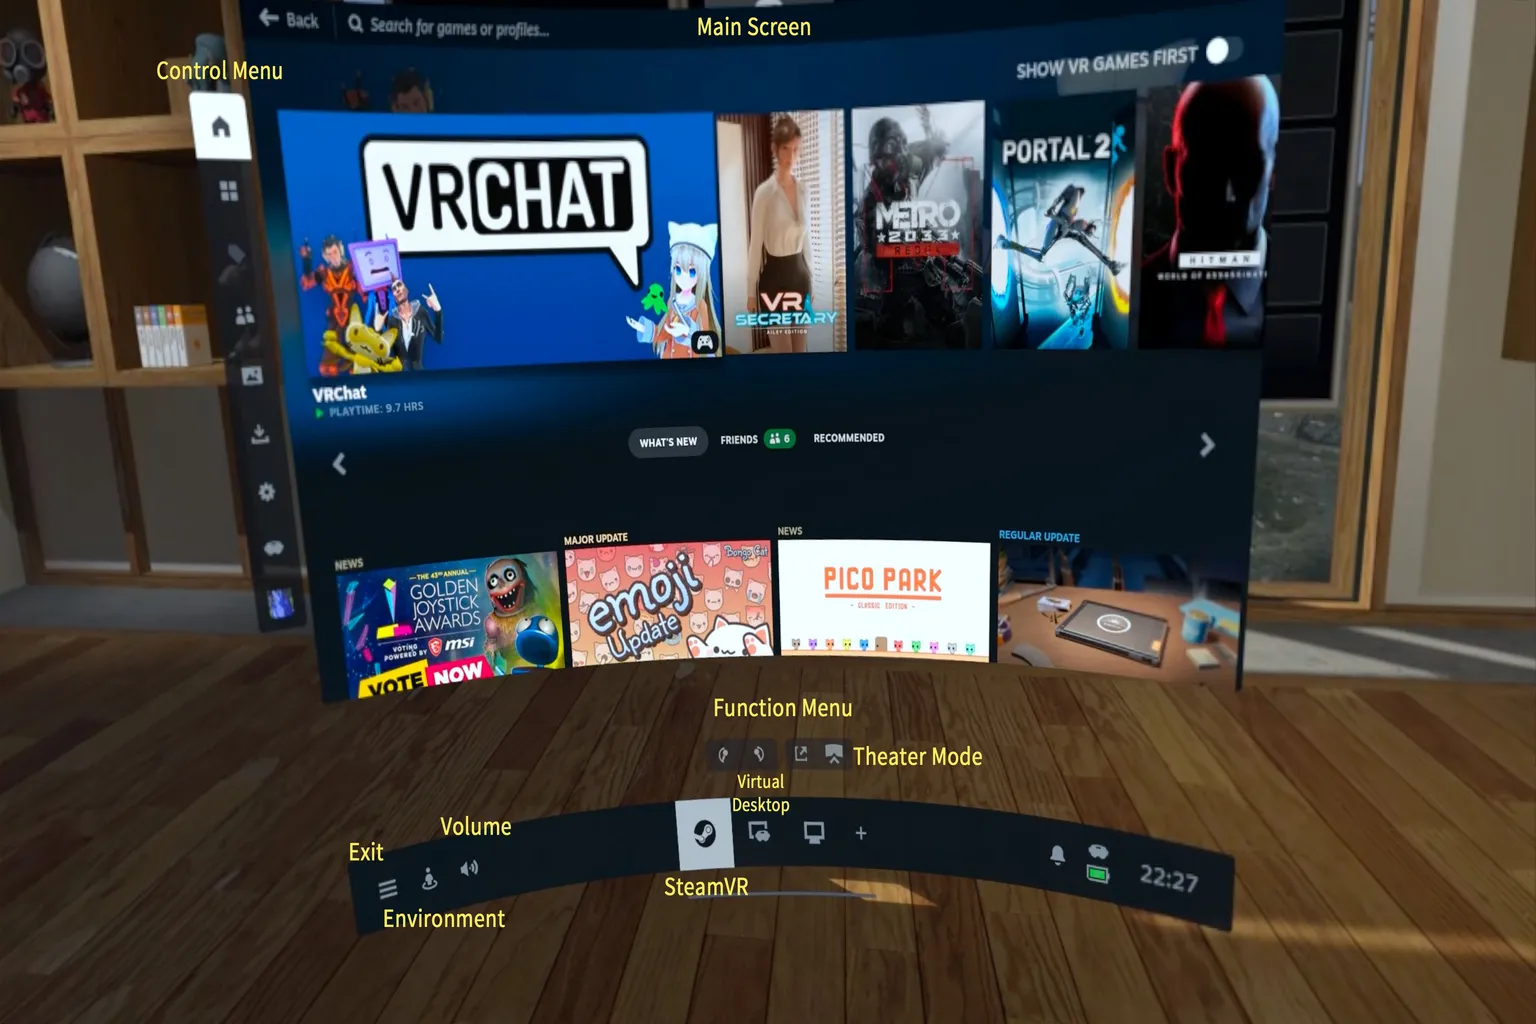
When you enter the headset lobby, you’ll see the Steam sign in front of you. The main screen is straight ahead, with the control menu on the left and the function menu along the bottom.
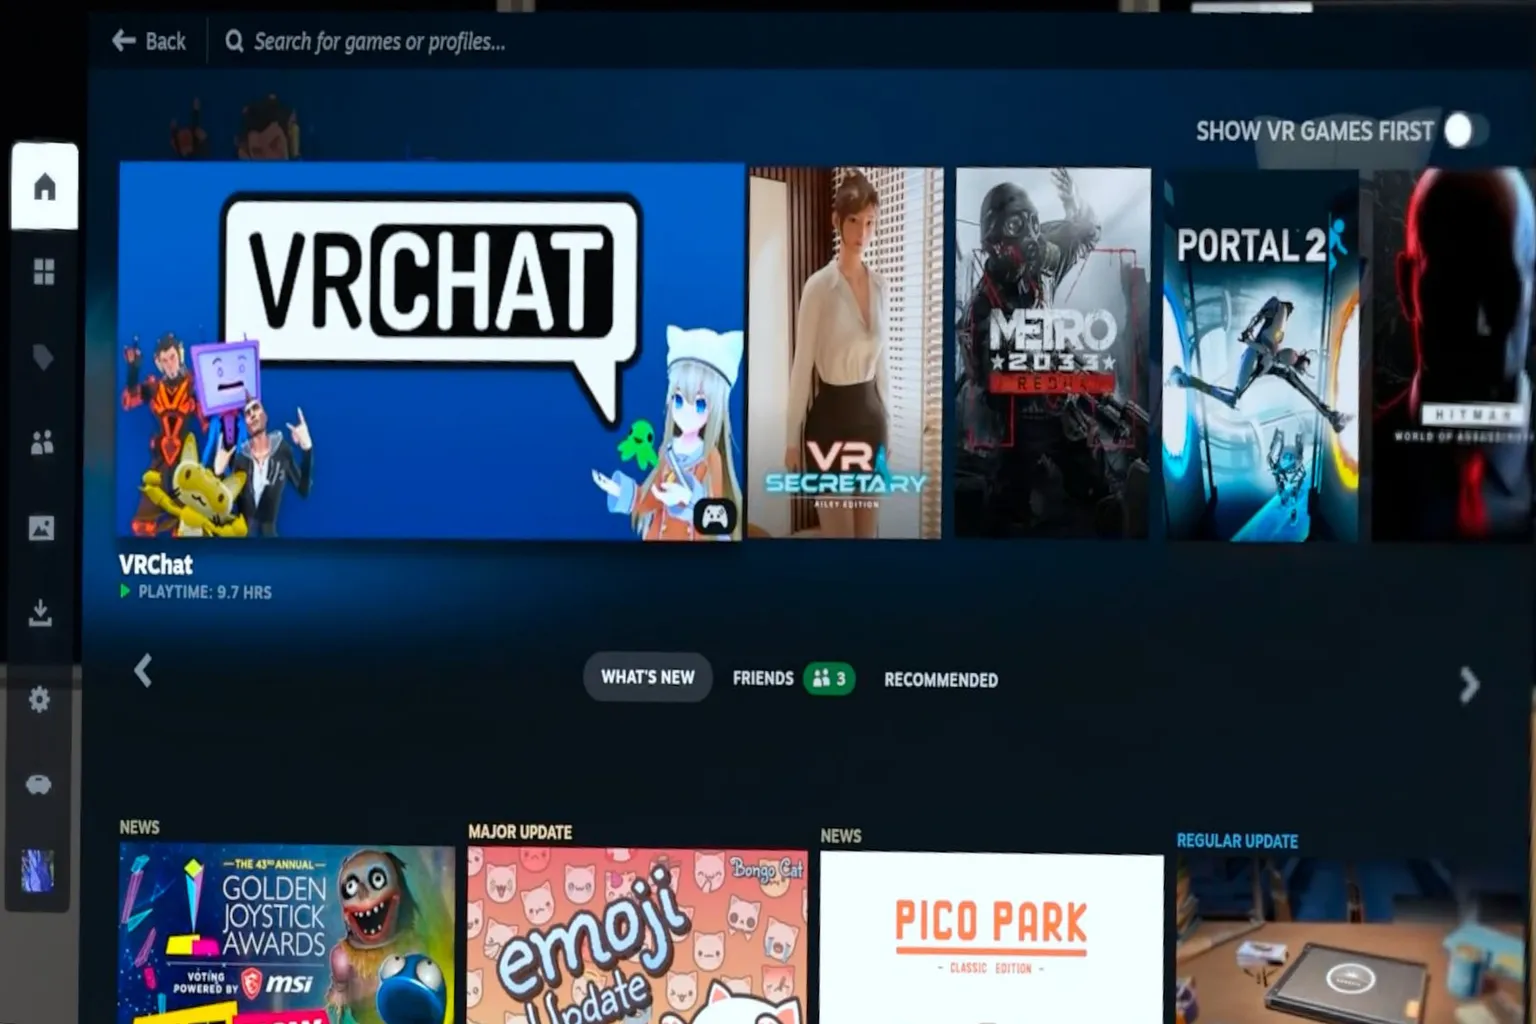
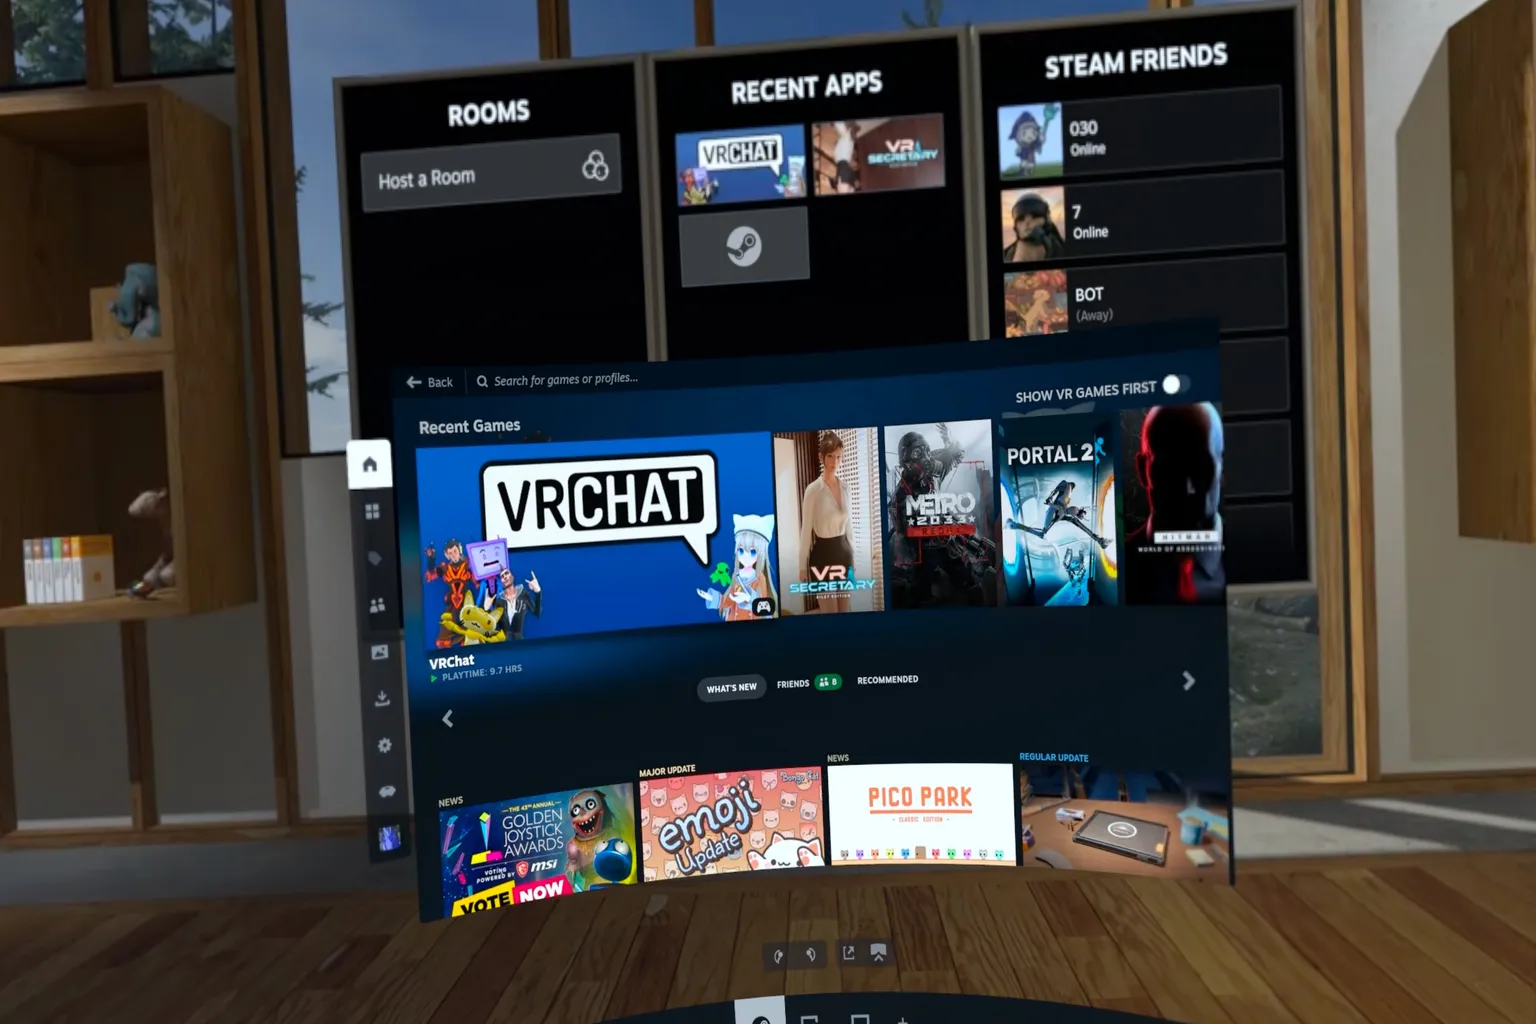
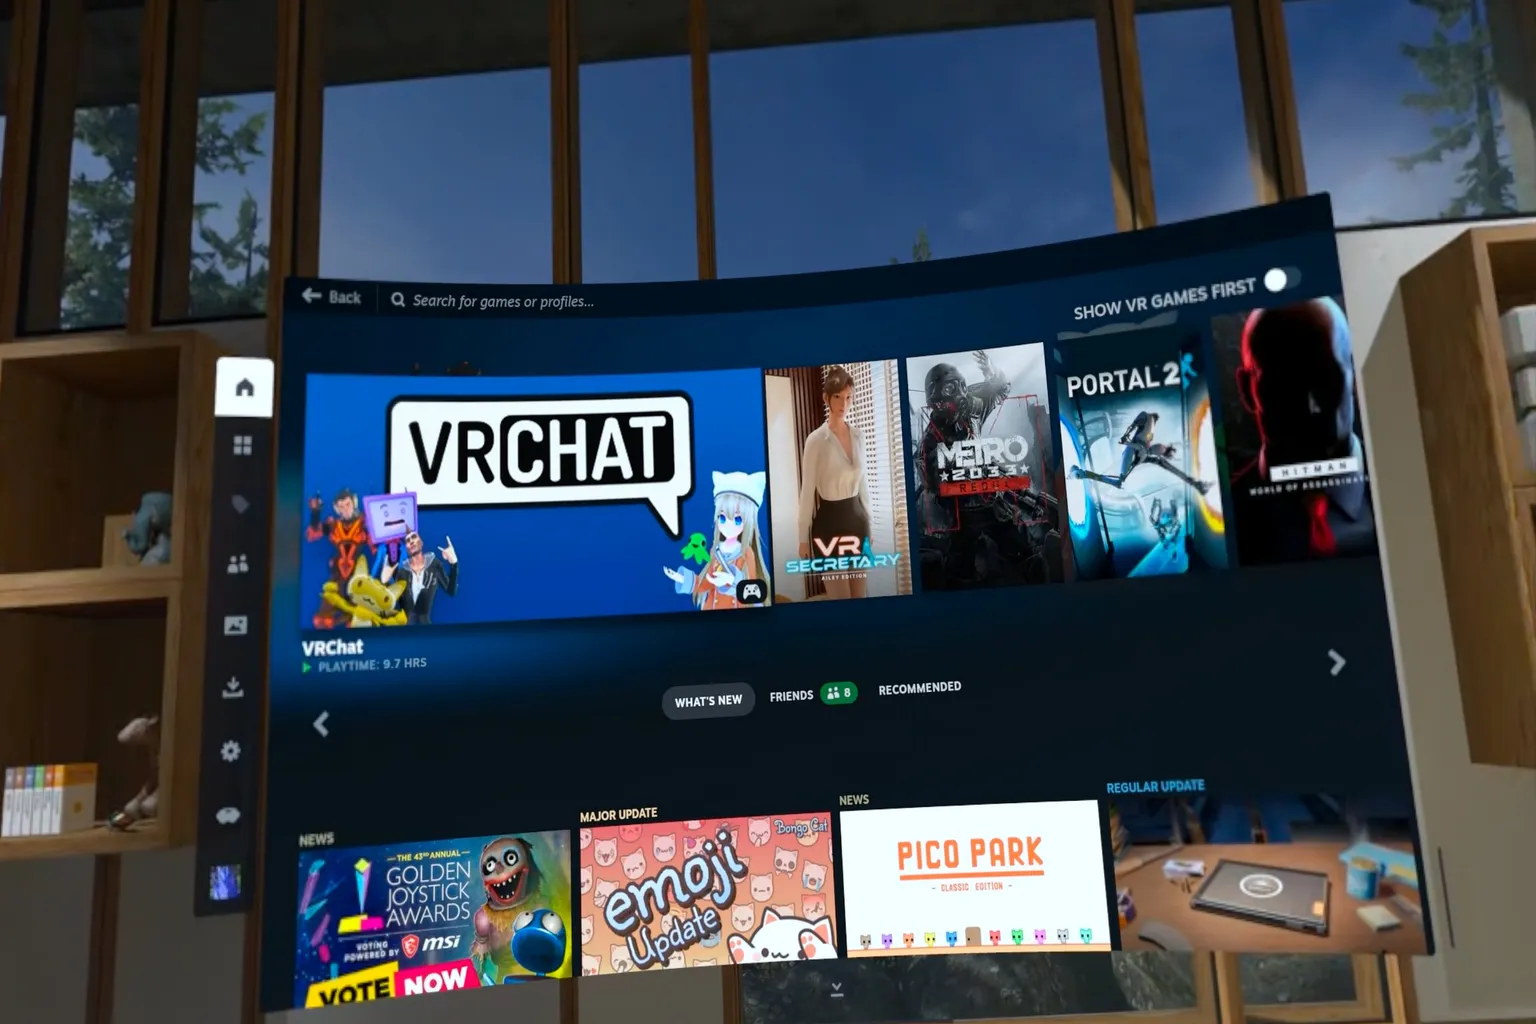
Home
This is the SteamVR main screen.
At the top, you’ll see games you’ve recently installed or launched, and at the bottom, there are game promotions and ads.
Library
All the games you’ve purchased and installed show up here.
At the top of the screen, you’ll see a list of your owned VR games and regular games, and you can also install games from this screen.
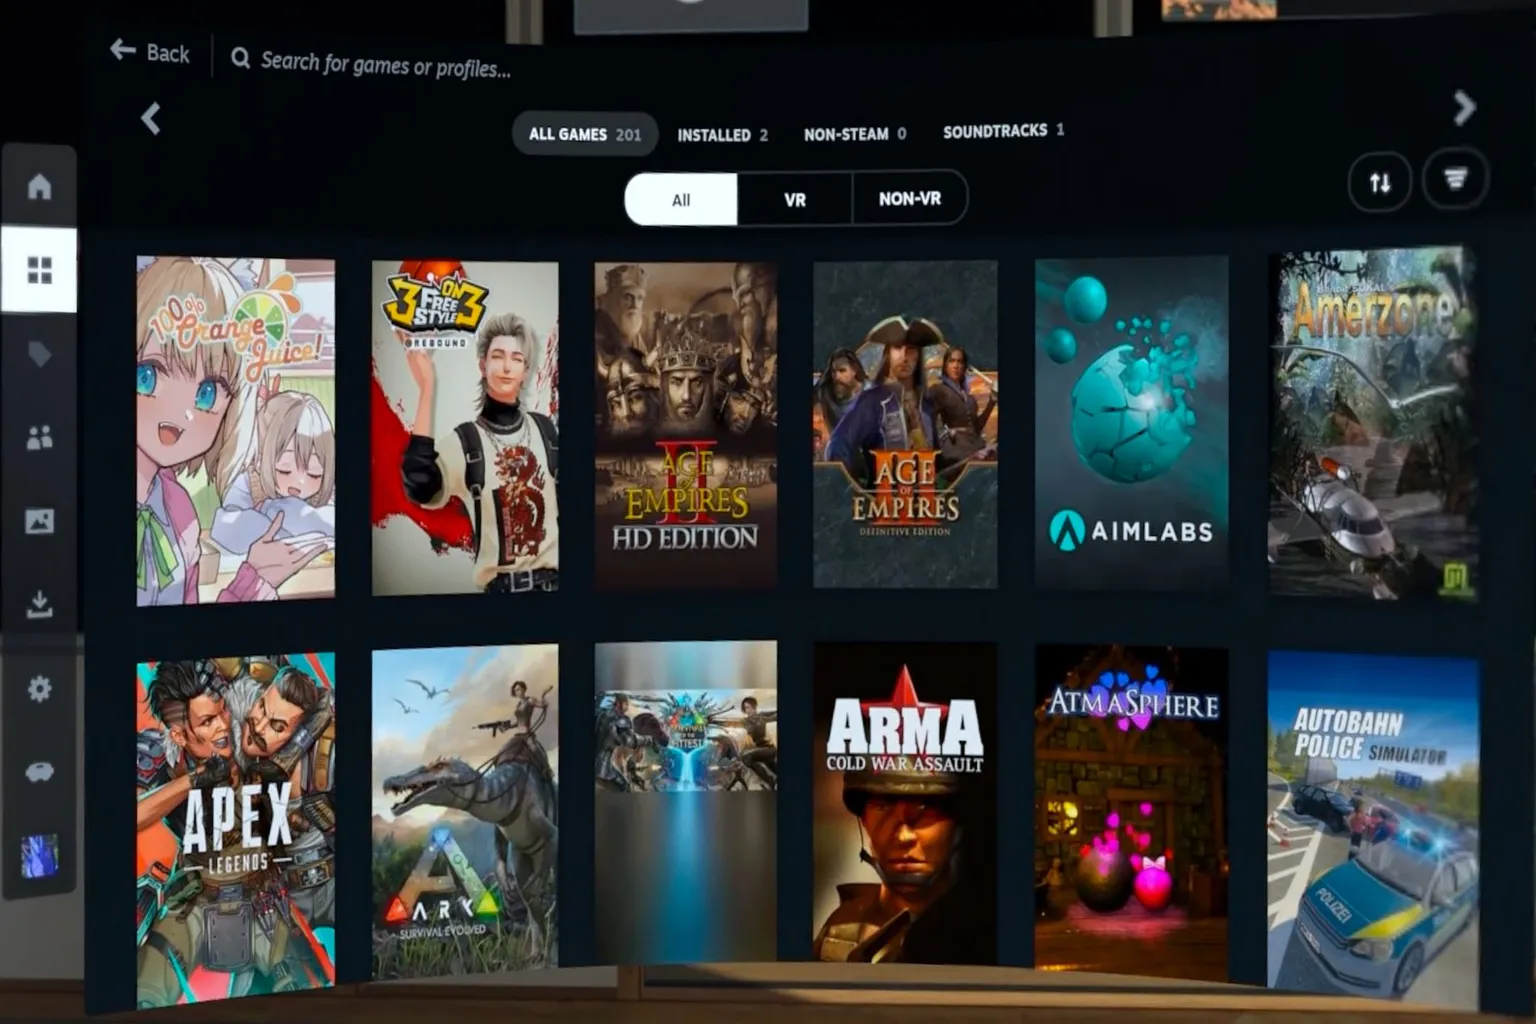
You can launch games directly from here as well.
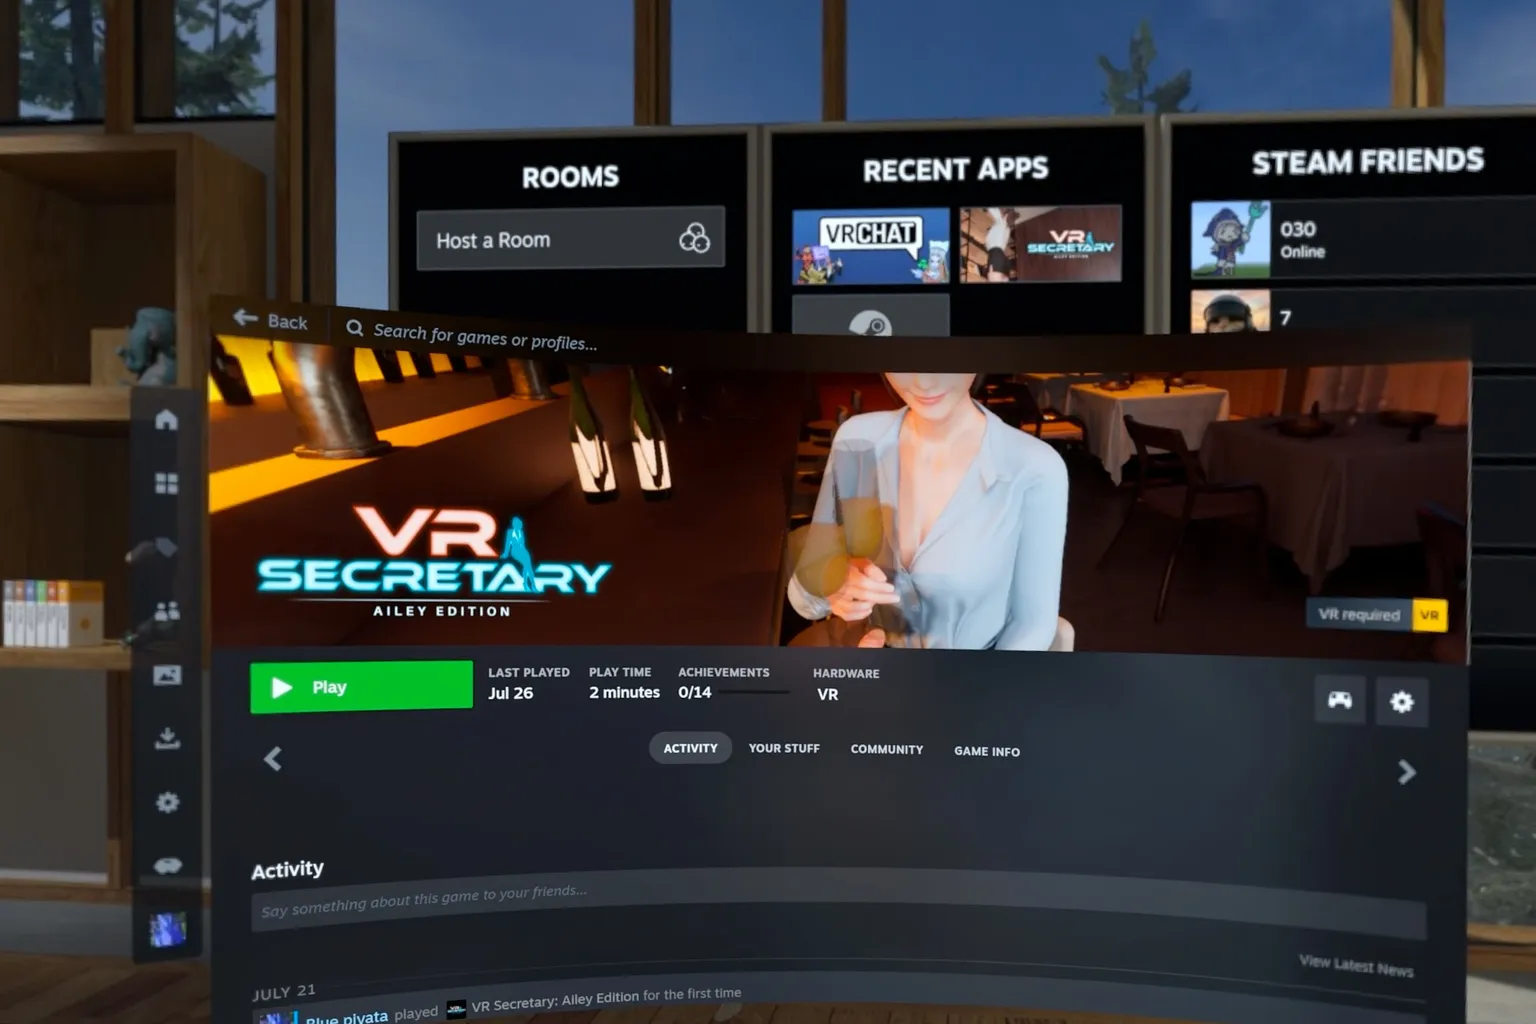
If it’s a VR game purchased on Steam, it will launch straight into VR mode.
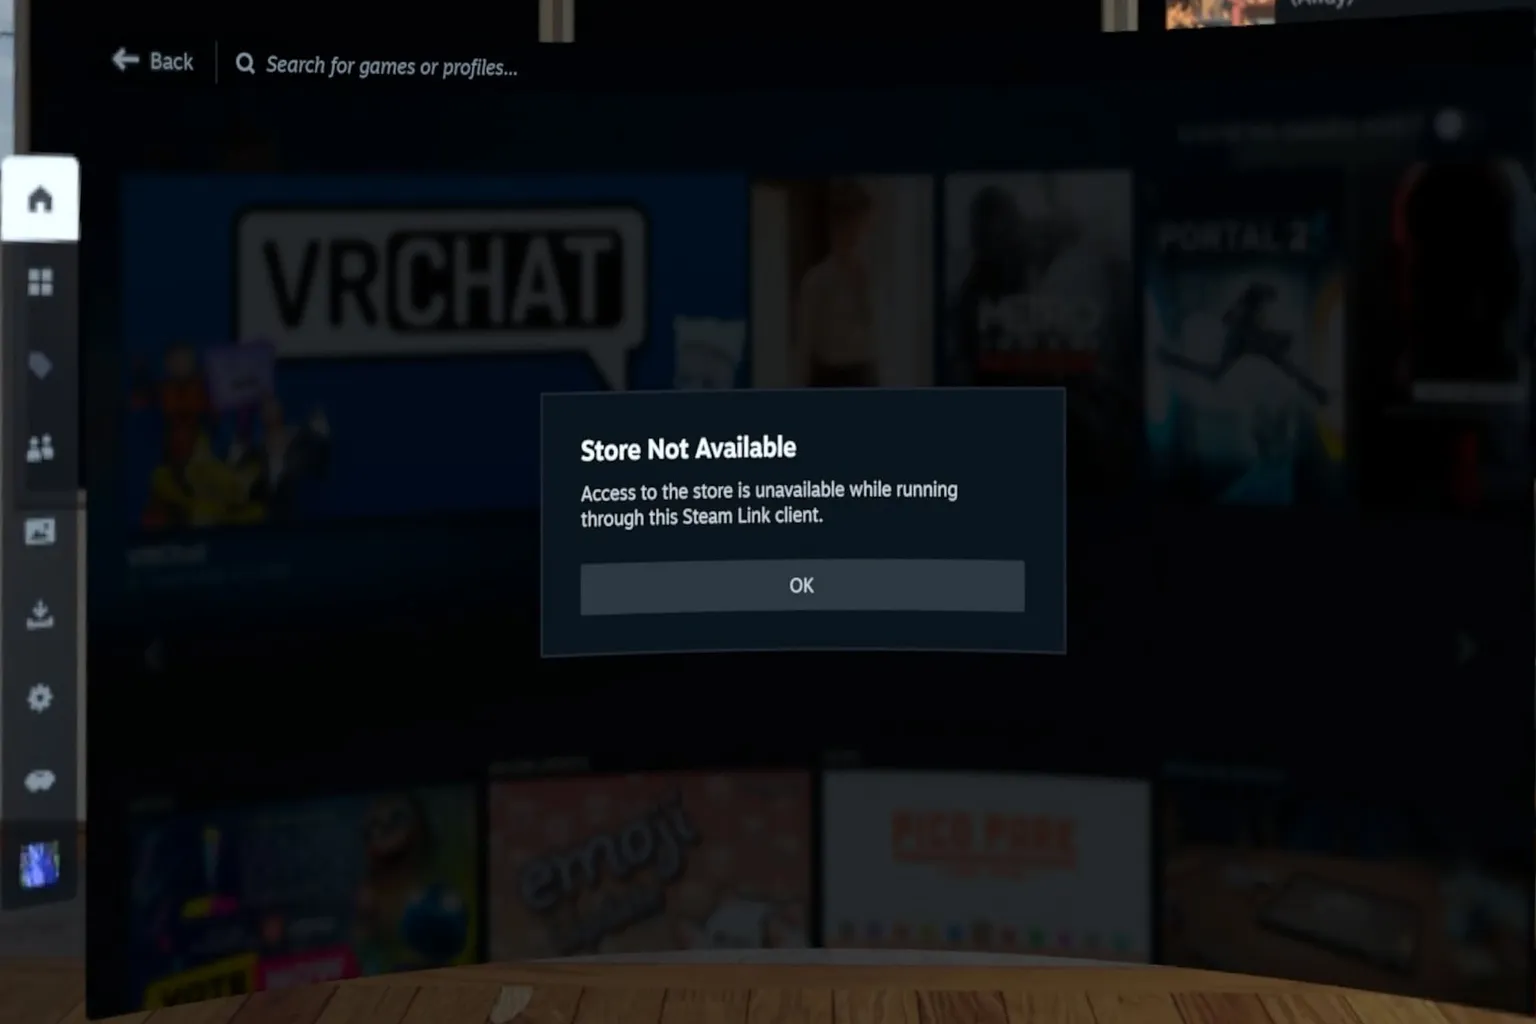
Store
The store isn’t available inside the headset.
If you want to buy games, you’ll need to access the Steam Store on your PC.
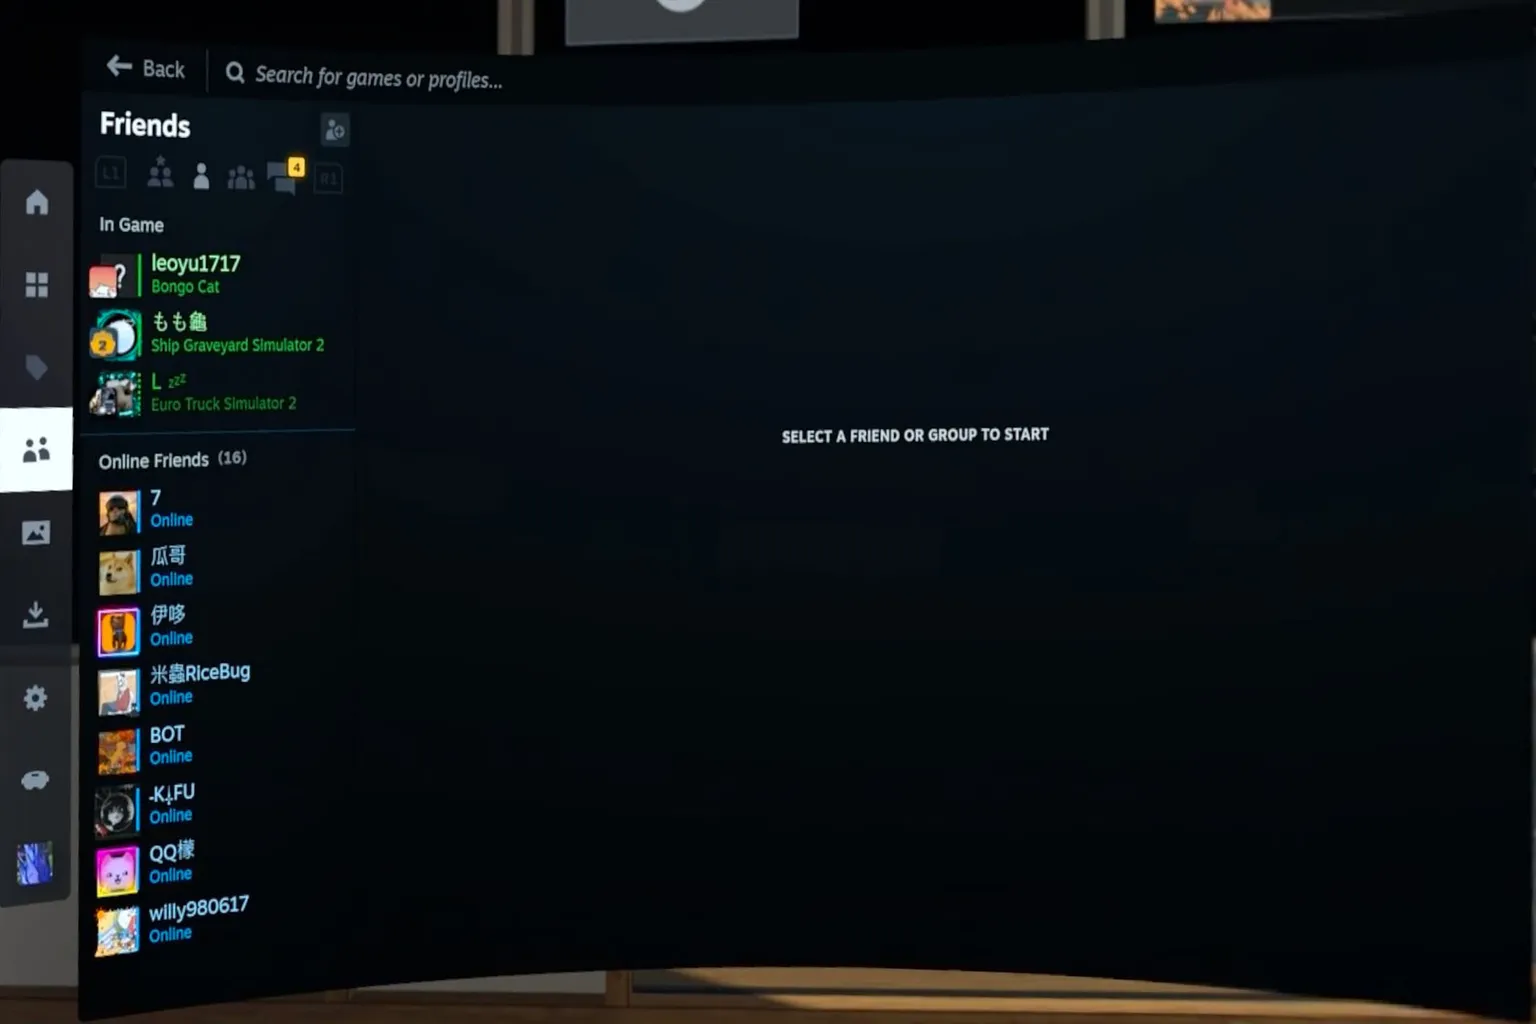
Friends & Chat
You can view your Steam friends list and chat with people who are online.
Just keep in mind that the in-headset keyboard only supports English input.
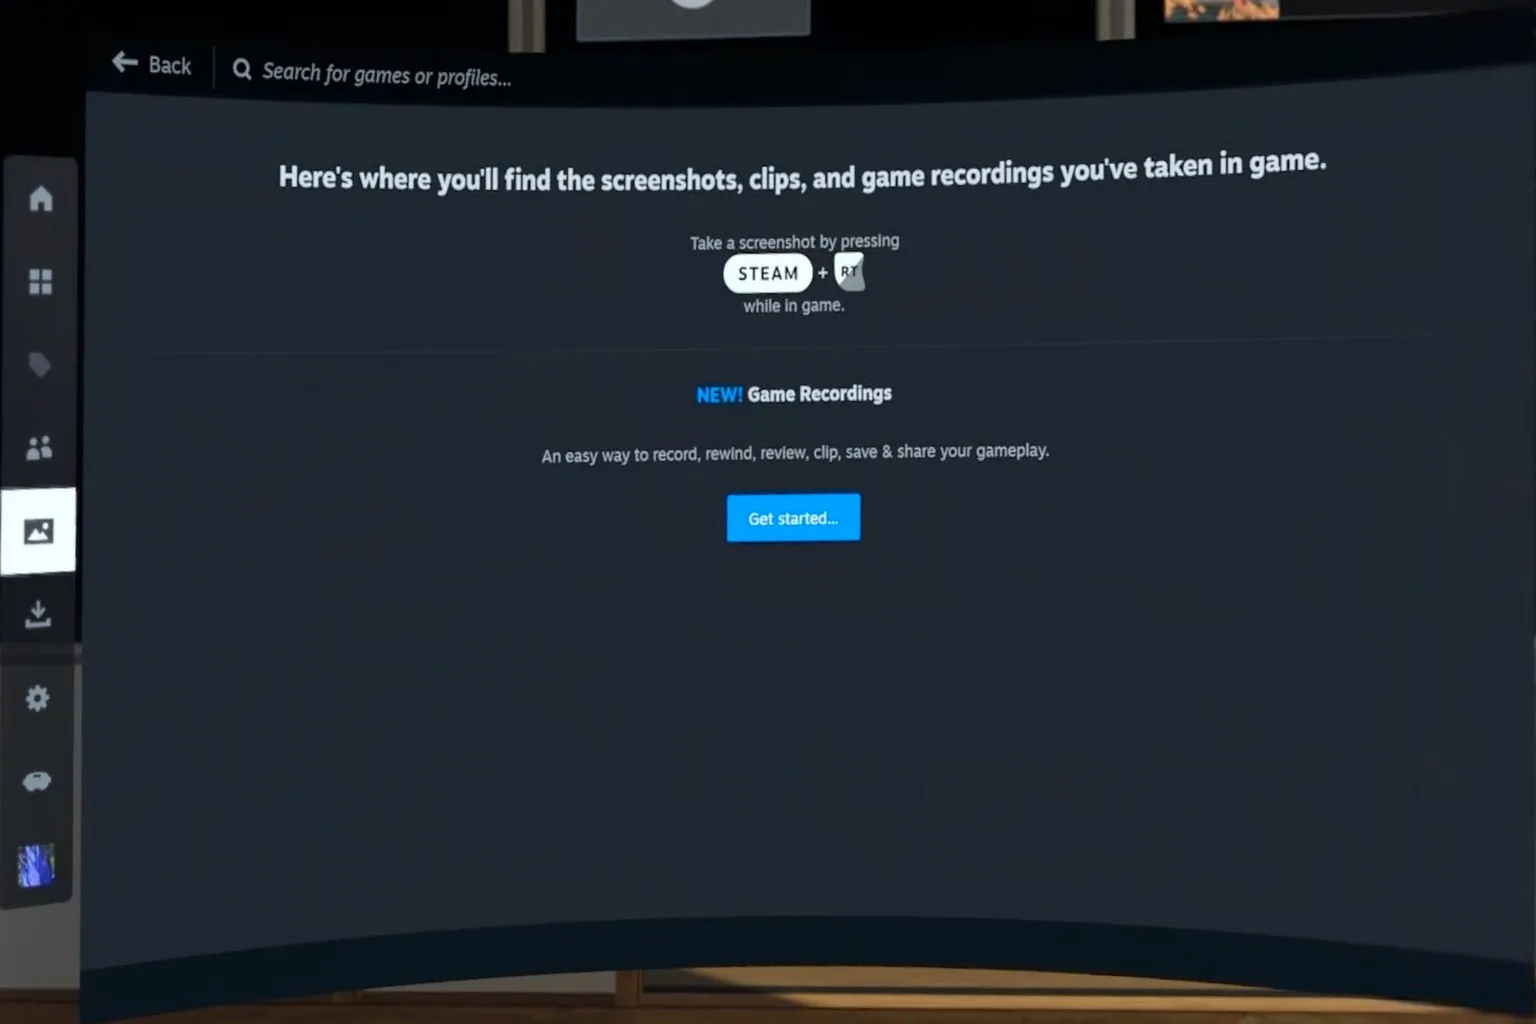
Media
You can view screenshots and video clips you captured while playing games here.
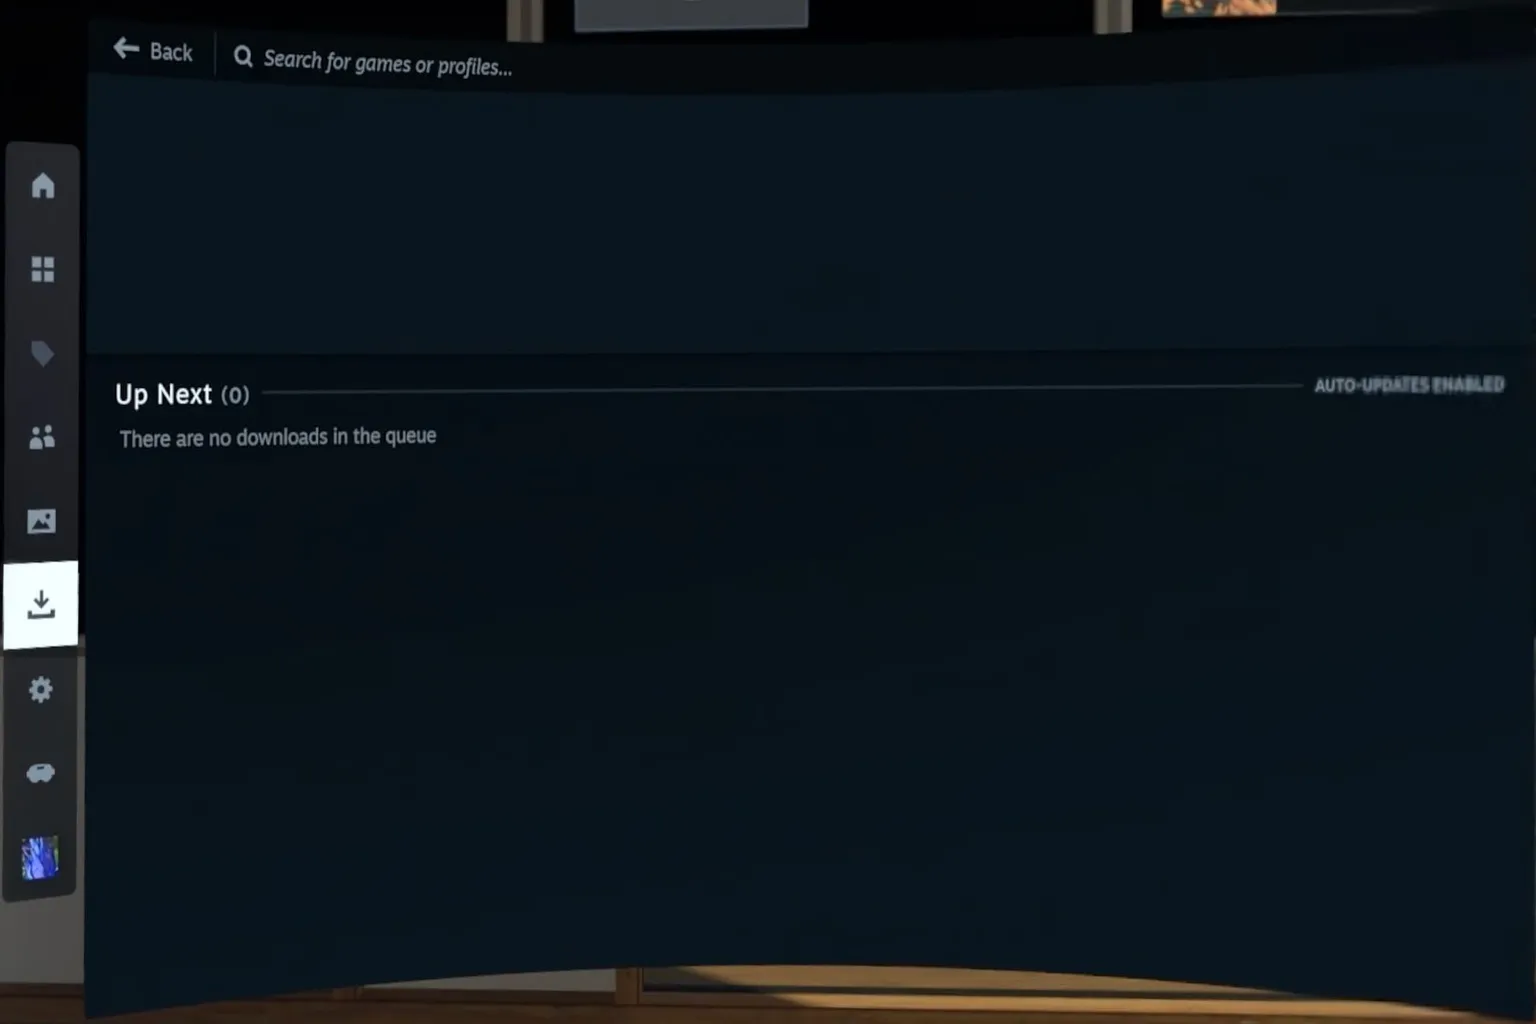
Downloads
This shows recently downloaded items and the current download progress.
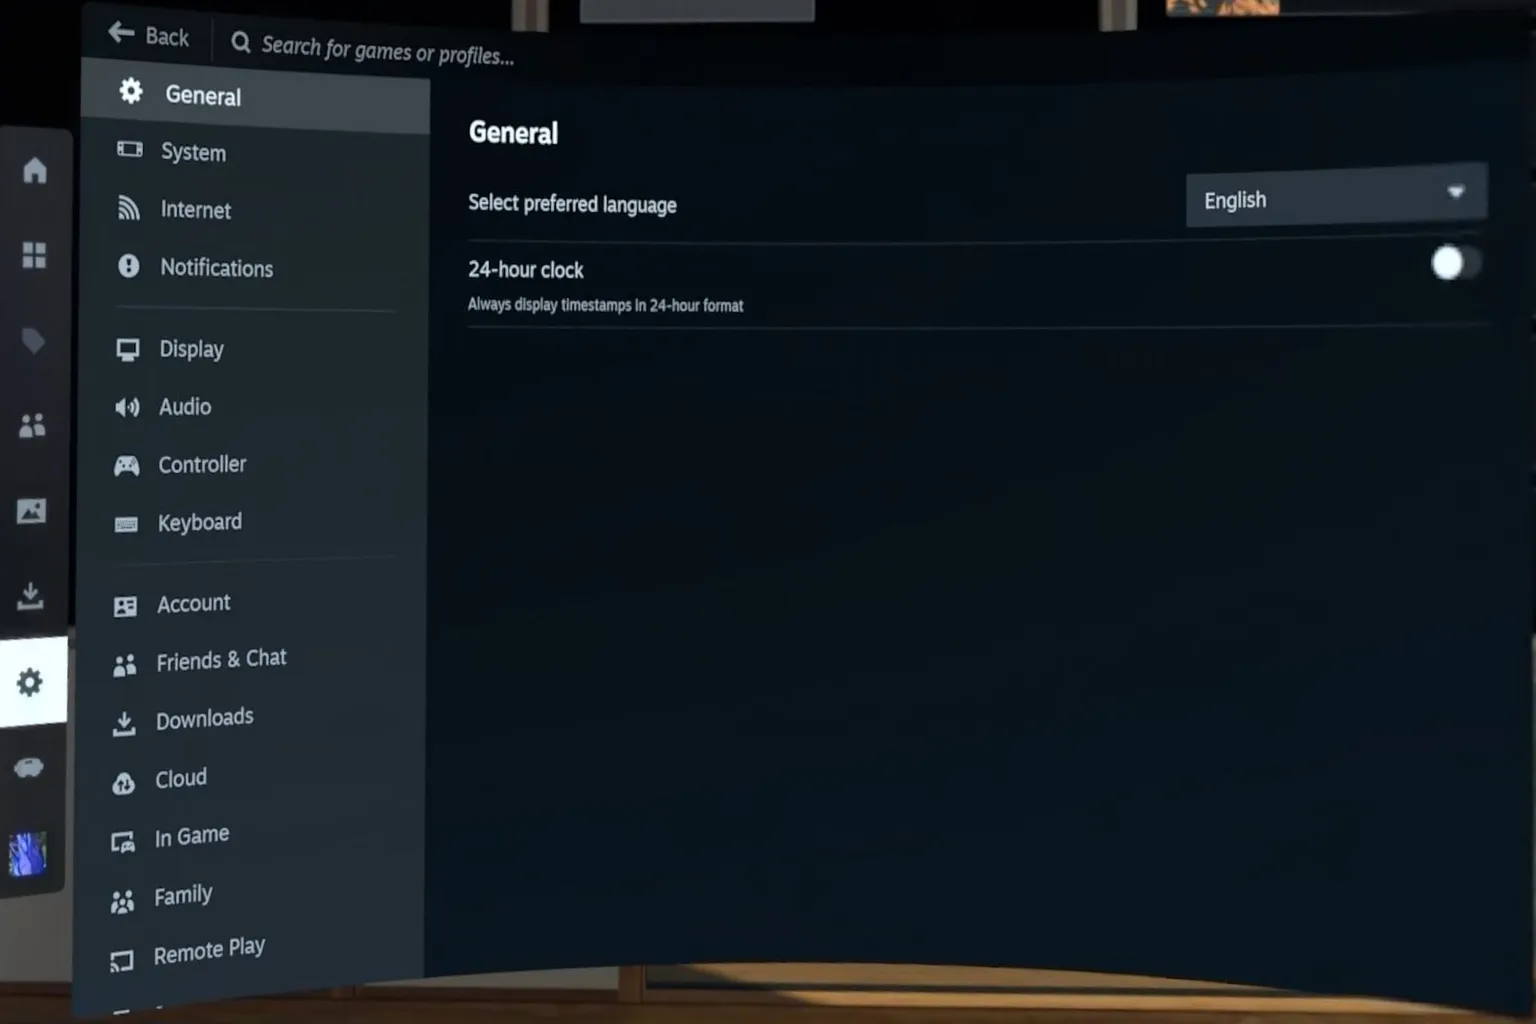
Steam Settings
These are Steam’s general game settings, including controller behavior and system options.
If you need to change anything, it’s easier to do it on the PC version. Since these settings are mainly for non-VR games and don’t affect VR much, I’ll skip the details here.
VR Settings
This is the VR game settings area for Steam Link. The options are almost the same as the PC-side settings explained earlier.
It’s much easier to adjust these on the PC, so that’s the recommended way to handle them.
Bottom Function Menu
The function menu is split into three main areas:
- Bottom left: Exit VR, environment settings, volume control
- Center: Virtual desktop, open keyboard, switch theater mode
- Right side: Battery level and time display
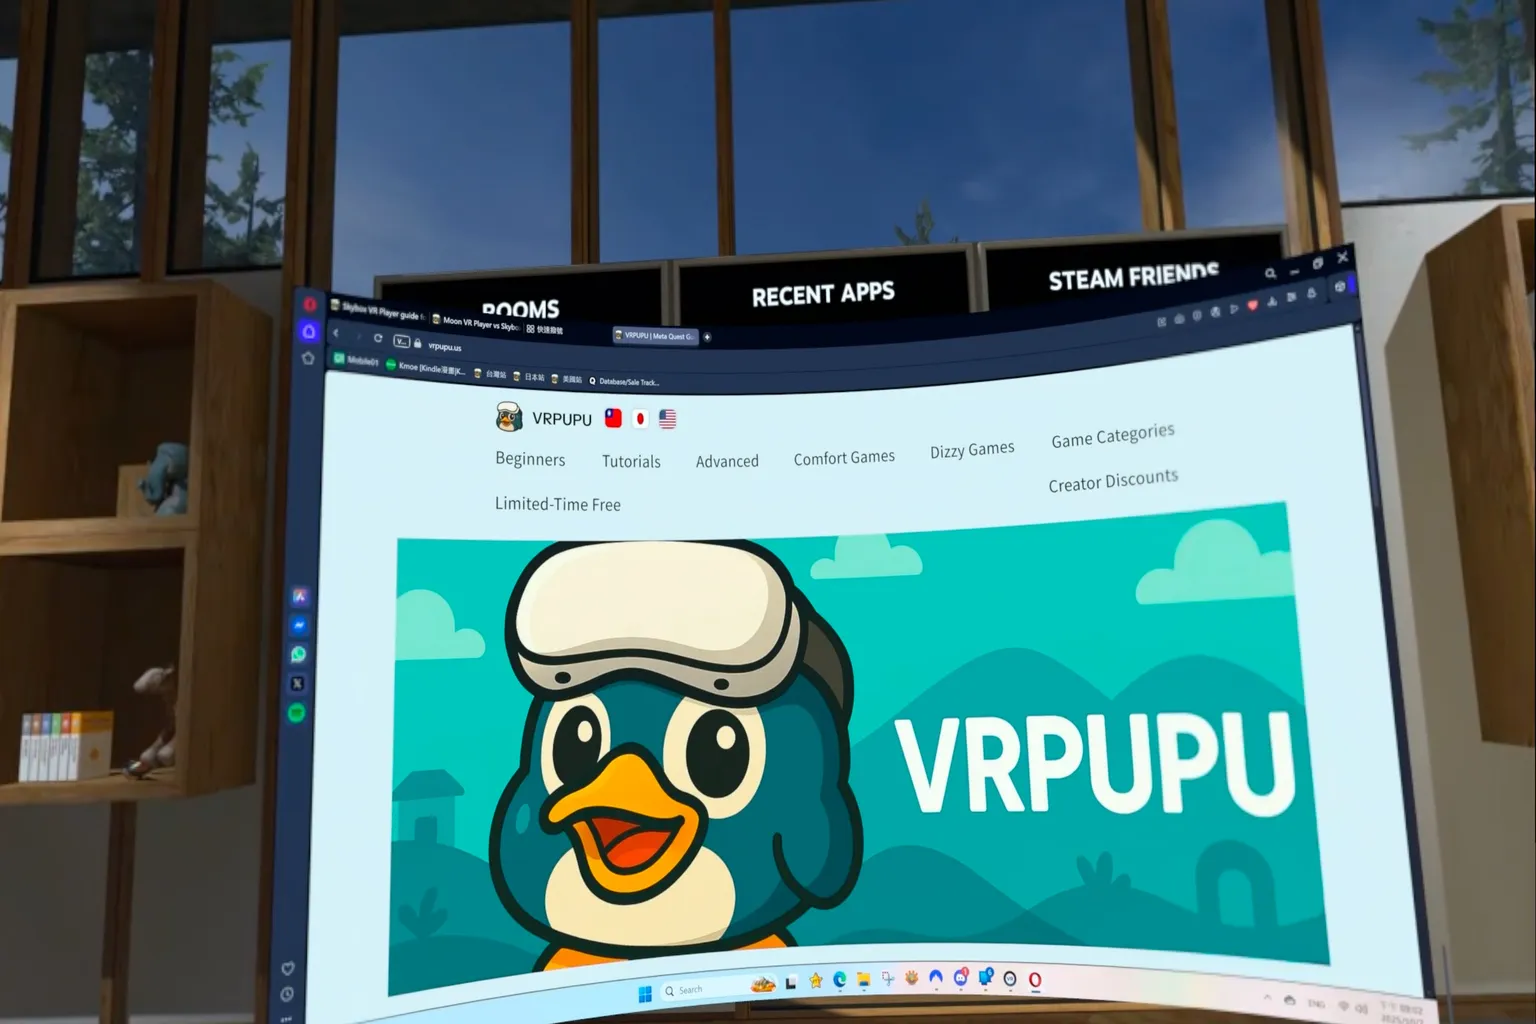
Virtual Desktop
This lets you mirror your PC screen inside the headset, so you can browse the web or use any PC application in VR.
Standard Mode / Theater Mode
When displaying content, you can choose between two modes: Standard Mode and Theater Mode.
Theater Mode is ideal for games and movies, giving you the feeling of watching everything on a large screen.
Standard Mode View
Theater Mode View
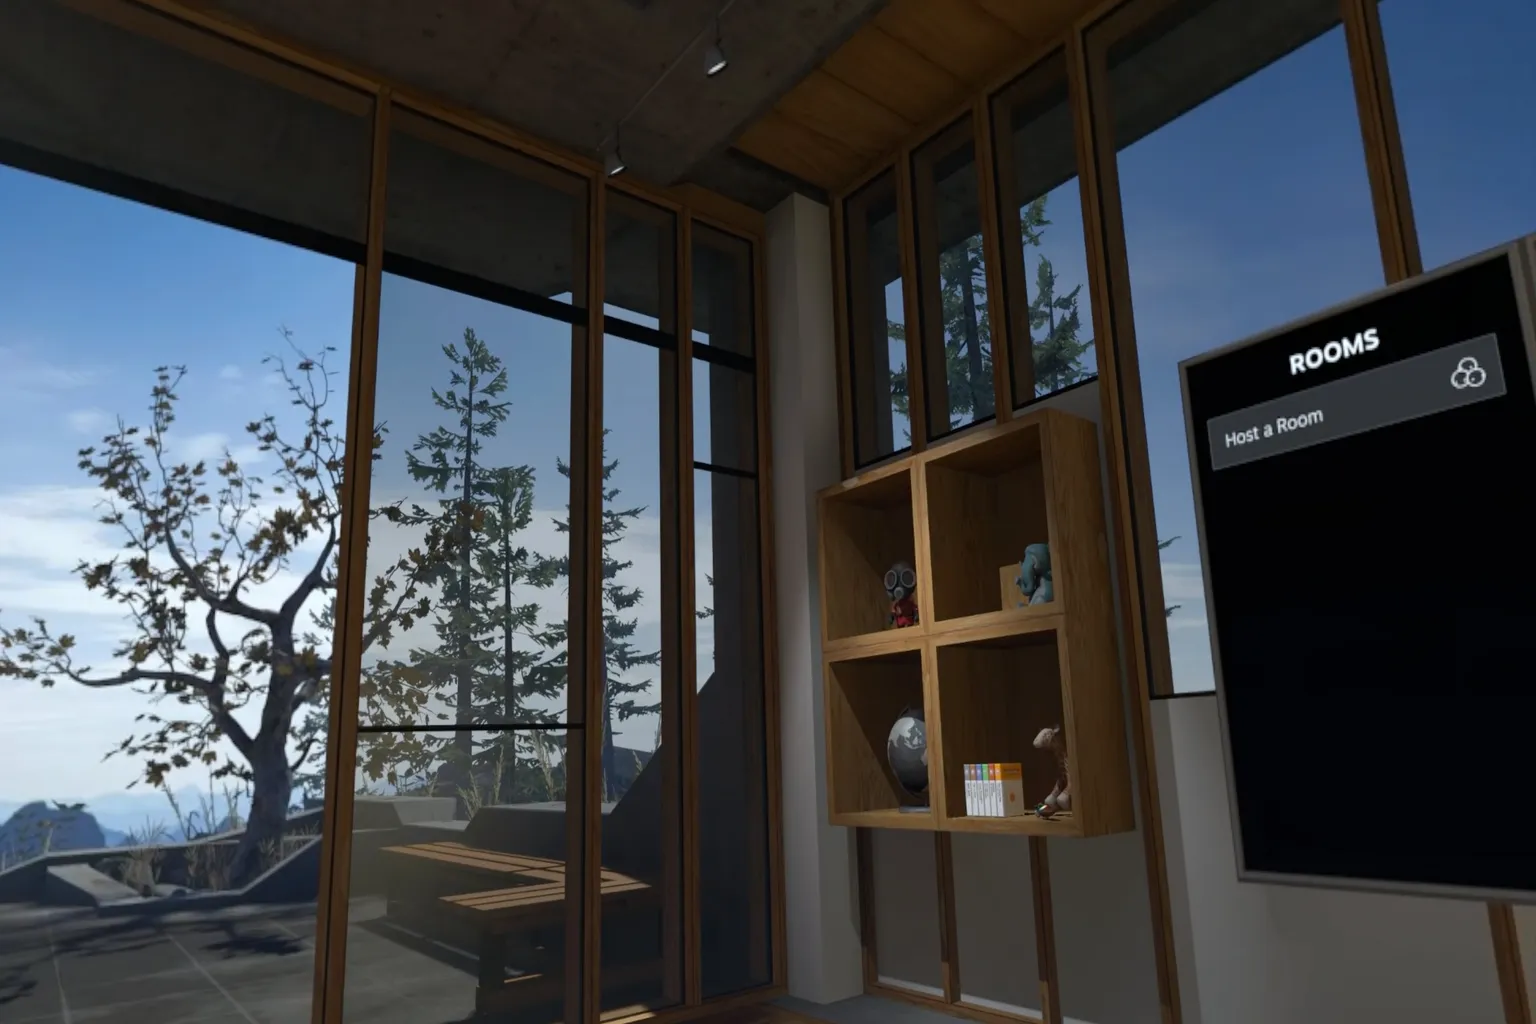
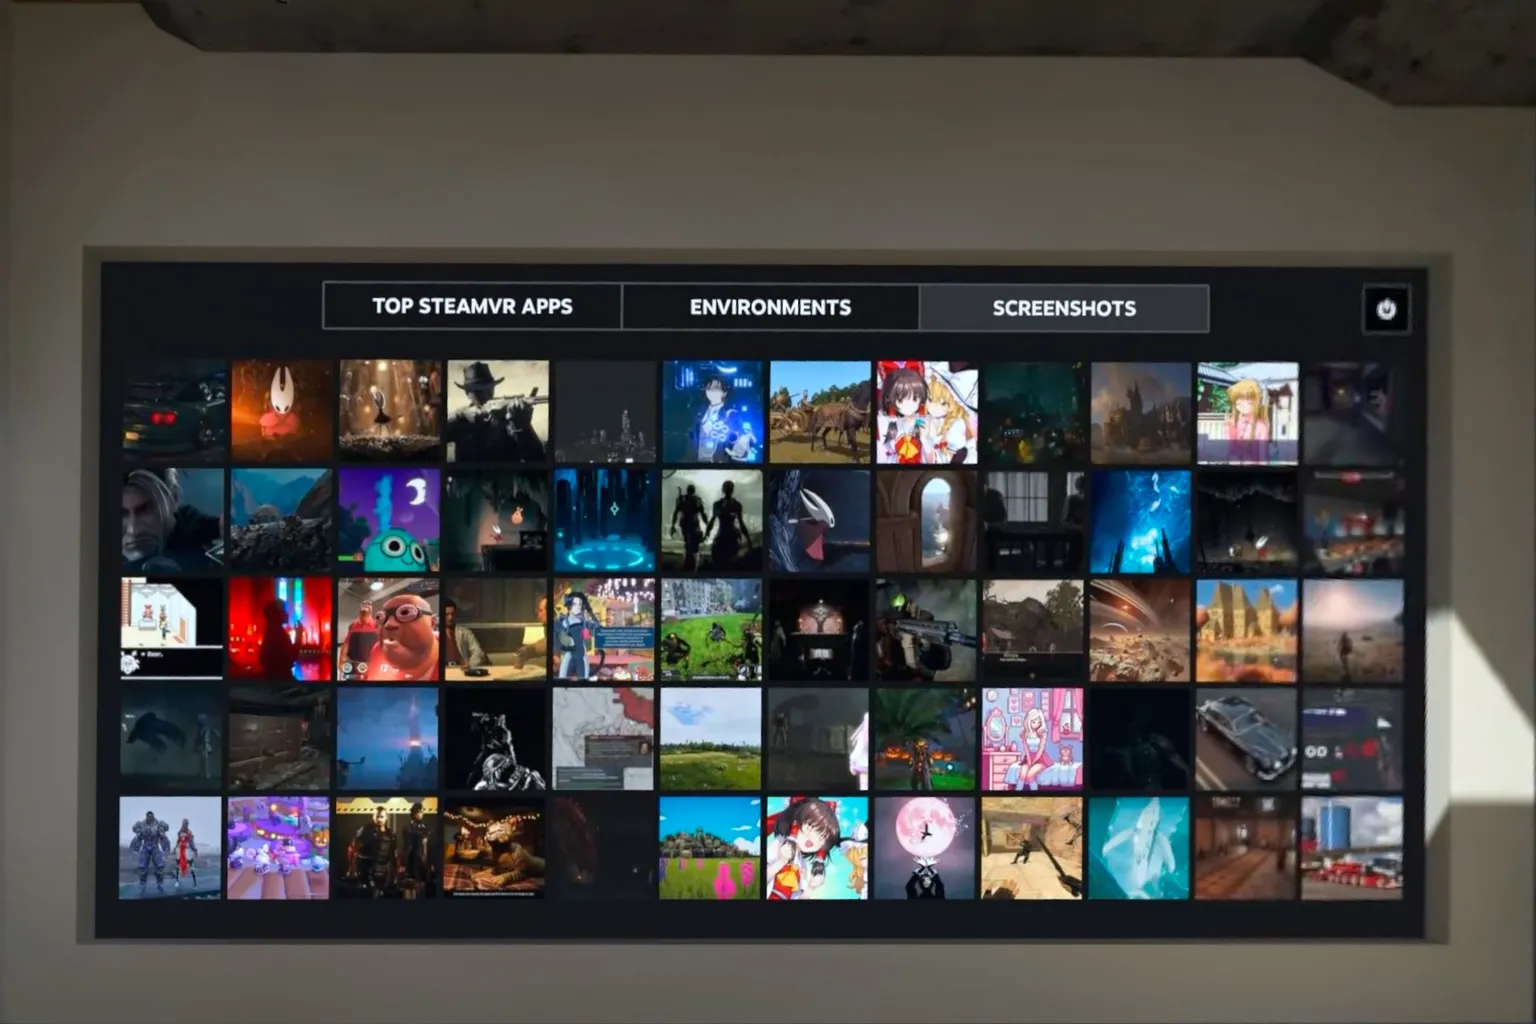
SteamVR Home
The default SteamVR Home environment is a mountaintop cabin. You can use the controllers to move outside, and the scenery is beautiful and relaxing.
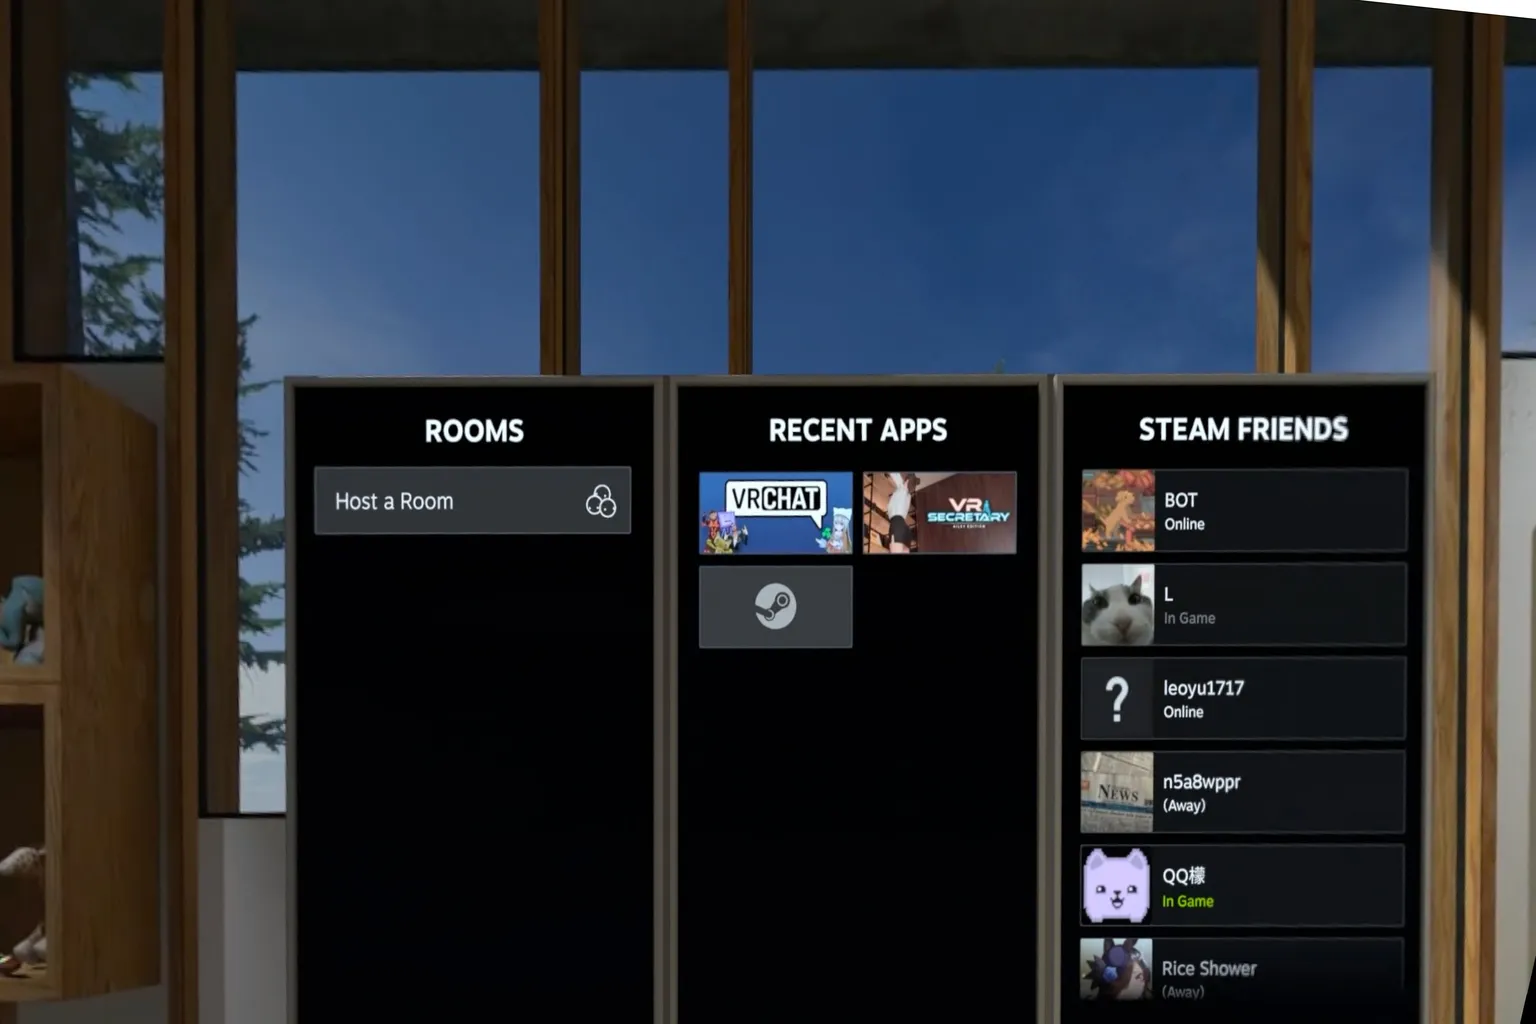
The signboard in front of you shows recently played games and your friends’ status.
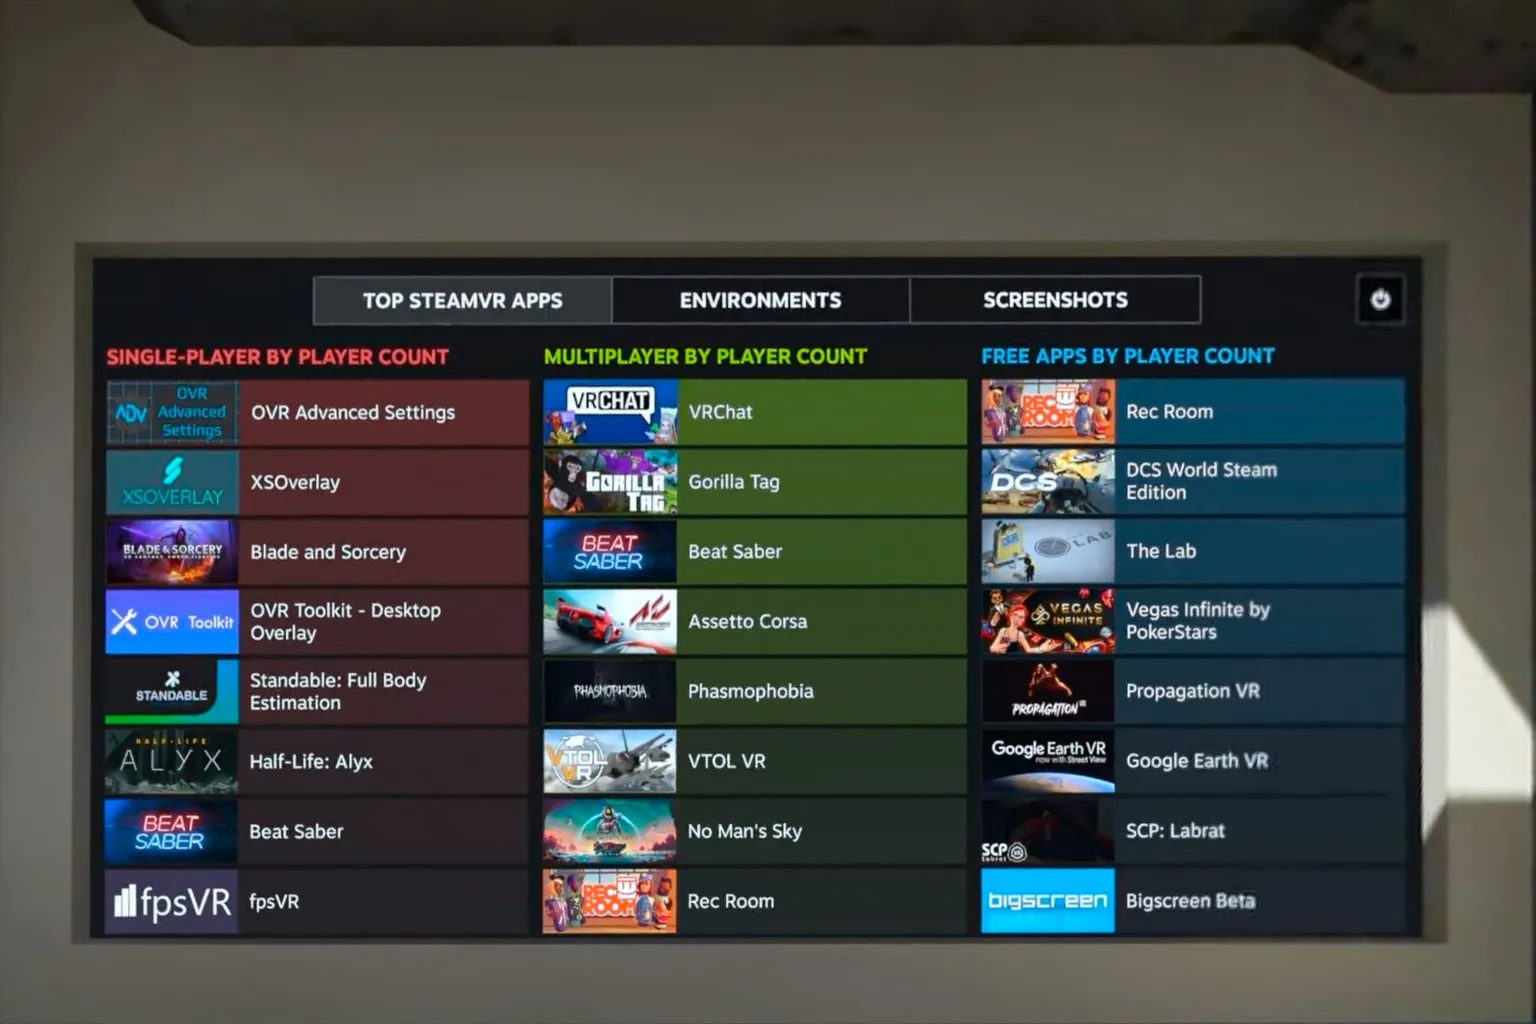
The side signboards highlight recently popular titles under Top SteamVR Apps.
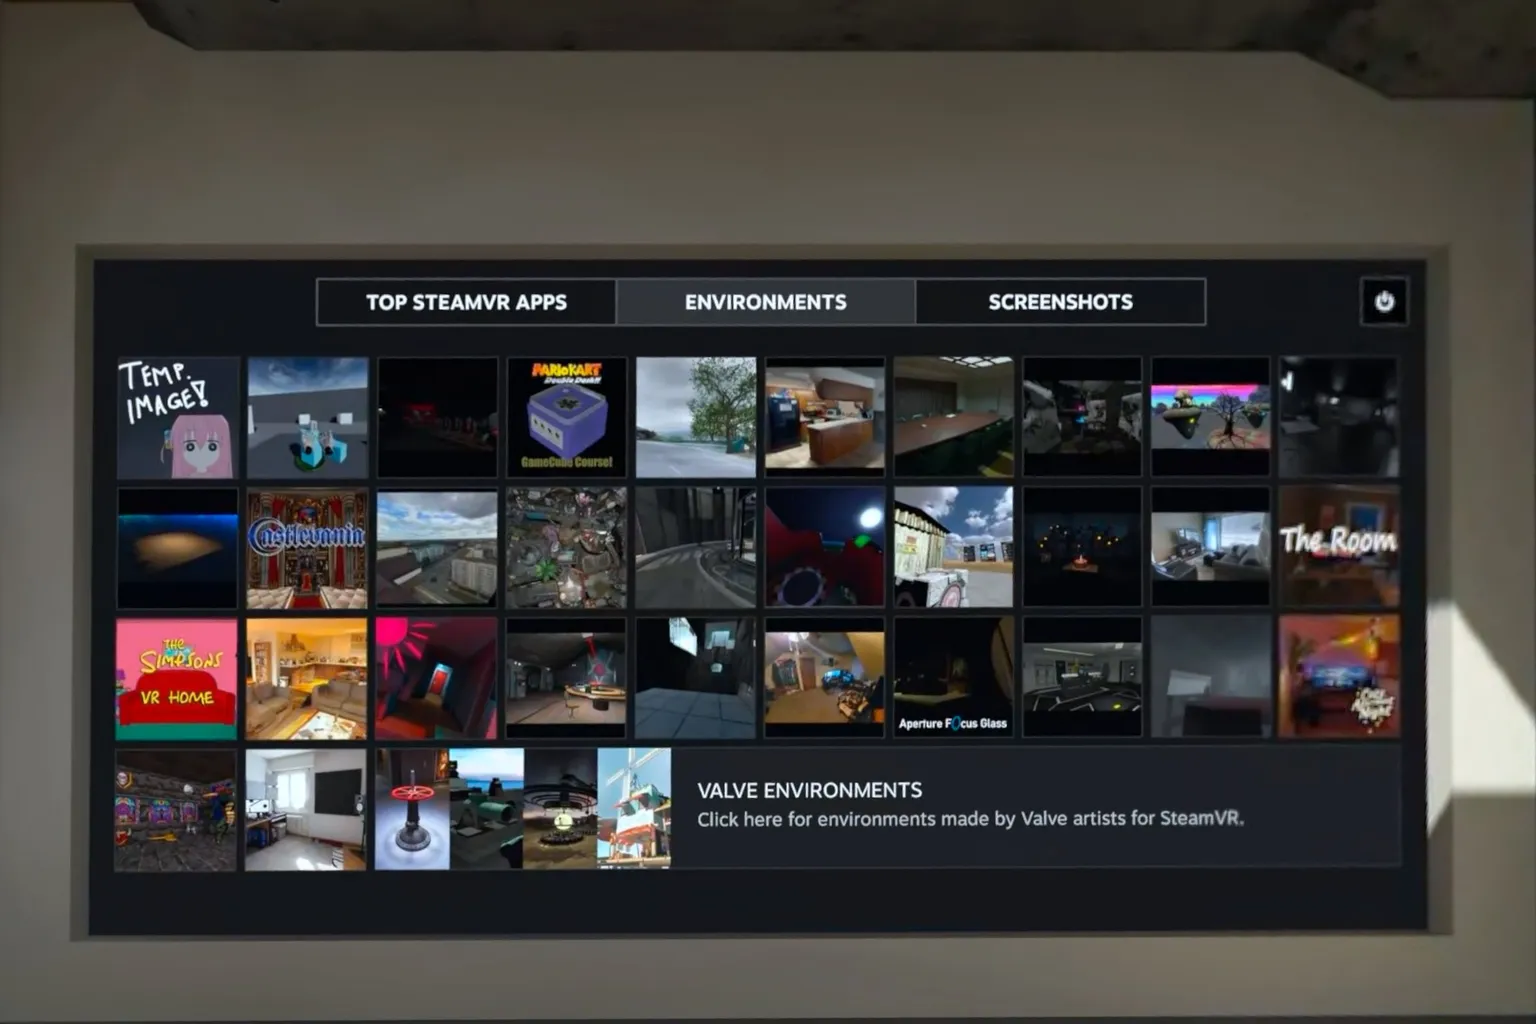
You can also browse newly created scenes from the Workshop here. If you purchase one, you can switch your environment to that creator’s custom setup.
The screenshot on the far right shows in-game screenshots captured by other players.
That wraps up the SteamVR overview. It’s a dedicated tool built specifically for Steam games, with stable connections and clean visuals. The downside is that it only works with VR games purchased on Steam. If you own games across multiple platforms and don’t want to keep switching tools, Virtual Desktop is the simplest and most flexible option.
Also, SteamVR isn’t designed for video playback. You can stream video from a PC, but the audio quality isn’t great. If you watch a lot of videos, it’s better to use a dedicated video player instead.
Virtual Desktop Ultimate Guide
Best Settings for Meta Quest PCVR

SexLikeReal Ultimate Guide
Hidden Discounts, Japanese VR & Passthrough Review
DEO VR Complete Guide
AI Passthrough, 8K Videos & Mixed Reality Setup
FAQ – Common Questions
What is SteamVR, and how is it different from Steam?
Steam is a PC game store, while SteamVR is the tool used to run VR games on a PC. Even if you buy a VR game on Steam, it runs through SteamVR when you play it.
How does SteamVR relate to Meta Quest Air Link?
SteamVR is the platform that runs VR games, while Air Link is Meta’s streaming feature that sends your PC screen to a Quest headset. You can use them together, or connect using other methods like Virtual Desktop.
What do I need to install to start using SteamVR?
First, install Steam, then download SteamVR from within Steam. After that, connect using your preferred method—Meta Air Link, Virtual Desktop, or a USB cable.
There are so many SteamVR settings. How should I configure them?
This article explains what each setting does, including OpenXR runtime, Direct Mode, hand tracking, and Meta plugins, along with recommended configurations. Just follow the steps in order to avoid issues.
Why doesn’t SteamVR work properly when I launch it?
The OpenXR settings may be incorrect, or your drivers or firmware might be outdated. This guide also covers troubleshooting steps, such as switching the OpenXR runtime or resetting settings.
Can I play Meta PC Store games like Asgard’s Wrath in SteamVR?
Unfortunately, no. SteamVR only supports VR games purchased on Steam. Trying to launch Asgard’s Wrath through SteamVR will result in an error. To play it, use Meta Air Link or connect via Virtual Desktop instead.