Frustrated because your VR player cannot find your PC files? While apps like Skybox, 4XVR, and Moon VR support local network streaming, they will not work unless your Windows SMB settings are correctly configured. In this ultimate guide, we walk you through a foolproof 8-step setup—from creating a dedicated local account to enabling shared folders. Stop struggling with “Connection Failed” errors and start streaming your 4K movie collection directly to your Meta Quest. Whether you are building a home theater or a private VR cinema, this is the only network setup guide you need.
How to Enable Network Sharing (formerly Network Neighborhood)
Popular VR video players on Meta Quest, like the common apps mentioned below, all let you play videos stored on your PC. However, to use this feature, you first need to enable Network Sharing (Network Neighborhood) on the Windows side. If this isn’t turned on, your headset won’t be able to access the videos on your PC.

MOON VR Player
Cheapest player after discounts
Price: 🌟🌟🌟
Solid features with clean visuals
SKYBOX VR Player
Affordable and easy to use
Price: 🌟🌟
Feature-rich and simple controls
4XVR Video Player Premium
Great features, but expensive
Price: 🌟
Excellent audio presentation
HereSphere
More trouble than it’s worth
Price: 🌟
Very complex setup, not beginner-friendly
There are two main ways to connect your headset using SMB (network sharing):
- Using the Samba feature on a NAS
- Using the built-in Samba feature on Windows
On the NAS side, the setup is usually simple and connection issues are rare, so I won’t go into detail here.
Windows, on the other hand, takes a bit more setup. Before we walk through how to enable sharing on your PC, make sure you have the following ready:
- A Windows PC
- A Meta Quest headset
- A Wi-Fi network
And one very important point:
Your PC and Meta Quest must be connected to the same Wi-Fi router (access point). If they’re on different networks, it won’t connect no matter how perfect your settings are.
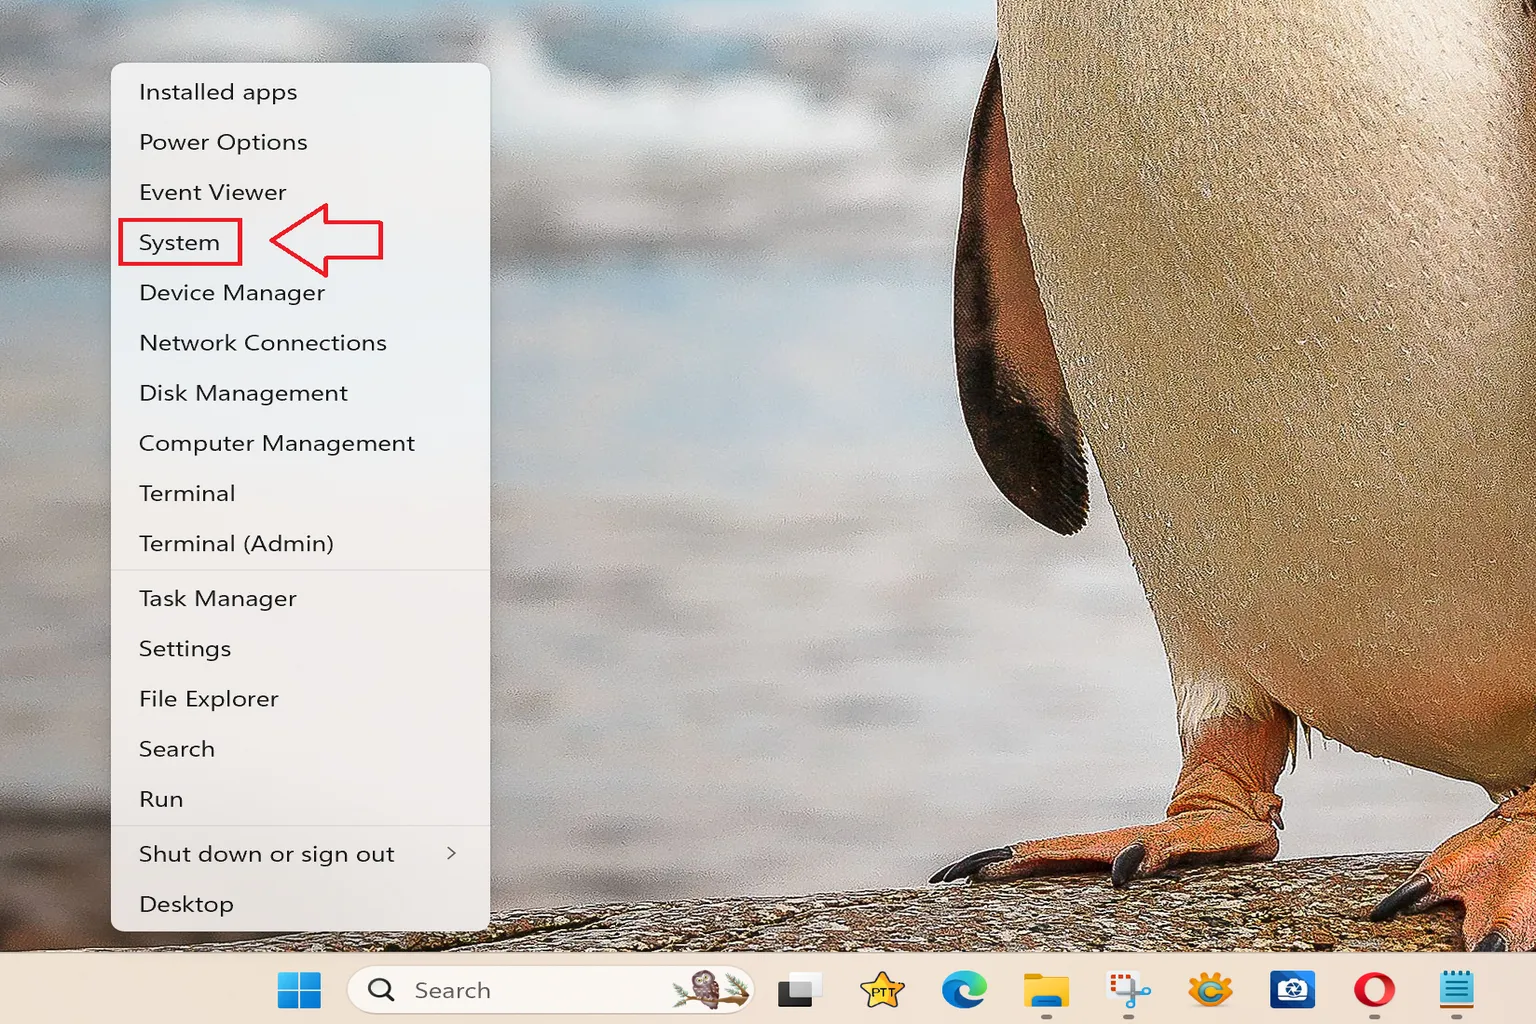
Step 1: Open the System screen
Right-click the Windows Start button, then select System from the menu that appears.
Step 2: Create a new user
From the menu on the left, select Accounts, then click Other users.
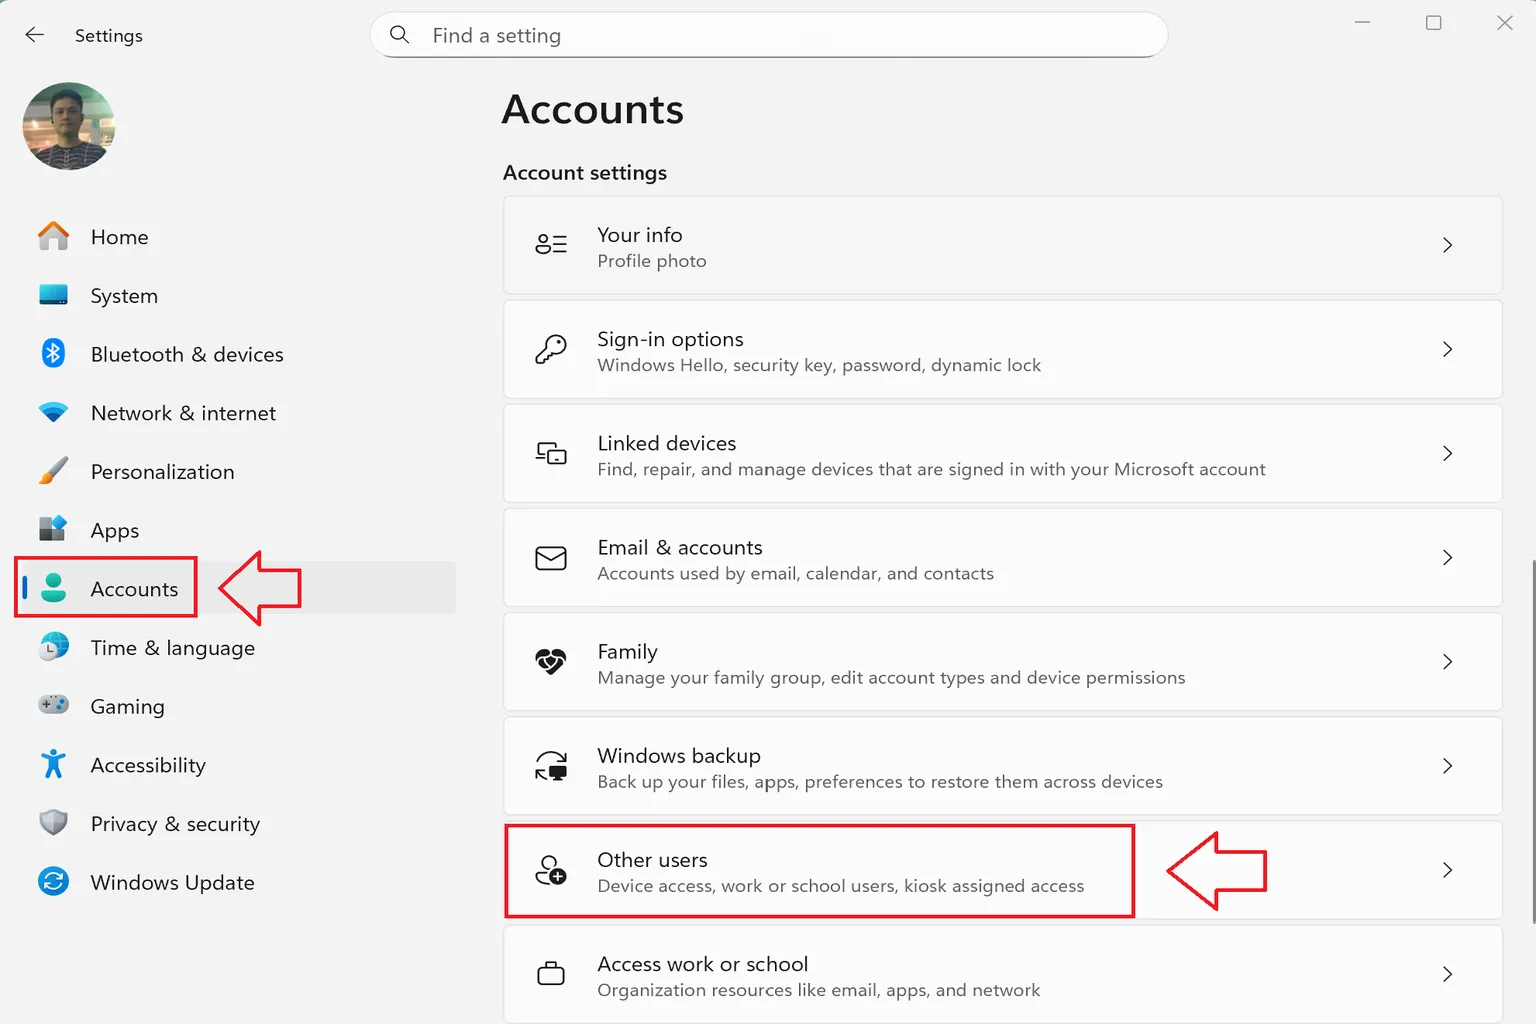
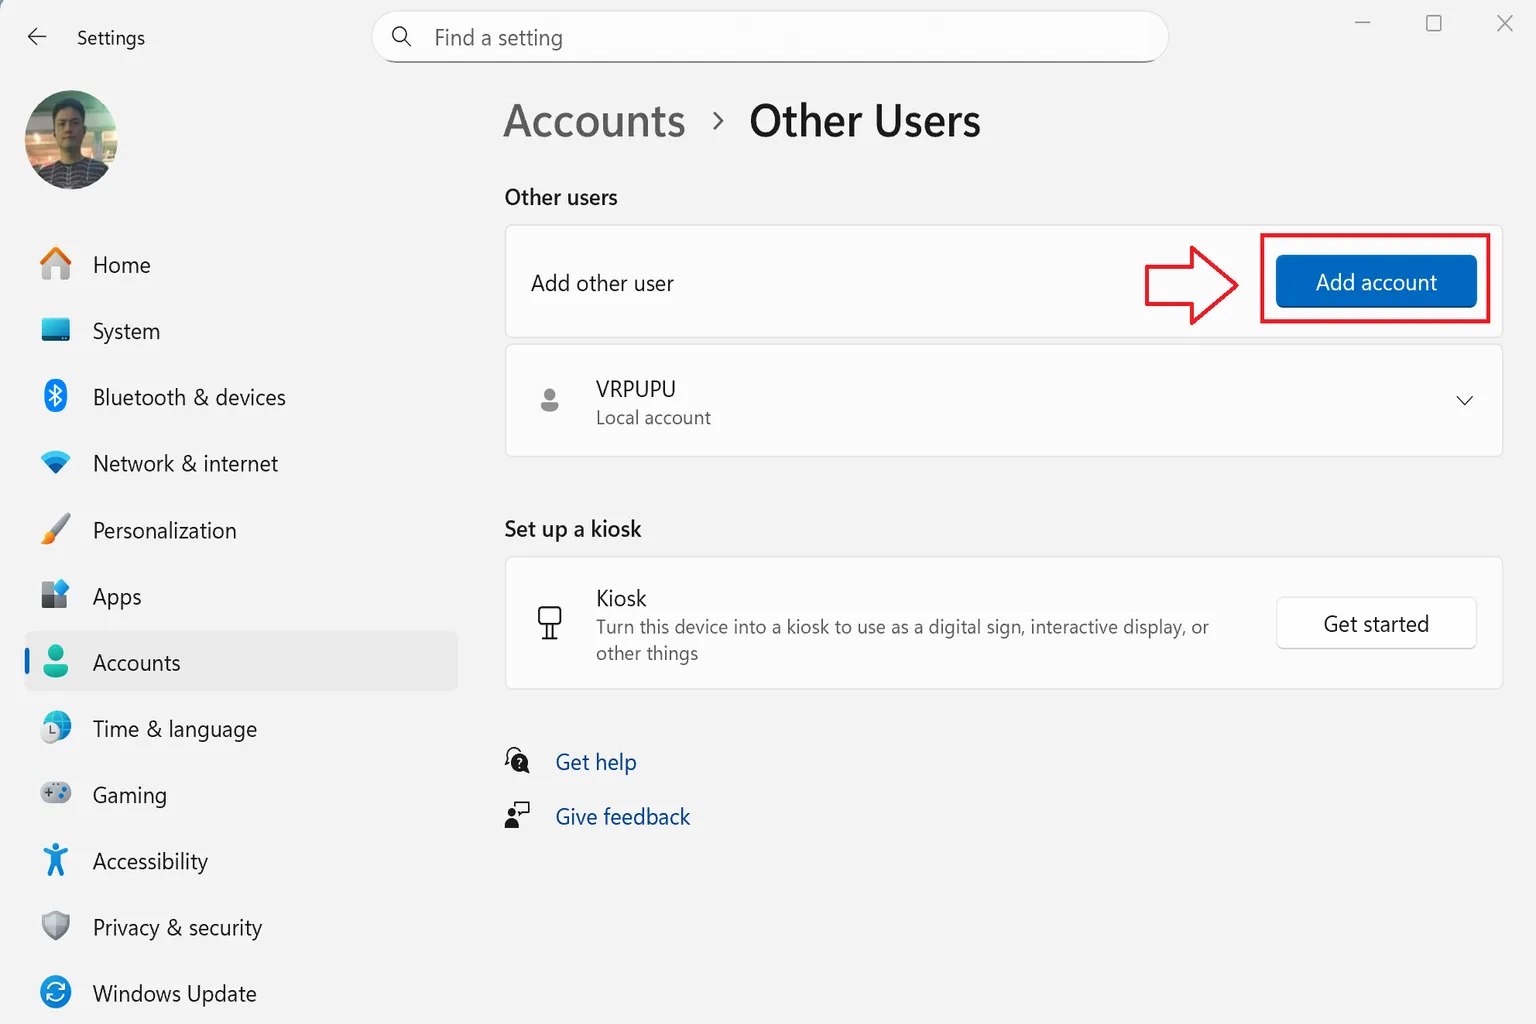
Then select Add account and move on to the next step.
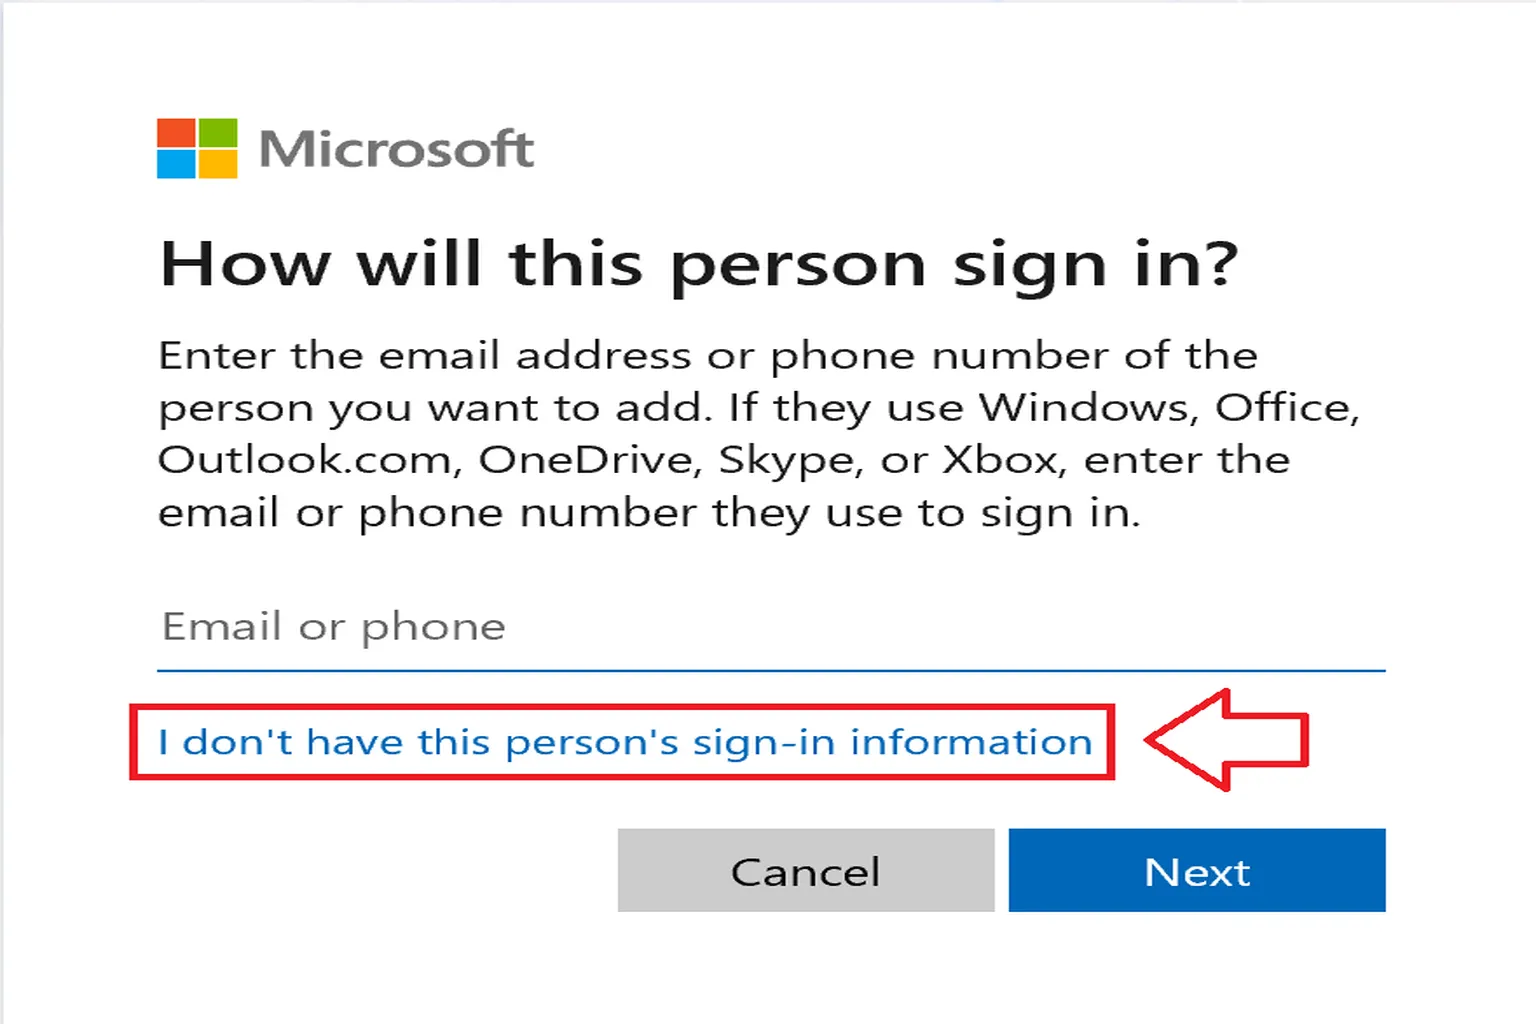
Step 3: Choose a sign-in method
To sign in without using an email address, select I don’t have this person’s sign-in information.
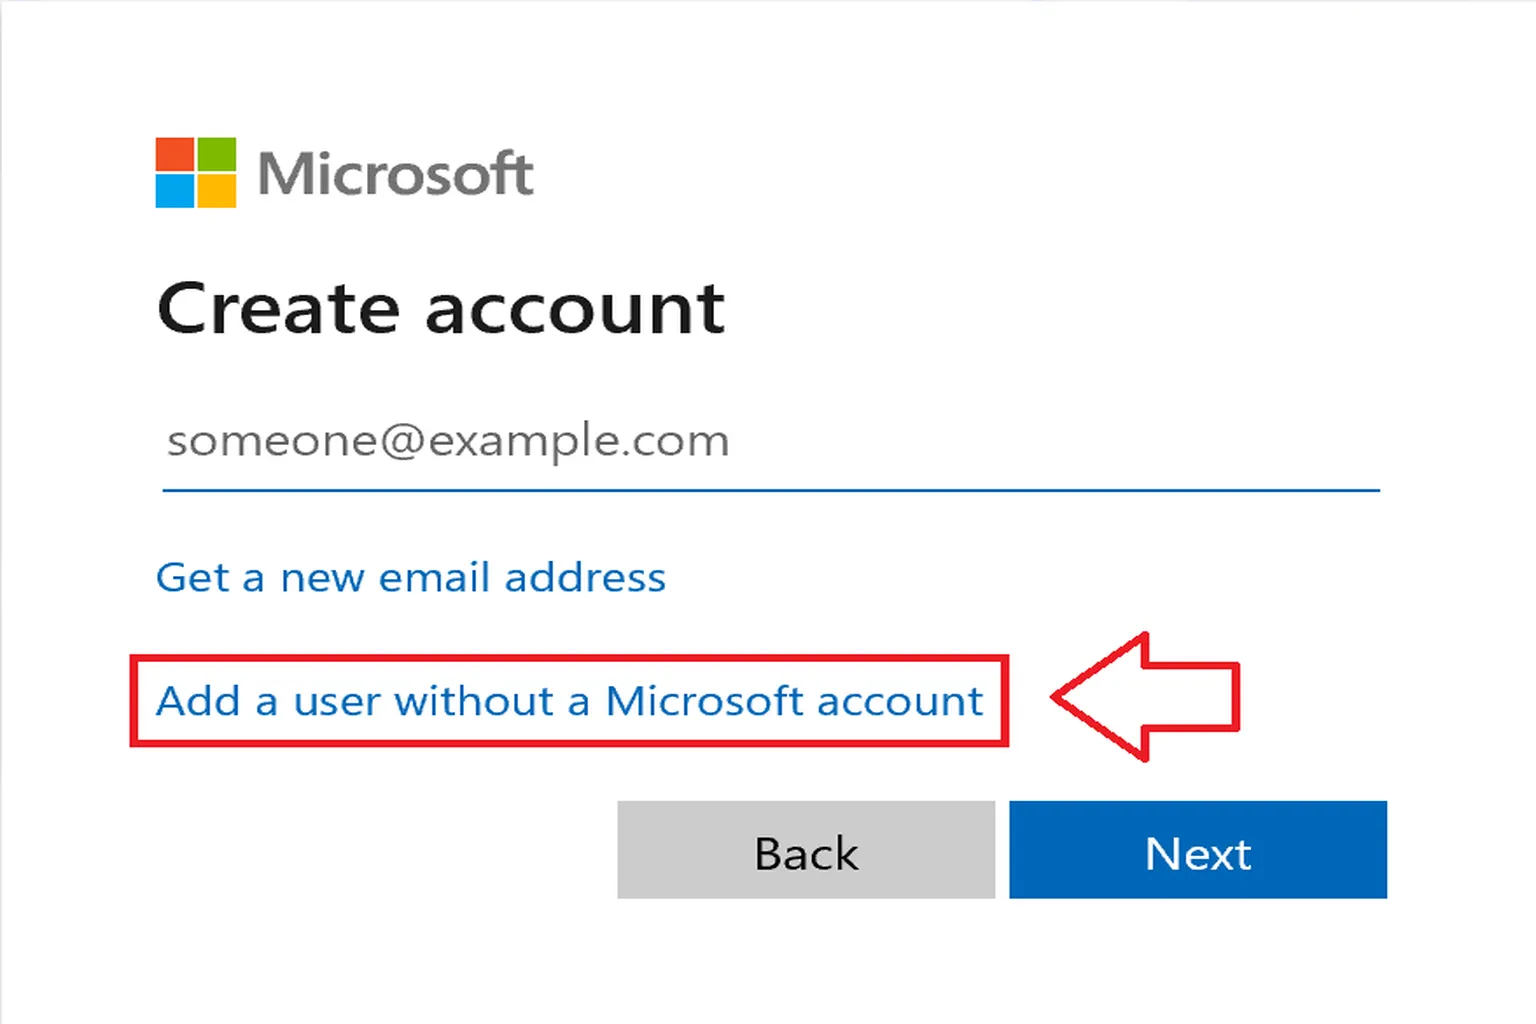
Step 4: Create the user
Click Add a user without a Microsoft account.
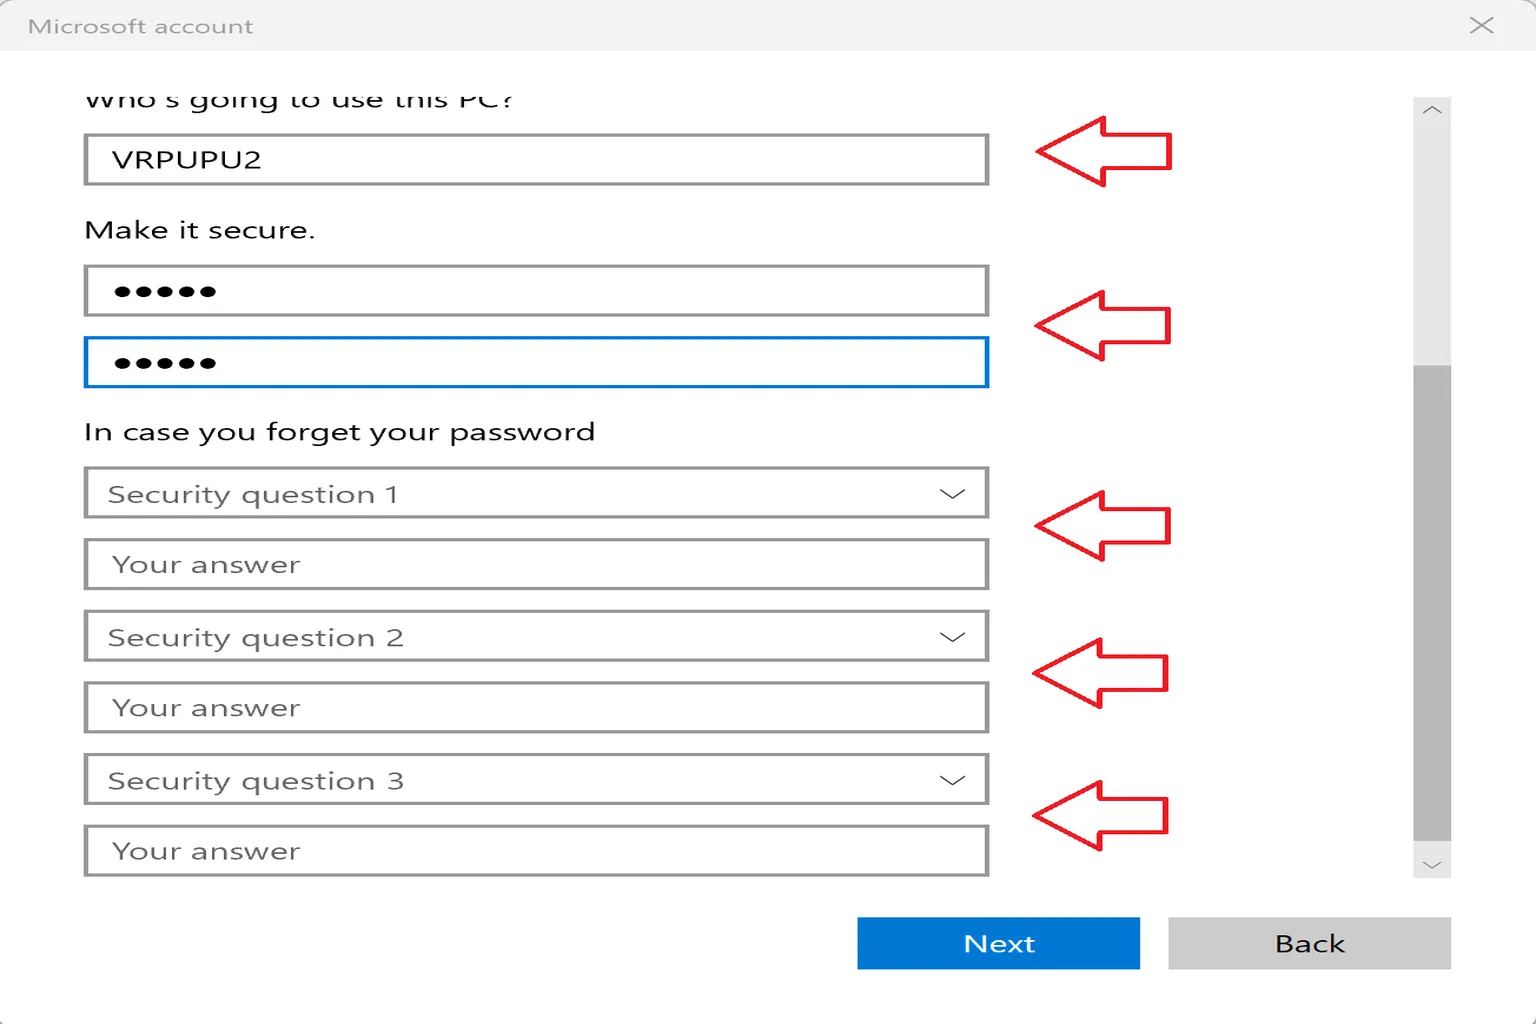
Step 5: Enter user details
Fill in each field as follows:
- Who’s going to use this PC?: Enter the account name
- Create a secure password: Enter a password
- In case you forget your password: Enter answers to the three security questions
For the security questions, just answer in a way that fits your situation. For example, something related to your childhood is fine.
Once that’s done, you’ll have a local account that can log in to the PC.
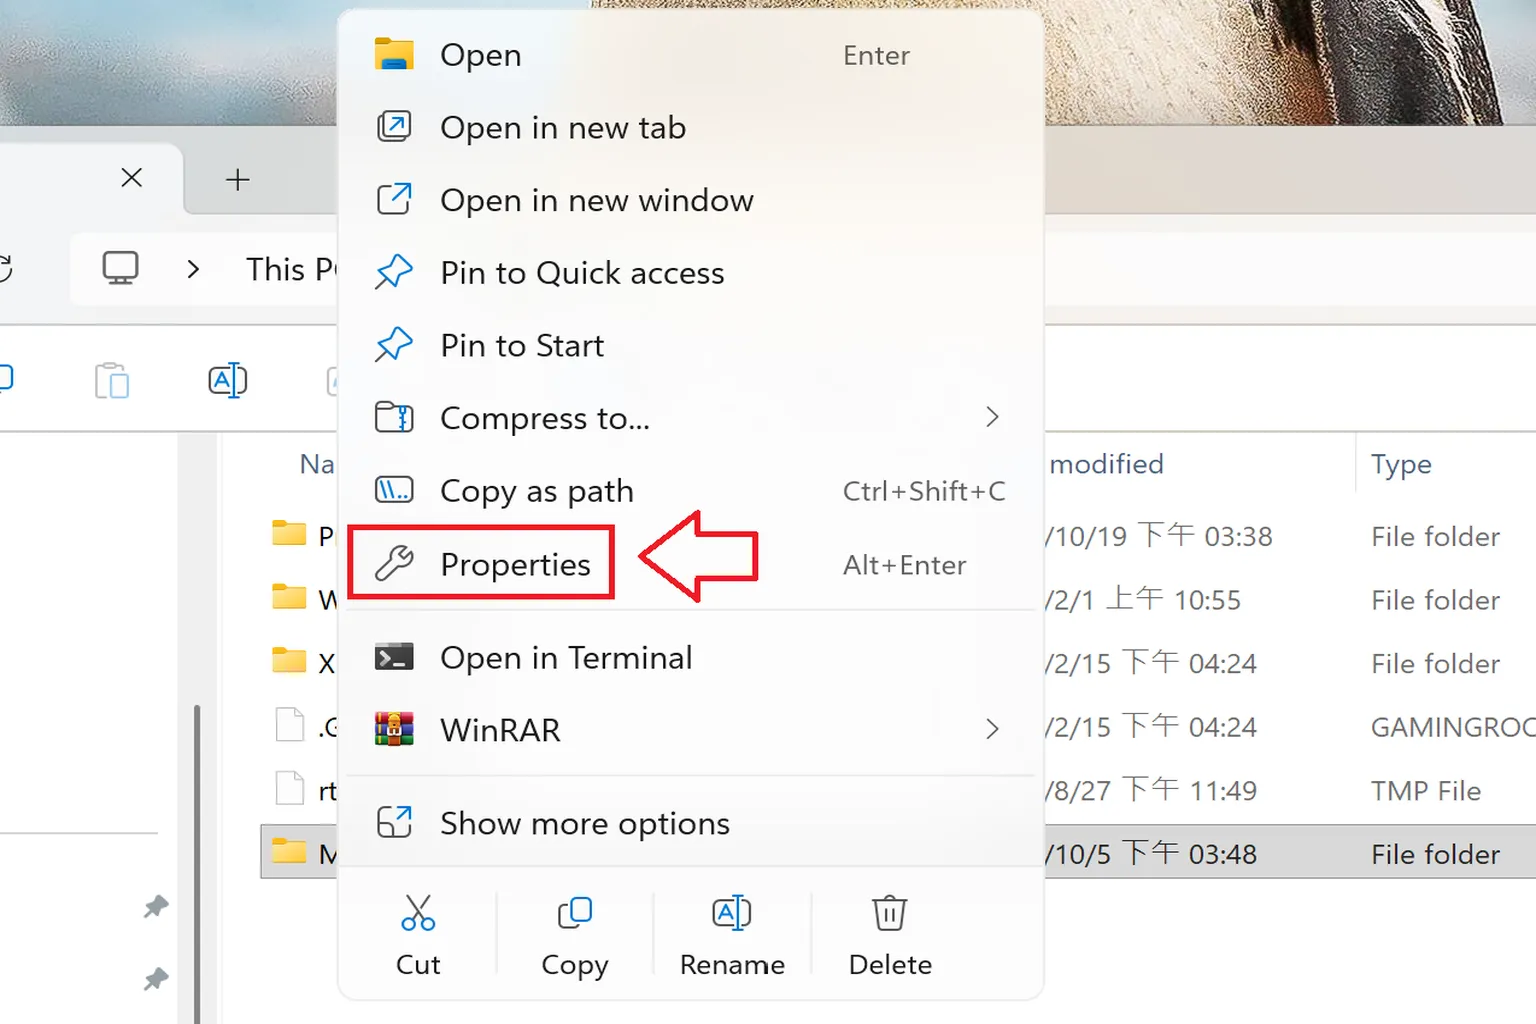
Step 6: Create a shared folder
Right-click the folder you want to share and select Properties.
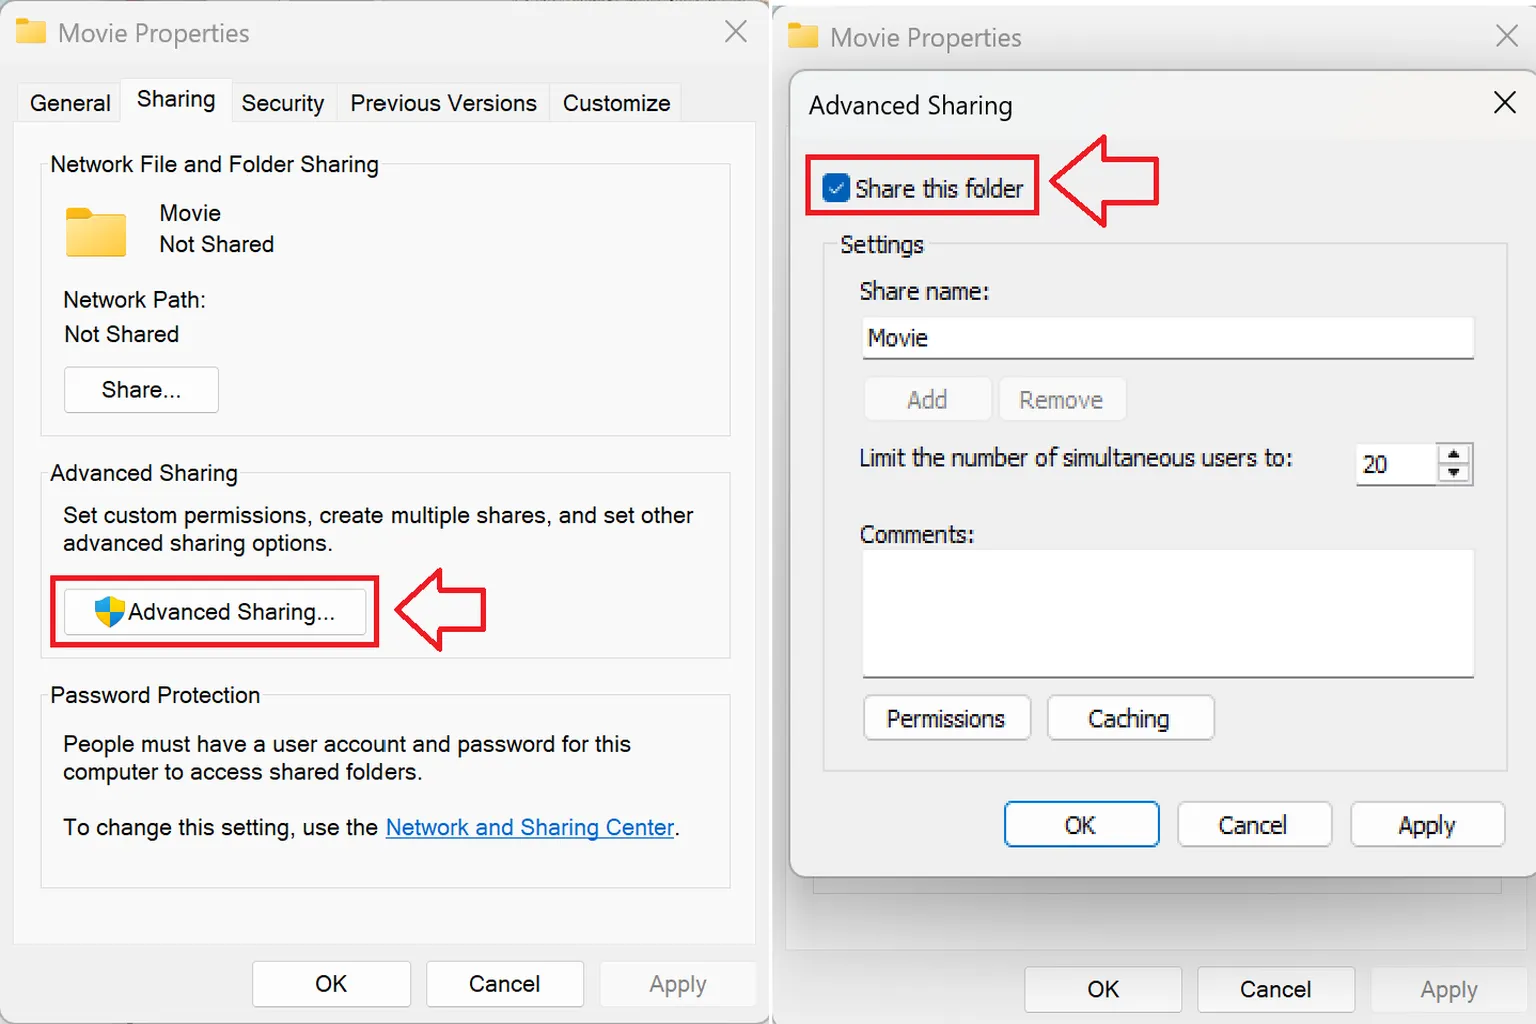
Step 7: Share this folder
Open the Sharing tab, go to Advanced Sharing, and check Share this folder.
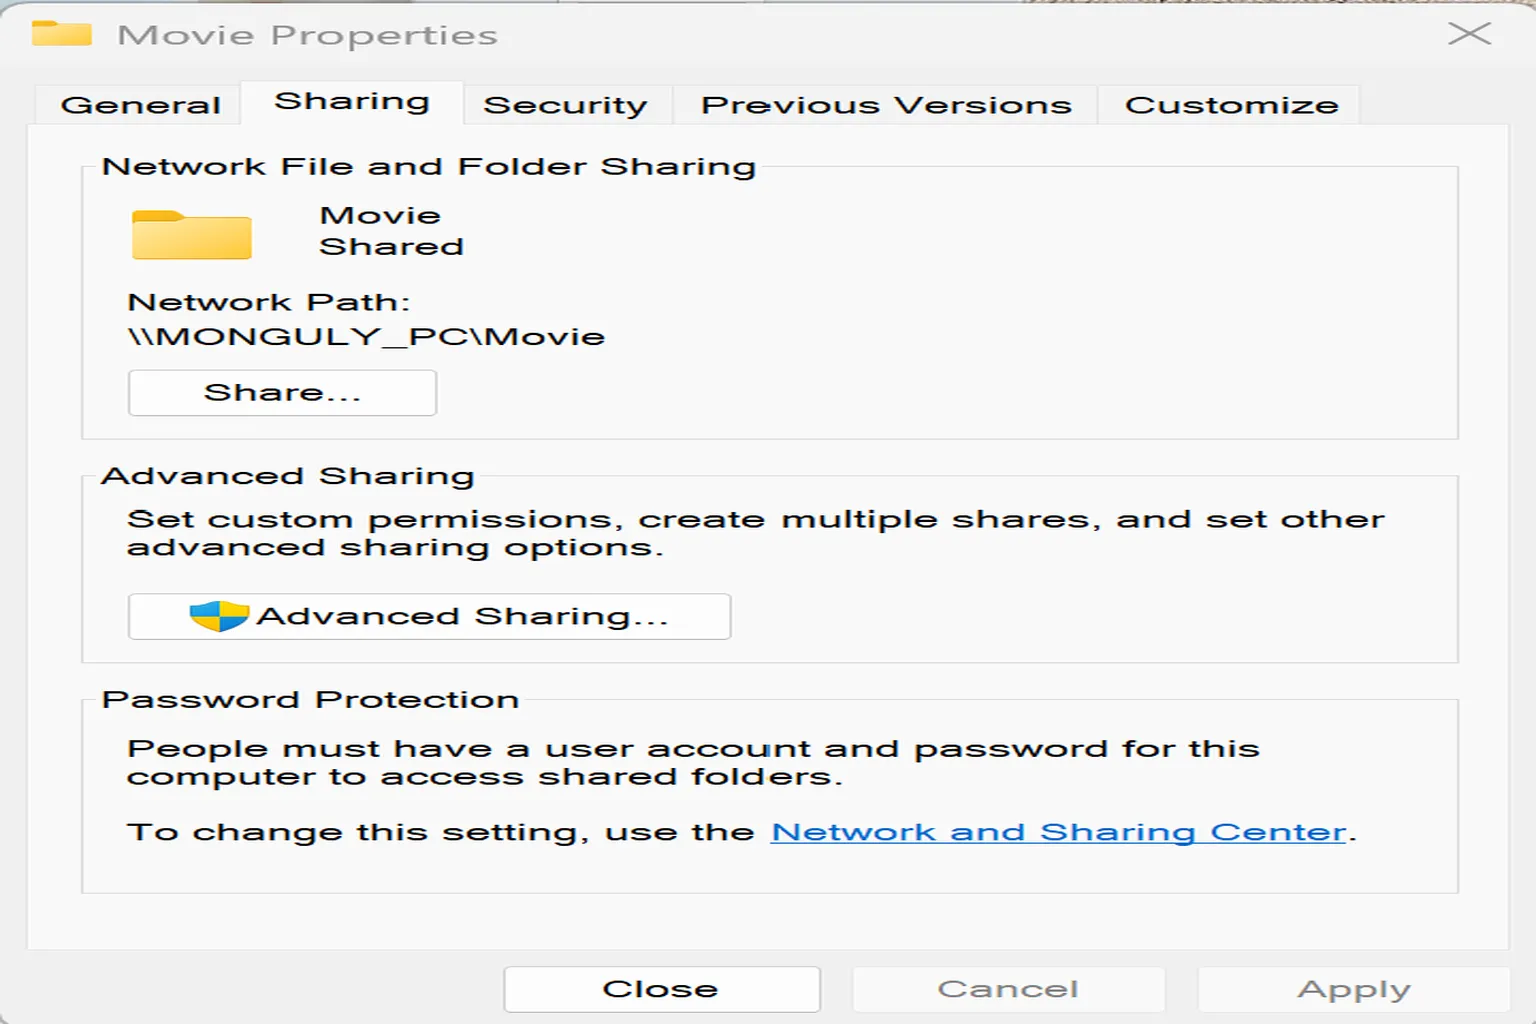
Step 8: Sharing complete
After the settings are applied, sharing is finished. Go back to your VR player, and you should now see your PC and the shared folder without any issues.
If your PC is already set up to log in with a Microsoft account, you can usually start from Step 6 and skip the earlier steps. Microsoft actively encourages account-based sign-in, and most recent versions of Windows are configured this way by default.
That said, many Meta Quest VR players tend to have trouble using SMB connections with Microsoft accounts. In contrast, a simple local account usually works without any issues.
So if you just can’t get SMB to work in your VR player over the local network, this is the method I recommend trying.
At this point, your SMB setup should be solid. Now it’s time to actually watch some videos. I’ve also introduced five commonly used playback apps for Meta Quest and summarized how to use these VR players, so they’re worth checking out as well.

Skybox VR Player Complete Guide
Setup AirScreen, Network Streams & YouTube VR

4XVR Video Player Premium Guide
PC Streaming, WebDAV & USB Setup

Moon VR Player Ultimate Guide
PC Streaming, WebDAV & Web Theater DLC
FAQ – Common Questions
What is Samba (SMB), and why do I need to set it up?
Samba, also known as SMB, is a protocol that lets different devices share folders over a local network. VR players on Meta Quest, like Skybox VR Player and 4XVR Player, use this protocol to access video files stored on your PC. If SMB isn’t enabled, the player simply won’t be able to find your PC’s video folders.
Can I log in and access videos using my existing Microsoft account?
In theory, yes. In practice, many VR players don’t work well with Microsoft accounts, and you’ll often run into login failures or missing folders. The most reliable solution is to create a new local account with a password. That usually makes the connection work right away.
Does setting up Samba sharing make my PC less secure?
As long as you set a password, avoid sharing the entire C drive, and keep everything on a private home network (not public Wi-Fi), it’s generally safe. The best approach is to share only the specific video folders you want to play and grant access only to the account you created.
Which player should I choose among 4XVR, Skybox, Moon, and HereSphere?
If budget isn’t an issue and you care most about audio quality, 4XVR Player is the best choice. For overall features and value, Skybox VR Player remains the most popular all-around option. If you want good image quality at a lower price, Moon VR Player is a solid pick. HereSphere is extremely powerful but has a much steeper learning curve, so it’s better suited for advanced users.
Is there an easier way to play PC videos?
Yes. Most VR players offer their own PC companion apps. For example, 4XVR provides “4X Link,” which lets you connect to your PC and start playback with much less setup.