Meta Quest’s built-in Air Link lets you play PC VR and Steam games wirelessly for free, but the clunky UI and hidden settings can be a headache. This no-nonsense guide cuts through the clutter, showing you exactly how to connect to your PC, add non-Meta games, fix frustrating launch errors, and optimize your streaming quality in minutes.
Note: Since February 2026, after updating Meta Horizon Link, you may see the OVR53744741 error when adding non-Meta games.
Go directly to the “How to Play Non-Meta PC Games” section for the solution.
Feature Overview
Meta Air Link / Horizon Link is the default app you use to play PC games on Meta Quest. It comes preinstalled on every headset and, of course, it’s completely free. You can play VR games purchased from the Meta Store right away, and with a bit of setup, you can also run SteamVR games or titles from other platforms. That ease of access is its biggest advantage.
That said, the feature set is very bare-bones. Outside of actually playing VR games, there’s almost nothing else it’s useful for.
For reference, there are three main ways to connect a Meta Quest to a PC.
| Method | Price | Description |
| Meta Air Link/Horizon Link | Free | Supports both wireless and wired streaming. Works well enough for casual use, but stability can be inconsistent. Fine if you only use it occasionally. |
| Steam Link | Free | Supports both wireless and wired streaming for SteamVR only. Stable connection, but limited features. |
| Virtual Desktop | $24.99 | Wireless streaming with excellent stability and a rich feature set. In addition to VR games, it also supports full PC desktop control and video playback. |
Note: Virtual Desktop has supported wired streaming since beta version 1.34.19, but this feature is not yet available in the stable release.
How to Play SteamVR on Meta Quest
Setup & Best Settings Guide
Virtual Desktop Ultimate Guide
Best Settings for Meta Quest PCVR
Meta’s official app is honestly a bit too simple in some areas, but its biggest advantage is that it’s free and comes preinstalled.
So let’s go through how to use it. Before you start, you’ll need to install the Meta Horizon Link app on your PC and connect it to your headset. If you haven’t set up the connection or enabled it yet, check the linked guide first and finish the installation and initial setup before moving on.
How to Use Meta Air Link
Once you’ve finished setting things up on both your PC and headset, open the Air Link menu inside the headset and select Enable to connect to the PC you specified. If you plan to record gameplay footage, make sure to start recording before enabling Air Link. After you enter the Air Link lobby (home screen), you can’t turn recording on from there, so this part is important.
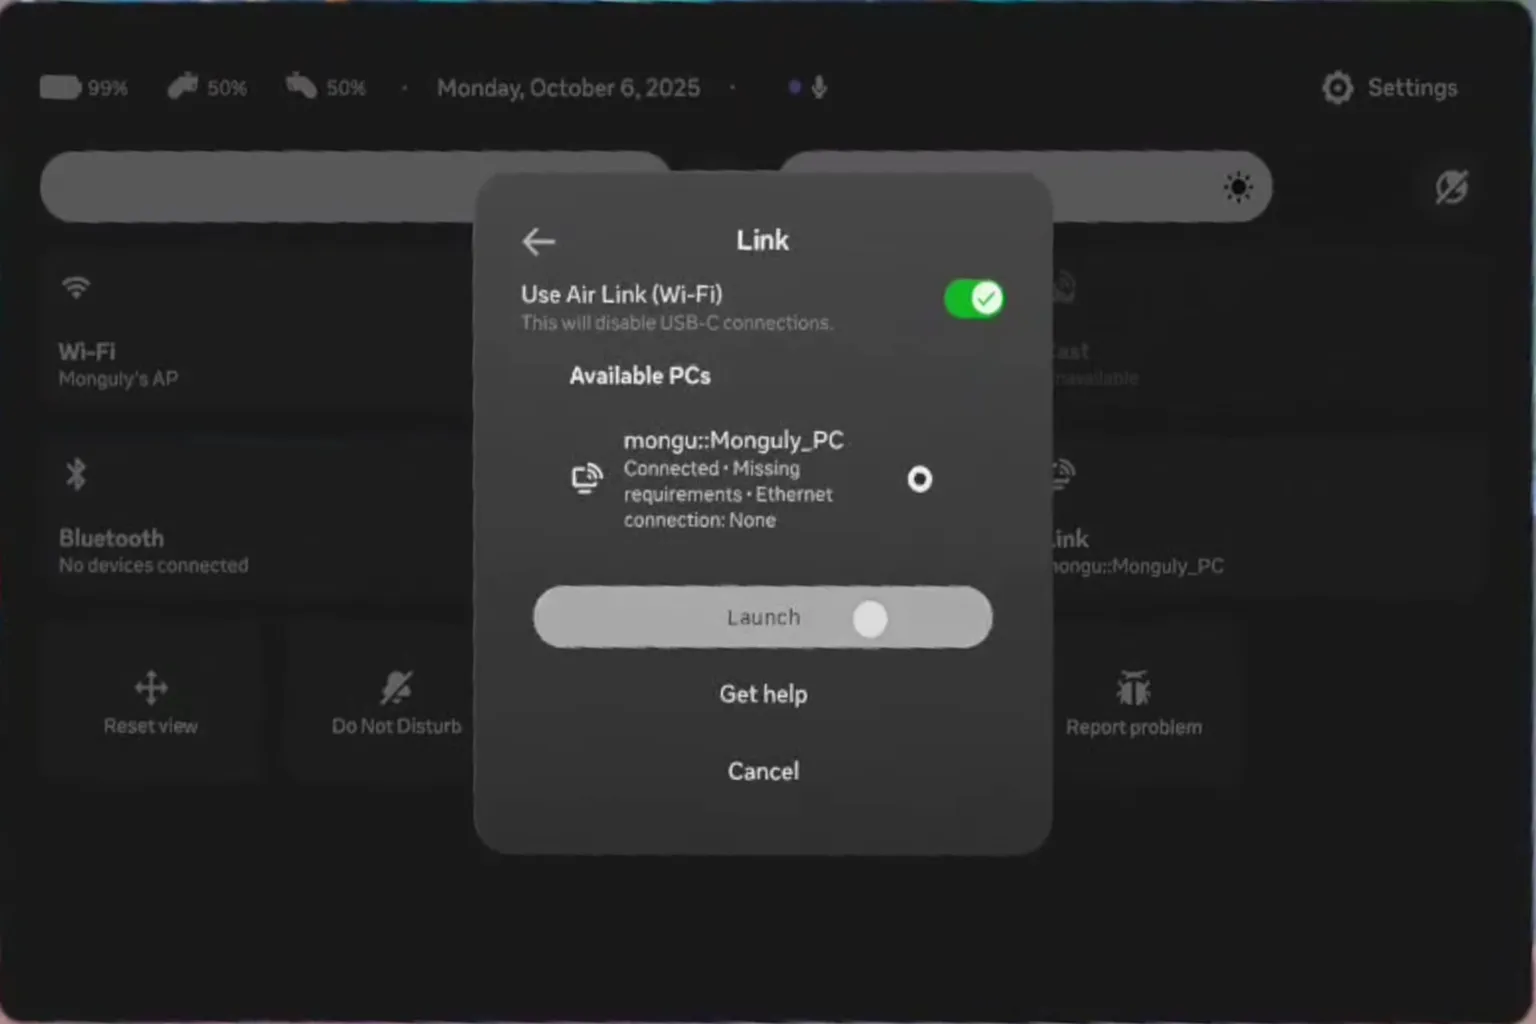
While connecting, you’ll see the Meta logo on screen. After about five seconds, you’ll be taken into the Air Link lobby.

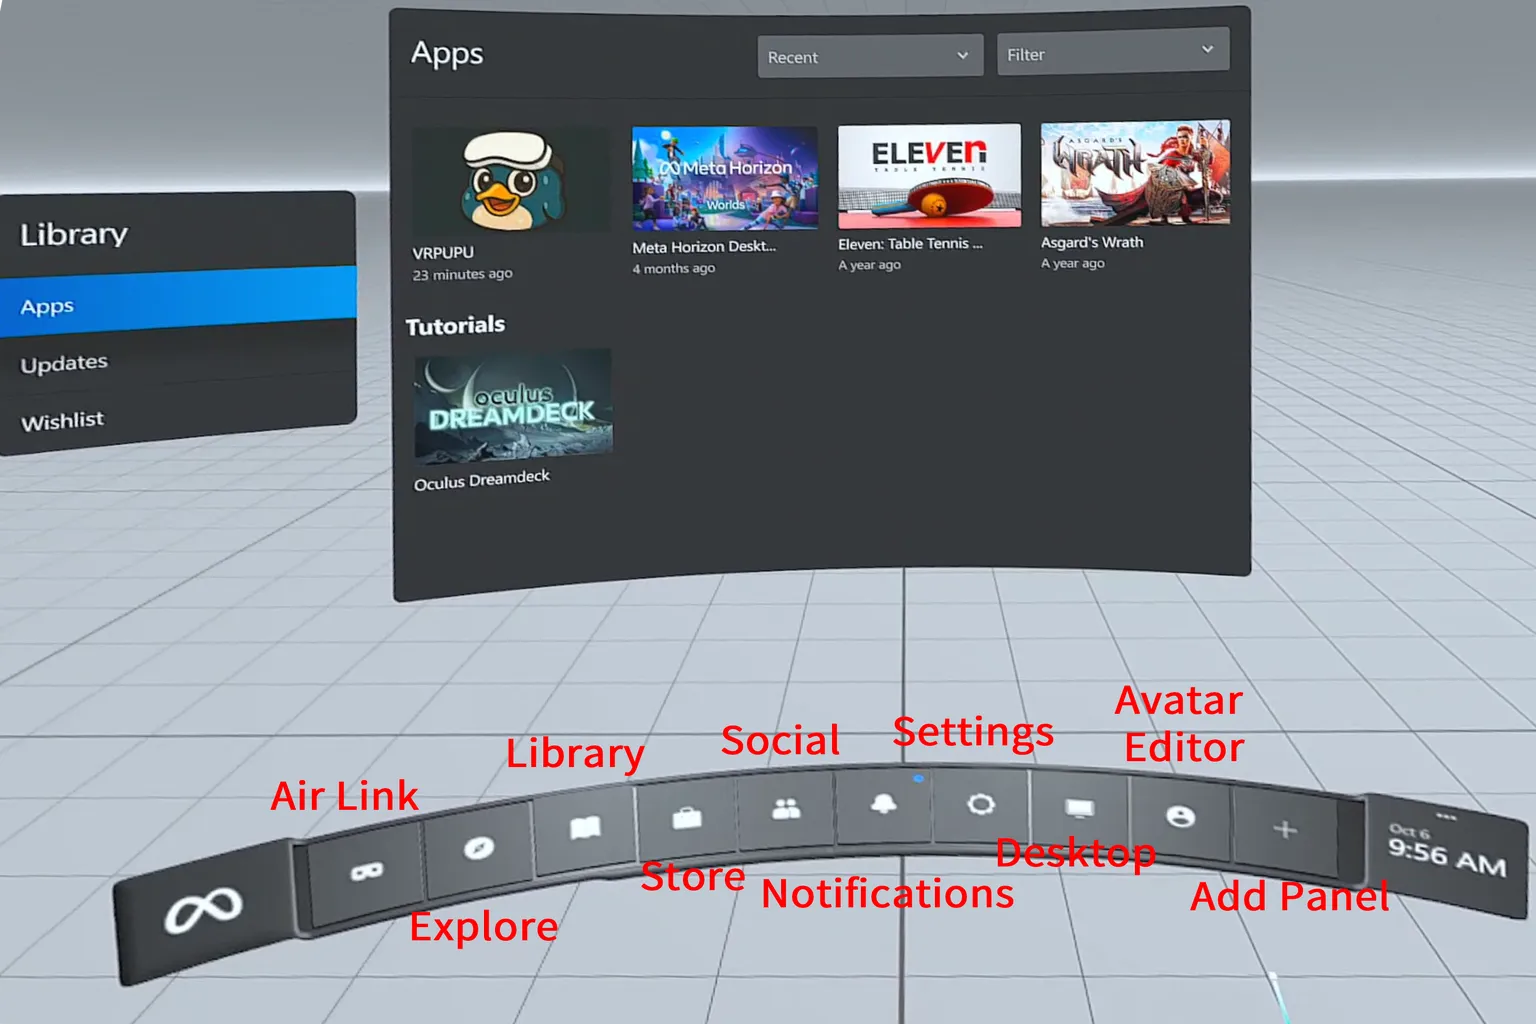
On the Air Link main screen, the upper area is the function area, and below it is a curved control panel. This panel includes the following ten items:
- Air Link: Switch connection modes
- Explore: Go to the PC interface home screen
- Library: View installed Meta Quest PC VR games
- Store: Open the Meta PC VR store
- Social: Check your friends list and send party invites
- Notifications: View system messages and alerts
- Settings: Adjust various options within Air Link mode
- Desktop: Display the Windows desktop
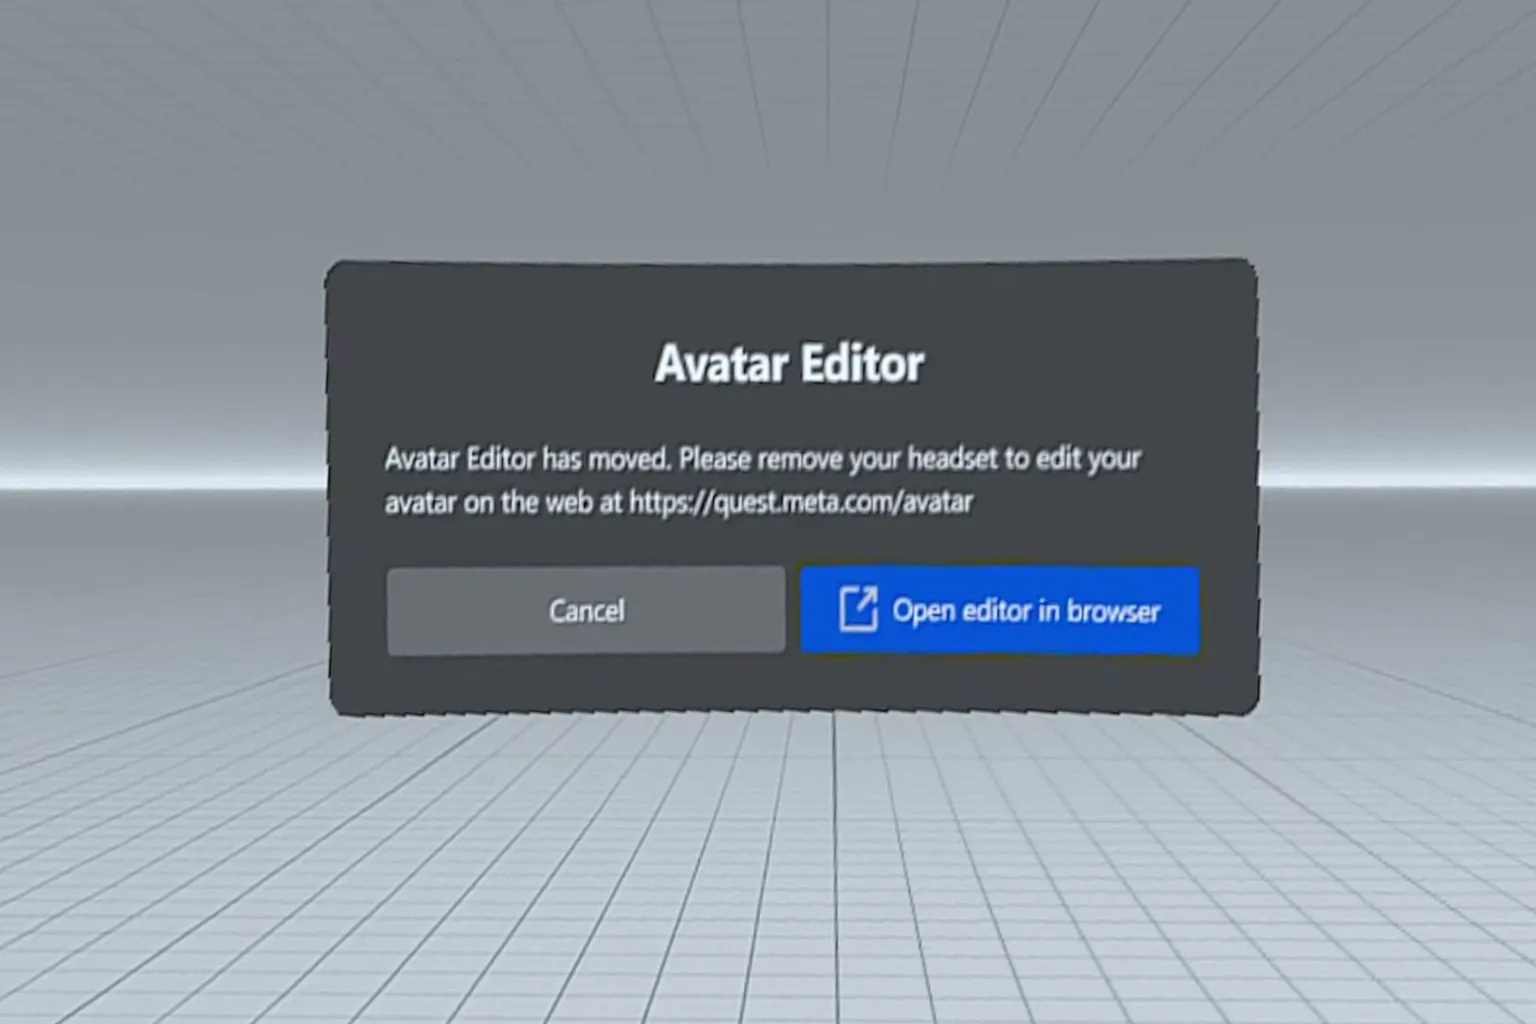
- Avatar Editor: Edit your avatar’s appearance (currently unavailable)
- Add Desktop Panel: Add PC apps as shortcuts to the control panel
Air Link
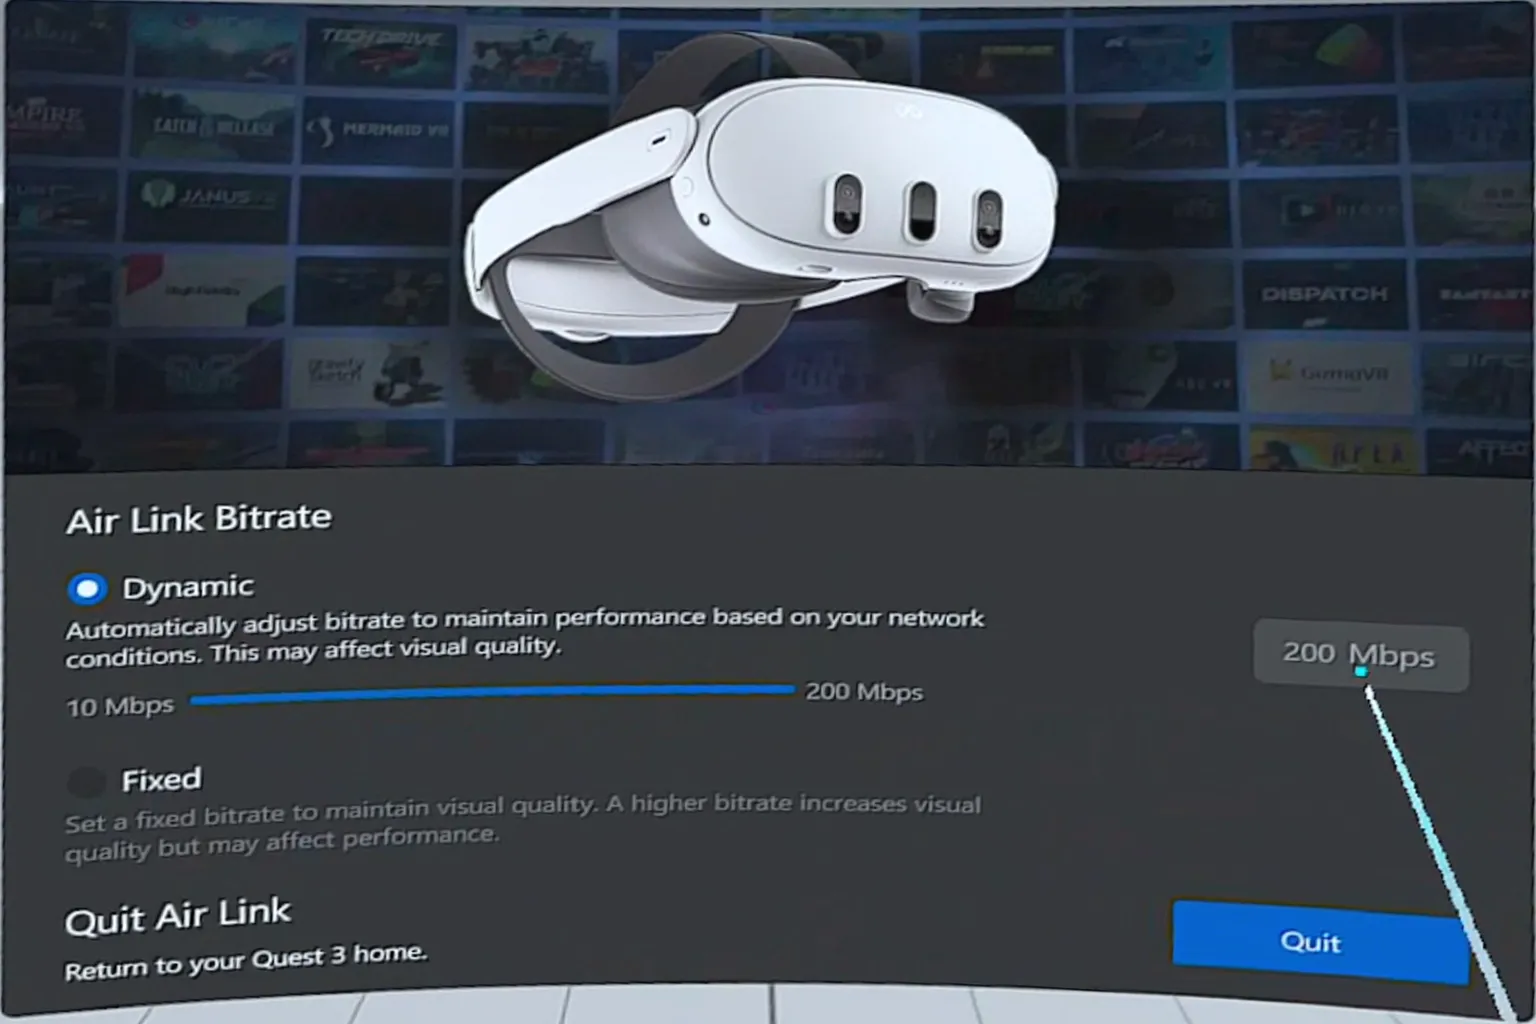
In the Air Link menu, you can set the streaming transfer rate (bitrate). Higher values mean better image quality. If your home router supports Wi-Fi 6 or newer, it’s usually safe to set a fixed 200 Mbps.
There are two bitrate modes:
- Dynamic: Automatically adjusts speed based on network conditions. It’s less likely to cause lag when the connection is unstable, but image quality may fluctuate.
- Fixed: Locks the stream to a specified speed. Image quality is more consistent, but if the connection isn’t stable, you may see lag or stuttering.
If you tap Exit here, you’ll return to the Meta Quest home screen.
Note: The latest Air Link has a bug with adjustments.
If you try to change the bandwidth directly from the default 100 Mbps to 200 Mbps, the system won’t respond.
To set it correctly, you need to increase it gradually: 100 Mbps → 150 Mbps → 195 Mbps → 200 Mbps.
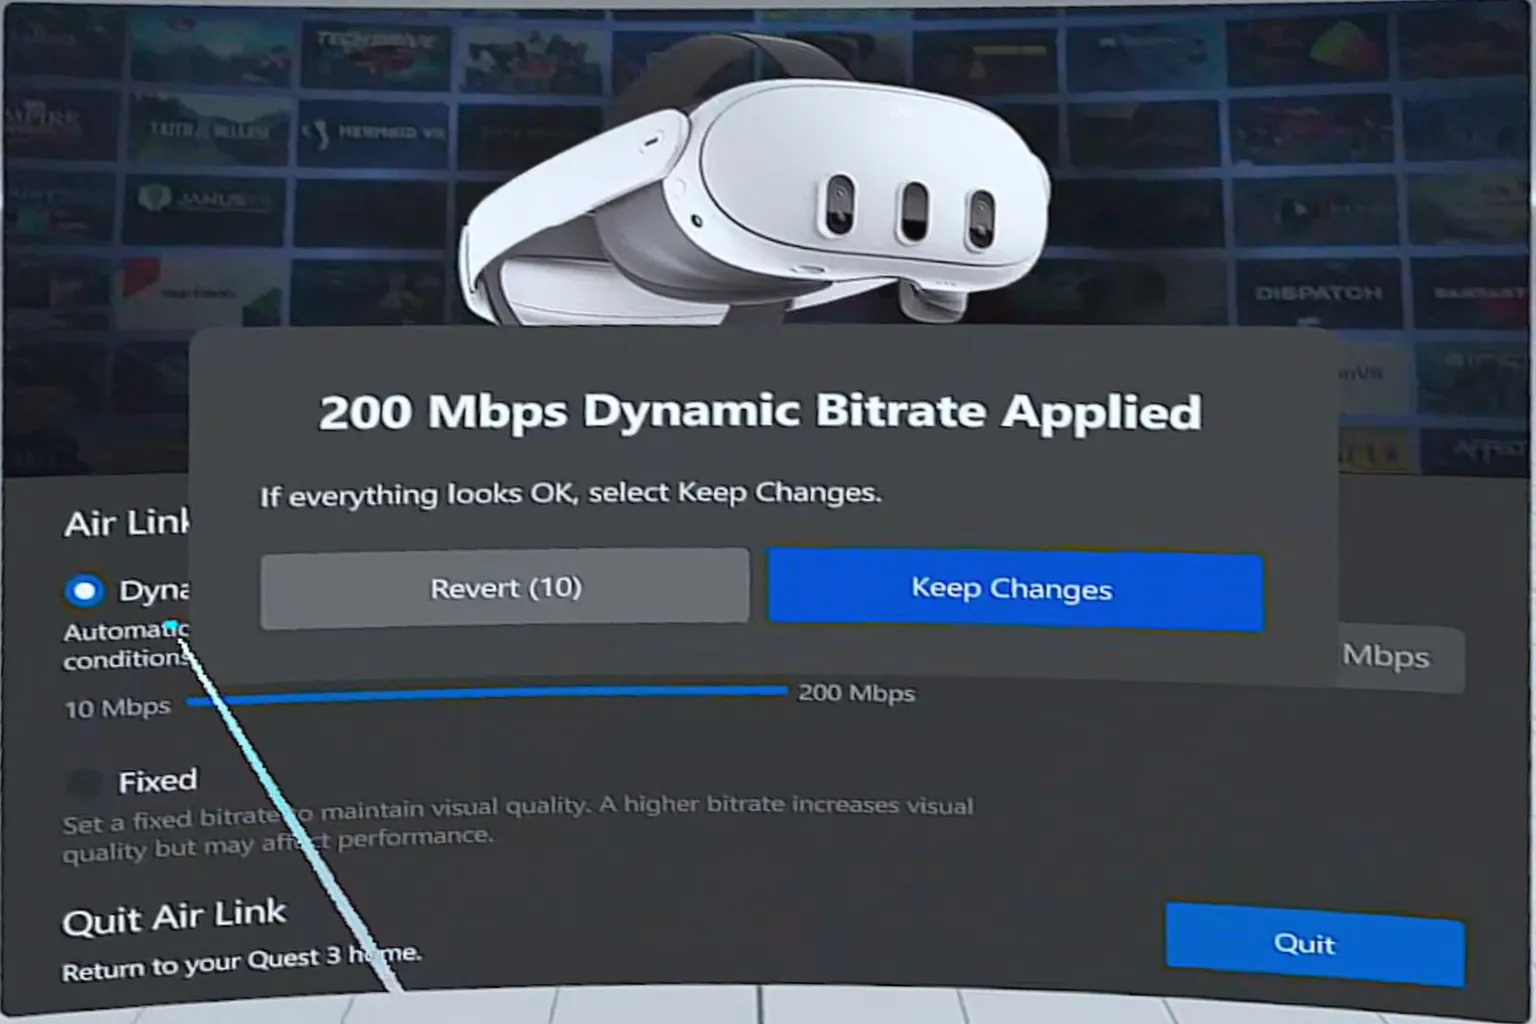
Once you’ve changed the bitrate and everything looks fine, select Keep Changes to apply the settings.
Explore
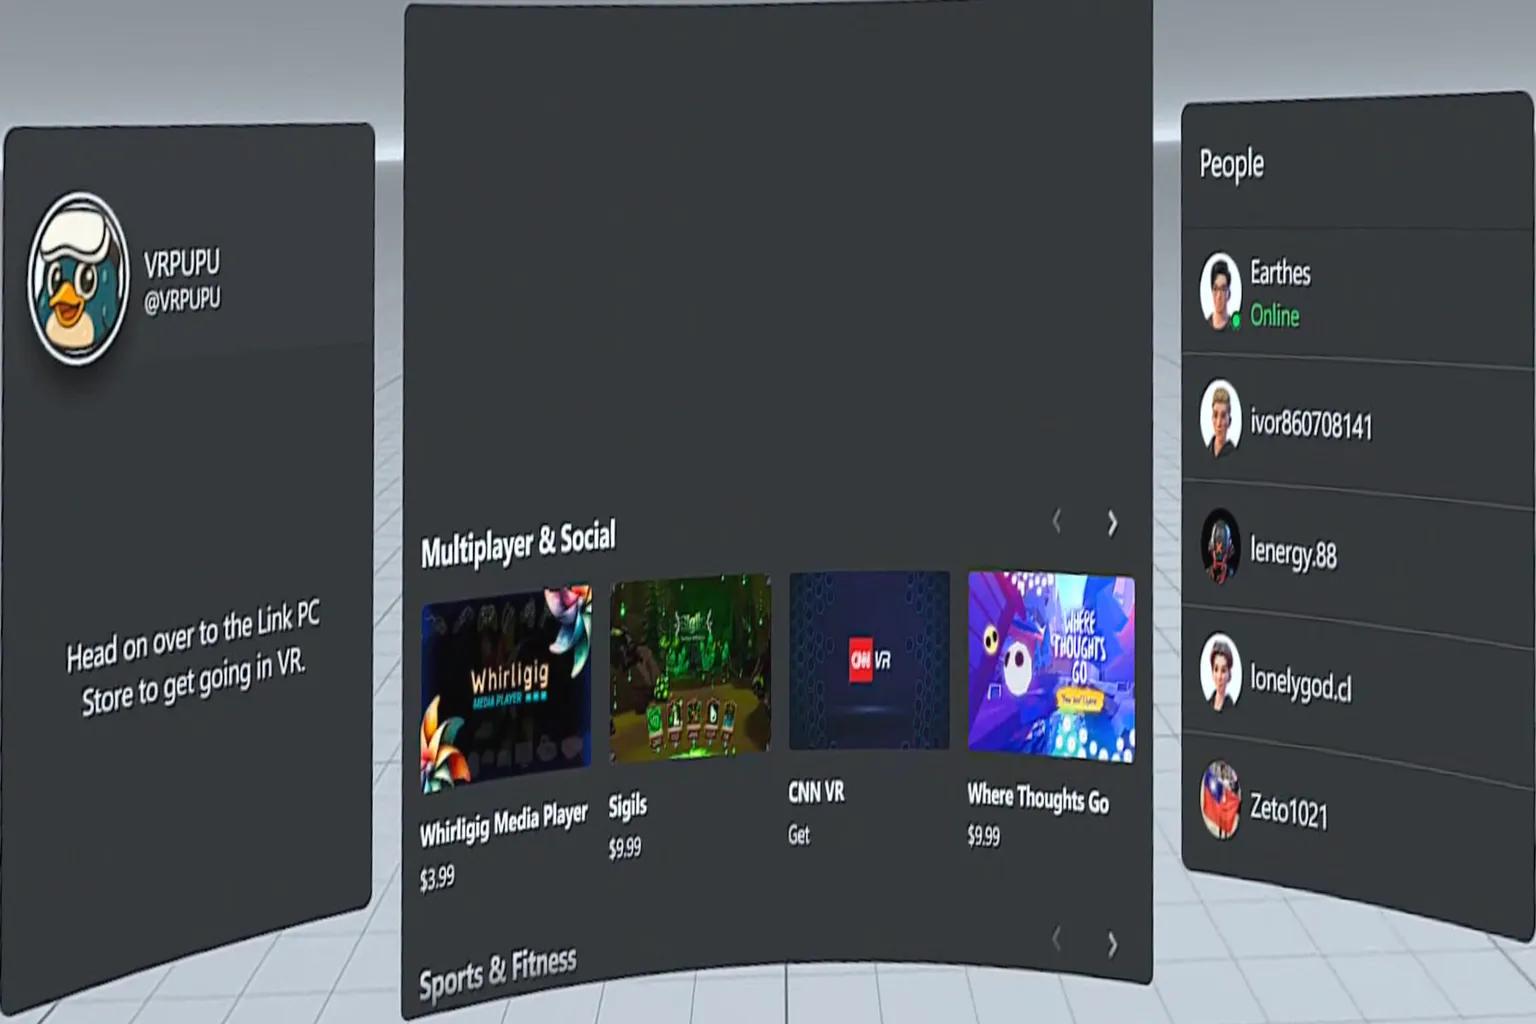
When you select Explore, you’ll enter the PC lobby screen. From here, you can browse and discover various games and social apps available on the PC platform.
Library
All Meta Quest PC games installed on your PC are listed here.
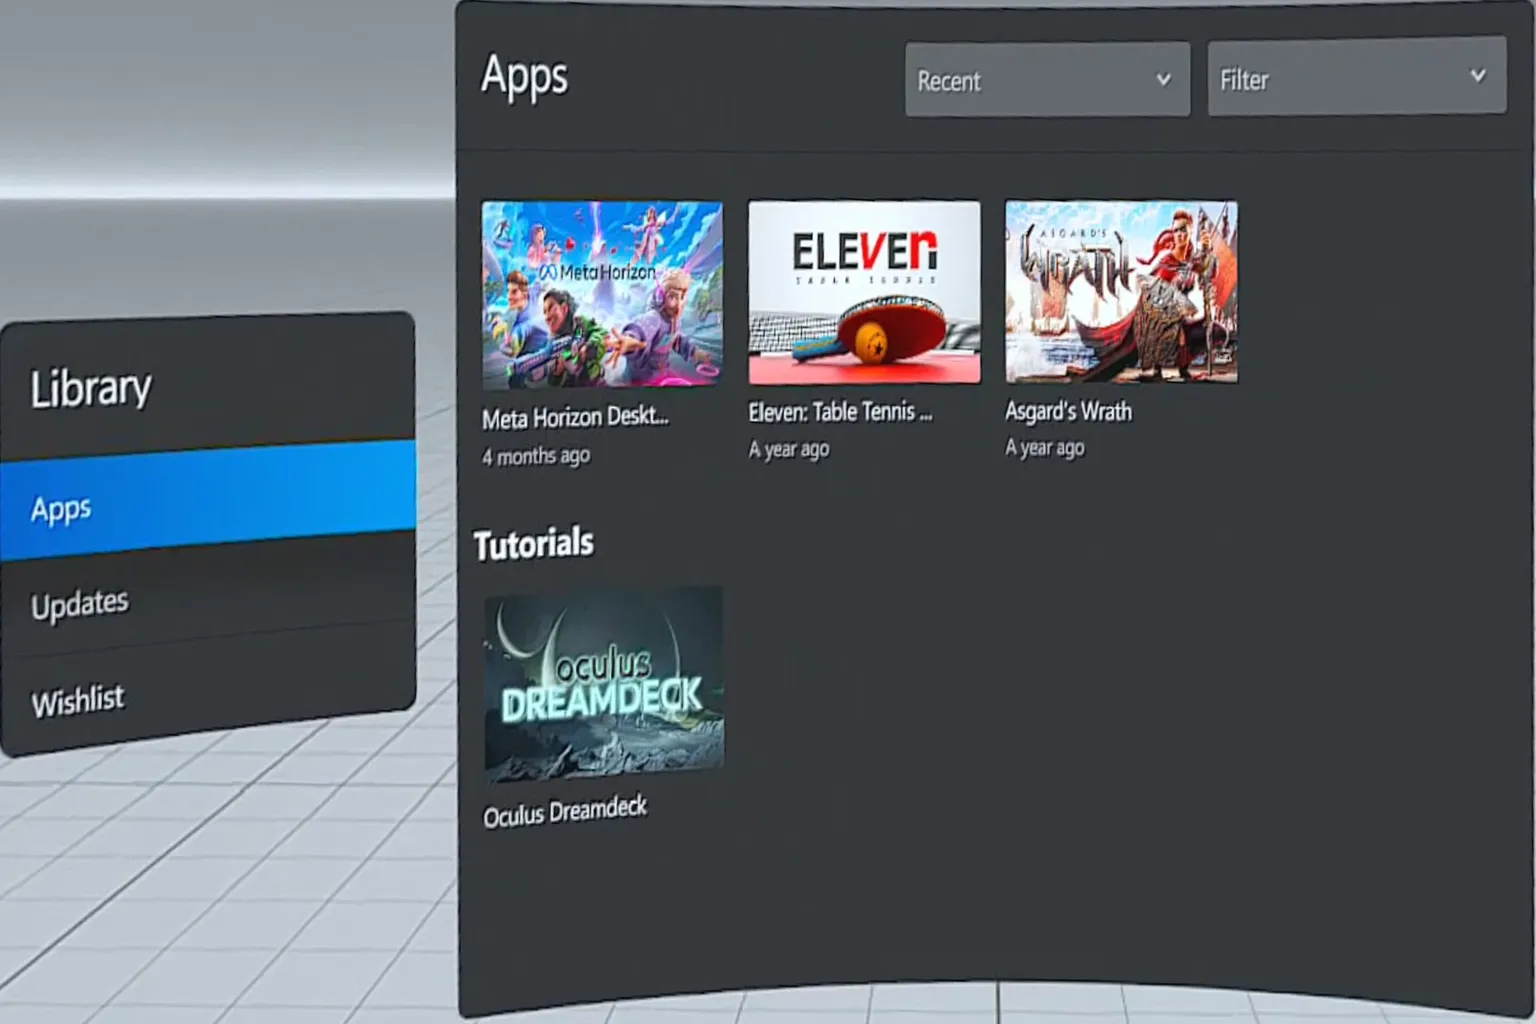
Just click a game to launch it directly in VR mode.
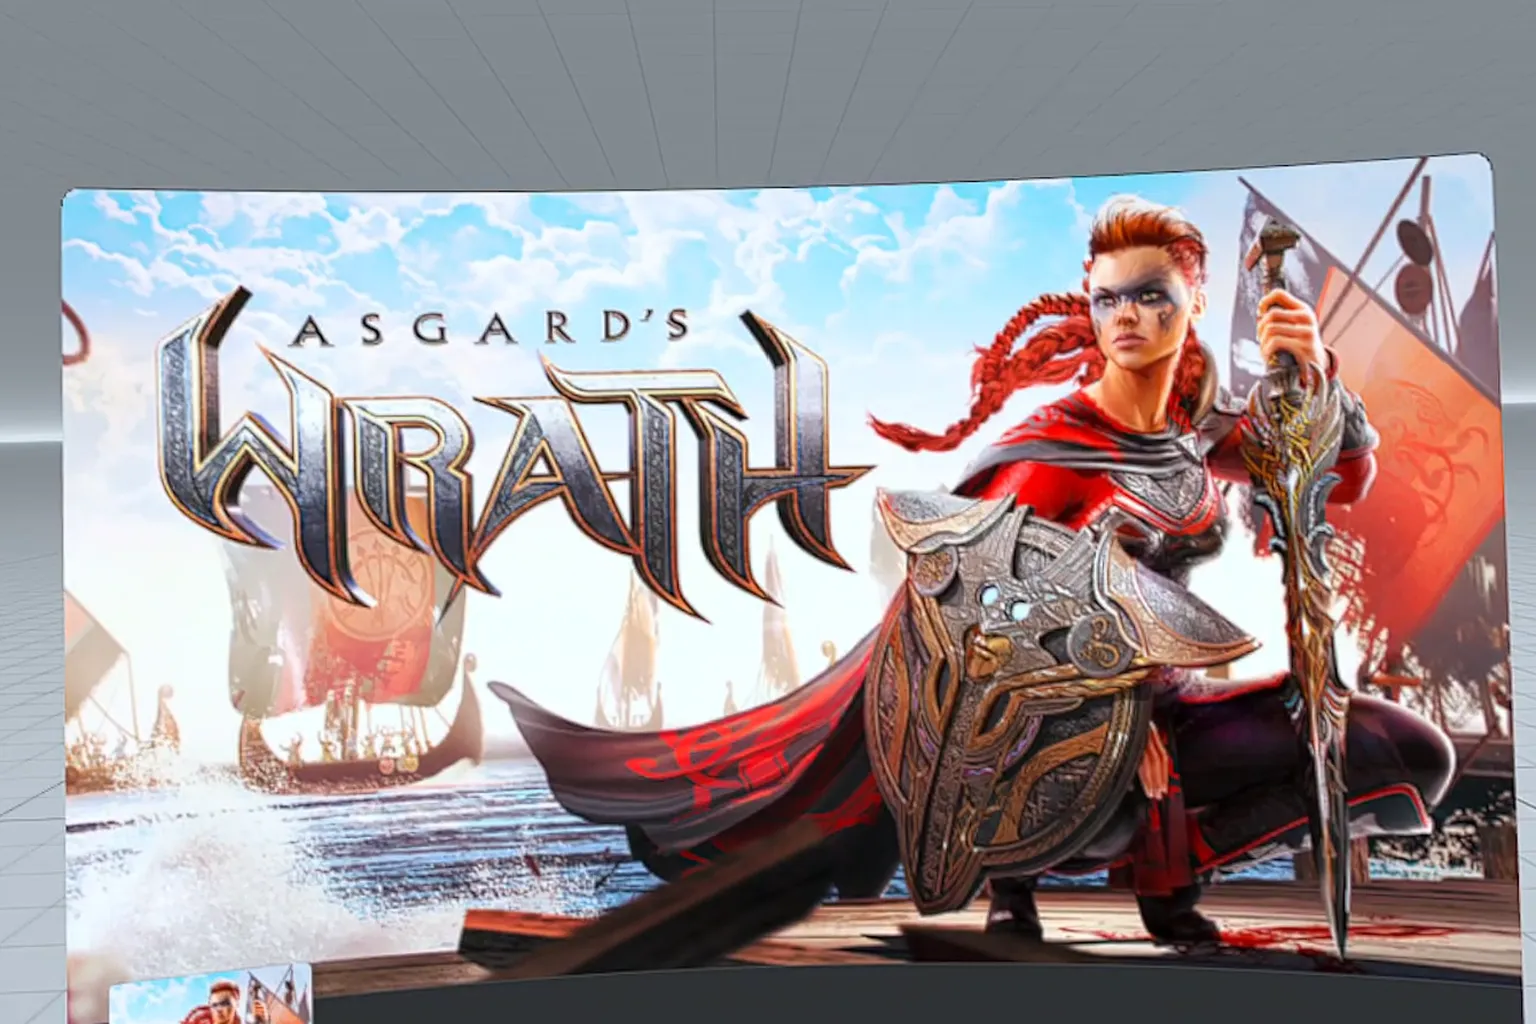
For Meta Quest PC titles, no special setup is required—once you start the game, it automatically runs in VR.

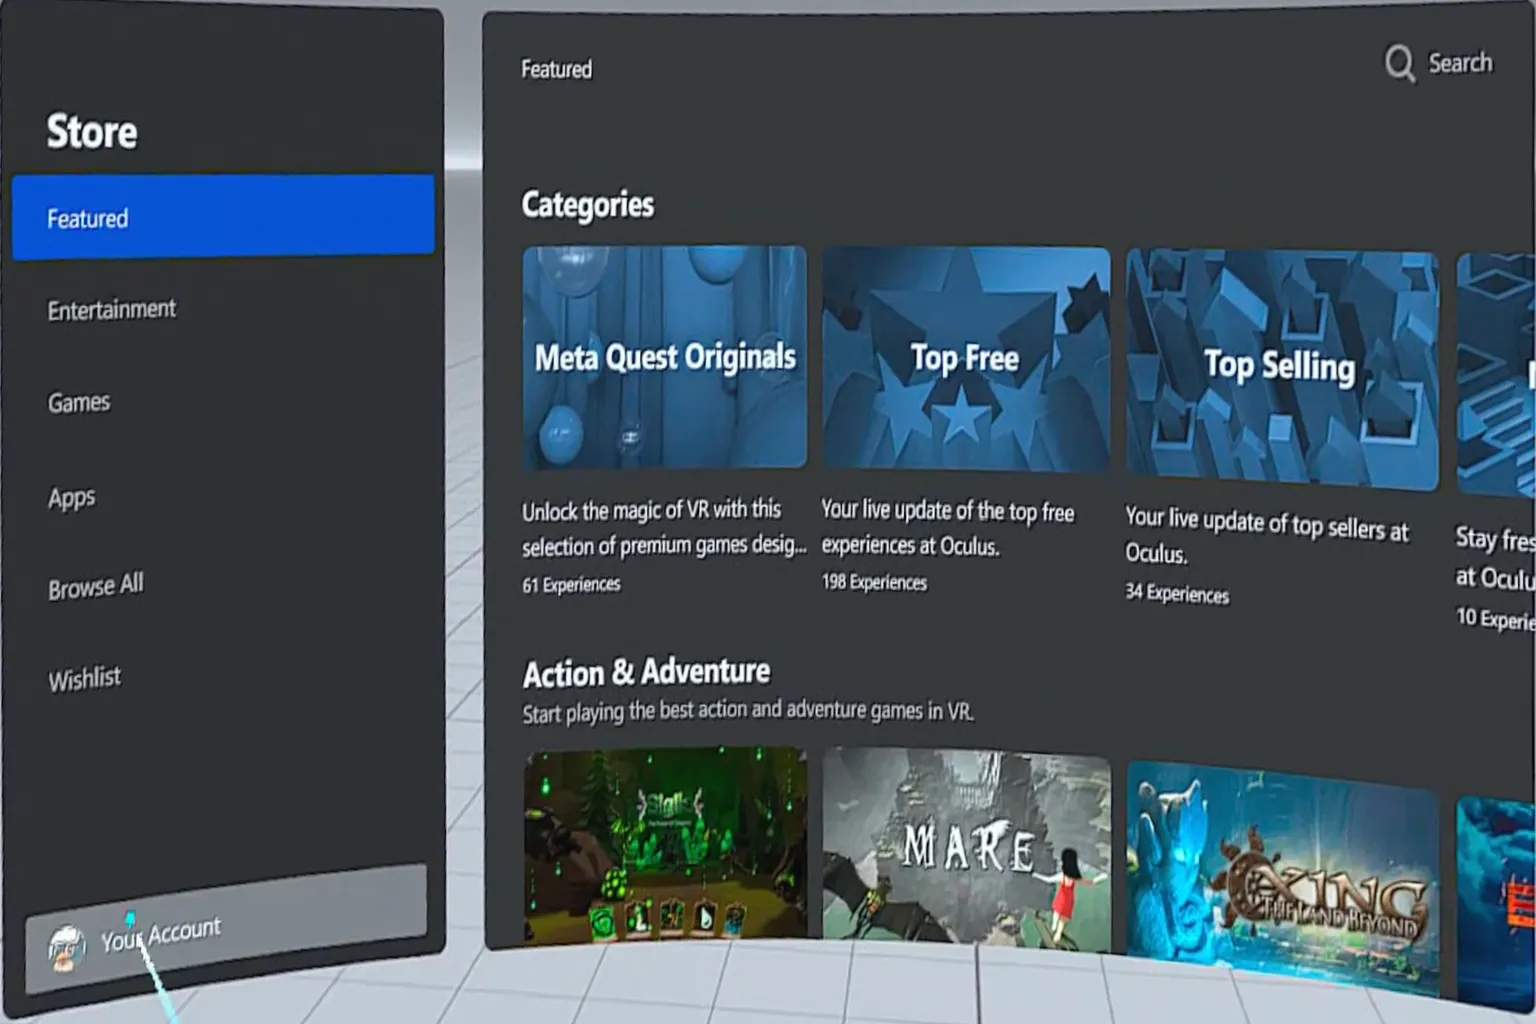
Store
From here, you can buy Meta PC VR games directly.
That said, it’s honestly easier and more comfortable to make purchases on a PC instead of inside the headset.
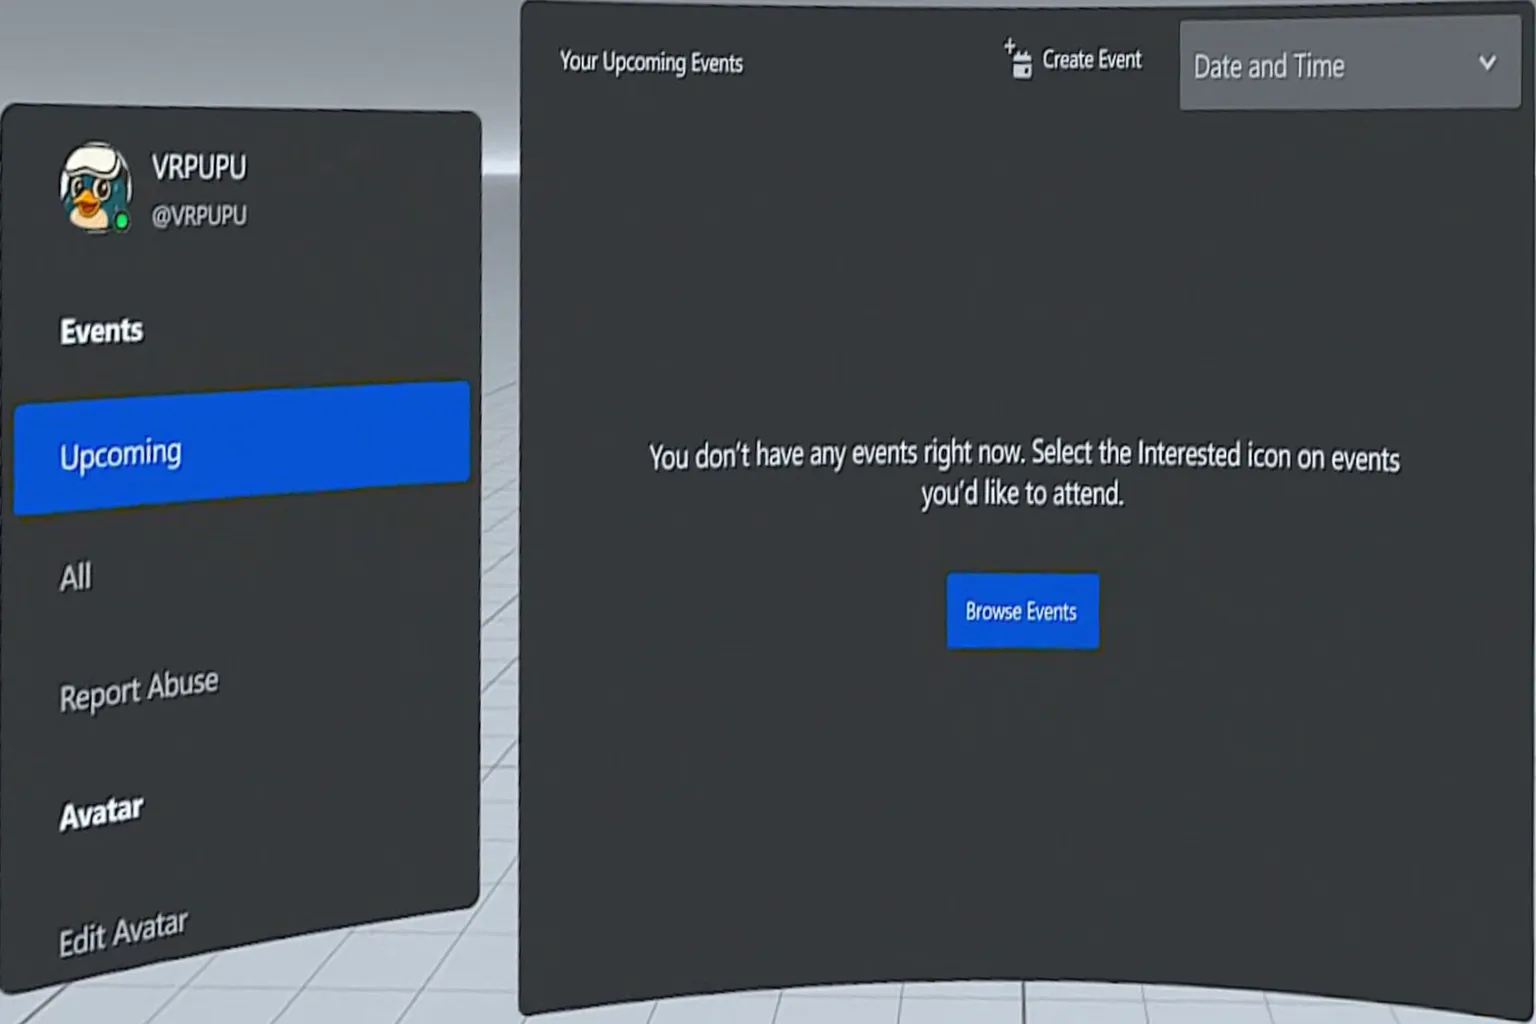
Social
This section lets you join events or report other players.
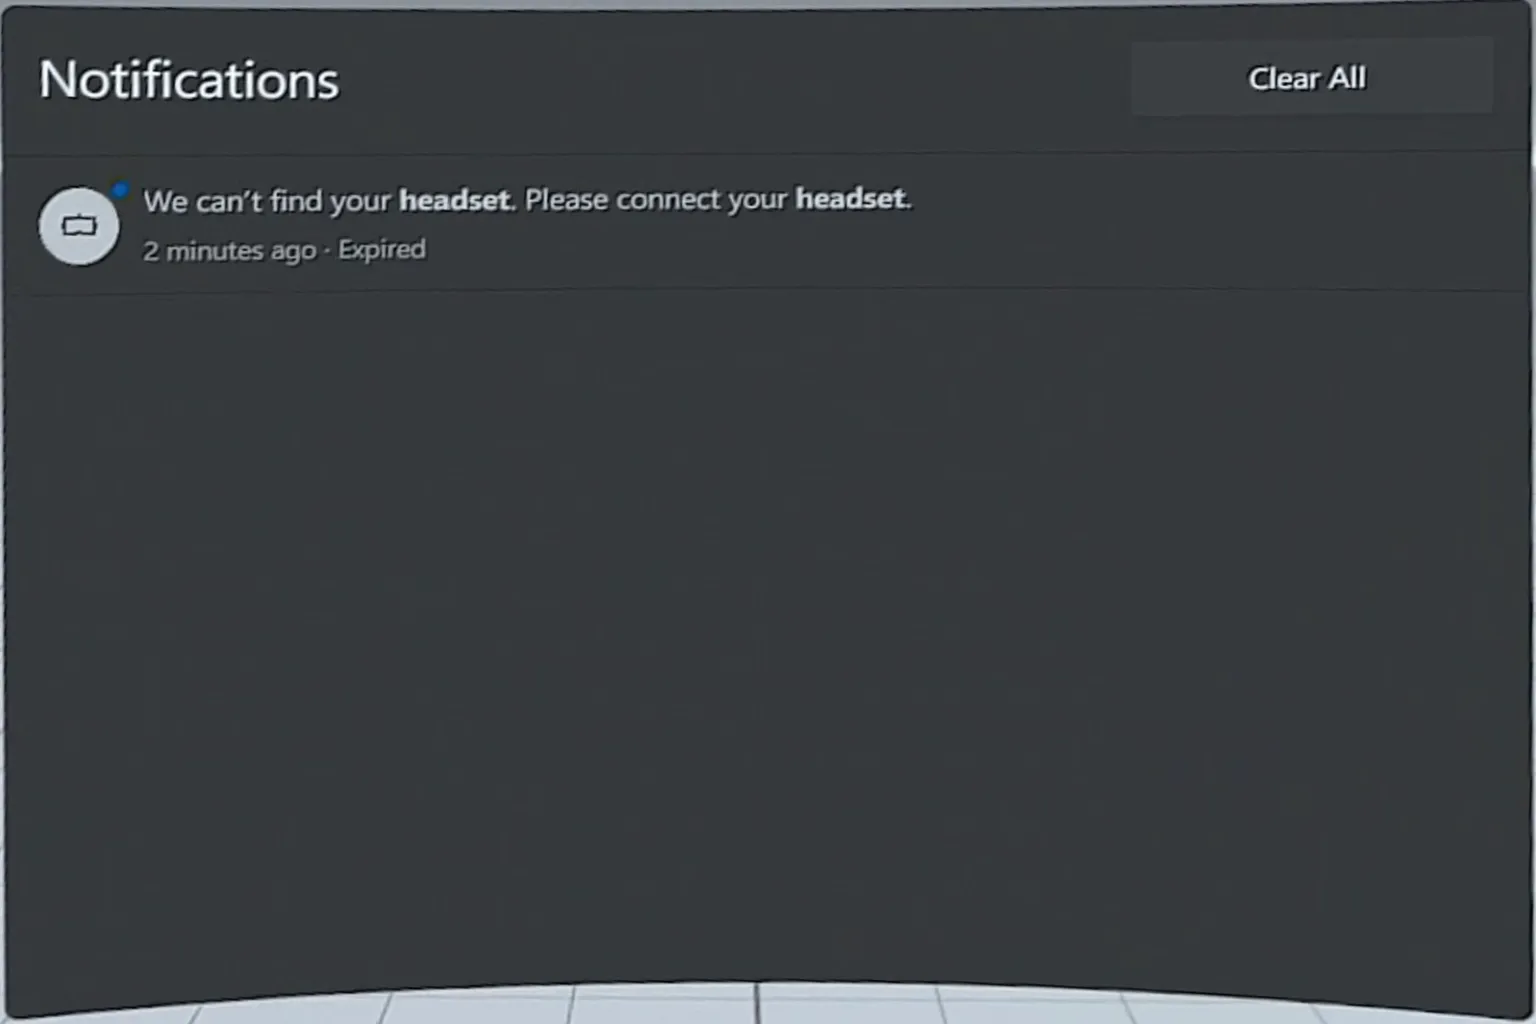
Notifications
Messages from friends and system announcements appear here.
Tap Clear All to remove all current notifications at once.
Settings
You can adjust headset-related options here, but honestly, there’s very little worth changing. In most cases, it’s best to leave these settings as they are.
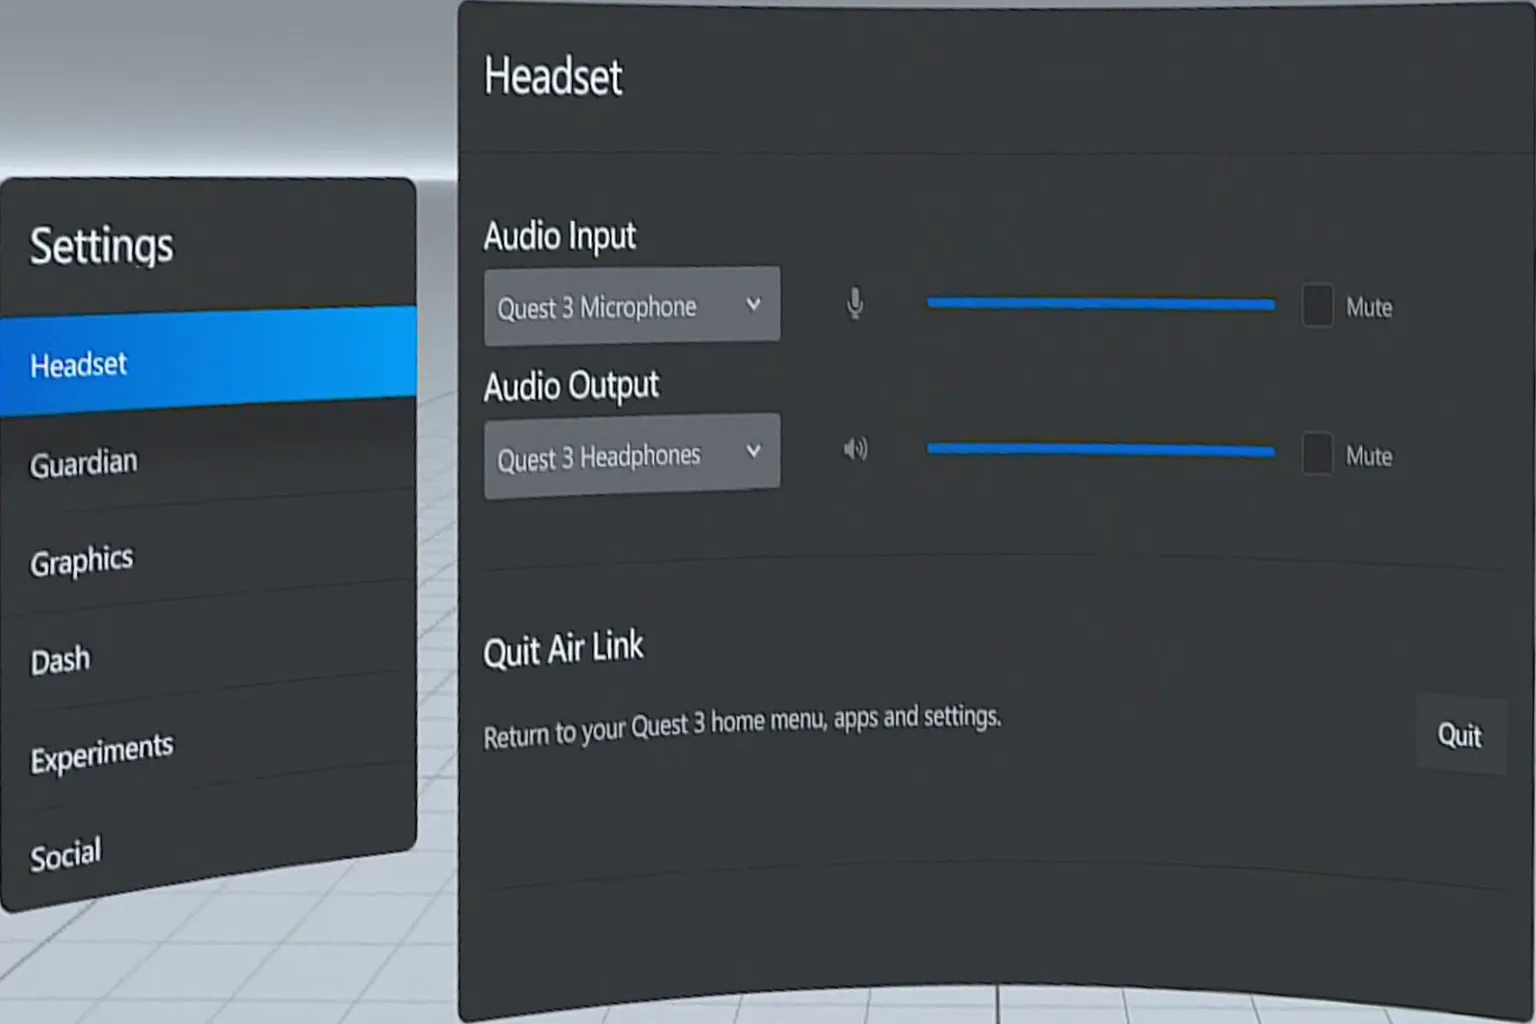
Headset
Switch the audio input/output device. You can choose between the Quest headset itself or the PC’s speakers.
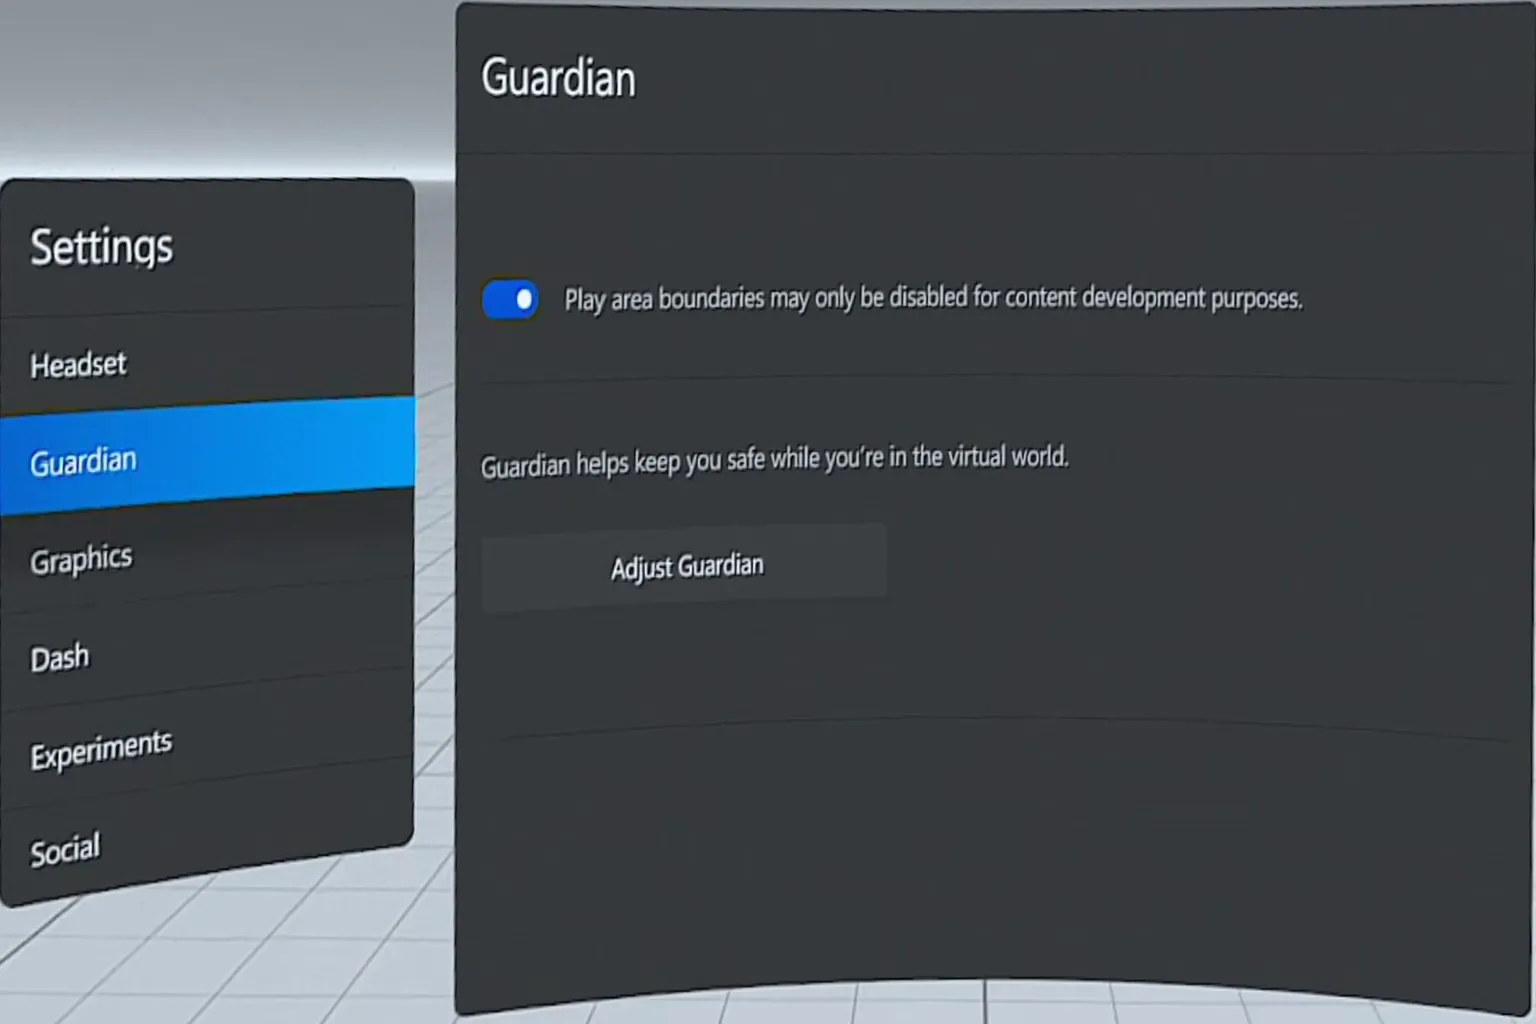
Guardian
This is where you set up the VR play boundary. There are three types:
- Stationary boundary (standing play)
- Room-scale boundary with a defined area
- Boundary created by scanning the room
Select Adjust Guardian to enter the setup screen.
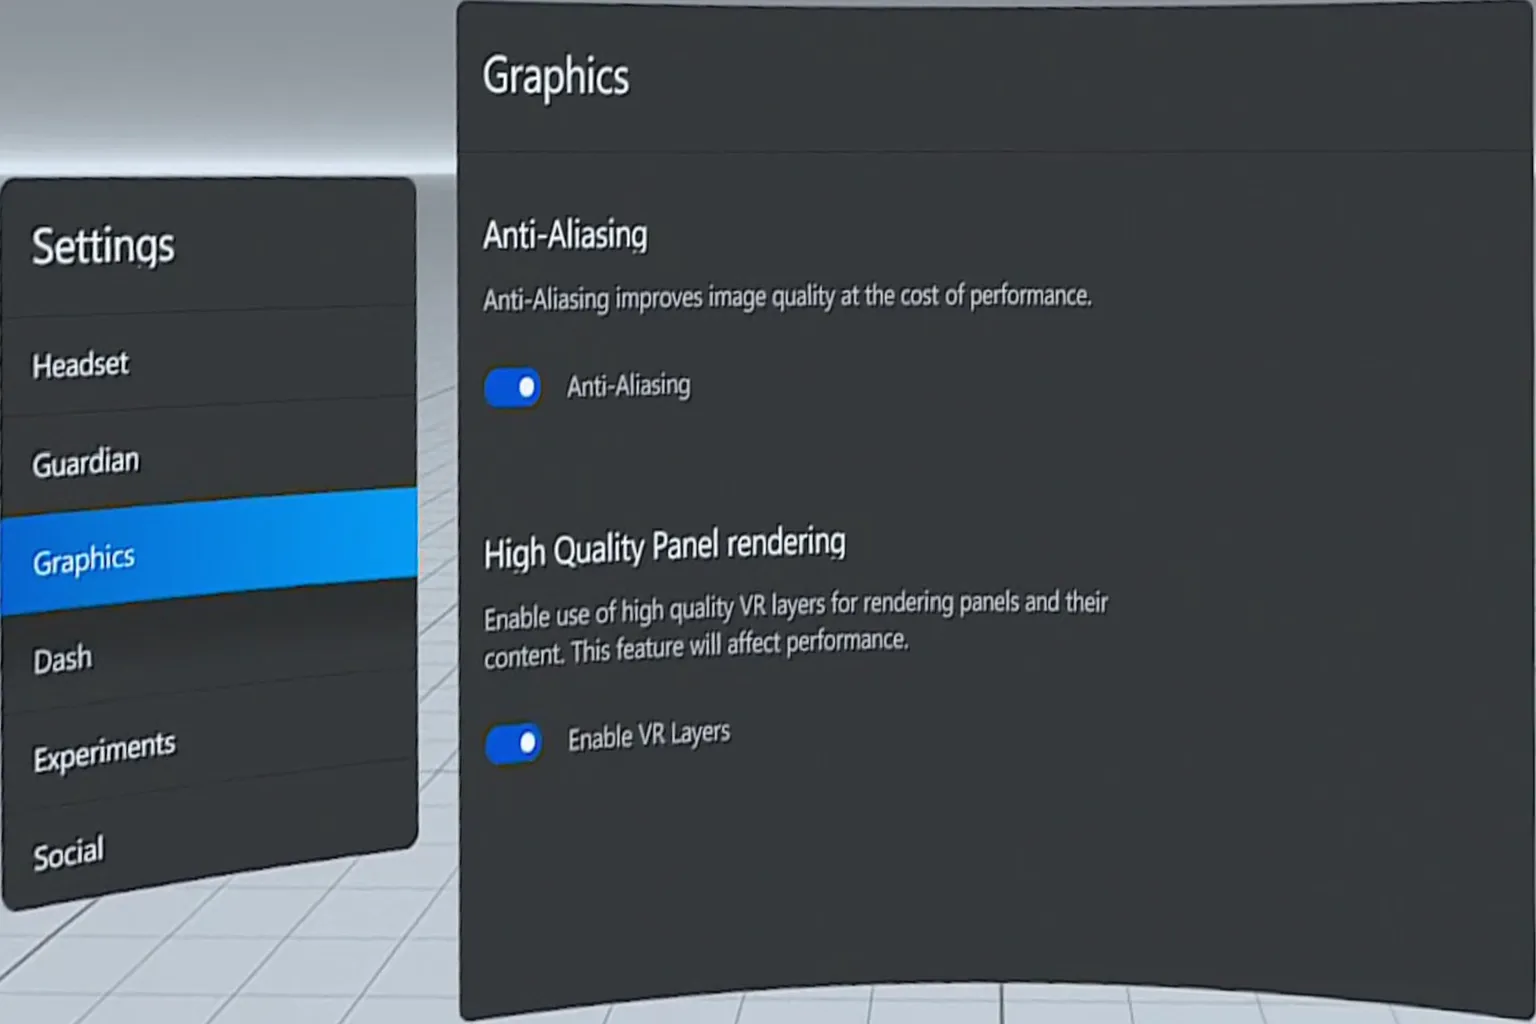
Display
There are options for anti-aliasing and high-quality VR layers, but in reality, these settings can’t be changed and can’t be turned off.
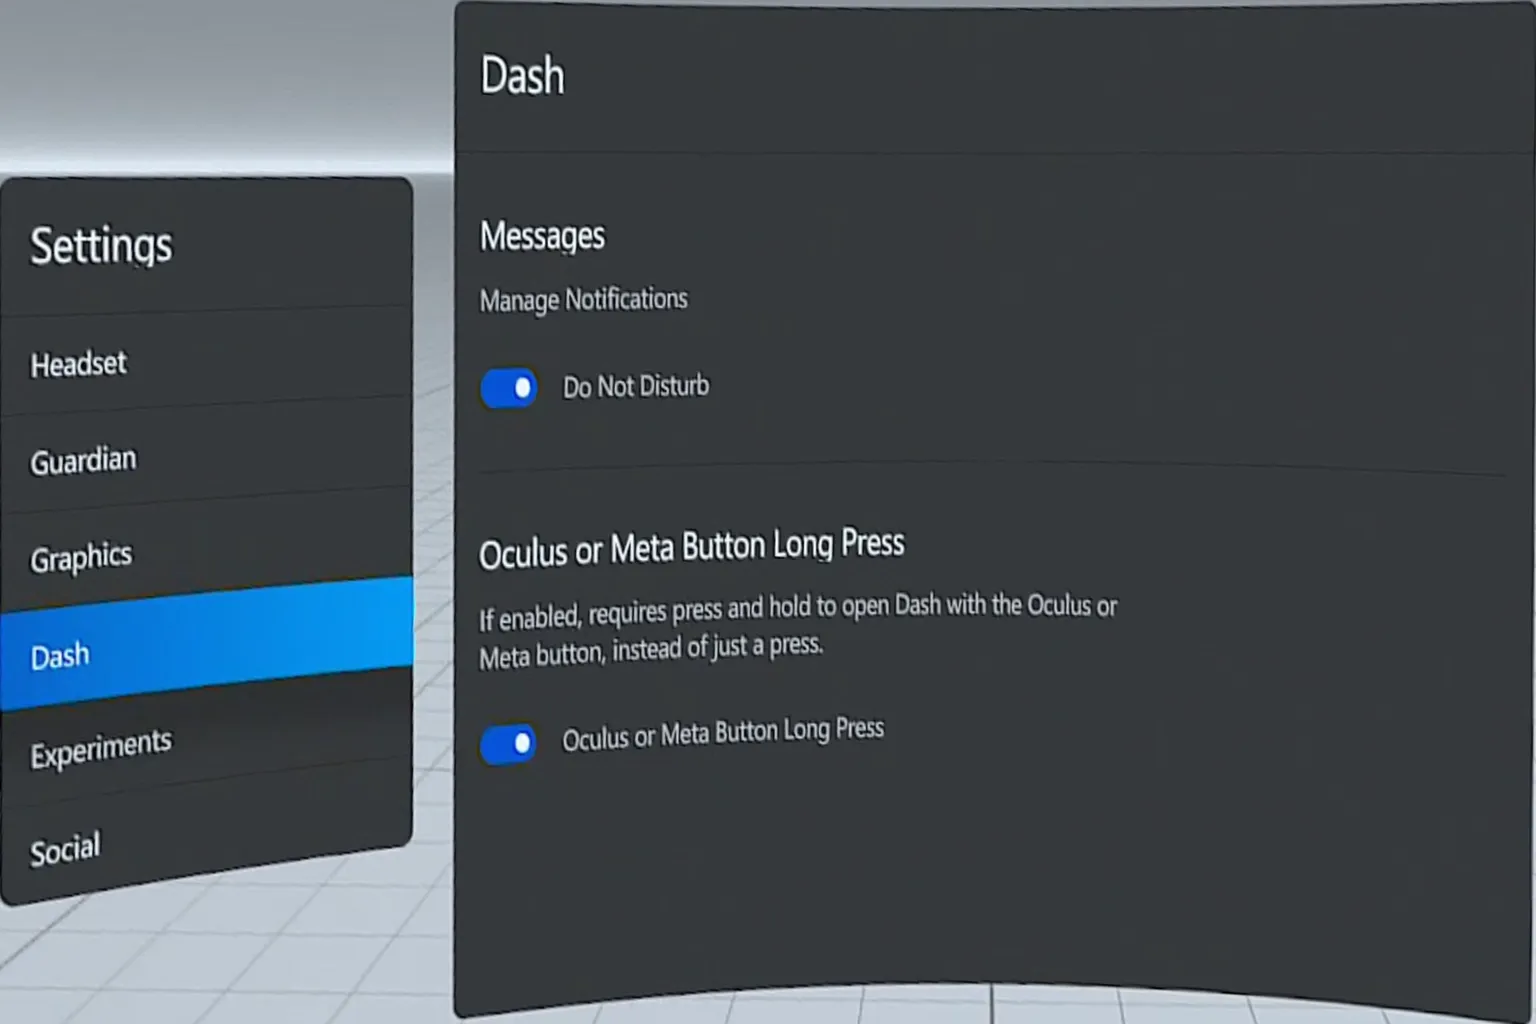
Dash
Turning on Do Not Disturb hides notification messages.
Enabling Long-press Oculus/Meta button requires holding the left menu button for about one second before it responds, which helps prevent accidental presses.
Experimentals
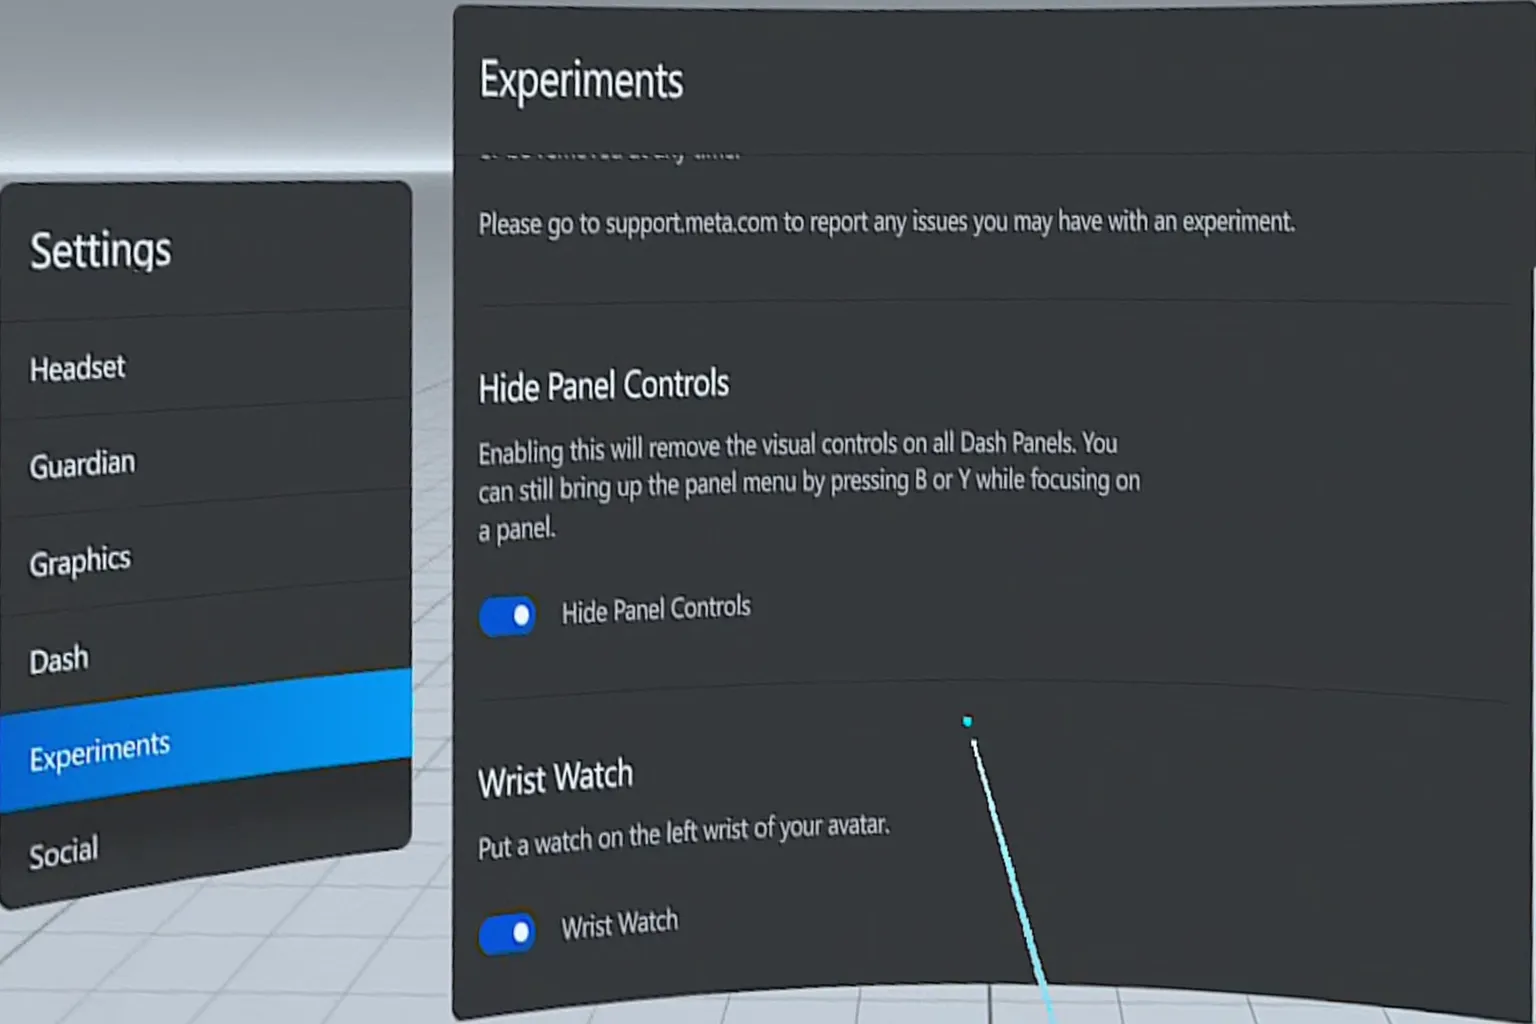
Here you can hide the panel control buttons, but honestly, it’s not very useful.
When this option is off, pin and minimize buttons appear at the bottom of the panel.
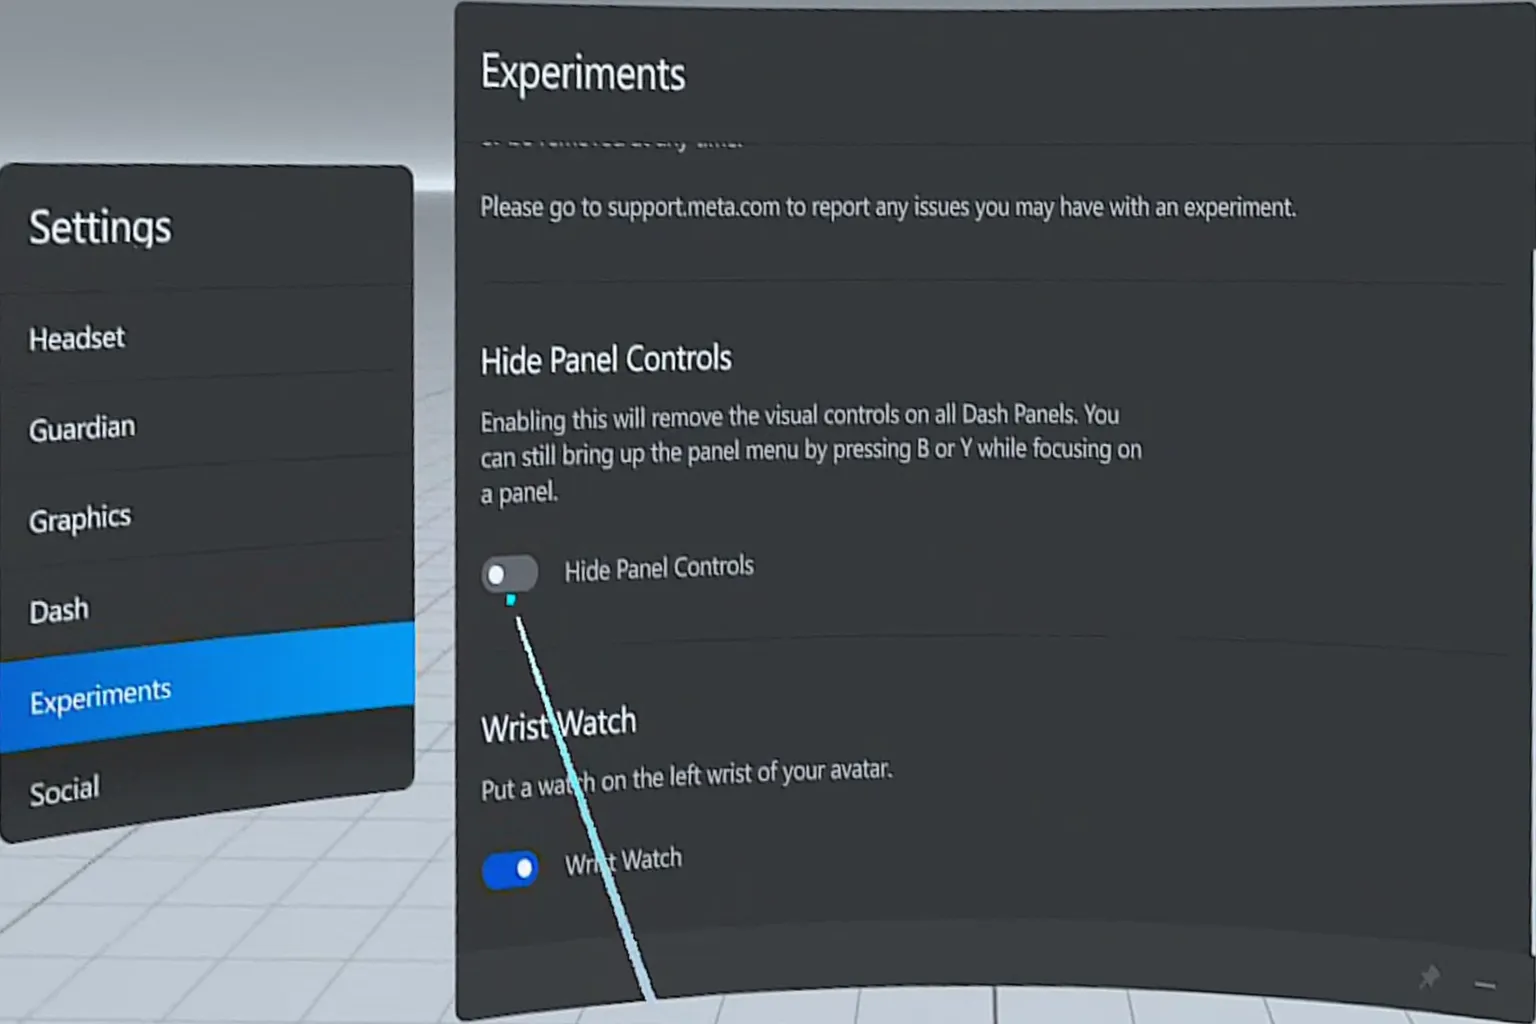
Turning Hide panel controls on removes those pin and minimize buttons from the bottom.
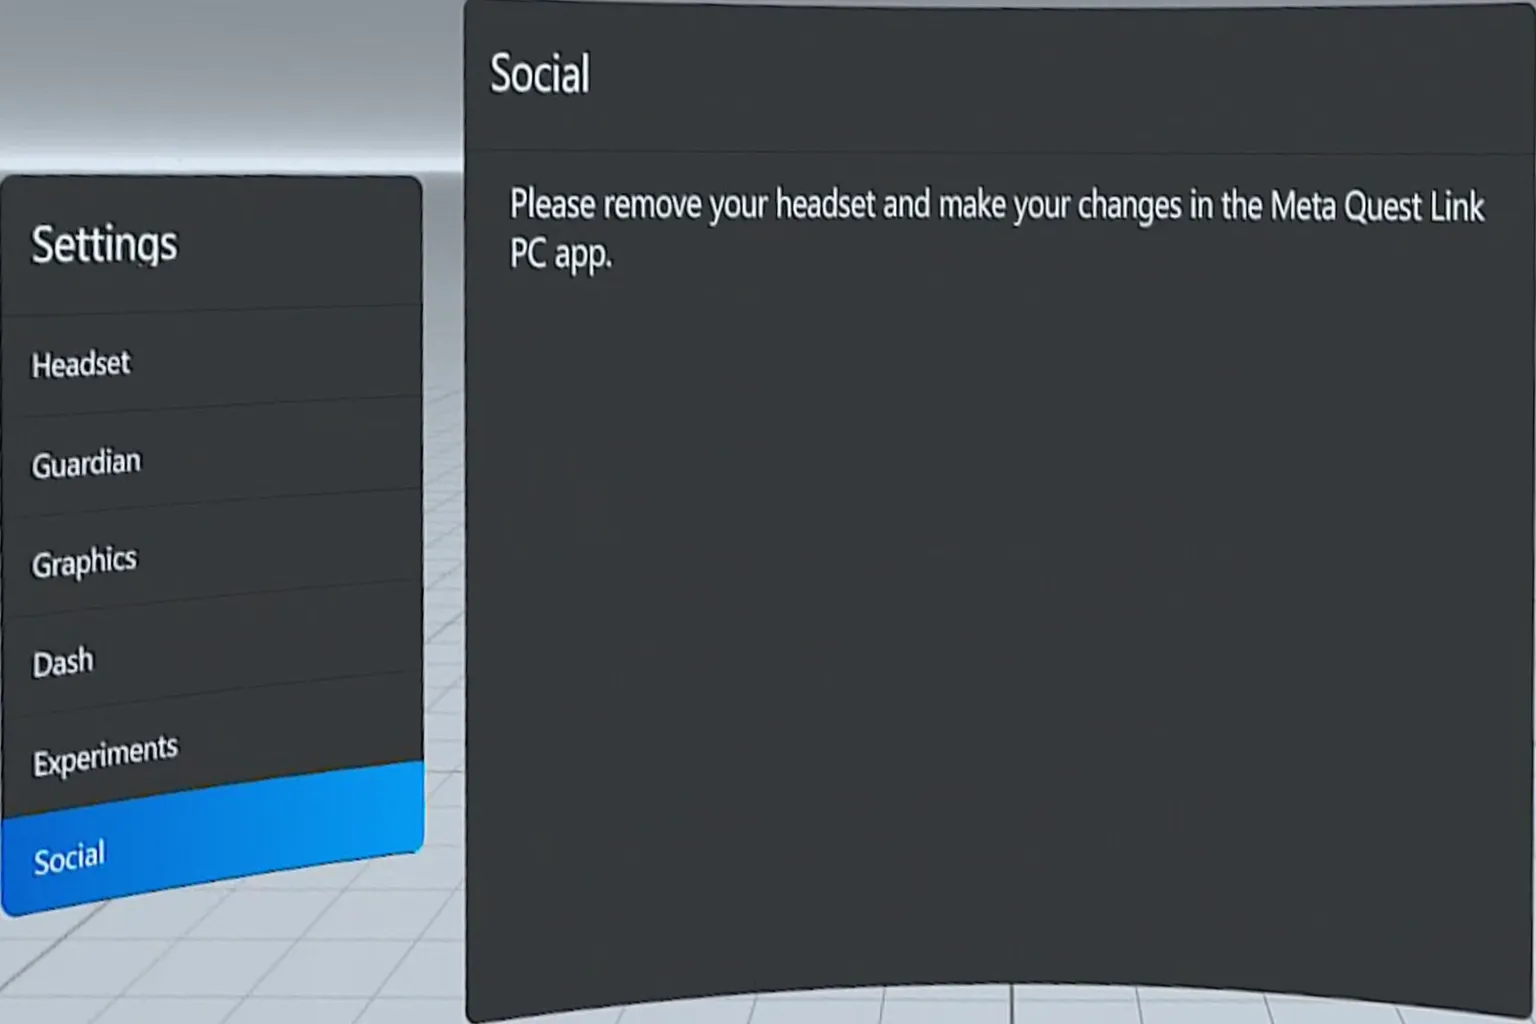
Social
You can’t control anything from here. These options are only available on the PC side.
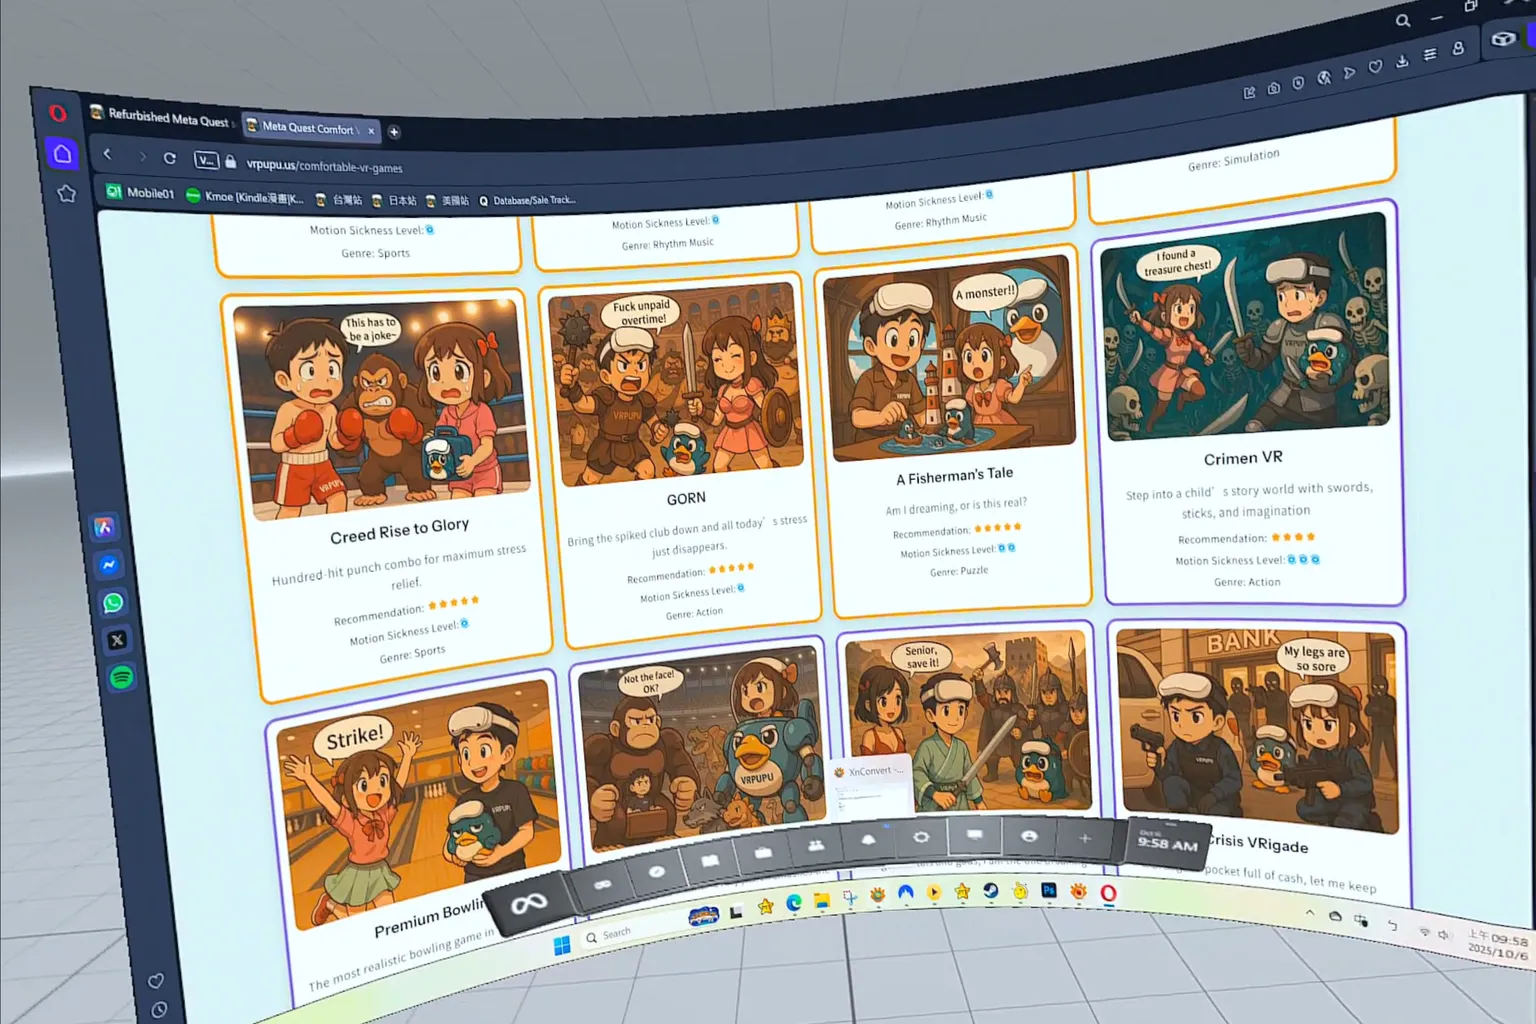
Desktop
This lets you view and control your PC’s desktop, but to be frank, it’s not very comfortable.
Web browsing isn’t very smooth, and the overall viewpoint feels awkward, so there’s rarely a good reason to use it.
Avatar Editor
This feature is used to edit your avatar.
When you press Open editor in brower, you’ll be taken to the avatar selection screen, where you can create and customize your avatar.
Add Desktop Panel
You can register Windows apps to the control panel and launch them quickly with a single click.
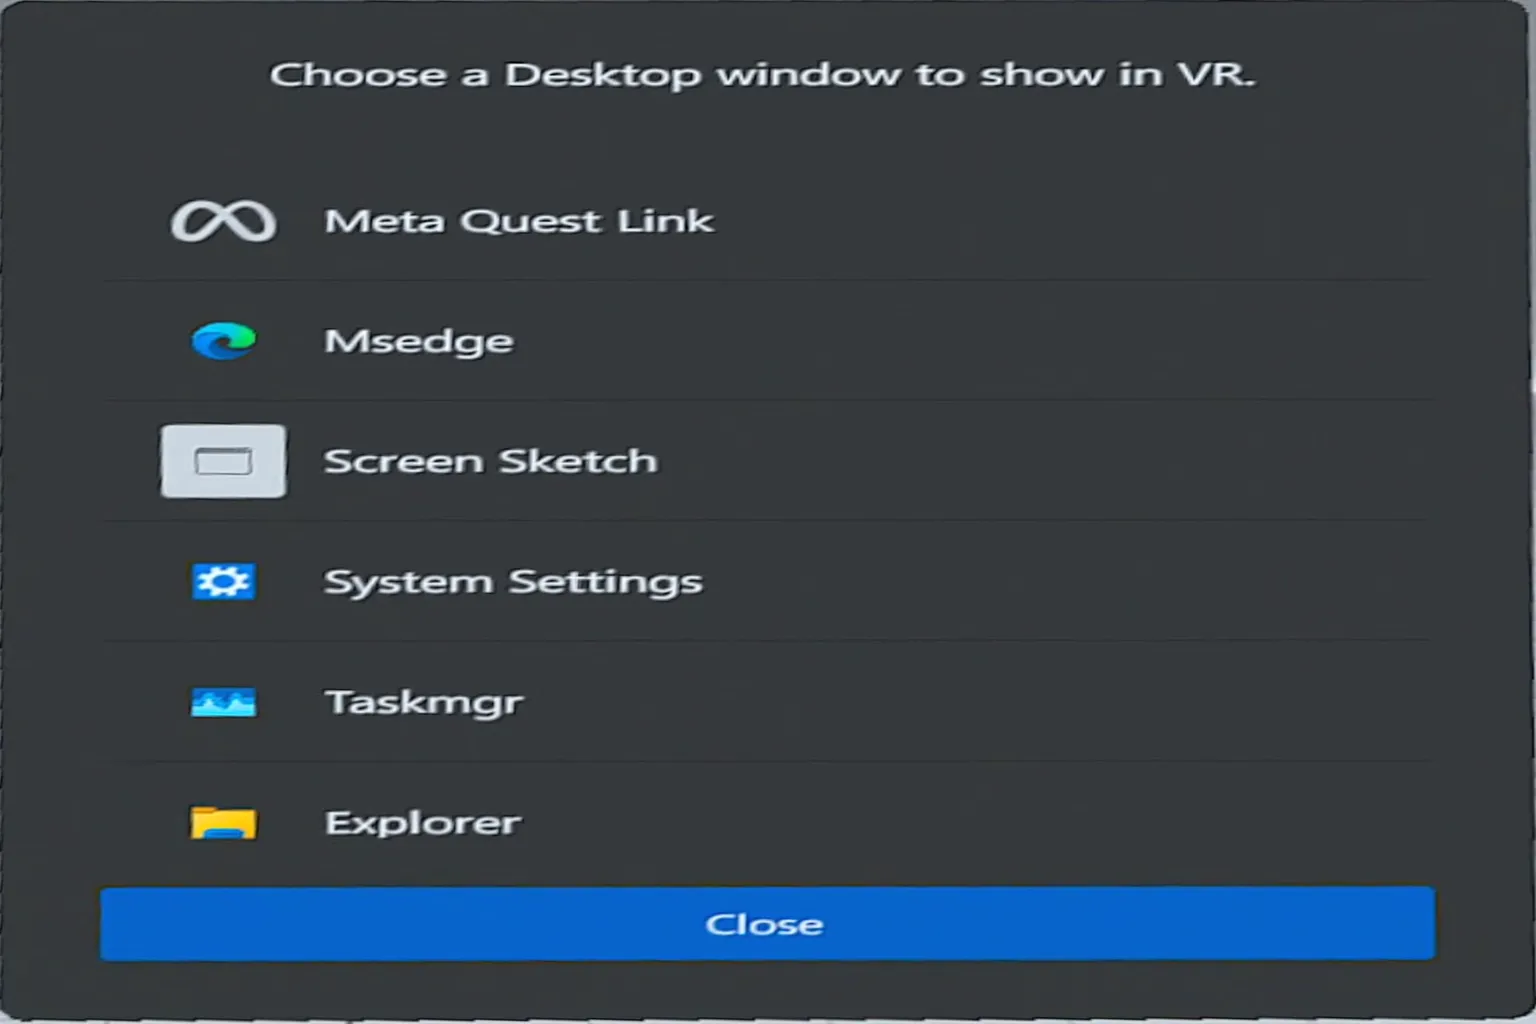
For example, if you add Opera as a shortcut, you can open it directly from the control panel.
That said, web browsing via Air Link has a pretty awkward viewing experience, so this feature isn’t really recommended.
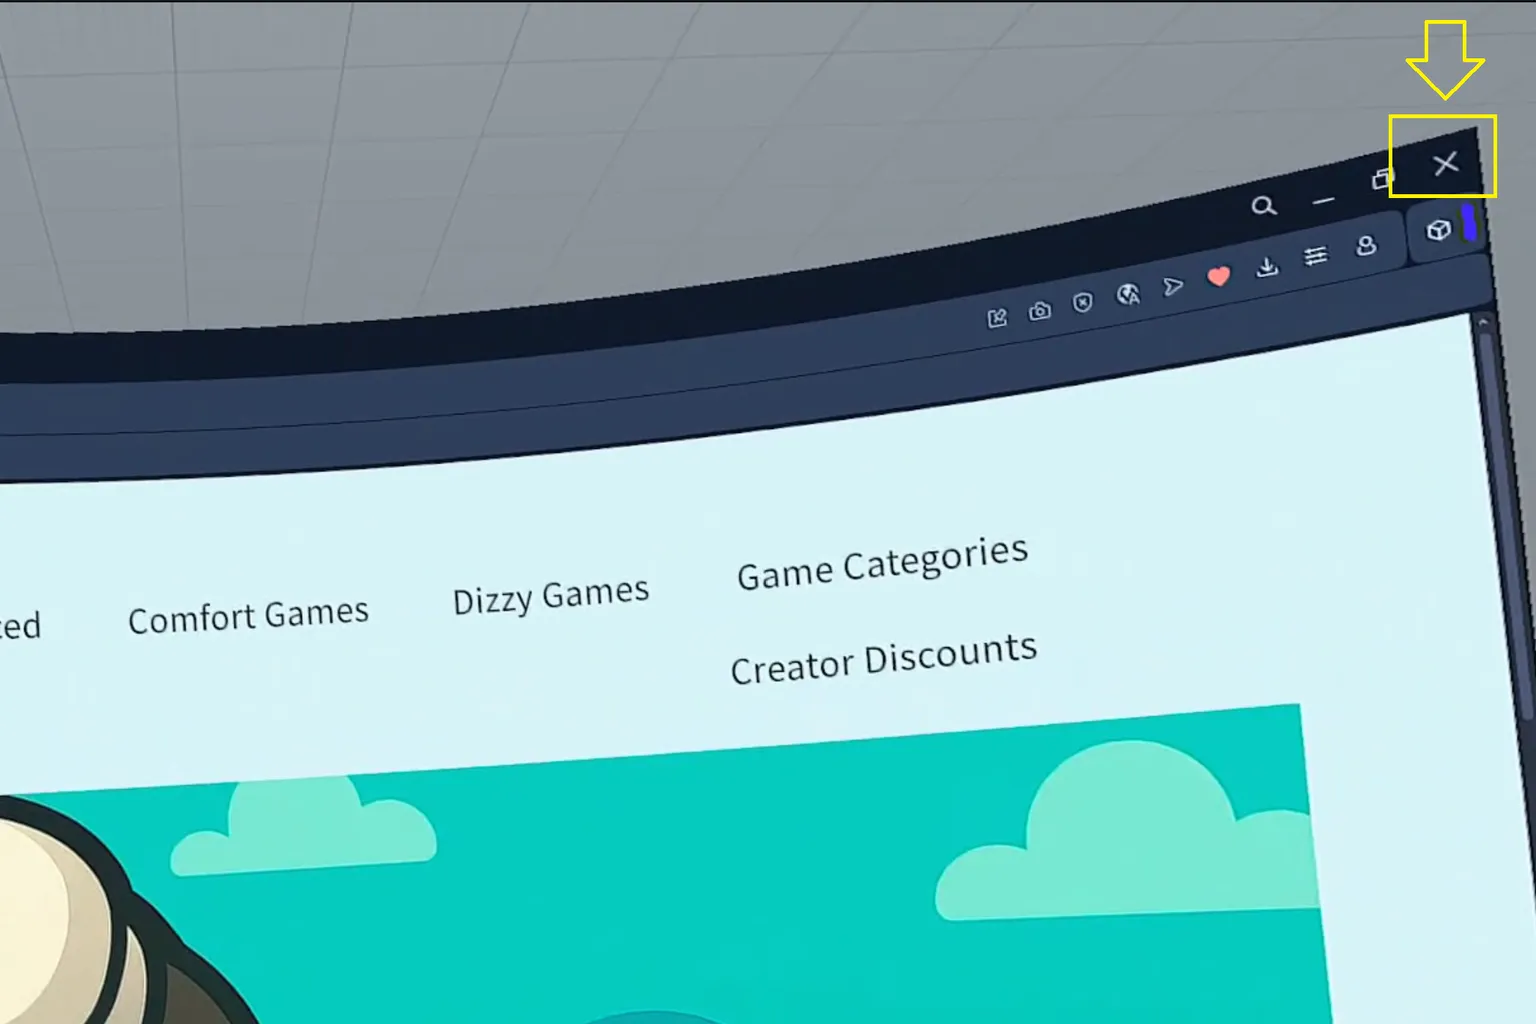
If you want to remove a shortcut, just launch that app and click the ✕ button in the top-right corner.
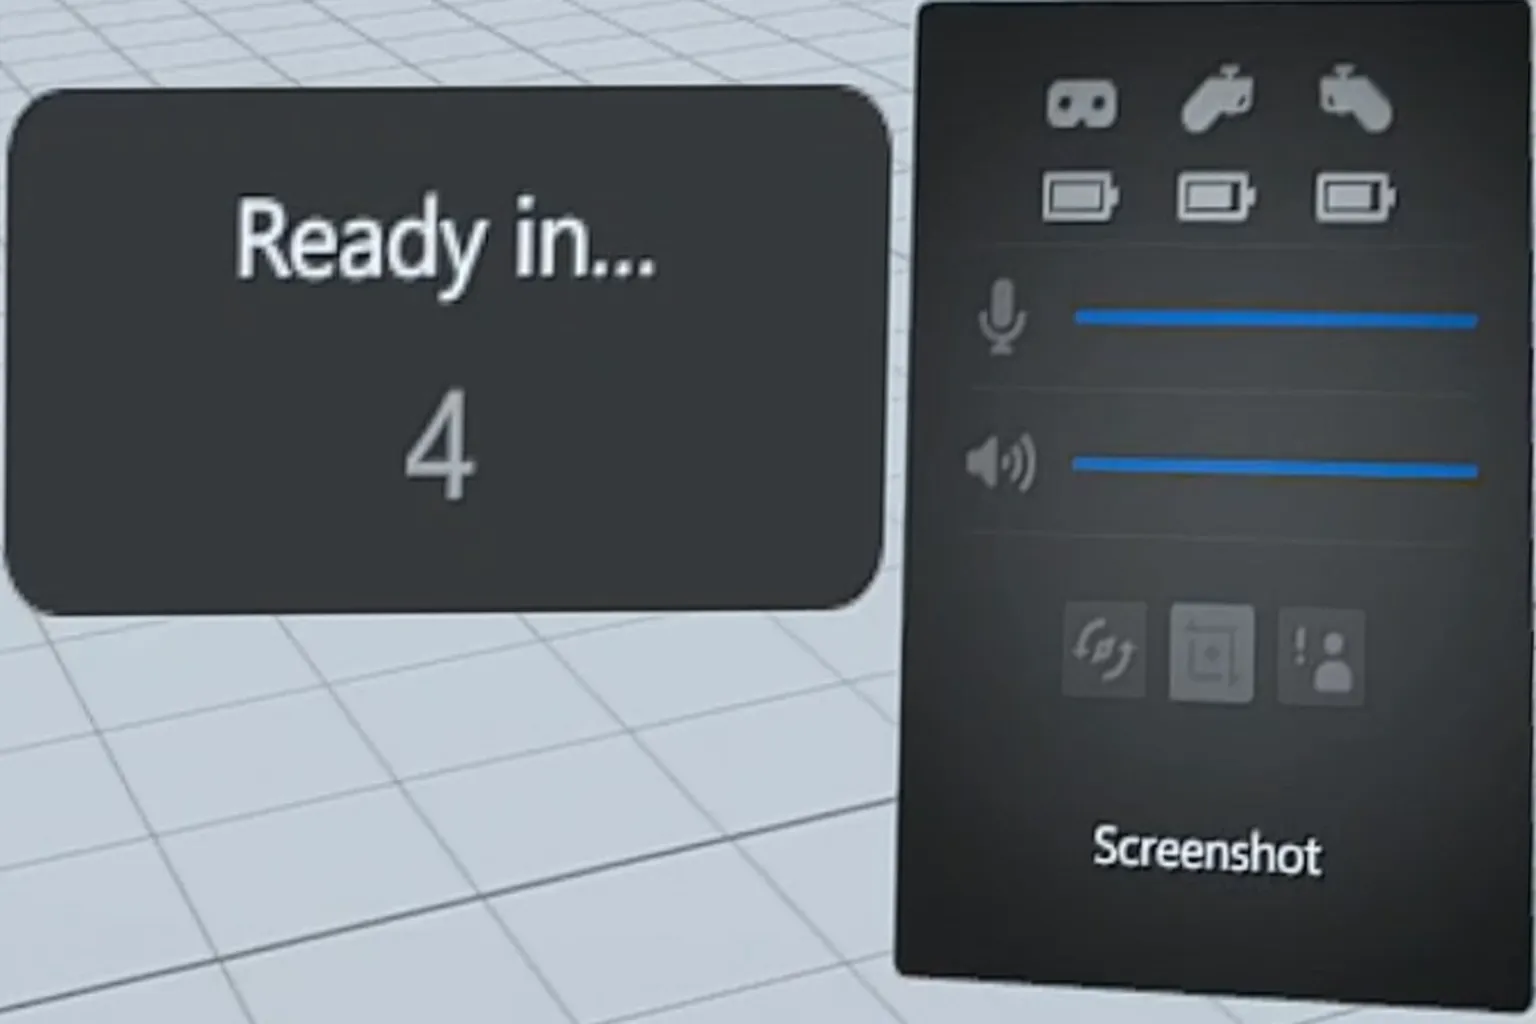
Quick Area
In the quick area on the right side of the control panel, you can check the battery levels of the headset and controllers, and adjust the volume.
Below that are three quick actions:
Left button: Reset view. This recenters your view to the front.
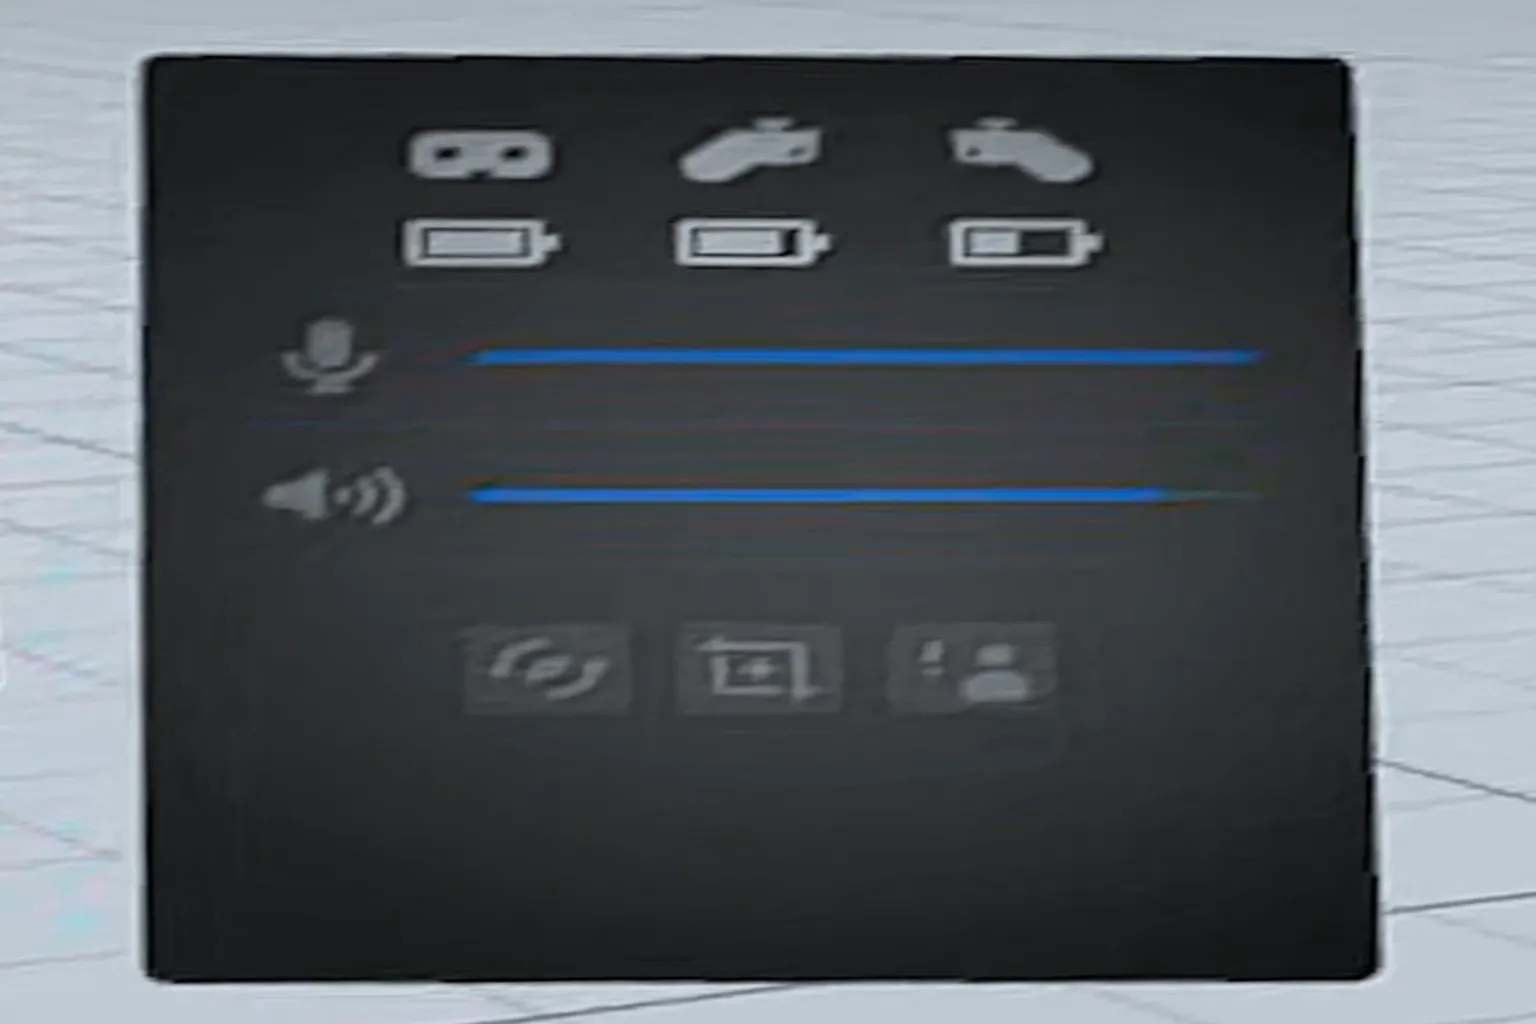
Middle button: Screenshot. There’s a 5-second delay after pressing it, which makes it not very practical.
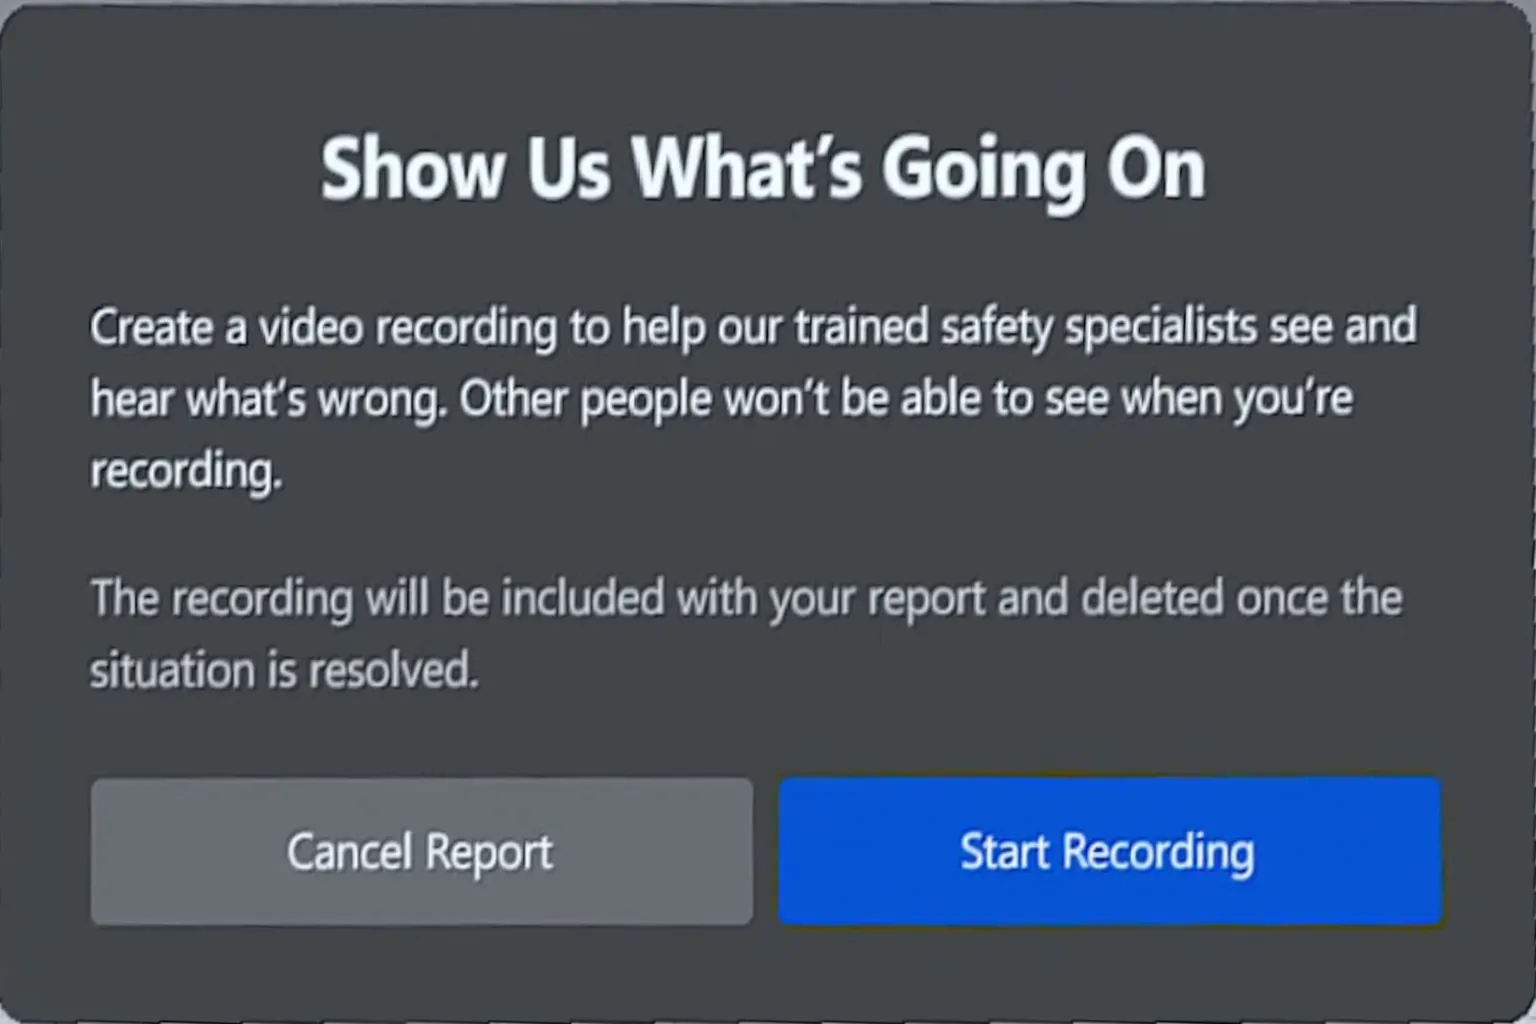
Right button: Report. This lets you report inappropriate behavior by other players.
How to Play Non-Meta PC Games
By default, Air Link only lets you play PC VR games purchased from the Meta Store. But in reality, most players buy their games on Steam, right?
Here, I’ll show you how to use Air Link to play games from other platforms.
Before playing, you need to add games from other platforms to the Horizon Link library. If you don’t, you won’t be able to launch them from the headset. Here’s how to do it (using Steam as an example):
Note: Since February 2026, after the Meta Horizon Link update, trying to add non-Meta games can trigger the OVR53744741 error.
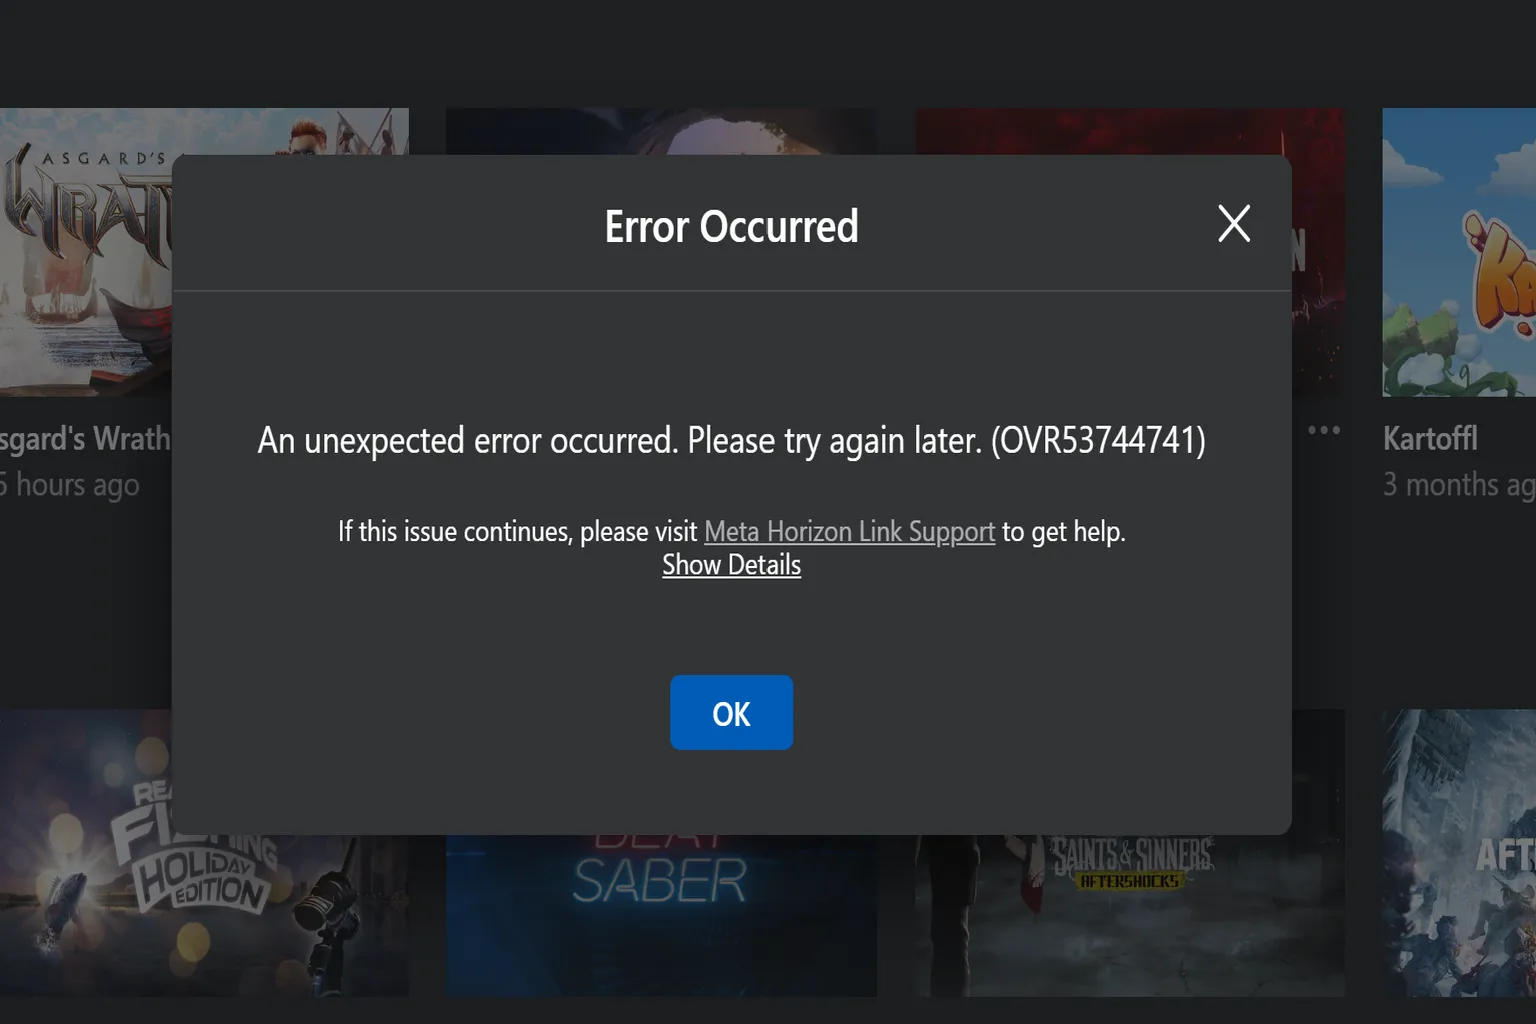
To fix this issue, update Meta Horizon Link to version 205.0.0.103.543 or later.
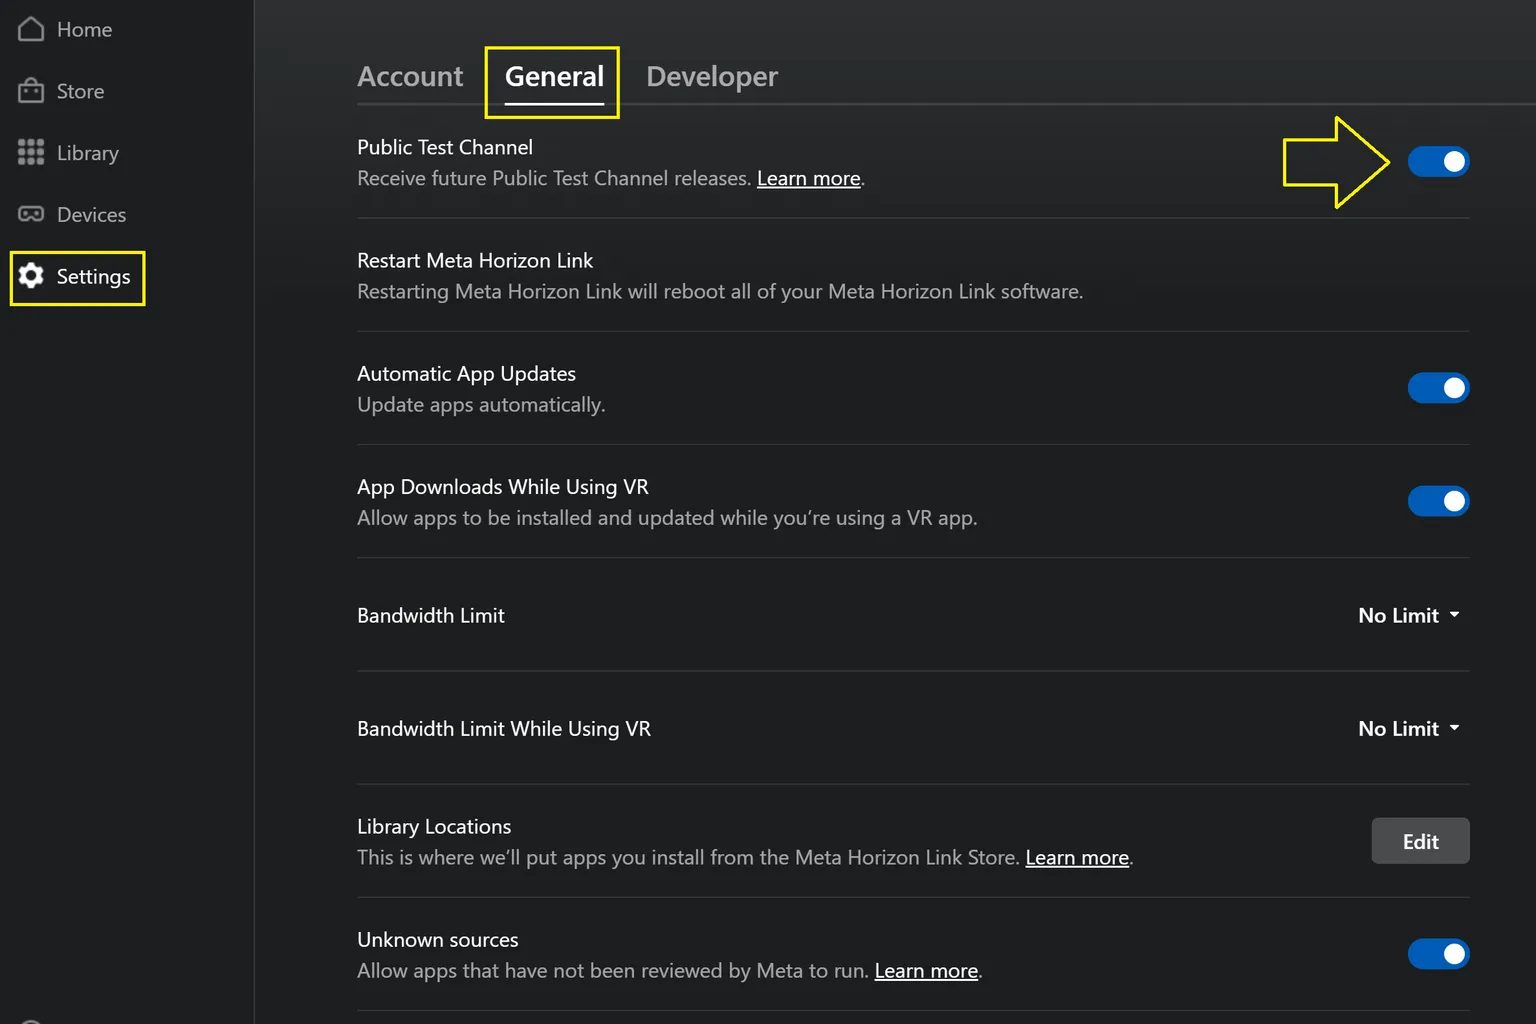
Since this version is still in testing, go to Settings → General and enable Public Test Channel. You can then download and install the newer version.
If that sounds like too much trouble, you can also use Virtual Desktop or Steam Link to play non-Meta PC games.
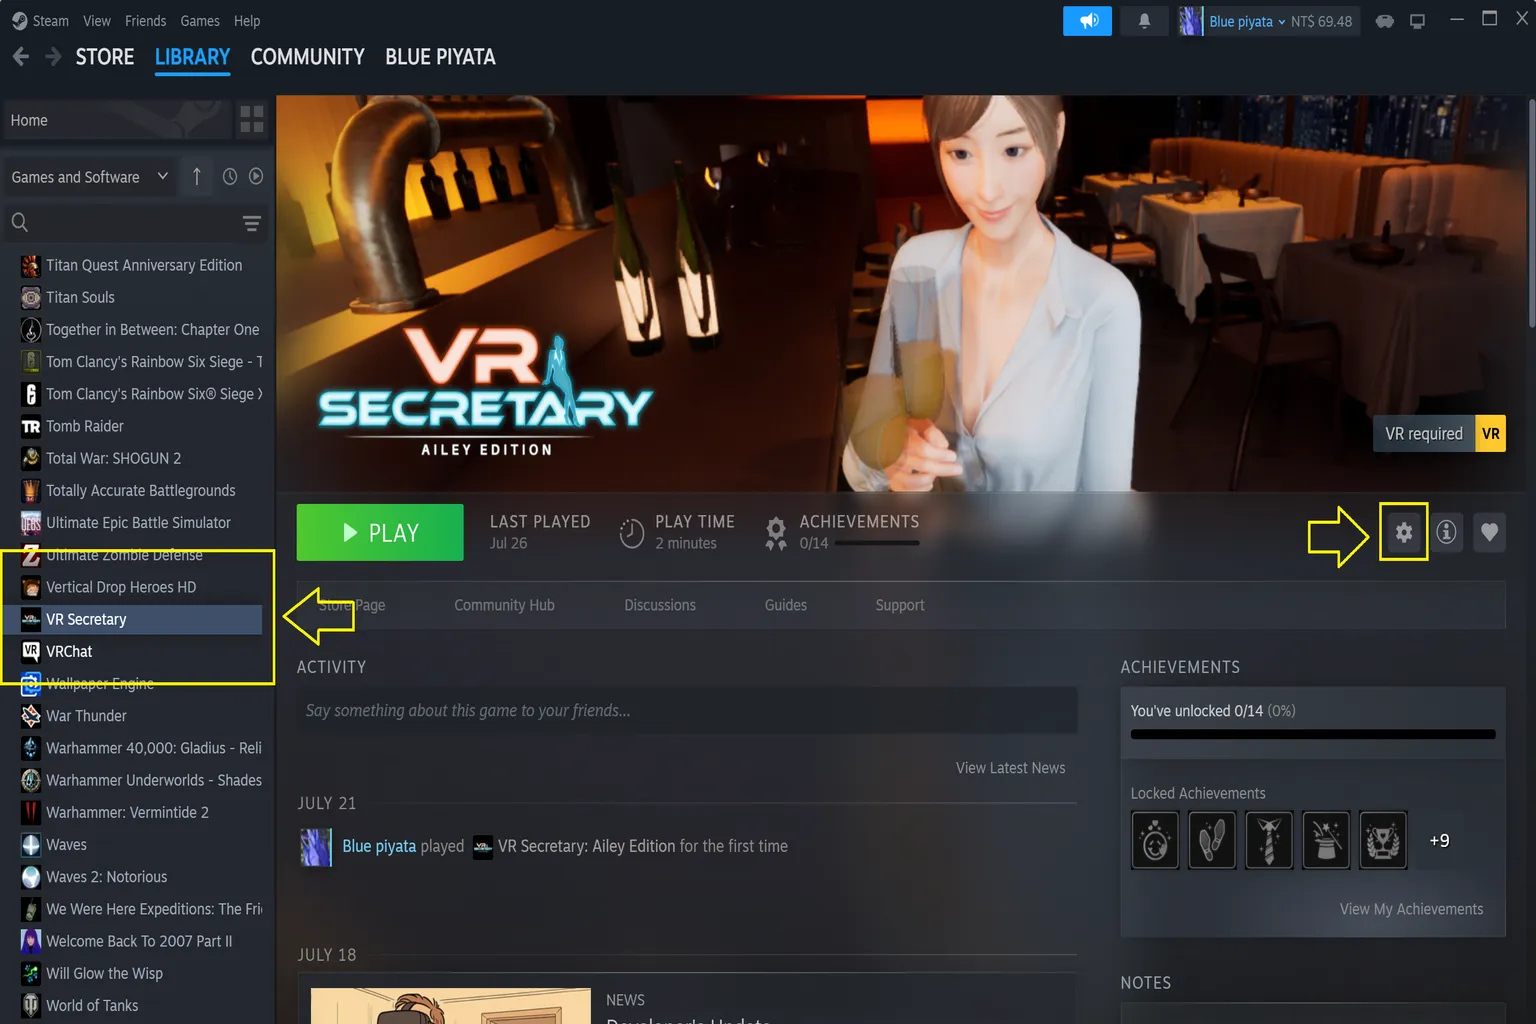
Step 1: Open the Game Library
In your Steam library, find the game you want to add to Air Link, then click the ⚙️ (Settings) icon on the right.
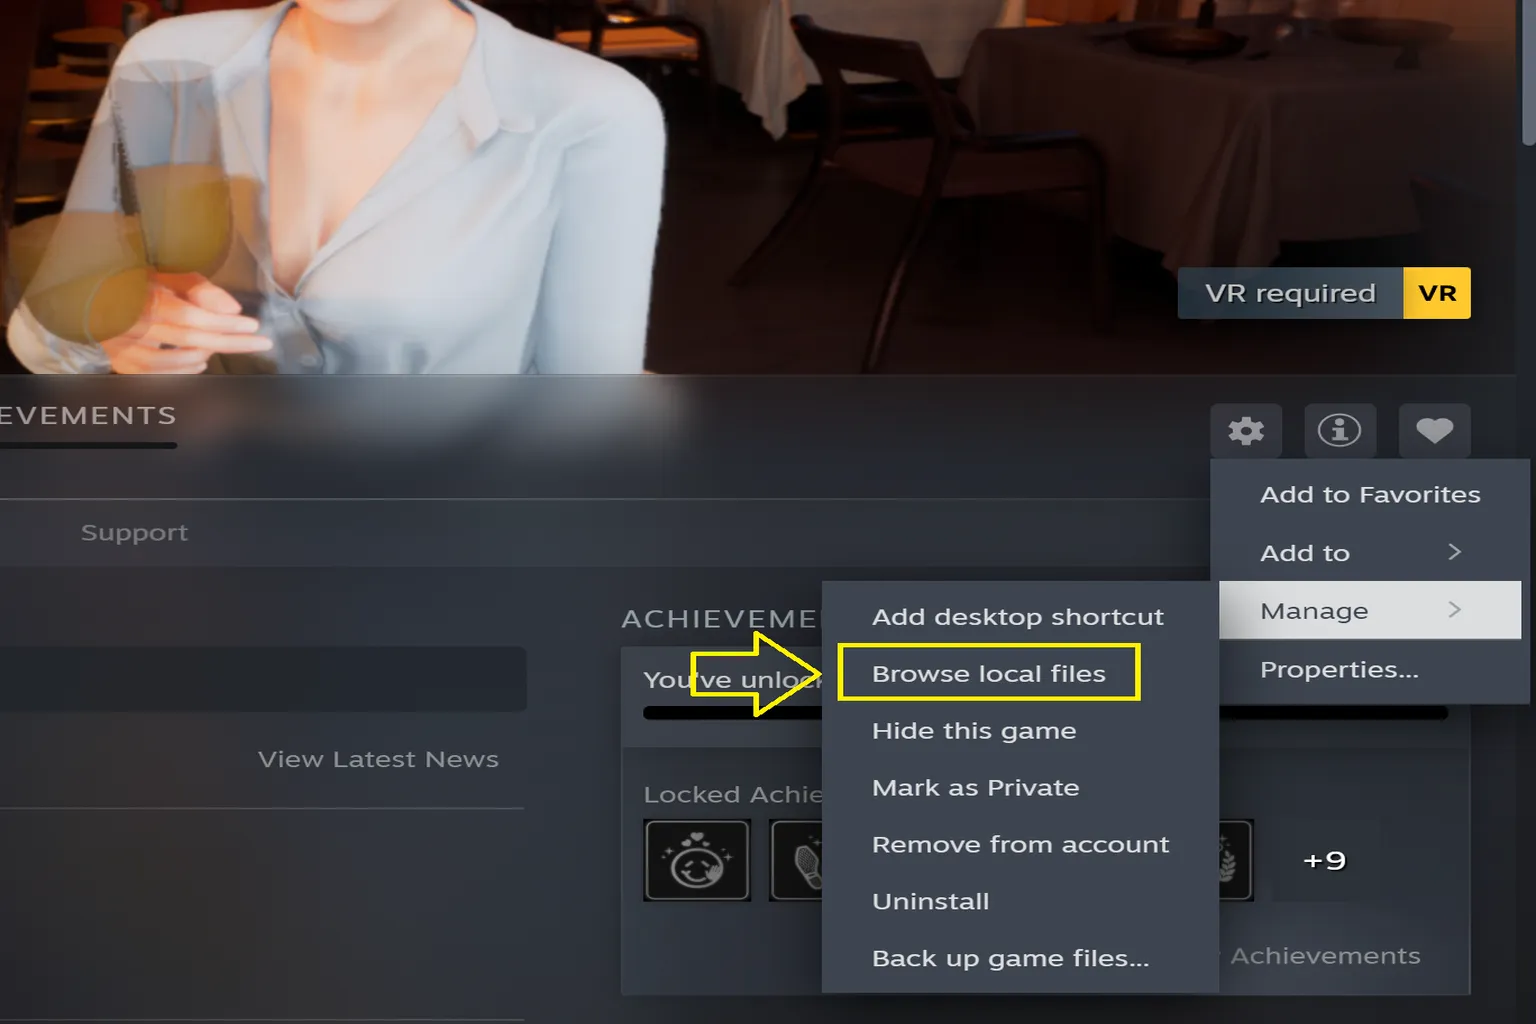
Step 2: Open the game’s folder
From the Manage menu, select Browse local files.
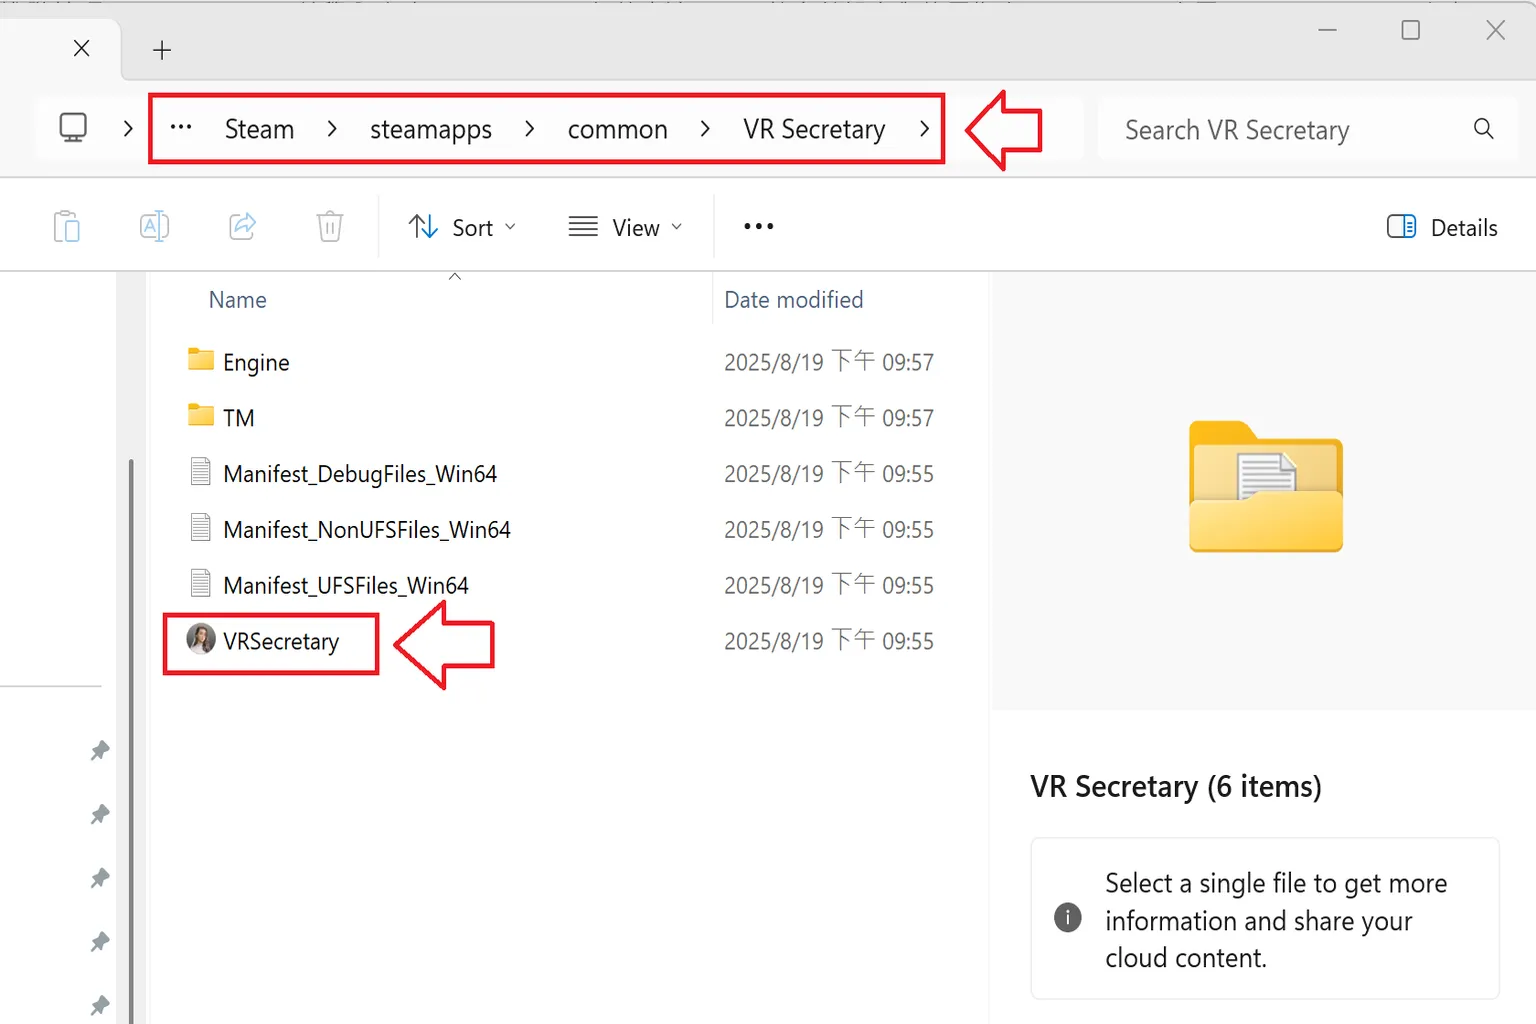
Step 3: Locate the game’s executable
In the game folder that opens, find the executable file (.exe) and note its file name and location.
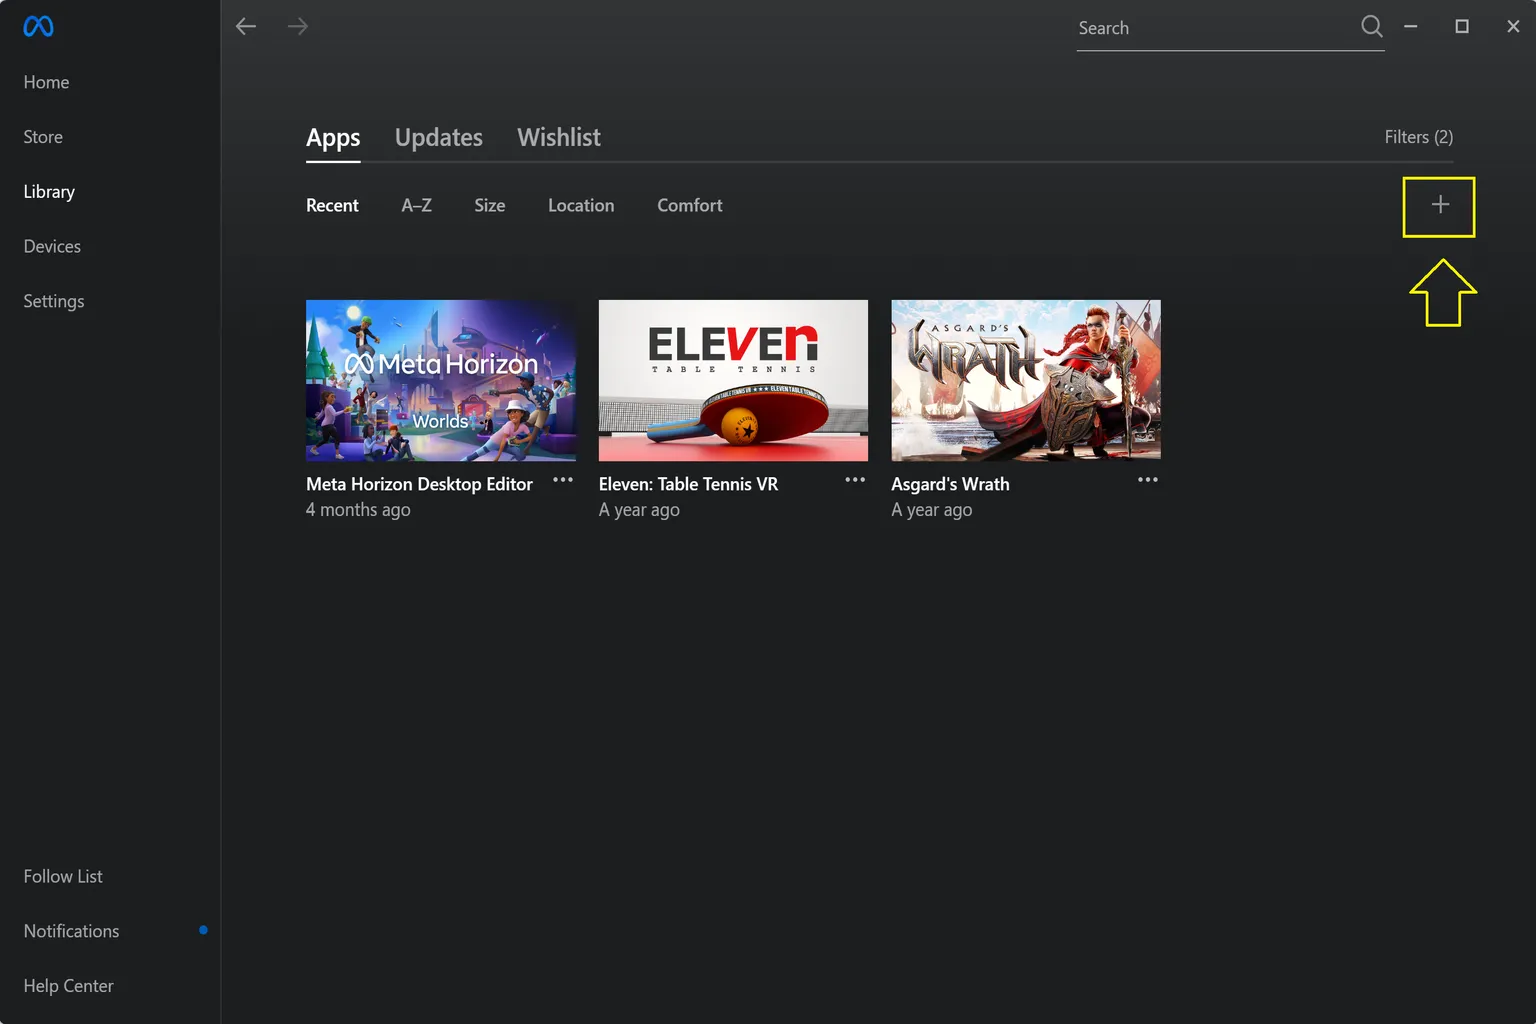
Step 4: Add the game
Go back to Meta Horizon Link (PC version) and click the “+” button at the top right of Library.
Then click “Add it here” to register the game.
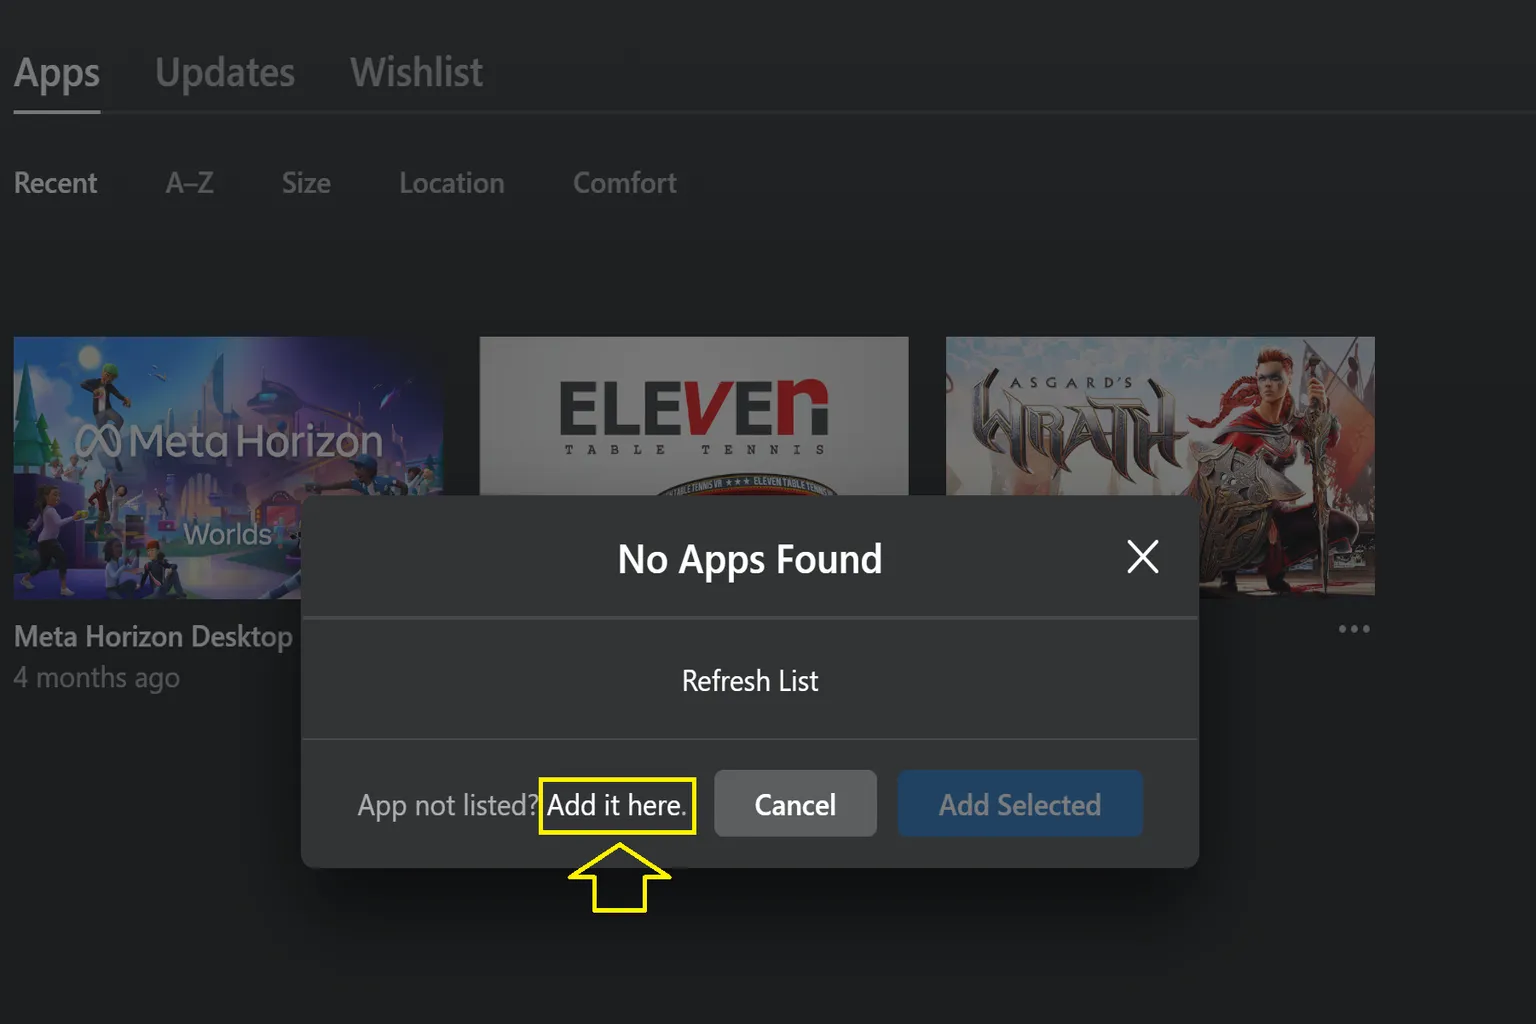
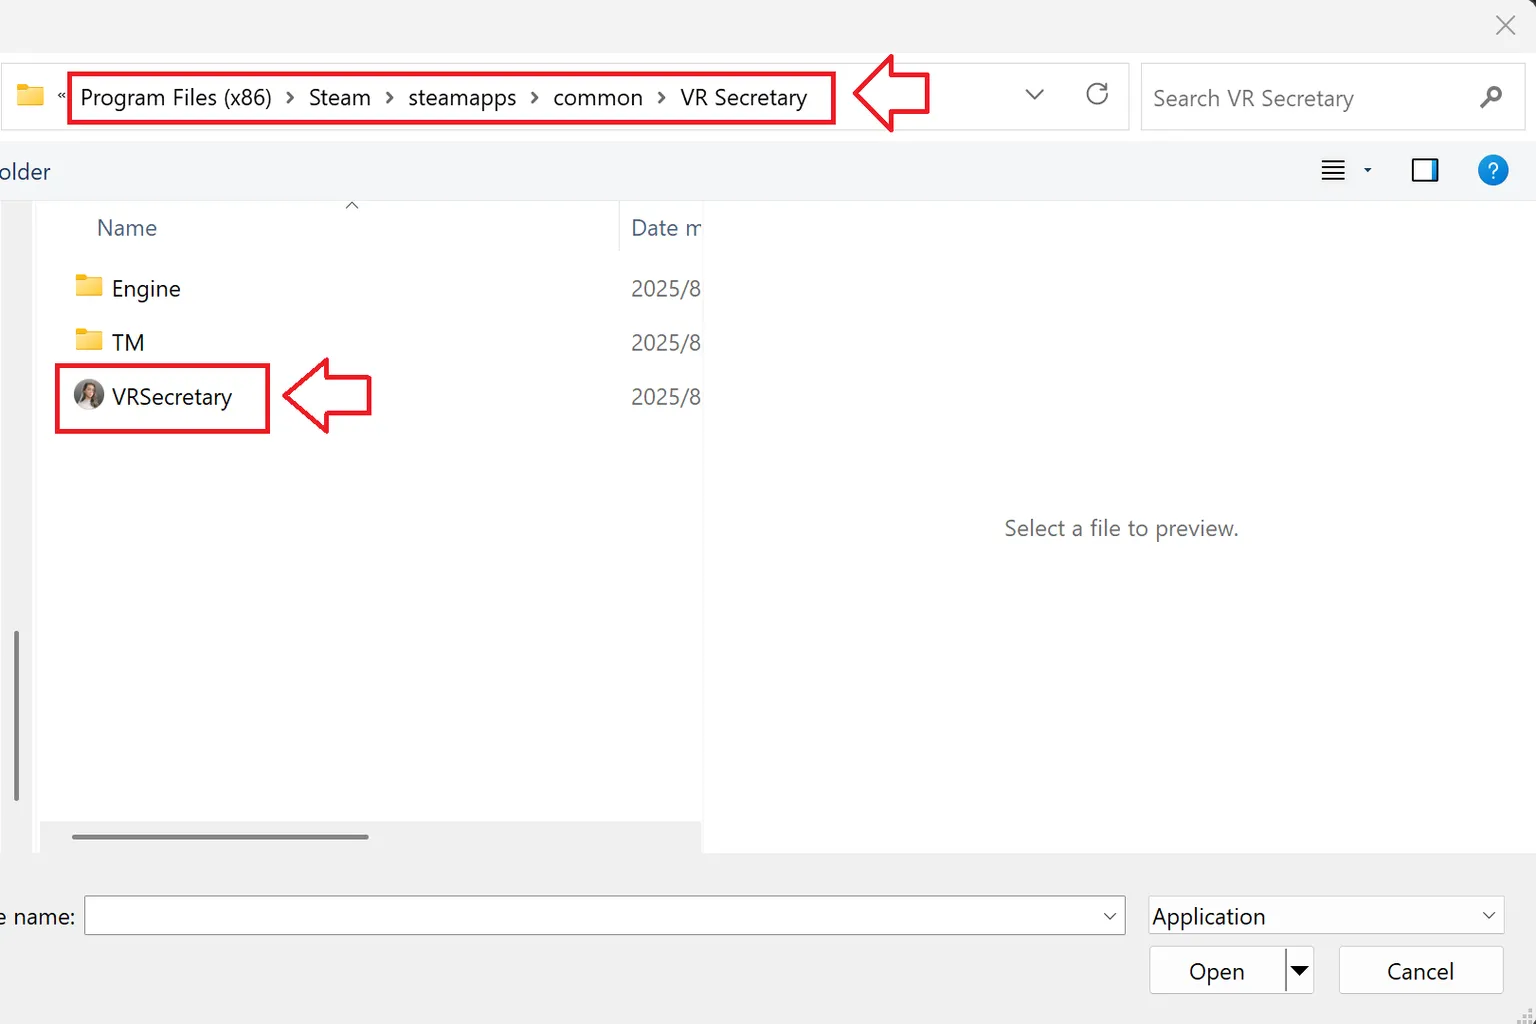
Step 5: Select the executable file
Open the folder you checked in Steam earlier and select the executable file (.exe) you want to use.
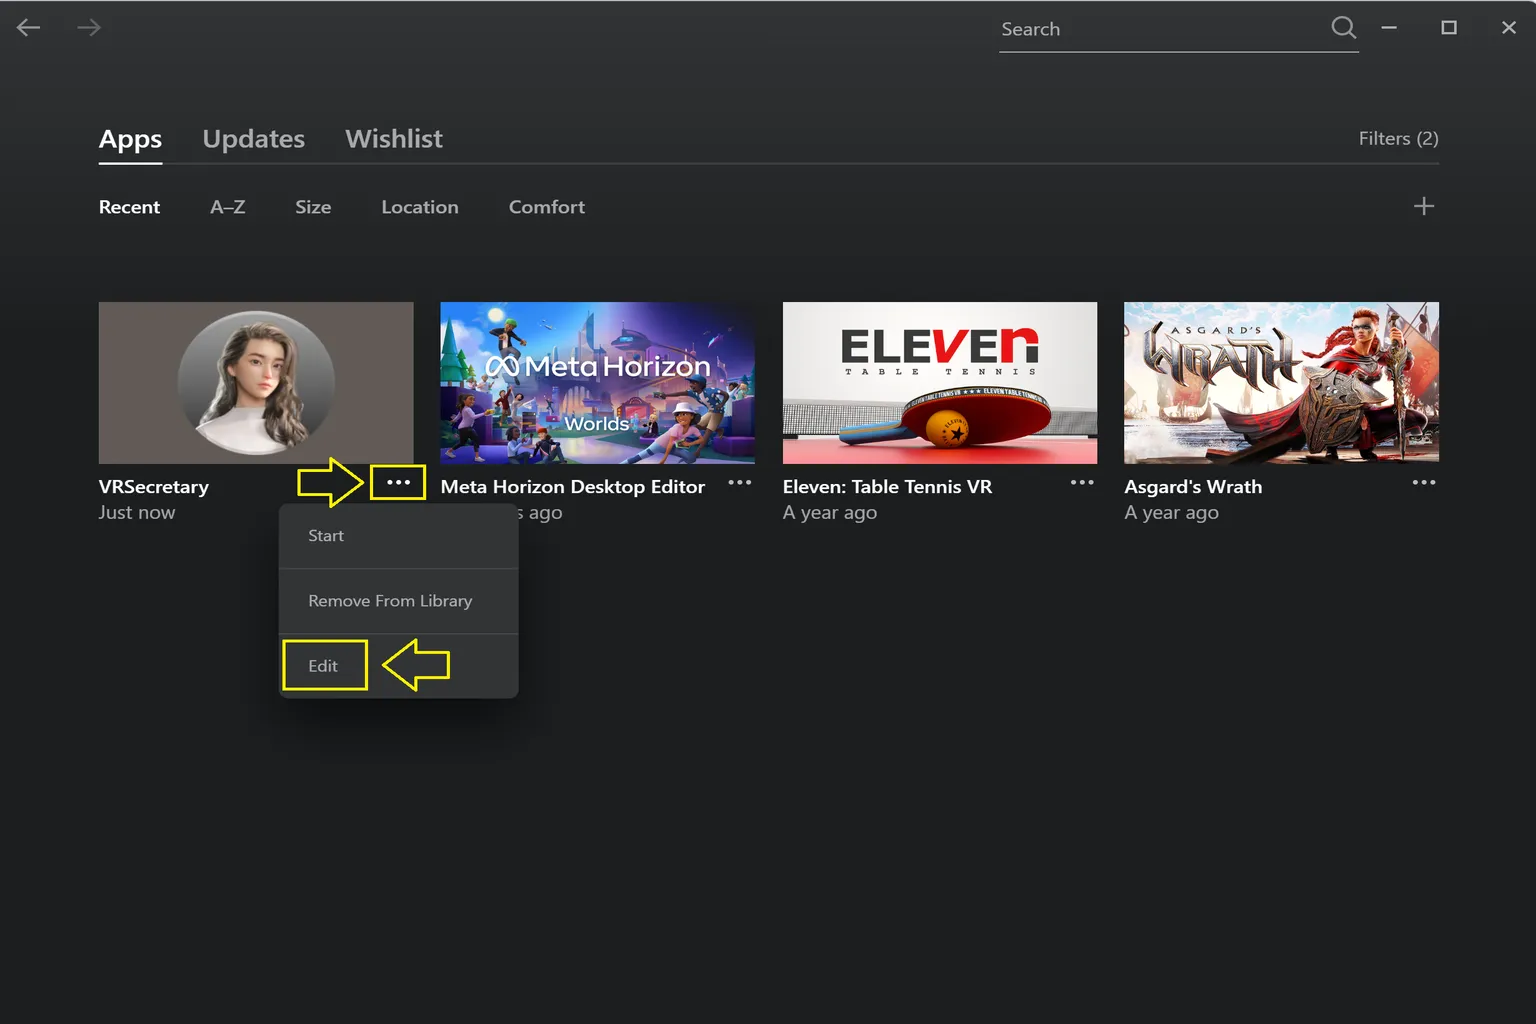
The game you added will now show up in your library. If you click on the “⋯” menu, you can change the cover image or rename the game.
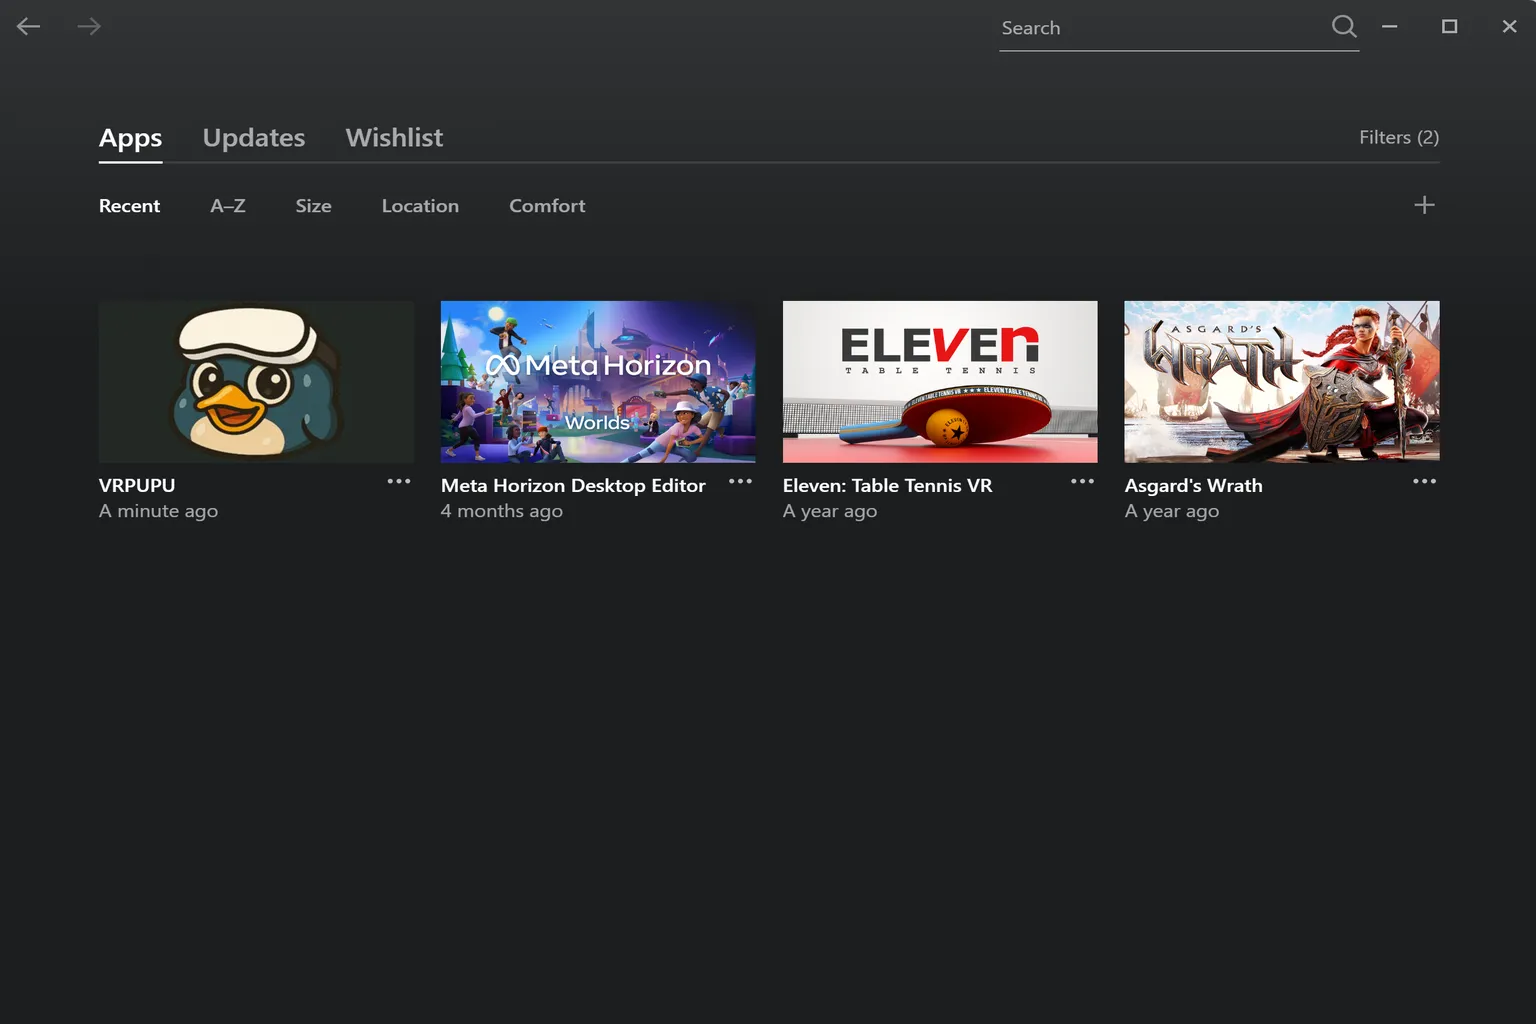
You can use any image on your PC as a custom cover art.
Step 6: Launch the game
The Steam or other platform games you added will appear in the Air Link library.
Just click the game to launch it.
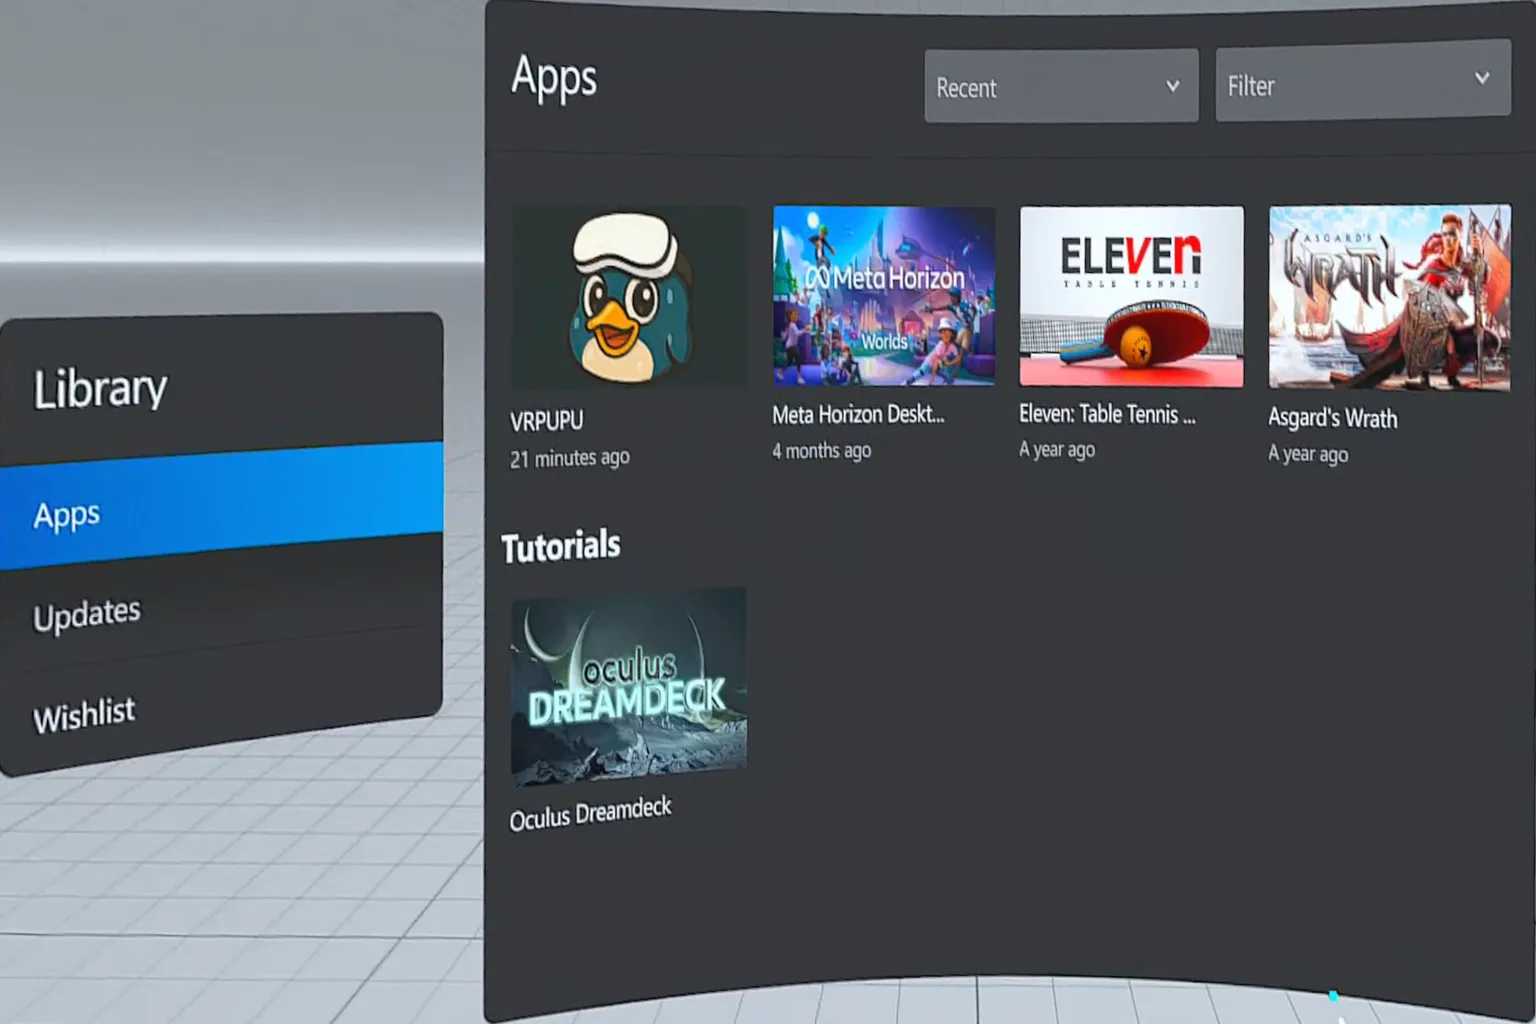
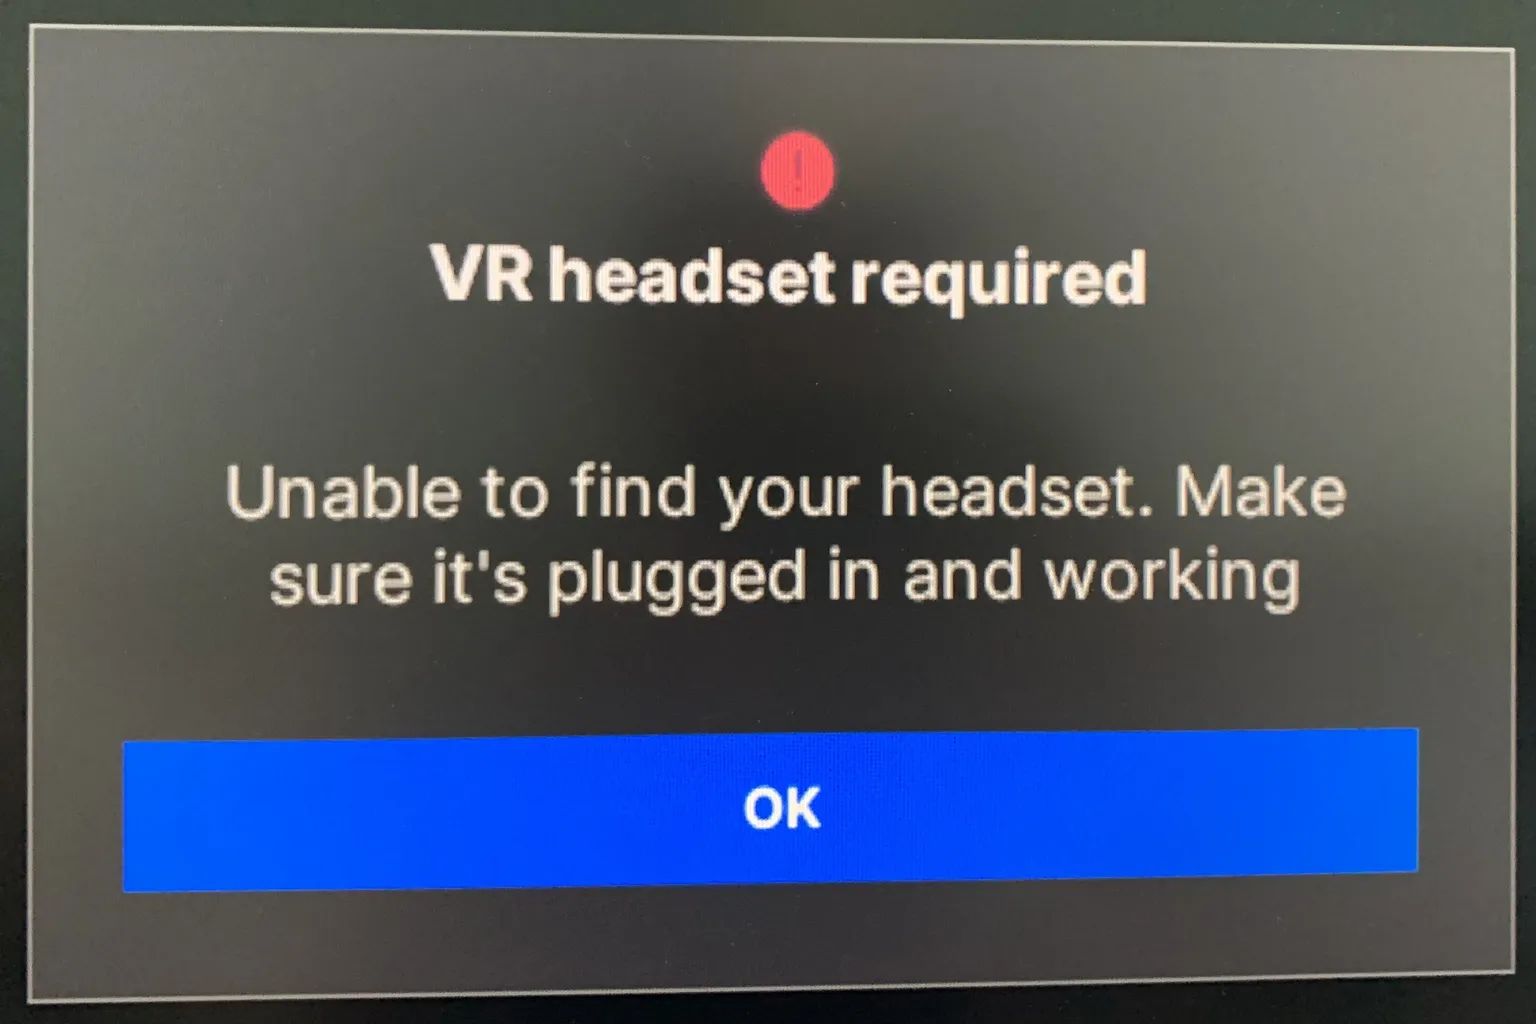
If the game takes unusually long to load or never starts, go back to the PC and check the status.

In this example, the PC shows “Headset not connected.” This happens because Steam games and Air Link may use different connection protocols, causing SteamVR games to fail to detect the headset.
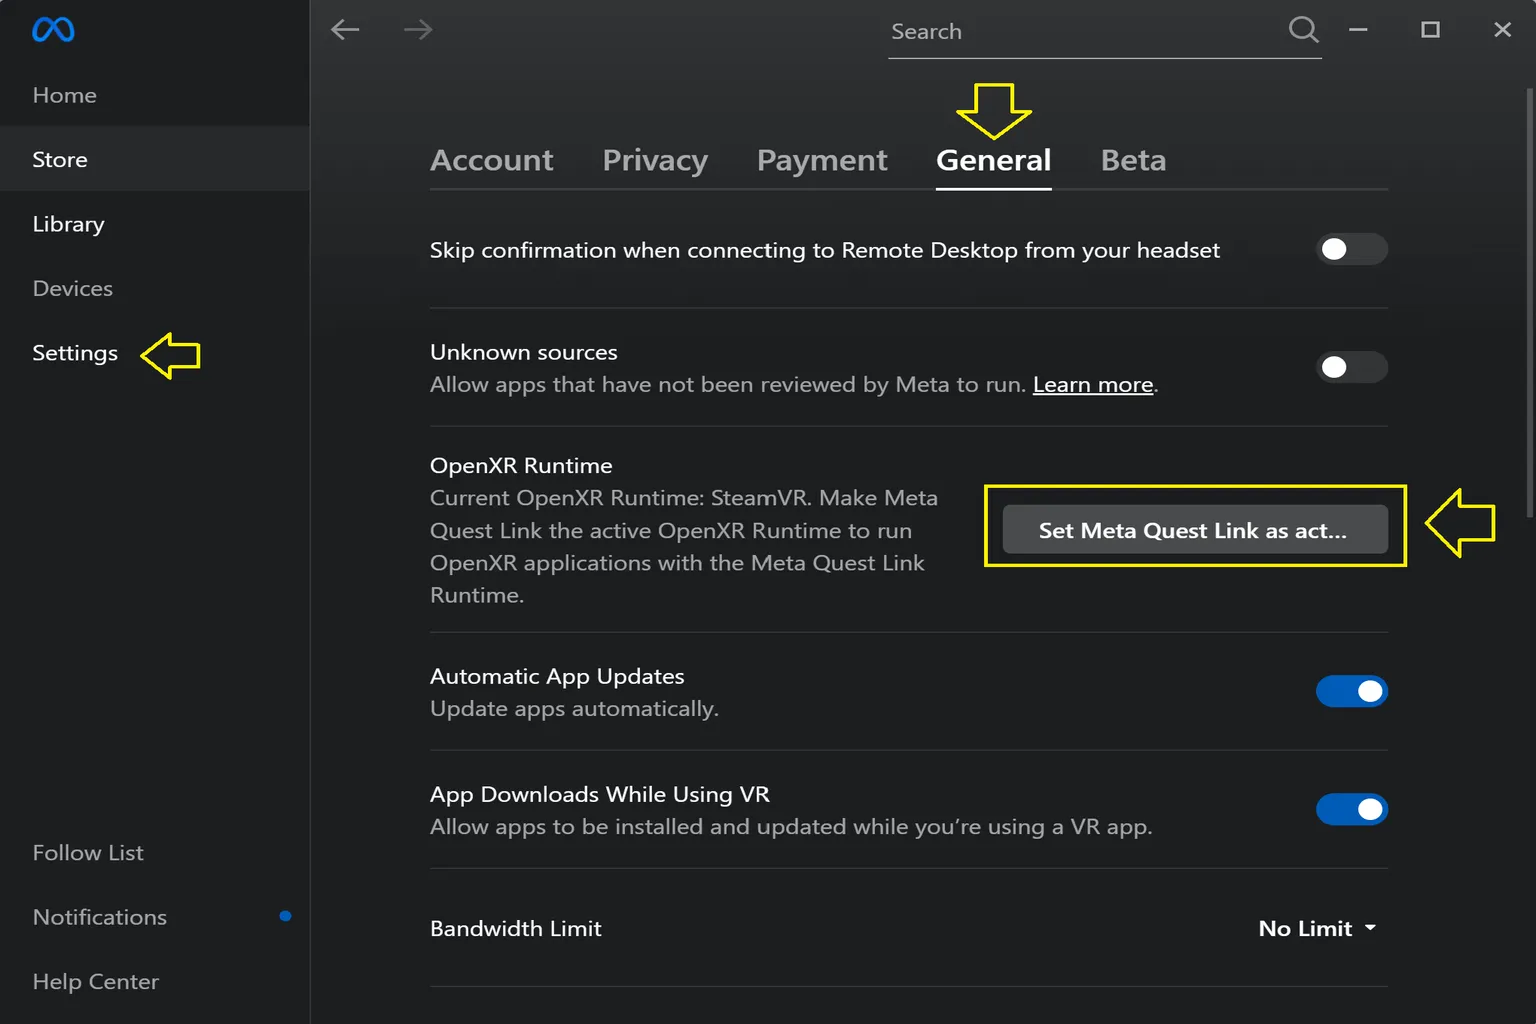
To fix this, open Meta Horizon Link (PC) → Settings → General, and enable Set OpenXR as active….
Because VR connection protocols differ by manufacturer, launching Steam games from Meta (or vice versa) can fail unless OpenXR is set correctly.
Third-party apps like Virtual Desktop handle these protocol differences automatically.
So if you don’t want to tweak settings every time, buying VD is the quickest solution.
Step 7: Restart the game
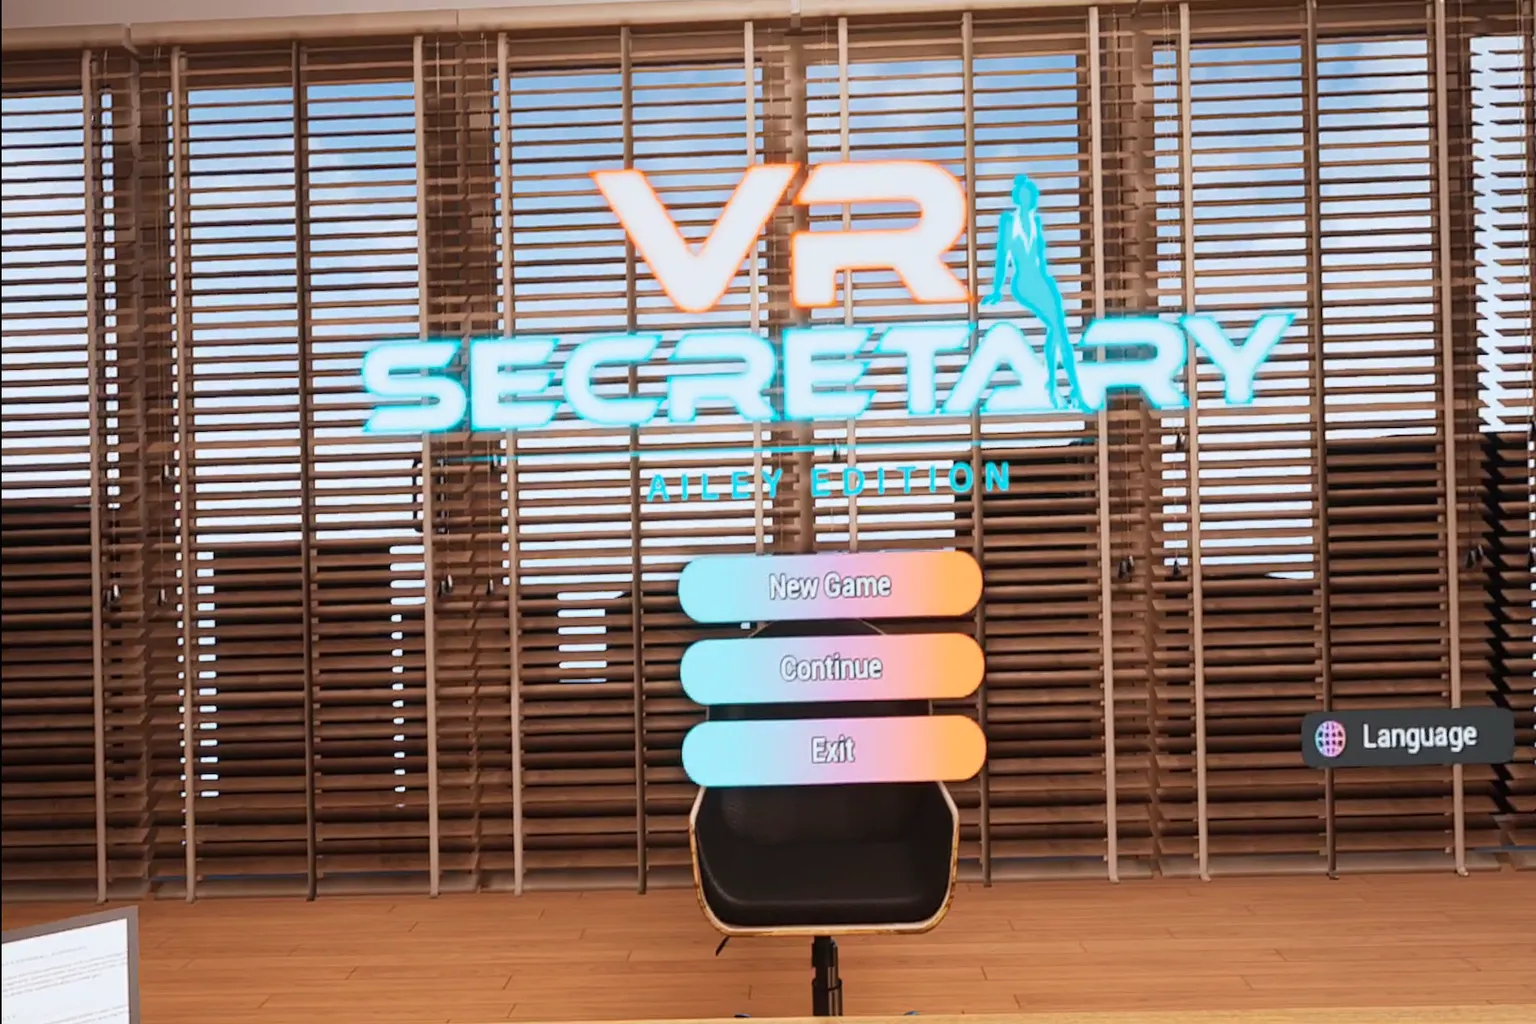
After enabling OpenXR, go back to your headset and launch the game again.
It should start normally this time and enter VR mode without issues.
That’s the full Air Link setup guide. As you’ve probably noticed, Air Link has a lot of unnecessary design choices and features that don’t really add value. If you’re using it just to play games, the only setting that really matters is enabling OpenXR—you can safely ignore almost everything else.
If you try it and think, “Yeah… this isn’t great,” then Virtual Desktop is absolutely worth considering.
Game launching is smoother, PC streaming feels much better, and overall it’s a far more polished experience.
FAQ – Common Questions
What’s the difference between Air Link, Steam Link, and Virtual Desktop?
In short:
- Air Link: Built-in and free. Simple features with average compatibility.
- Steam Link: Designed specifically for SteamVR. Very stable, but feature-limited.
- Virtual Desktop: Paid. Stable image quality, flexible settings, and supports video playback and desktop control. Overall, it offers the best experience.
How do I add Steam games to Air Link?
Use the PC version of the Meta Horizon Link app to manually add the Steam game’s executable file. Once added, you can launch it as a shortcut from the headset’s library. See the illustrated 7-step guide in the main article for details.
Why won’t my game launch after I add it?
In most cases, OpenXR isn’t enabled. Open the PC Meta Horizon Link app → Settings → General, and set OpenXR as the default runtime. This makes SteamVR and Meta protocols compatible, allowing the game to launch properly.
What should I do if image quality is unstable or latency is high?
Set Air Link’s bitrate to a fixed 200 Mbps and use a Wi-Fi 6 (5 GHz or higher) router. If performance still isn’t good, switching to Virtual Desktop will usually give a smoother experience.
Are Air Link’s desktop, store, and avatar features usable?
Technically yes, but the experience isn’t great. For example, avatar editing just tells you to use the Horizon app, and desktop control has noticeable latency. Realistically, you can ignore these features—the only truly practical part is launching games from the Library.