
Ready to buy a Meta Quest 3 or 3S but not sure which retailer is the safest bet? While grabbing a headset from Amazon or Best Buy offers great convenience, you might be missing out on superior warranty coverage and hidden cash perks. In this complete 2026 buying guide, we compare the top retailers based on return policies, shipping speed, and customer support. We will also walk you through the official Meta Store checkout process, show you how to claim a free $30 Quest Cash bonus using promo code VRPUPU, and expose the “cart trap” that ruins your game discounts. Read on to secure the best deal and start your VR journey the smart way.
Meta Quest VR Buying Options Overview
There are three main ways to buy a Meta Quest 3 or Meta Quest 3S:
- Big-box stores (like Best Buy or Walmart)
- Amazon
- Buying directly from the official Meta Store (with creator perk)
Below, I’ll go through each option one by one and explain the differences and what to watch out for.
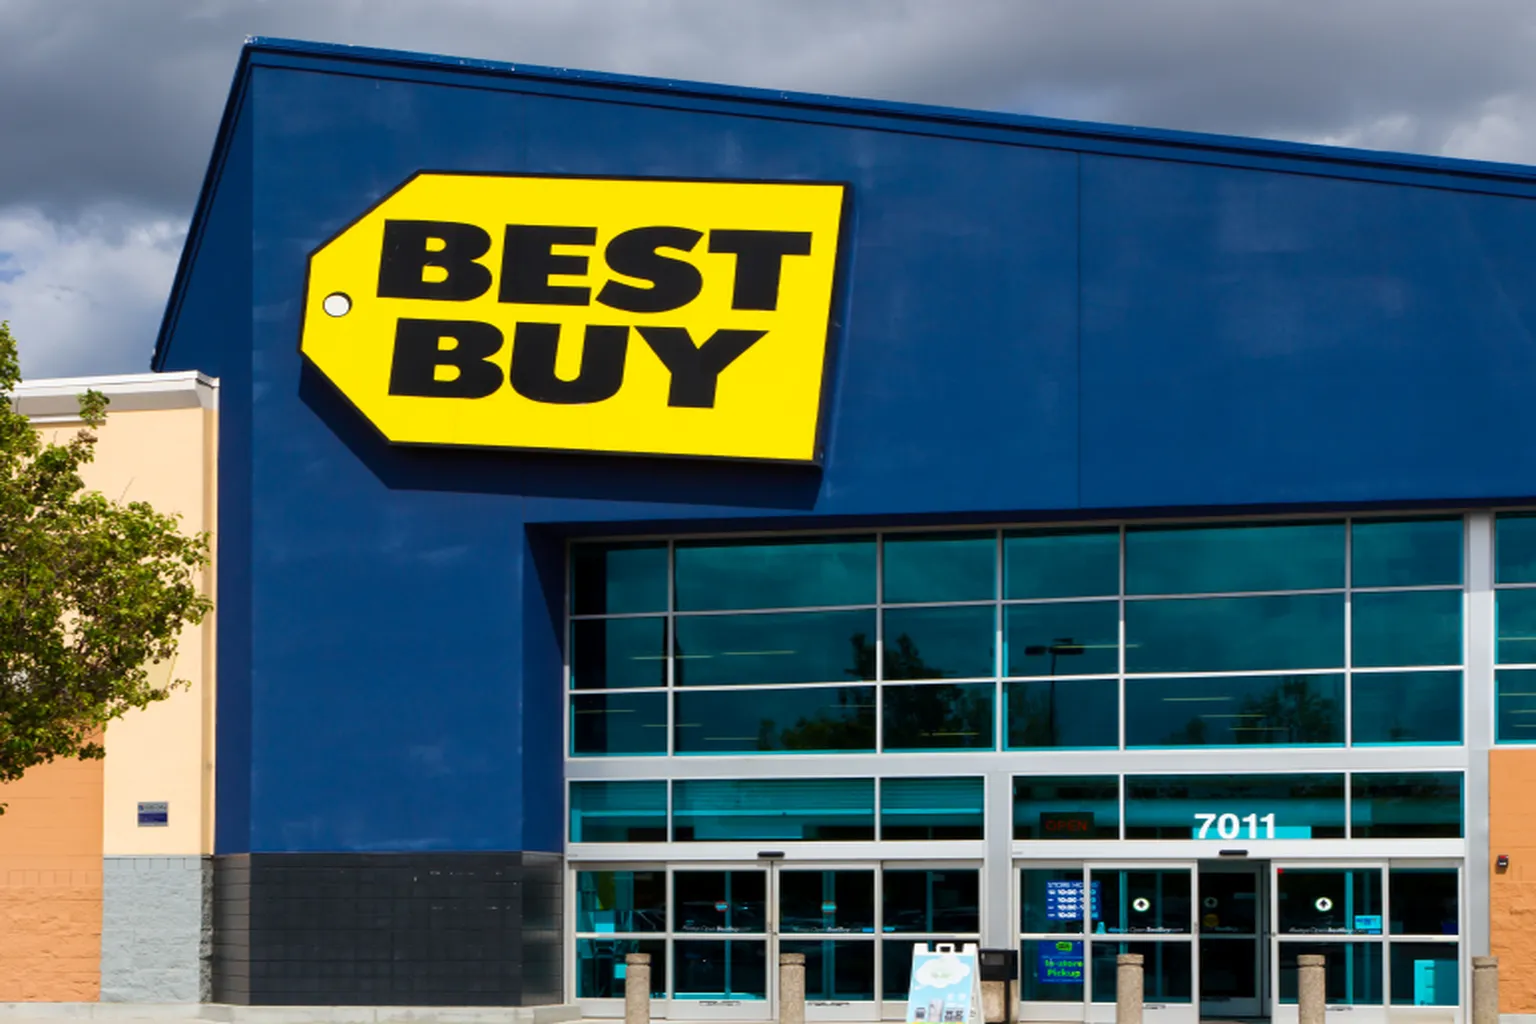
Big-box stores
You can buy the Meta Quest 3 or 3S directly from large retail chains, like Best Buy or Walmart in the US, Currys in the UK, or JB Hi-Fi in Australia.
The biggest advantage here is convenience. You can buy it in person, take it home the same day, and start playing right away.
Out-of-the-box defects aren’t common, but I’ve seen one or two unlucky cases. If you’re traveling a bit to get to the store, it’s a good idea to do a quick check before you leave.
It’s simple. Open the box, pull out the controller insulation tabs, and make sure they power on. Then put on the headset and check that the display, buttons, and thumbsticks all respond normally. If those basics work, you’re generally in the clear. You don’t need to log into an account yet. Do the full setup at home when you have time.
If something does go wrong, there’s no need to worry. Store staff are usually helpful, and if you bring it back, they’ll exchange it for a new unit right away.
Amazon
Amazon is a major global online retailer. It does run sales from time to time, but the timing isn’t very predictable.
The main benefit of buying here is the huge selection of third-party accessories. It’s easy to pick up the headset and all the accessories you want in one order, which is genuinely convenient.
Another strong point is peace of mind. Shipping is free, and if there’s any issue with the product, you can return it for free within one month. That kind of flexibility makes Amazon a safe choice for a lot of people.
Meta Quest Official Store
When you buy from the official Meta Store, the headset is shipped straight to your home with shipping and taxes included. The total price ends up being almost the same as Amazon or big-box retailers.
Quest pricing is already fairly reasonable, but the real strength here is the warranty. It’s extremely solid.
If something goes wrong during the warranty period, such as hardware issues or unstable connectivity, Meta will arrange a courier to pick it up from your home and replace it with a refurbished unit that’s equivalent to new.
You also get a one-month no-questions-asked return policy. If it doesn’t feel right, VR motion sickness is too much, or it just isn’t for you, you can return it for a full refund, no explanation needed.
Below is a comparison table that summarizes the three purchase options.
| Purchase option | Delivery time | Perks | Return policy |
| Big-box stores | Same-day pickup 👑 | None | Returns are accepted within a limited time. Policies vary by store. |
| Amazon | Around 2 to 4 days | None | Returns accepted within one month. |
| Official Meta Store | Around 3 to 5 days | $30 Quest Cash (with creator promo code) 👑 | No-questions-asked returns within one month 👑 |
On top of that, the official Meta Store offers an exclusive perk. When you enter “VRPUPU” at checkout, you’ll receive Quest Cash with your purchase. The amount depends on your region. It’s £25 in the UK and AU$50 in Australia.
How to Buy Meta Quest from the Official Store
Buying directly from the Meta Store is very straightforward. It works just like any other online shop. You just enter your shipping address and credit card details, and a few days later, your new Meta Quest arrives at your home.
Meta also runs a creator campaign. When you enter a creator promo code during checkout, you receive additional Quest Cash with your headset purchase. The exact amount depends on your region, but it is displayed as $30 Quest Cash during the process. The steps for using the code are explained on this page, so you can simply follow along.
The bonus value varies by region: $30 in the US, £25 in the UK, and AU$50 in Australia. During checkout, Meta displays this uniformly as “$30 Quest Cash.”
With that out of the way, let’s continue with the purchase steps.

Purchase flow
If you want to skip a few steps, you can use the creator link I prepared. Opening that link takes you straight to the Quest 3 or Quest 3S purchase page.
If you’re in the US, there are also 24-month installment payment options available for both Quest 3 and Quest 3S.
Step 1: Open the official Meta Store and choose your model
When you open the Meta Store link, you’ll land on the homepage first. From here, I’ll walk you through the actual steps, focusing on how to receive the $30 bonus.
Start by selecting Meta Quest from the top-left menu.

From the menu on the right, select the headset model you want to buy. Here, I’ll use Quest 3 as the example for the rest of the steps.
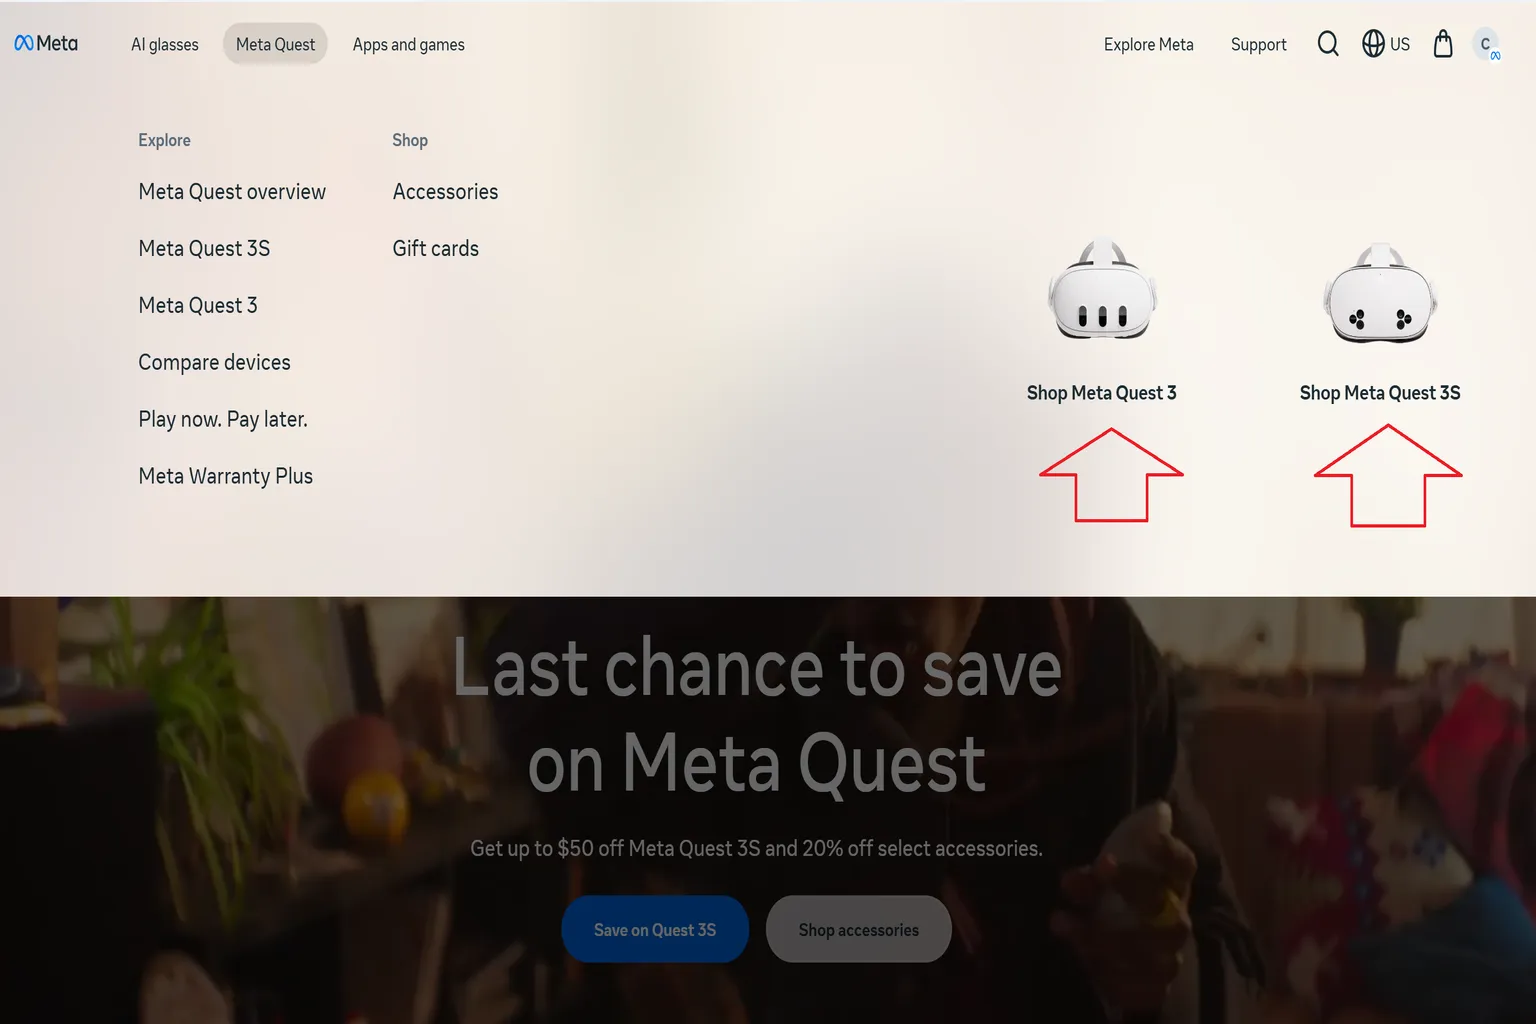
Once you’re on the Quest 3 product page, click Buy Now to start the checkout process.

Step 2: Choose your headset
On the purchase page, select the model you want and double-check that everything looks correct. Once you’re sure, click Add to Bag in the bottom-right corner.
At the moment, Meta Quest 3 is only available in a single 512GB version. If you’re buying the Meta Quest 3S instead, you’ll need to choose between the 128GB and 256GB options here.

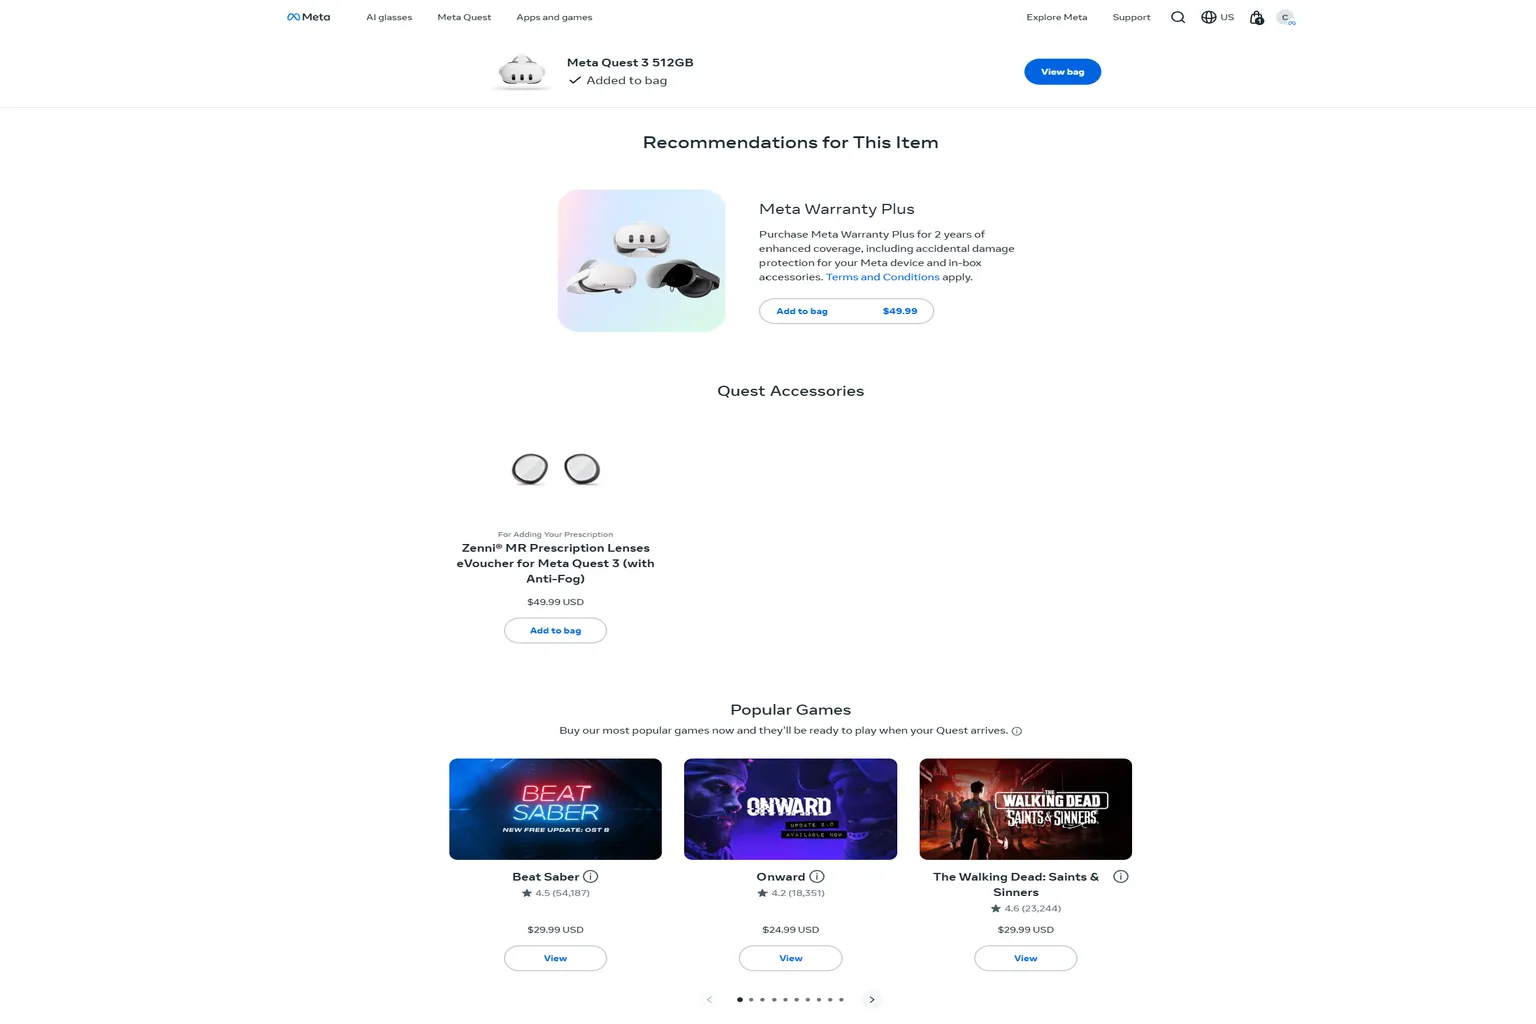
Step 3: Add accessories or games
If you want official accessories or plan to pick up some software, you can add everything to your cart on this screen. Once you’re done, select View Bag and you can check out together with the headset.
That said, you should not buy games here. Any games added at this stage are charged at full price with no discount, which is a pretty bad deal.
The best approach is to buy the headset and games separately. That way, you can apply discounts properly later and get the most value.
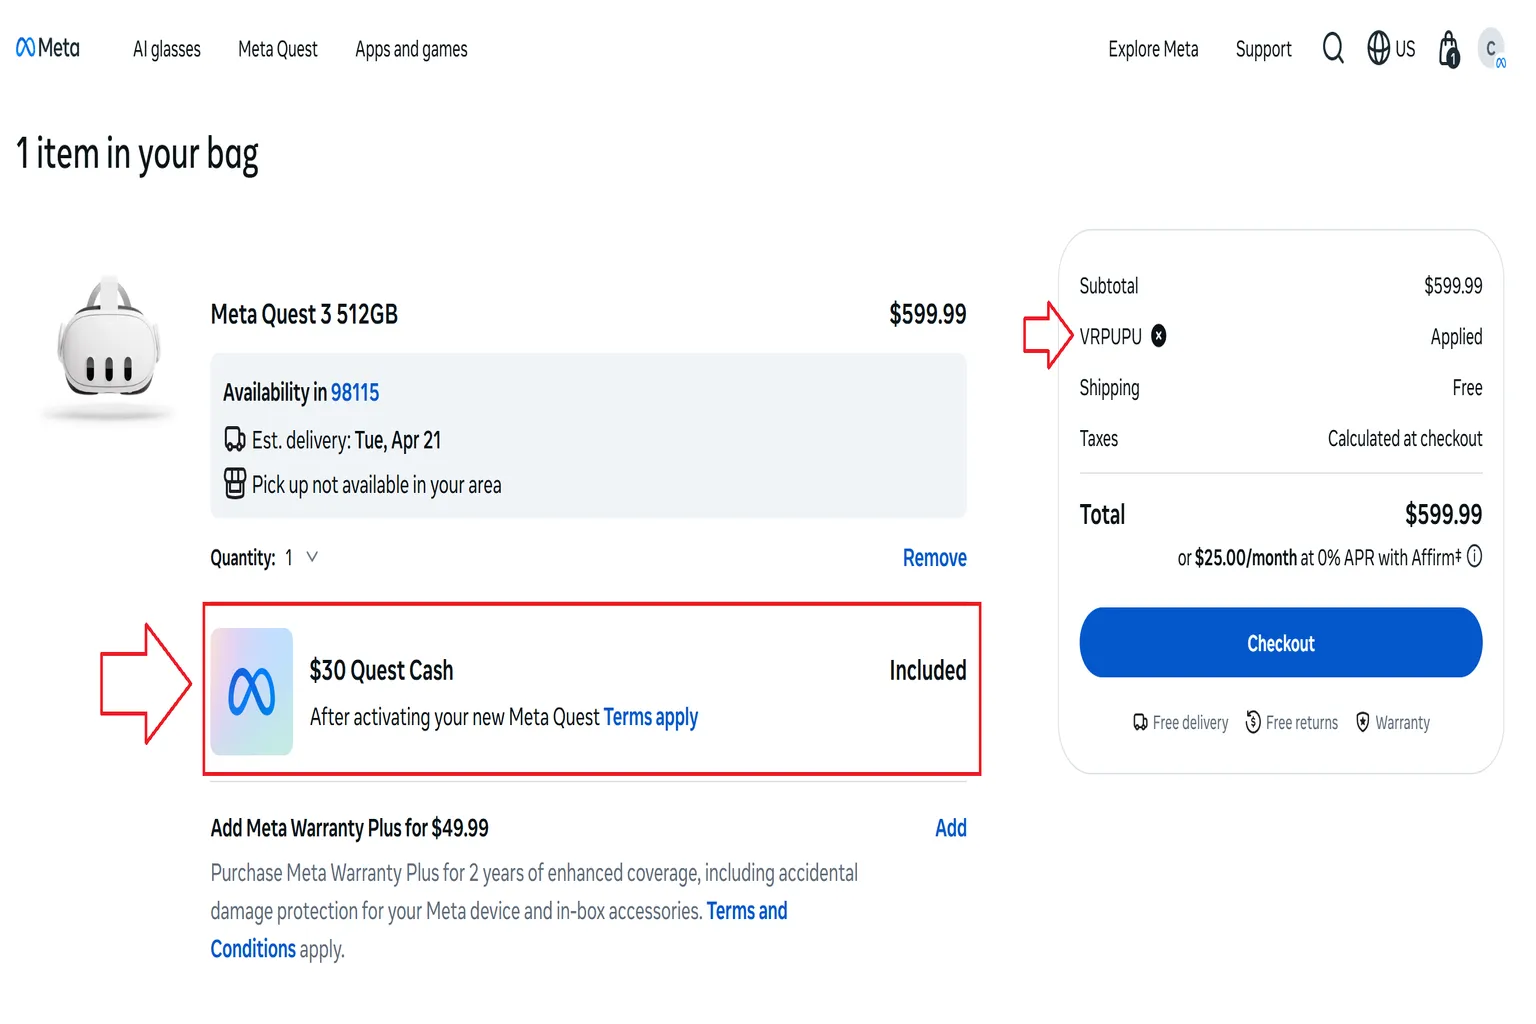
Step 4: Review your bag and proceed to checkout
If you entered through the creator link earlier, you should see “$30 Quest Cash” displayed here, and on the right side it should say that “VRPUPU is applied”.
This is a sign that after you receive the headset, Meta will add a $30 Quest Cash bonus to your account. It’s an official perk that isn’t openly advertised.
Once you’ve confirmed that the bonus is applied correctly, just click Checkout to move forward.
Even if you navigated the official site on your own and don’t see the bonus at first, that’s not a problem. Just take your time and enter the code manually.
Click Add promo code on the right side, enter the code there, and the bonus will be applied correctly.
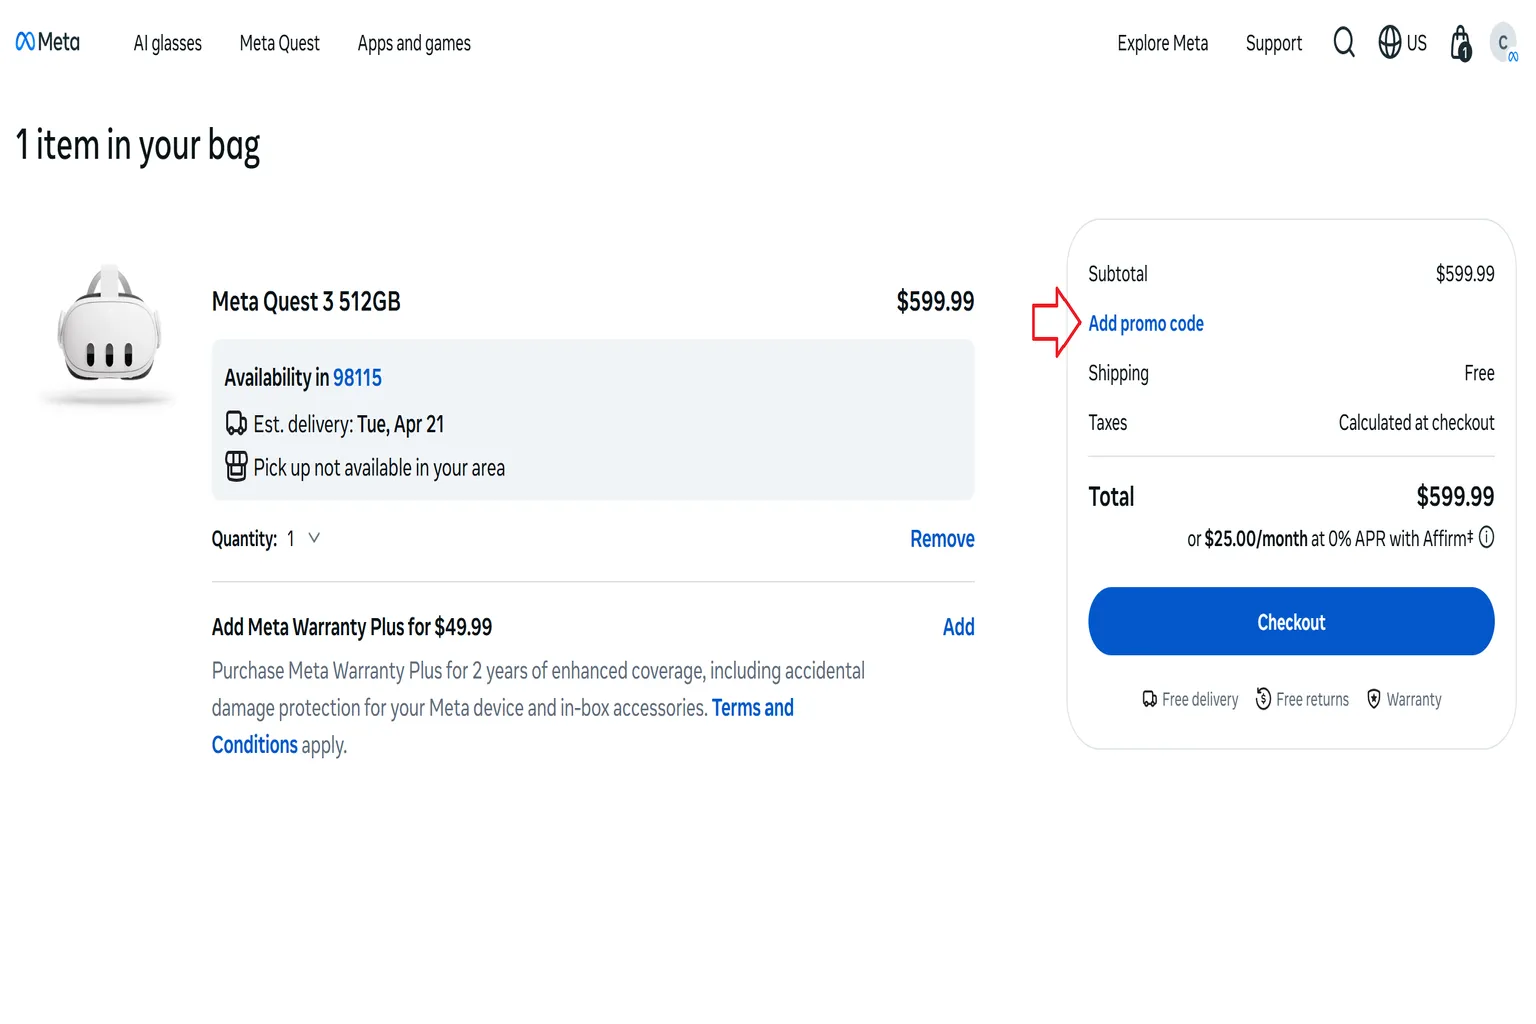
Enter “VRPUPU” in the promo code field and apply it. Once it’s accepted, the perk will be applied properly and you’ll receive the same bonus.

Once you apply VRPUPU, you’ll receive the same $30 in Quest Cash.

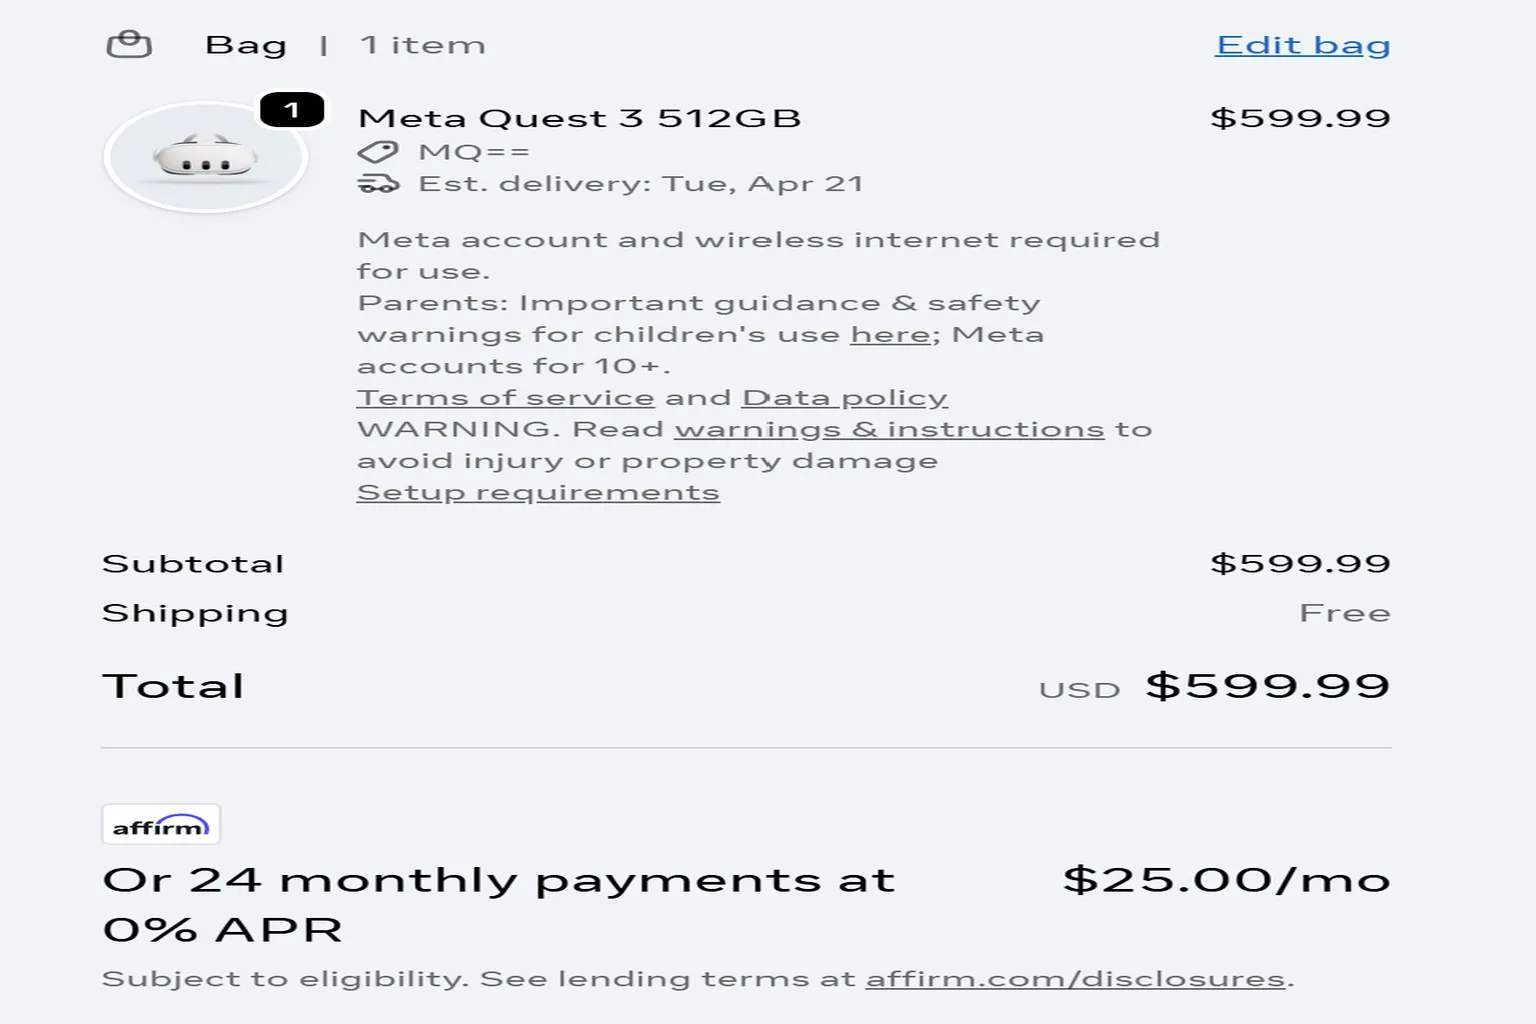
Step 5: Final Check Before Checkout
Once you reach the checkout screen, take a moment to review the bag on the right side.
If you see “$30 Quest Cash – Included in headset”, that means the perk has been applied correctly.
As long as this line is there, you will receive the bonus without any issues later, so make sure to double-check it before moving on.
Take a screenshot of this screen and save it for your records. The $30 USD Quest Cash won’t appear on the shipping invoice, so this image can be used as proof of purchase if you need it later.

If you don’t see “$30 Quest Cash – Included in headset” on the screen, it means the perk hasn’t been applied yet. In that case, go back to Step 4 and try again.
Step 6: Enter your address and payment details
Meta uses a standard online checkout system. You can pay by credit card or PayPal, and after you place the order, the headset will be shipped directly to your home.
On the left side of the screen, enter the recipient information and your payment details. Once everything is filled in, click Pay Now to complete the order.
If your address is long and causes an error, move the latter part of the address into the “Address line 2” field. That usually fixes the issue and lets the order go through.

After the payment goes through, a short survey will pop up on the screen.
If you felt the purchase experience was good, giving it a 10 is a nice extra touch.
What if the credit card payment fails?
This is a problem that comes up occasionally. I ran into the exact same error myself when I ordered a Quest 3 and Quest 3S on 2025/12/10. As soon as I clicked pay, Meta showed a “payment failed” message.
The simplest and fastest fix is to try again with a credit card from a different bank. That’s honestly the quickest solution. If you only have one card, though, you’ll need to remove the restriction on that card.
In most cases, you’ll first receive an SMS from your credit card company saying the transaction was declined. When that happens, call the customer support number on the back of your card and explain it like this:
“This transaction is not fraud. I was personally trying to make a purchase on the Meta Store, so please allow the transaction.”
That’s usually enough to unblock Meta Store payments.
The process itself isn’t complicated. You just need to wait until you’re connected to an operator. Setting aside about 20 minutes is usually sufficient.
Meta payment verification
After you purchase the headset, you may sometimes receive a confirmation email from Meta. This is part of their security check, used to confirm that the payment was actually made by you.
The email includes the following details:
Sender
[email protected]
This is Meta’s official security verification system, so emails from this address are legitimate.
Your name
The purchaser’s name is shown exactly as entered.
Purchase time
The time is displayed in US Eastern Time (UTC−5), so it will appear much earlier than your local time.
For example, I placed my order at 9:26 PM on 12/10, but the email showed 8:26 AM on 12/10. This is completely normal.
Amount
The payment itself is processed in US dollars, but the verification email may show the amount in euros. The numbers can look different, but this is only due to the email’s display format and does not affect the actual charge. As long as the amount looks reasonable to you, there’s no issue.
Once you’ve confirmed that all the information is correct, just click Yes, It was me to complete the verification.

Once the verification is complete, the system will show a message confirming that the payment has been approved. After that, all you need to do is wait for Meta to ship your order.

Right after you finish buying the headset, you can start browsing games in the Meta Store.
There’s one really important point I want you to remember here.
Even if a game isn’t on sale in the store, you can get a 10% discount by entering “VRPUPU” before checkout. Some DLCs and bundles can also work with the code at the same time.
That difference can be big enough to grab one or two extra games with the money you save, so it’s genuinely worth using.
For example, a game like Beat Saber drops to $26.99 just by entering the code.
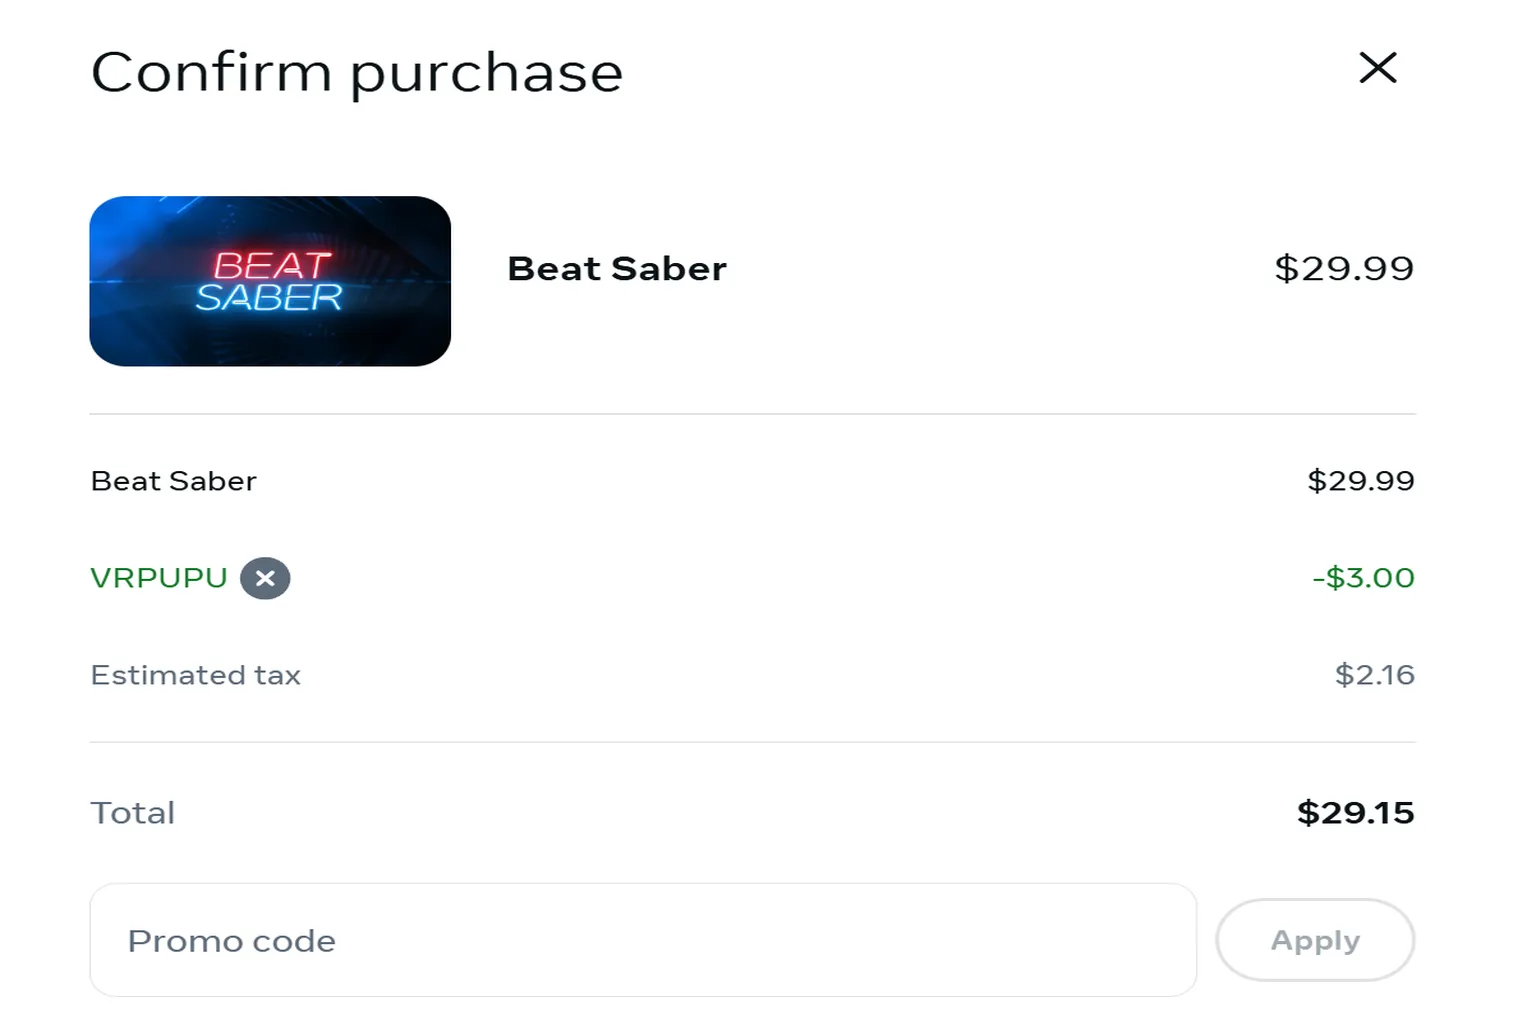
The reason I said earlier that you shouldn’t buy games together with the headset becomes obvious if you look at this example.
The Meta Quest 3 is $599.99, Beat Saber is $29.99, for a total of $629.98. That clearly doesn’t make sense.
The headset itself is $599.99. If Beat Saber drops to $26.99 after entering VRPUPU, the total should be $626.98.
What’s happening here is that the Meta Store isn’t correctly applying the Beat Saber discount when the game is purchased together with the headset. That’s exactly why the smartest approach is to buy the headset first, then purchase games separately and enter “VRPUPU” at checkout for the game purchase.
The reason I said earlier that you should not buy games together with the headset should be pretty obvious once you look at this image.

What happens after purchase
Once your Quest 3 or Quest 3S order goes through on the official store, Meta will send you three important emails in order.
First email: Order confirmation
This confirms that your Meta Quest order was successfully placed.
Second email: Shipping notification
This lets you know the headset has left the warehouse and is on its way to your address.
Third email: Delivery confirmation and feedback request
This confirms that the headset has been delivered and asks you to rate your purchase experience.
While you’re waiting for the headset to arrive, it’s a good idea to check the unboxing tips and how to receive your perks in advance. That way, you can get started smoothly as soon as it shows up.

Meta Quest 3 & 3S Unboxing Guide
Setup & $30 Referral Bonus

How to Claim Meta Quest Bonuses
Missing Games & Account Transfers
FAQ – Common Questions
Benefits of buying from the Meta Store
The biggest advantage is the warranty. It’s the most hassle-free option. With the official store, Meta arranges pickup and return directly from your home, and repairs are handled quickly. You’ll also often hear cases where Meta provided free support even after the warranty period had already expired.
On top of that, when you enter “VRPUPU” during purchase, you’ll receive $30 in Quest Cash.
What should you do if payment fails on the official store?
The fastest solution is to try a different credit card. If you only have one card, you’ll need to call your bank and ask them to remove the usage restriction for Visa, MasterCard, or JCB
What if the headset you bought from Amazon or the Meta Store has an issue right after opening?
Submit a return request immediately. Especially when buying from the Meta Store, returning it and exchanging for a new unit is usually faster and easier than sending it in for repair.