Quest Games Optimizer (QGO) lets you fine-tune CPU and GPU performance levels, render resolution, refresh rate, and other settings, so you can either push visuals further or ease off a bit to save battery, depending on what you want.
I tried it with A Fisherman’s Tale, and the before-and-after difference is easy to spot. What makes it even better is that you can do the whole setup directly on the headset. No PC and no cable required. The ADB activation is handled directly inside the headset through Android Developer Options and a pairing code.
This guide walks through the entire process, from buying QGO to getting it installed, and then shows what it actually changes in real use. I’ve also included practical notes, common issues, and FAQs. If you like getting the most out of your headset and don’t mind tweaking settings, QGO is worth a look.
Feature overview
Quest Games Optimizer, or QGO for short, lets you adjust CPU and GPU performance levels, render resolution, refresh rate, and other parameters to tune system performance for each game. Depending on the profile, you can improve image quality or extend battery life.
So let’s take a look at how that difference shows up on screen in A Fisherman’s Tale.
This shows the screen before and after turning QGO on.
In the PC comparison, the left side is the original game image, and the right side is with QGO enabled. On mobile, the first image is QGO off, and the second is QGO on.
You can tell just by looking at the images that once QGO is enabled, the jagged edges around the screen are much less noticeable. In VR, improvements like this—even small ones—make a big difference in how immersive the experience feels.




Because this tool directly changes performance and rendering parameters on the headset, it isn’t an app that Meta officially approves. That’s why you can’t buy it from the official Quest Store. Instead, you need to purchase it directly from the developer on itch.io and install it manually on your headset using an app like Mobile VR Station.
Also, because this software changes performance and rendering parameters on the headset, you should understand what these settings do before using very demanding profiles for long sessions. For that reason, it is better suited for intermediate to advanced users who are already comfortable with their hardware and know how to adjust the settings based on the situation.
Install directly on the headset
The headset-only install process is a bit more involved, but the upside is big: no PC, no cable, and no SideQuest. ADB activation is handled directly inside the headset through Android Developer Options and a pairing code.
Before you start, make sure you have the following ready (this method uses Mobile VR Station):
- Your Quest headset
- Quest Games Optimizer already purchased on itch.io
- The Quest headset connected to Wi-Fi
- Meta Developer Mode must already be enabled on your account to allow apps installed outside the store.
Step 1: Log in to QGO
Open the browser app inside the headset. In the address bar at the top, enter https://itch.io/ to access the official itch.io website.

Then click Log in and sign in to your account.

Step 2: Access your library
Once you’re logged in, click My Library in the top-right corner to open your software library.

You should see QGO listed there. Click Download.

Step 3: Download QGO
On the download page, click Download to start downloading the file.
One thing to note: inside the headset, download progress isn’t shown automatically. To make sure it’s actually downloading, you’ll need to stay on that page and check manually.

Step 4: Check the download
Click the ⋯ menu in the top-right corner of the browser to open the menu.

Next, select Downloads.
If you see QuestGamesOptimizer listed there, the download was successful.
If you notice the same file listed multiple times, that just means you clicked the download button too many times. After installation, you can clean things up using Clear to keep the list tidy.

Step 5: Install and launch Mobile VR Station
Next, search for Mobile VR Station in the Meta Store. Once you find it, install it and get ready to launch it.
I’m doing this directly from the store inside the headset, but using the Meta Horizon app on your phone works too. Honestly, the phone app is often faster, so just use whichever feels easier.

After that, hit Get and then Download. Don’t worry—this one’s free, so there’s no charge.

Step 6: Install QGO
Open Mobile VR Station. The first time you launch it, you’ll see a prompt asking, “Allow this app to access audio files?” This is just a permission check tied to microphone access, so go ahead and tap Allow. That’s the recommended choice here.

Once you’re in Mobile VR Station, you’ll see a red button at the bottom of the screen. Press that to move on to the main menu.

From here, just follow the on-screen steps. The first thing you’ll select is Configuration Wizard.

Next, tap Show All Options. This unlocks all the available settings.

The third option you’ll choose is Configure Manage All Files.

The fourth thing you’ll tap is Open Files All. This is where you grant access to all files on the headset.

At this point, you should be able to see the QuestGamesOptimizer Android file you downloaded earlier in the Download folder. Select it and tap it to start the installation.

Before the install actually starts, you’ll see a security prompt pop up. Just tap Settings and move on.

Then turn on Allow apps from this source. Once that’s enabled, you’ll be able to install Android apps this way going forward.

Once the installation finishes, you can launch QGO right away, or open it later from Unknown Sources in your game library.
Step 7: Launch QGO
The first time you open QGO, you’ll need to complete email verification.
Enter the email address you used when you bought it, and finish the activation.

On the first launch, the required permissions aren’t enabled yet, so QGO won’t actually work right away.
Tap Options on the screen to move forward.

To activate QGO properly, you need to generate a pairing code. Since we’re doing this wirelessly, tap Open Settings.

Step 8: Enable Android Developer Options on Meta Quest
In App Info, click Open to enter the Settings page.

Once you’re in the settings screen, you’ll be inside a hidden Android system area that Meta doesn’t normally expose.
From here, you need to enable Android Developer Options on the headset, so scroll all the way to the bottom of the page.
Note: In this case, Android Developer Mode is mainly used to show debugging options, including wireless debugging, which is needed for ADB pairing. Meta’s official Developer Mode is used to allow apps created or installed outside the store to run. These two modes are not the same thing.

Scroll all the way to the bottom of the settings screen and tap About Headset.

On the About Headset page, scroll to the bottom again and tap Build Number seven times in a row.
If it works, you’ll see a message saying that Developer Mode has been enabled.

Step 9: Get the pairing code
Go back to the settings screen and tap Developer Options twice to enter it.

You’ll see a toggle for Use developer options. Leave it turned on.
Then scroll down until you reach USB debugging.

Next, tap the switch next to Wireless debugging to turn it on.

When you turn it on, a confirmation prompt will pop up. Tap Always allow on this network to approve it.

After that, go back to the Developer Options screen and tap Wireless debugging again.

Once you’re on the wireless debugging page, select Pair device with pairing code.

At this point, a 6-digit Wi-Fi pairing code will be shown on the screen.
Make sure you note it down—you’ll need it in the next step.
Note: This 6-digit code is one-time use only. Do not close this screen before completing Step 10.
If you accidentally close it, simply repeat Step 9. The system will generate a new code.

Step 10: Activate QGO
Go back to the QGO screen and enter the 6-digit code you wrote down earlier into the input field.
Once you do that, pairing is complete and QGO will become active.

After pairing, make sure to turn on Auto Detection.
With this enabled, QGO will automatically apply the best settings for each game going forward.
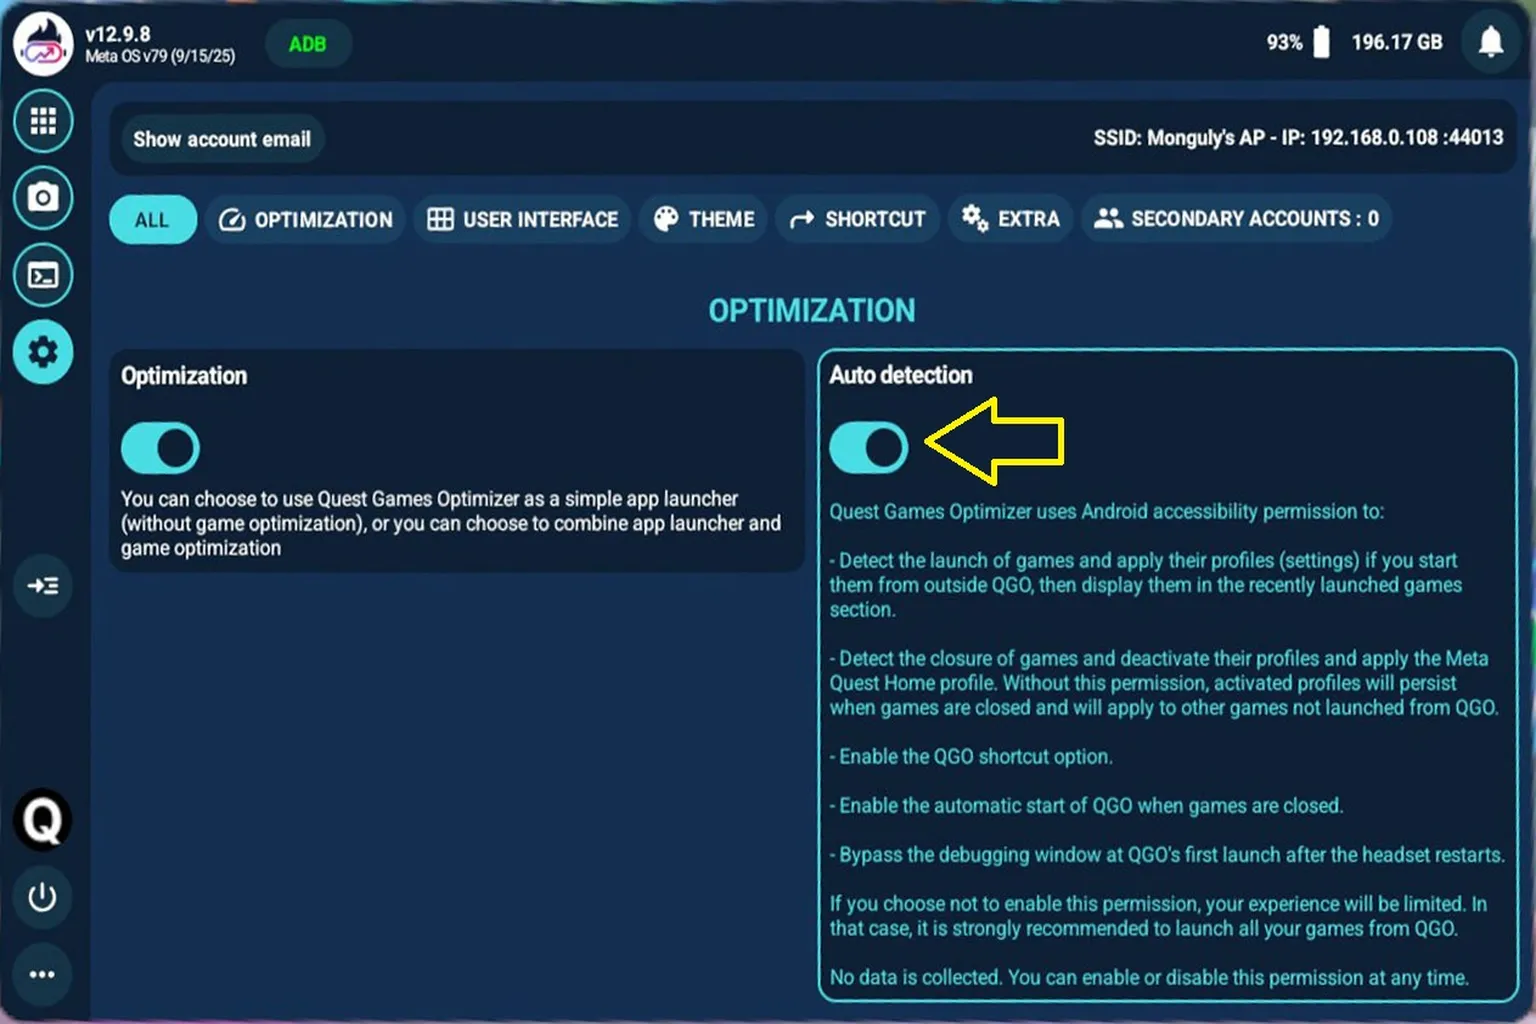
Once you’ve finished all of these steps, QGO is fully installed and activated.
And yeah—after getting it set up, the next question is usually, “So what can it actually do?”
In the next part of this guide, I’ll break down QGO’s features in detail and show plenty of real before-and-after screen comparisons.
FAQ – Common Questions
Is QGO an official Meta product?
No. Quest Games Optimizer is not an officially authorized Meta tool, which is why you won’t find it in the official Quest Store. It’s sold through itch.io and provided directly by the original developer.
Will QGO affect the lifespan of my Quest headset?
QGO improves performance by adjusting performance levels and rendering parameters on the headset. Using high-performance profiles for long sessions can increase heat and power consumption. It is best suited for advanced users who understand the settings and adjust them based on the situation.
What if my credit card payment fails?
itch.io is an English-language site, so most English users usually won’t run into this issue. However, if you have Chrome or Edge translation enabled, it may cause a payment error.
To fix it, turn off the browser translation feature, or use PayPal for the payment.
I installed QGO but don’t see any visual difference. What should I do?
Not every game shows an obvious visual difference right away. In QGO, first check whether the game has an active profile. HD and HD+ profiles are mainly for improving visual quality, while Performance or Battery Saving profiles focus more on smoother gameplay or longer battery life.
Does QGO improve video playback quality for movies?
Not really. QGO can improve VR games by adjusting rendering, 3D models, and textures, but video streams or already encoded video files can barely be improved. So when watching movies, you should not expect a real image-quality improvement.