
Just received your refurbished Meta Quest replacement after a repair, only to find the controllers will not pair and the headset will not link to your account? You are not alone. Setting up an RMA replacement can be incredibly frustrating since the official manual leaves out the most crucial synchronization steps. In this complete guide, we will walk you through the exact process to safely unlink your old device and manually force-pair your new headset and controllers via the Meta Horizon app. Stop struggling with unresponsive hardware—follow our step-by-step fix to get back into VR today.
About Repairs and Returns
When you send your Meta Quest headset or controllers to official support for repair, Meta usually ships a replacement to your specified address about 4-7 business days after they receive the faulty unit.
If you’re still not sure about the repair request process, there’s a separate article that walks through the steps in detail. Take a look at that one as well to get everything sorted smoothly.

Meta’s official handling for faulty devices is replacement only, not repair. What you get back is a refurbished replacement of the same model. When it arrives, it’s fully packaged like a complete product, and the box is clearly labeled with the product name and “Refurbished.”
You might see a label that says “AA batteries,” but that only means the controllers use AA batteries. It doesn’t mean batteries are included in the replacement package, so don’t get caught off guard there.
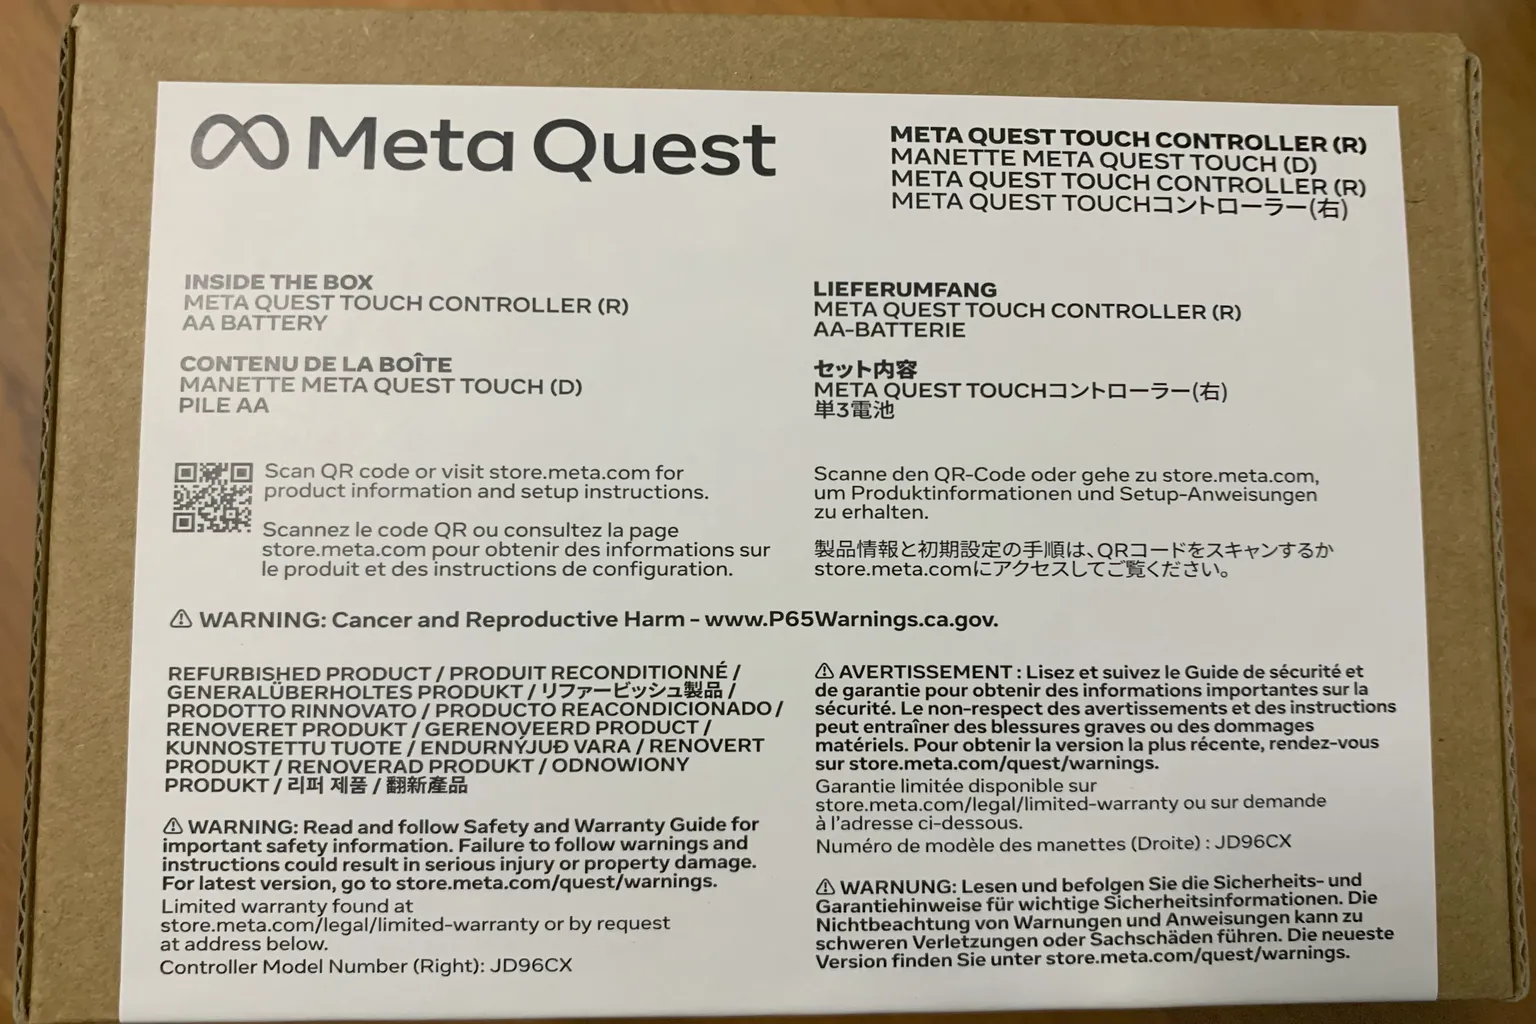
When you open the box, you’ll find the controllers securely packed, along with a single instruction manual.
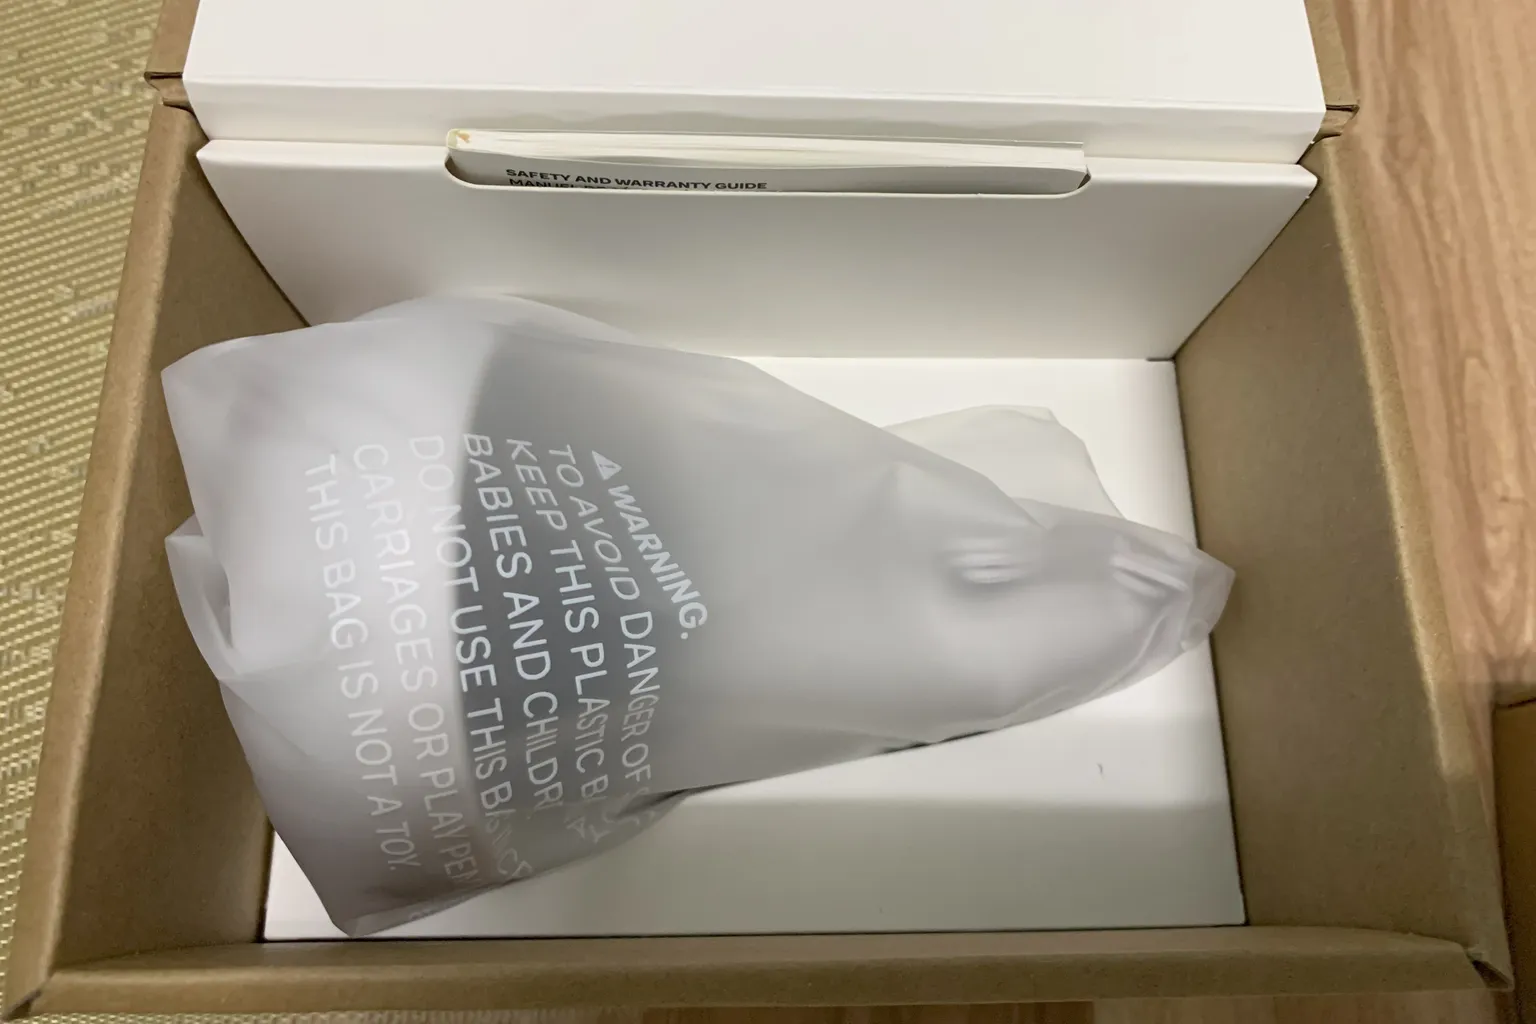
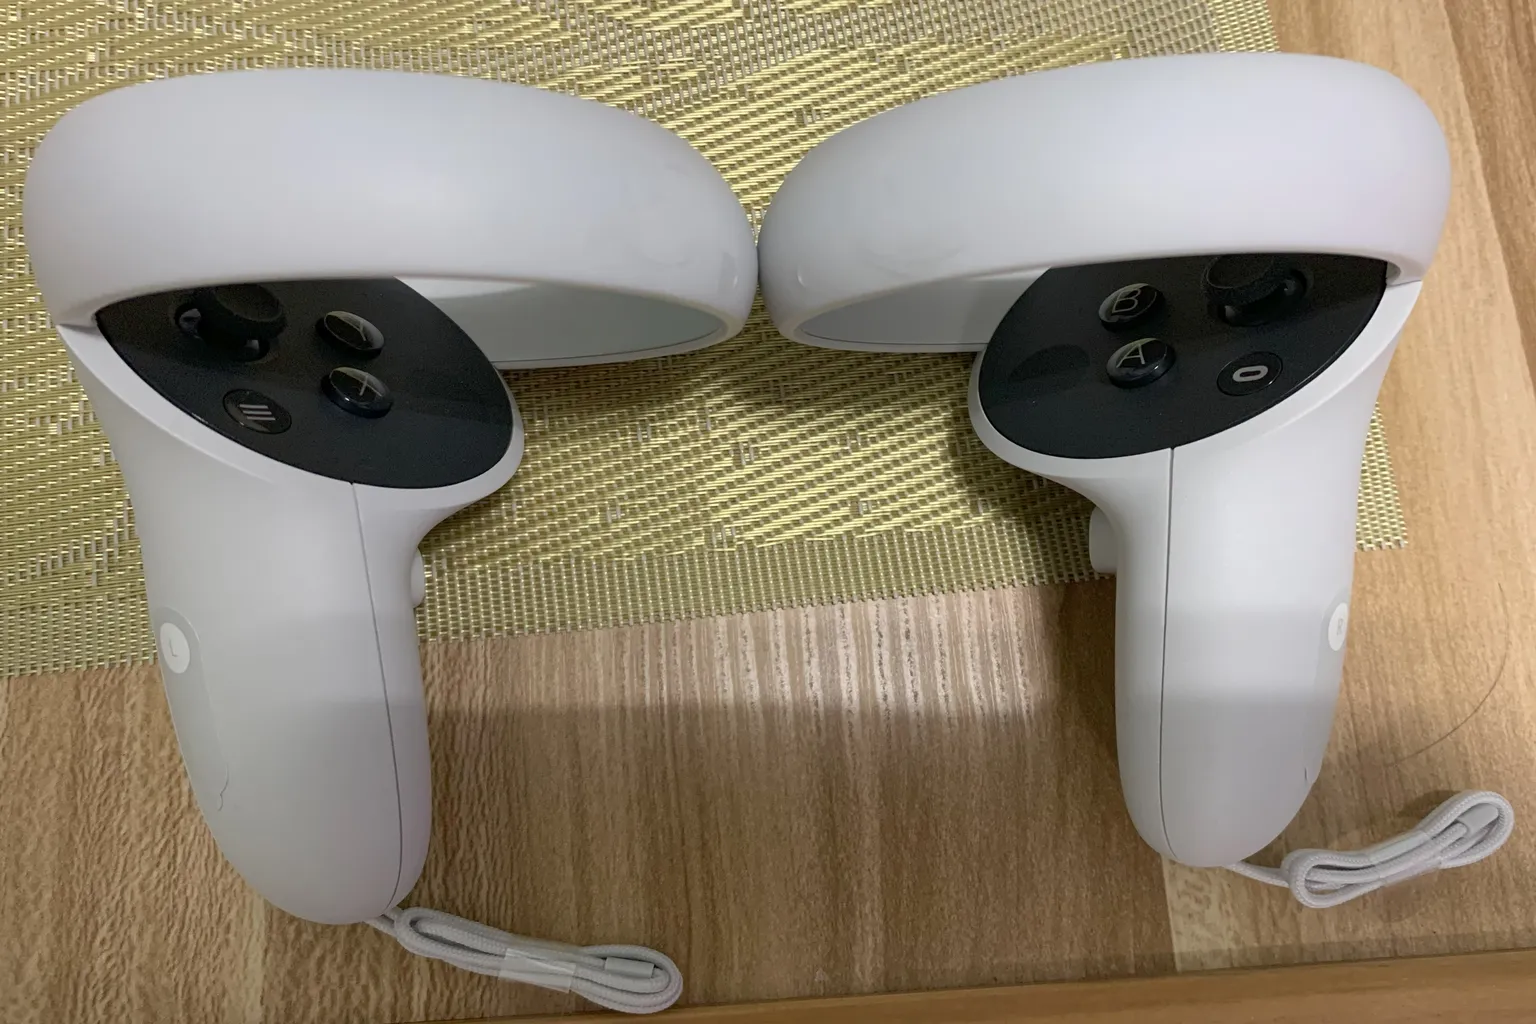
This one is a Meta Quest 2 controller replacement. Even after unboxing, it looks almost identical to a brand-new unit. The wrist straps are completely new as well and come included right out of the box.
If you sent in the headset itself for repair, the replacement package also includes a full set of new accessories, like a fresh face cover and head strap. That means you can start using it right away as soon as it arrives. This is one area where Meta’s hardware service really delivers—it’s the kind of unboxing that makes you think, “Nice, this is actually pretty solid.”
Setting Up a Refurbished Replacement
Getting a headset or controllers that look basically brand-new is exciting, but right after that, you can hit a small wall.
- If you got a replacement headset, you might think, “My controllers aren’t connected to this new headset. I can’t control anything. How am I supposed to link it to my account?”
- If you got replacement controllers, it’s the same kind of problem. “I boot up the headset, but nothing responds. So how am I even supposed to open the settings menu?”
That’s why I’m going to walk you through the pairing process step by step from here.
You might be thinking, “Isn’t this in the manual that came in the box?”
Sadly, no.
That thick manual is 104 pages long and written in 13 languages, but it’s basically just stuff like “controllers won’t work without batteries” and “don’t give controllers to kids under 3 because they might take them apart and swallow the batteries.”
The one thing you actually need, the real setup steps, isn’t in there at all.
So from here on, I’ll show you exactly how to set up a refurbished replacement headset or controllers, in the right order.
Setting Up a Refurbished Headset
Before you can use a replacement headset, you need to remove the old headset from your account first. There are three ways to do this, but Methods 1 and 2 only work if you still have the old headset with you.
Method 1: Remove it from the Meta Horizon app
Open the Meta Horizon app on your phone, go to account settings, and delete the target headset from your device list.
Method 2: Hard reset using the power button + volume down
Press and hold the power button and the volume down button on the old headset at the same time to perform a factory reset.
Method 3: Remove it from the Meta official website
If you no longer have the headset, use this method. Log in to the official Meta website and remove the device from your registered devices list.
For example, when the headset is no longer with you, you can’t remove it through the Meta Horizon app. In the device list, the headset may show “Not found,” and you won’t be able to open its detail page. In that case, removing it from the official website is the way to go.
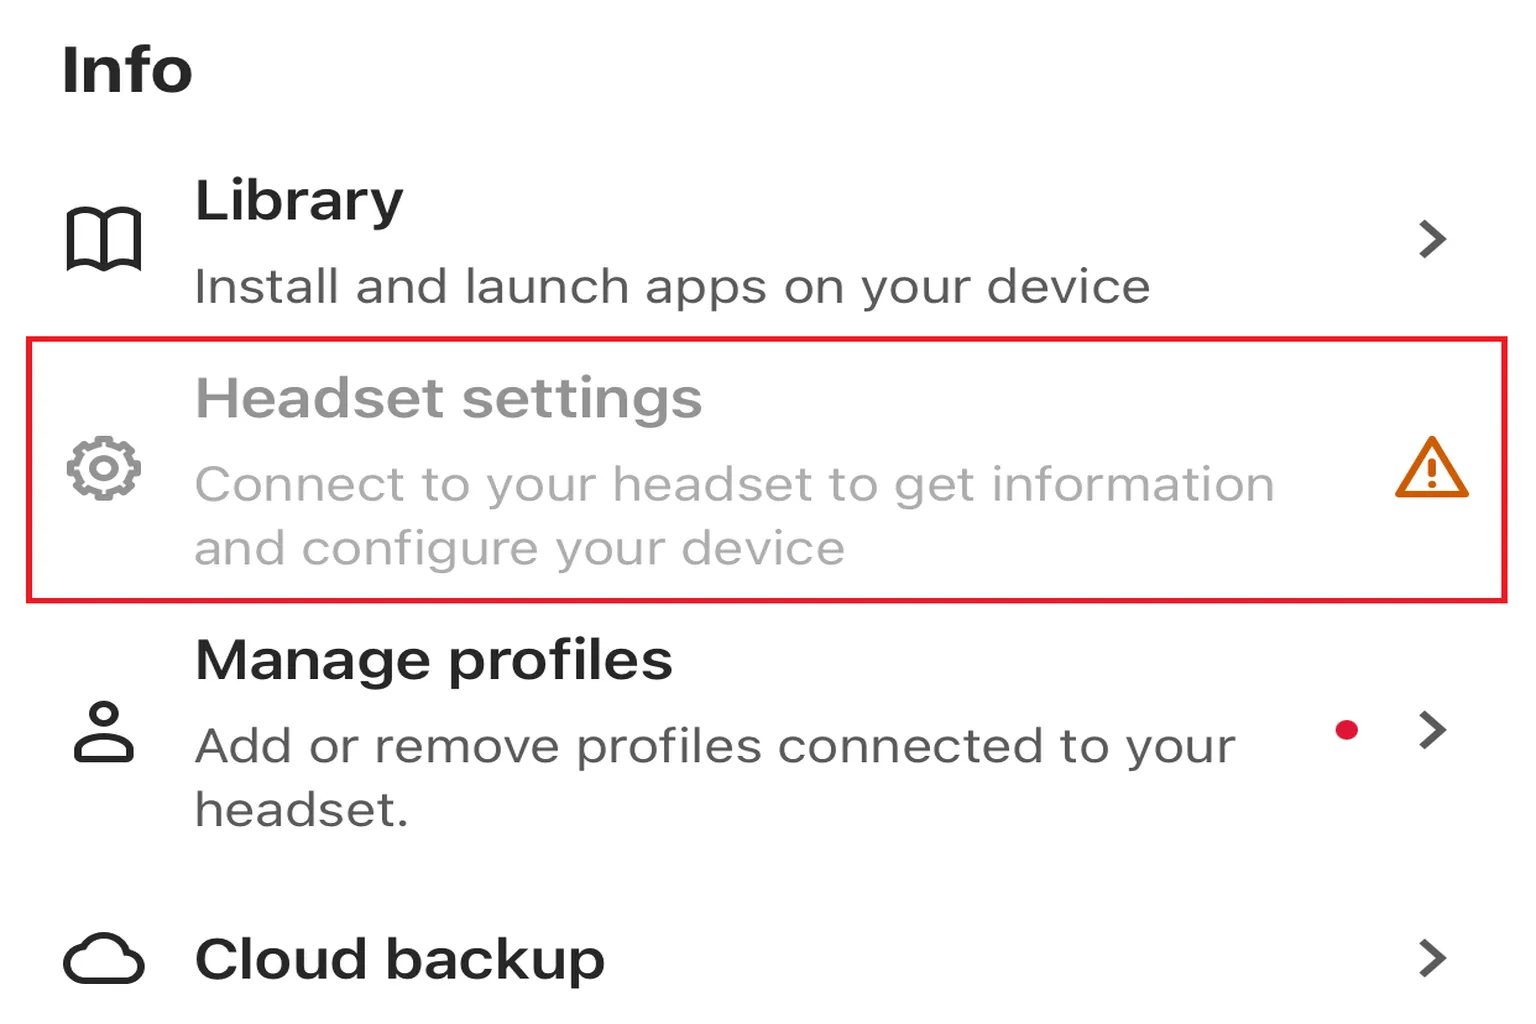
To remove an old headset, you’ll need to reset it from the official Meta website.
If you already unlinked it before sending it in for repair, or if you just want to skip the old one and set up the replacement right away, you can simply tap the + icon in the top-right corner of the previous screen. That lets you skip ahead and jump straight to Step 5.
Here’s how the reset process works on the official website.
First, head to the Meta official site.
Step 1: Open the Settings Page
Click the user icon in the top-right corner of the Meta official website and log in to your account.

Next, click Meta Horizon Profile Settings in the lower-left corner to enter the settings page.

Step 2: Select Devices in Settings
Once the settings page opens, click Devices in the left-side menu.

On that screen, you’ll be asked to log in to your account again.

Step 3: Reset the Headset
You should see your old headset listed on the screen. Click Factory Reset.

A confirmation will appear. Resetting the device will erase all data on the headset, including videos and photos. If you’re sure, click Continue to proceed.

Step 4: Enter the Verification Code
For security, Meta will send a 6-digit code to your account email. Enter that code on the page, then tap Submit to start the deletion.

Once you select Confirm, the old headset will be unlinked from your account.

Once the unlinking is done, it’s time to set up the new headset.
You’ll need these three things ready:
- A smartphone with the Meta Horizon app installed and already logged in to your Meta account
- Bluetooth turned on on your phone
- The Quest headset in your hands, powered on
Step 4: Open the Devices Screen
Tap the ☰ menu in the top-left corner of the Meta Horizon app.

Select Devices from Device Management in the menu.
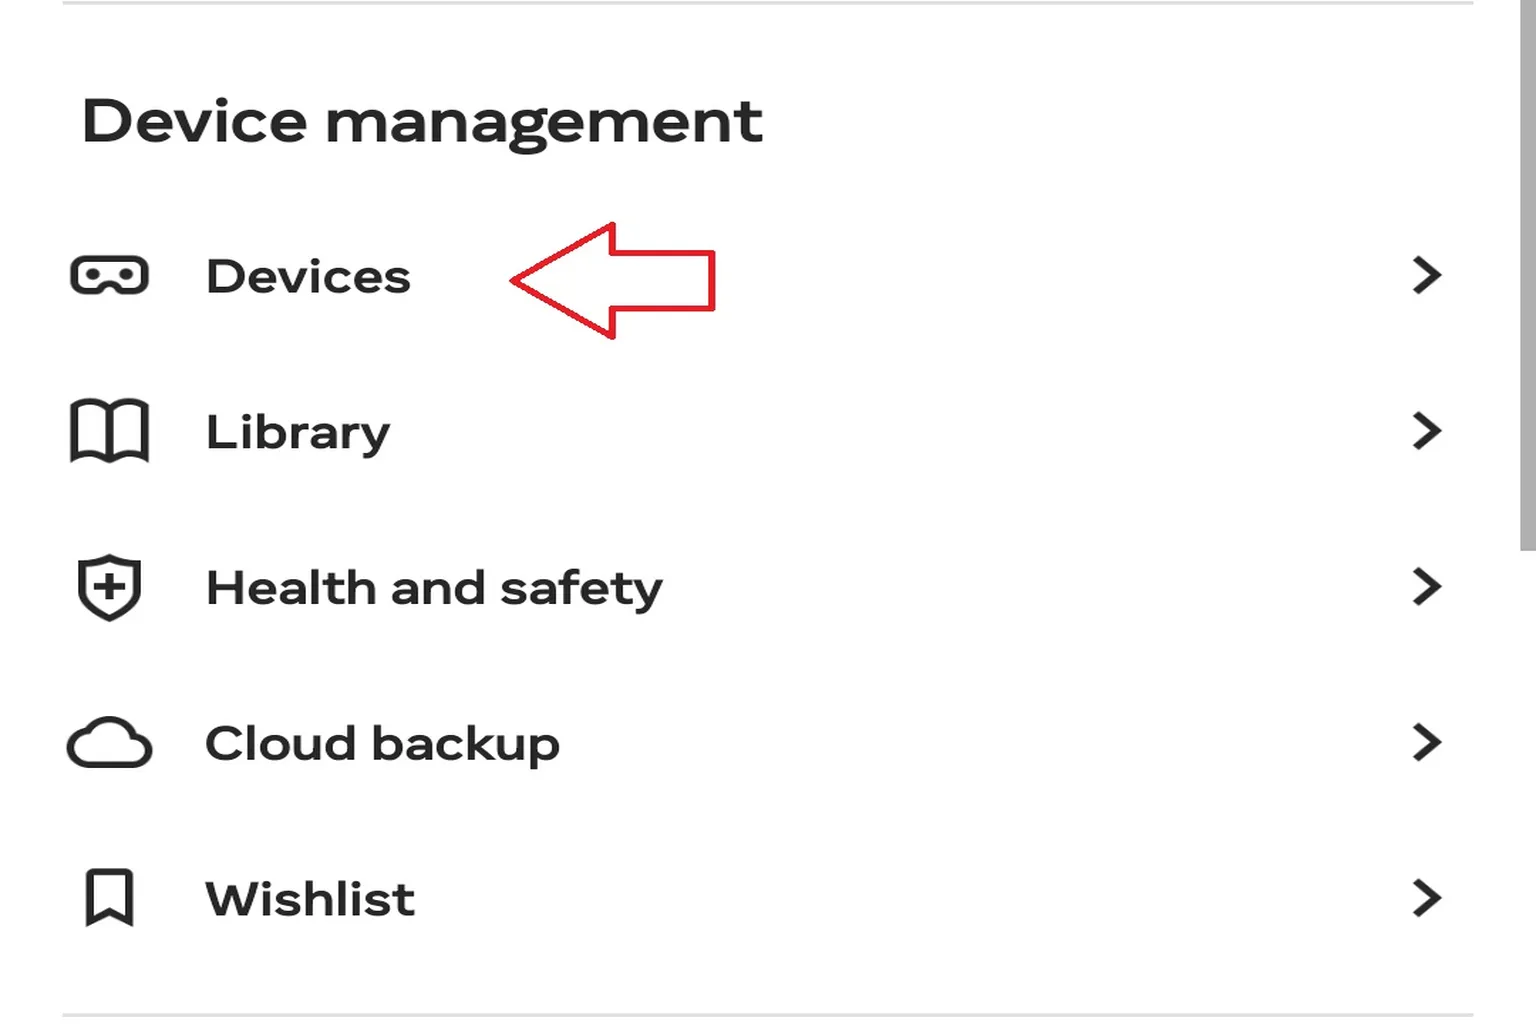
Step 5: Set up the device
From the list, tap your model name (e.g. Quest 2 / Quest 3 / Quest 3S) to start pairing.
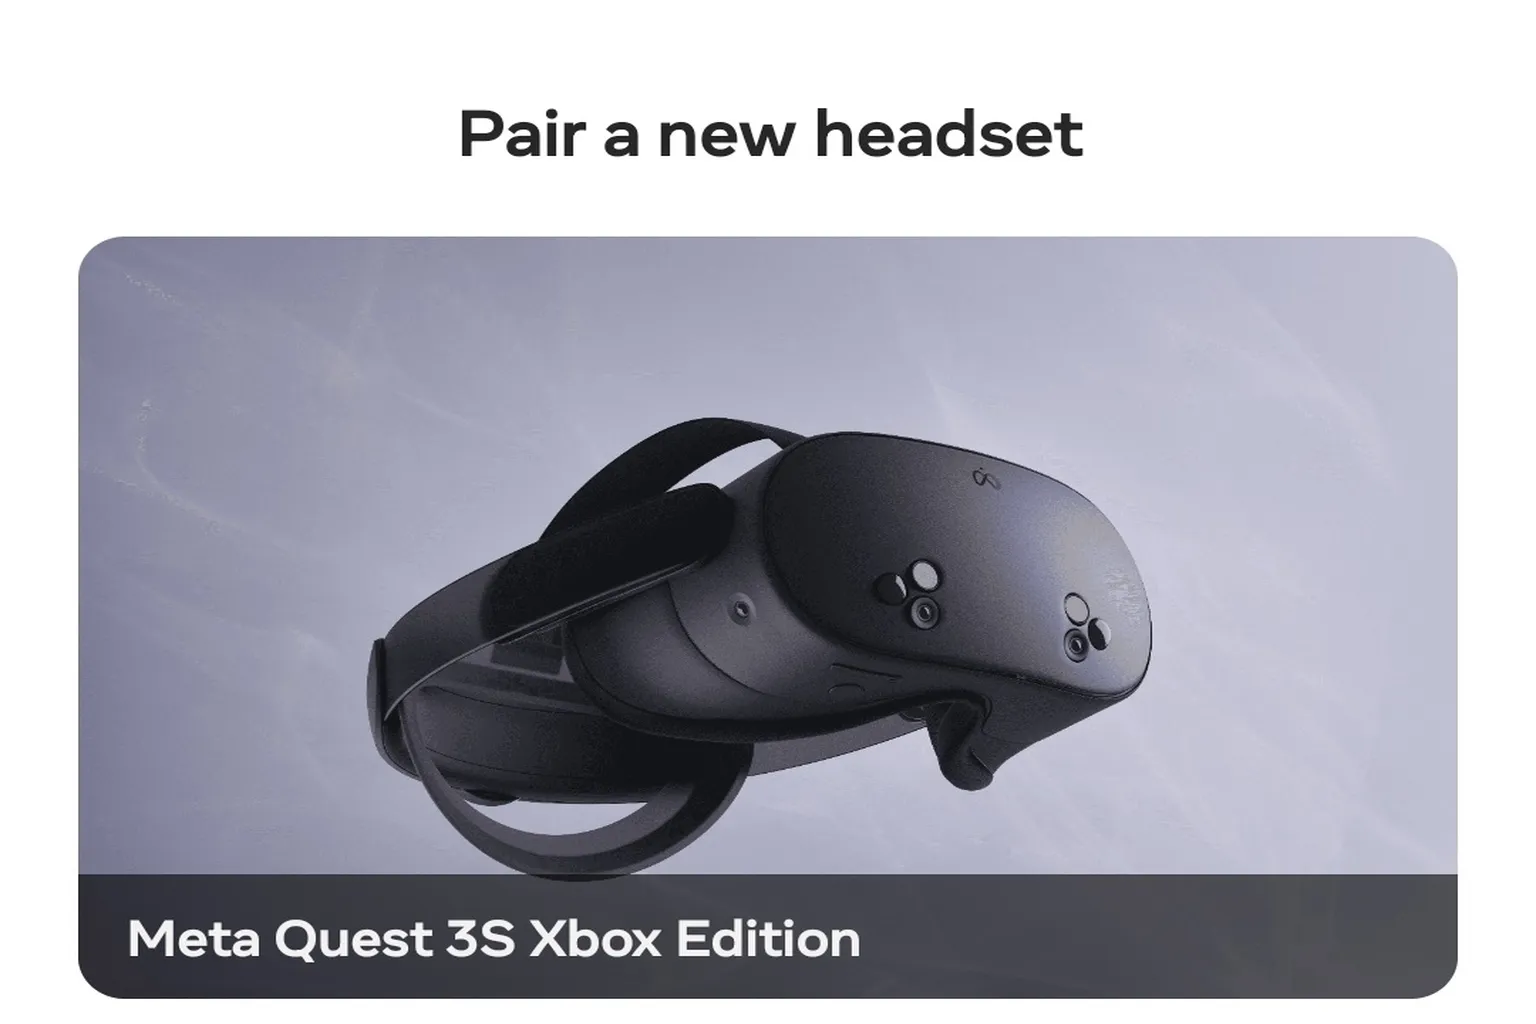
It’s the same process as when you first bought it, so here just choose the bottom option, Already connected.
Your phone will start searching for nearby Meta Quest devices via Bluetooth.
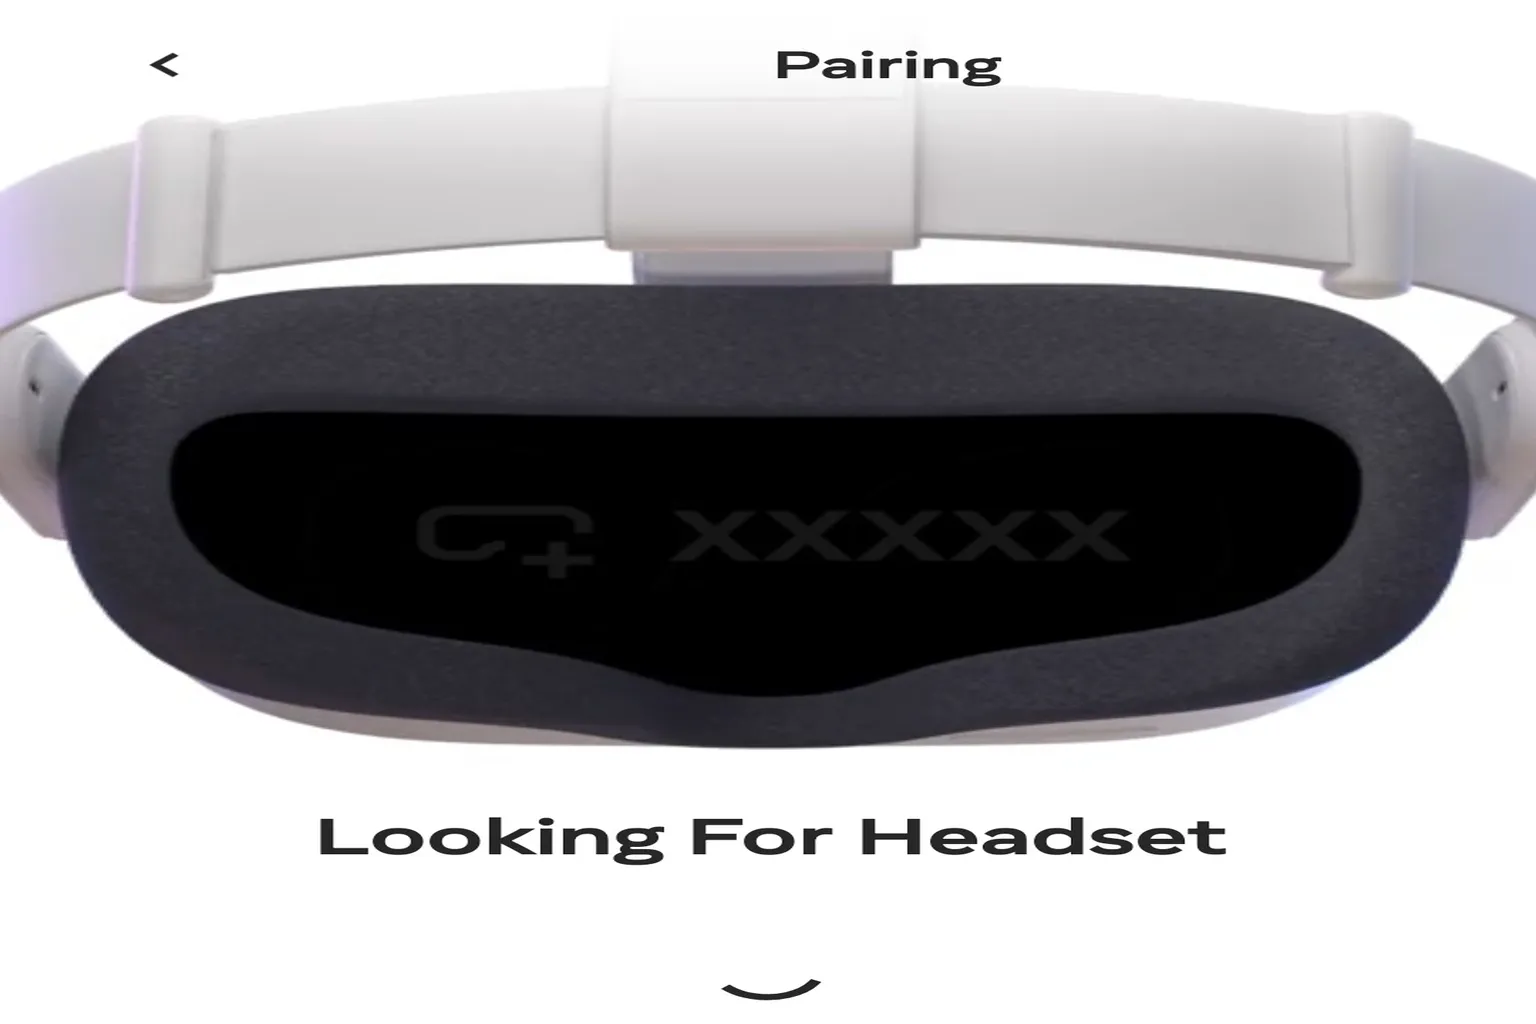
Step 6: Connection complete
In most cases, it’ll connect automatically. Sometimes, though, you’ll be asked to enter a 5-digit code.
If that happens, put on the headset—the code will appear inside. Enter it and you’re good to go.
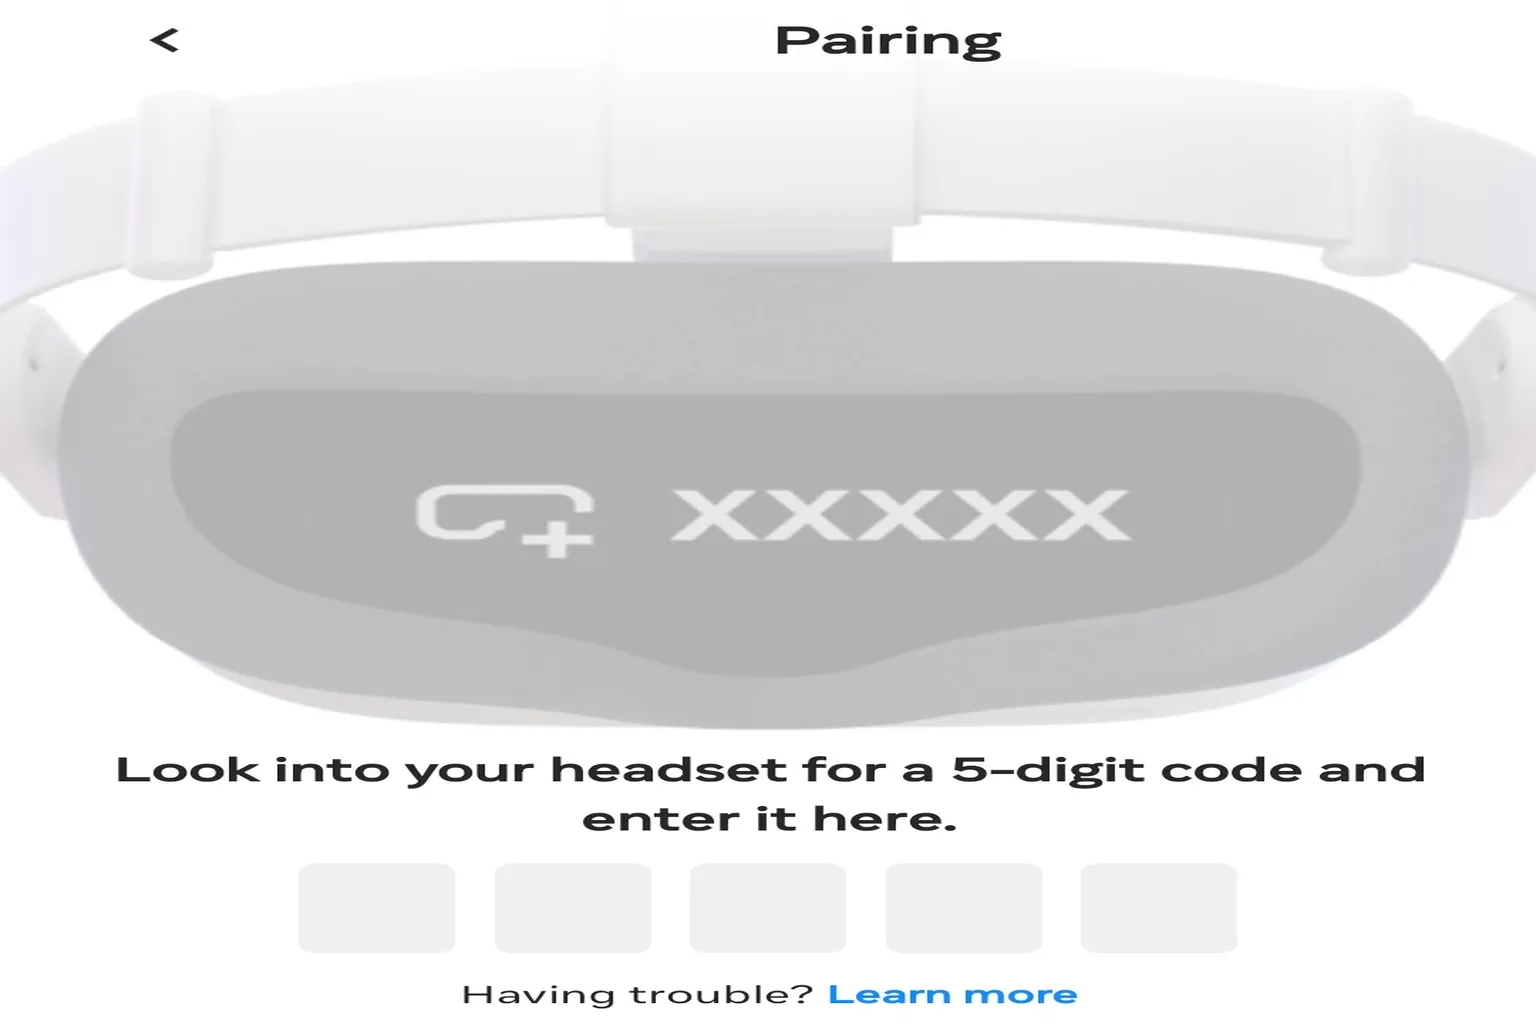
Once that’s done, the new headset will be linked to your account.
That covers pairing the Quest headset.
But even if the headset is connected, the new headset and your old controllers aren’t paired yet.
Next up, we’ll connect the controllers.
Connecting refurbished controllers
This process works in two cases:
- You switched to a refurbished headset and want to pair your old controllers with the new headset
- Or you replaced the controllers themselves
If you replaced the controllers, you’ll need to unpair the old ones first, so start from Step 1.
If you replaced the headset, your old controllers are already unpaired, so you can jump straight to Step 4.
Here’s how it goes:
Step 1: Open the device screen
In the Meta Horizon app, tap the ☰ menu in the top left.
Select Devices from Device Management in the menu.
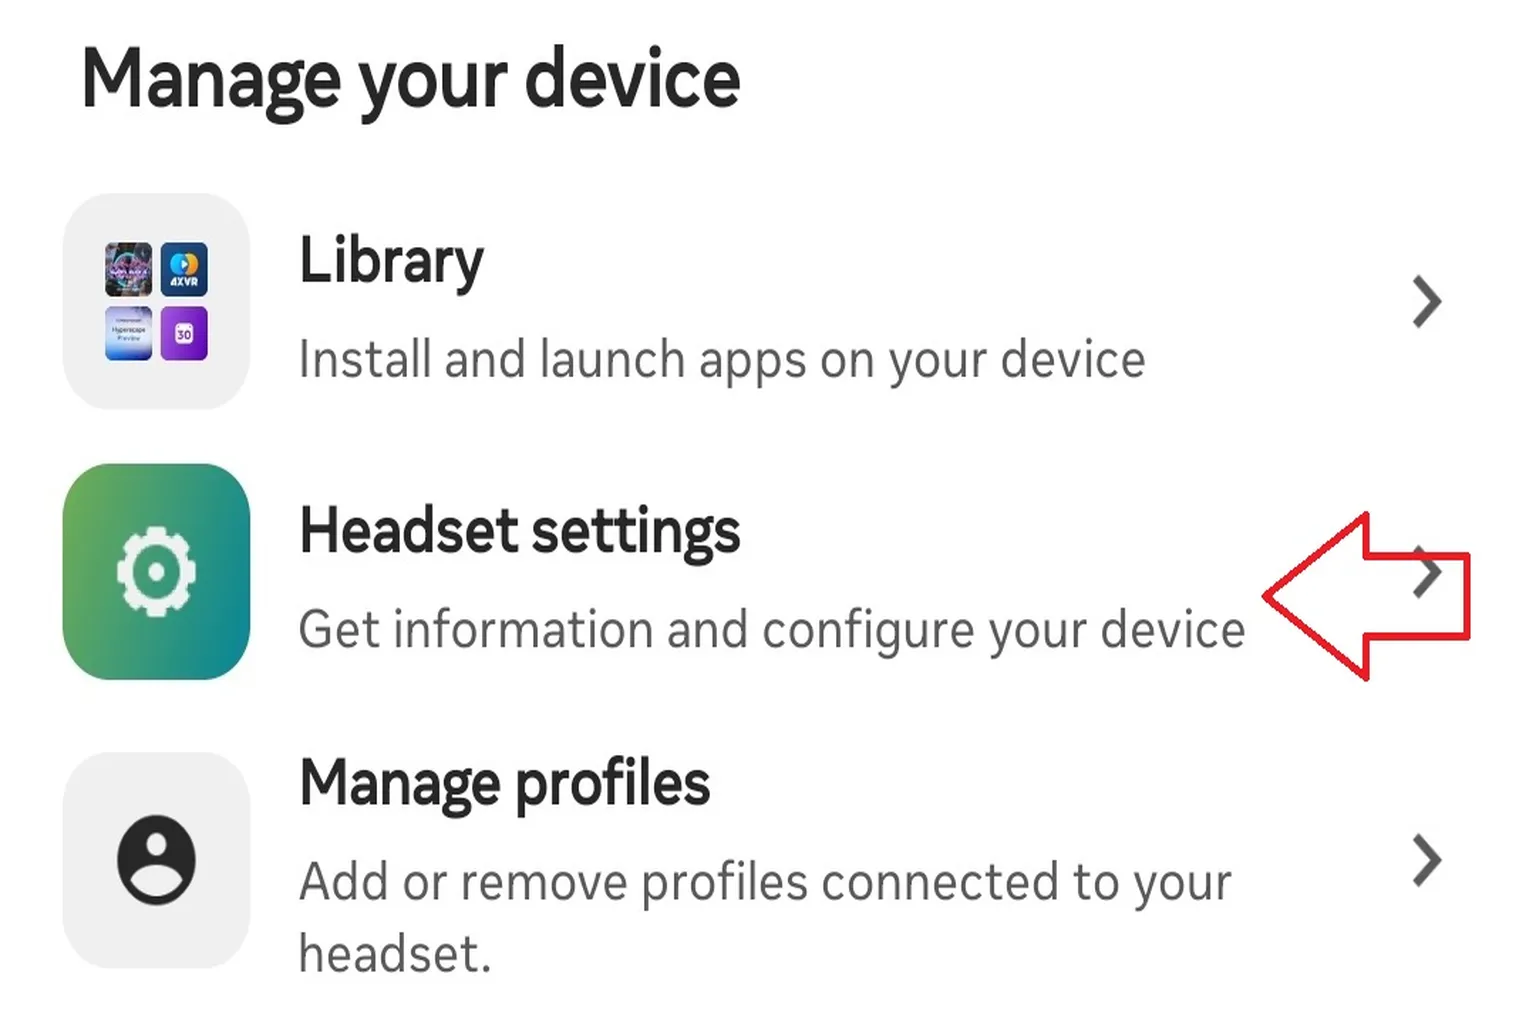
Step 2: Open controller settings
Tap Headset Settings.
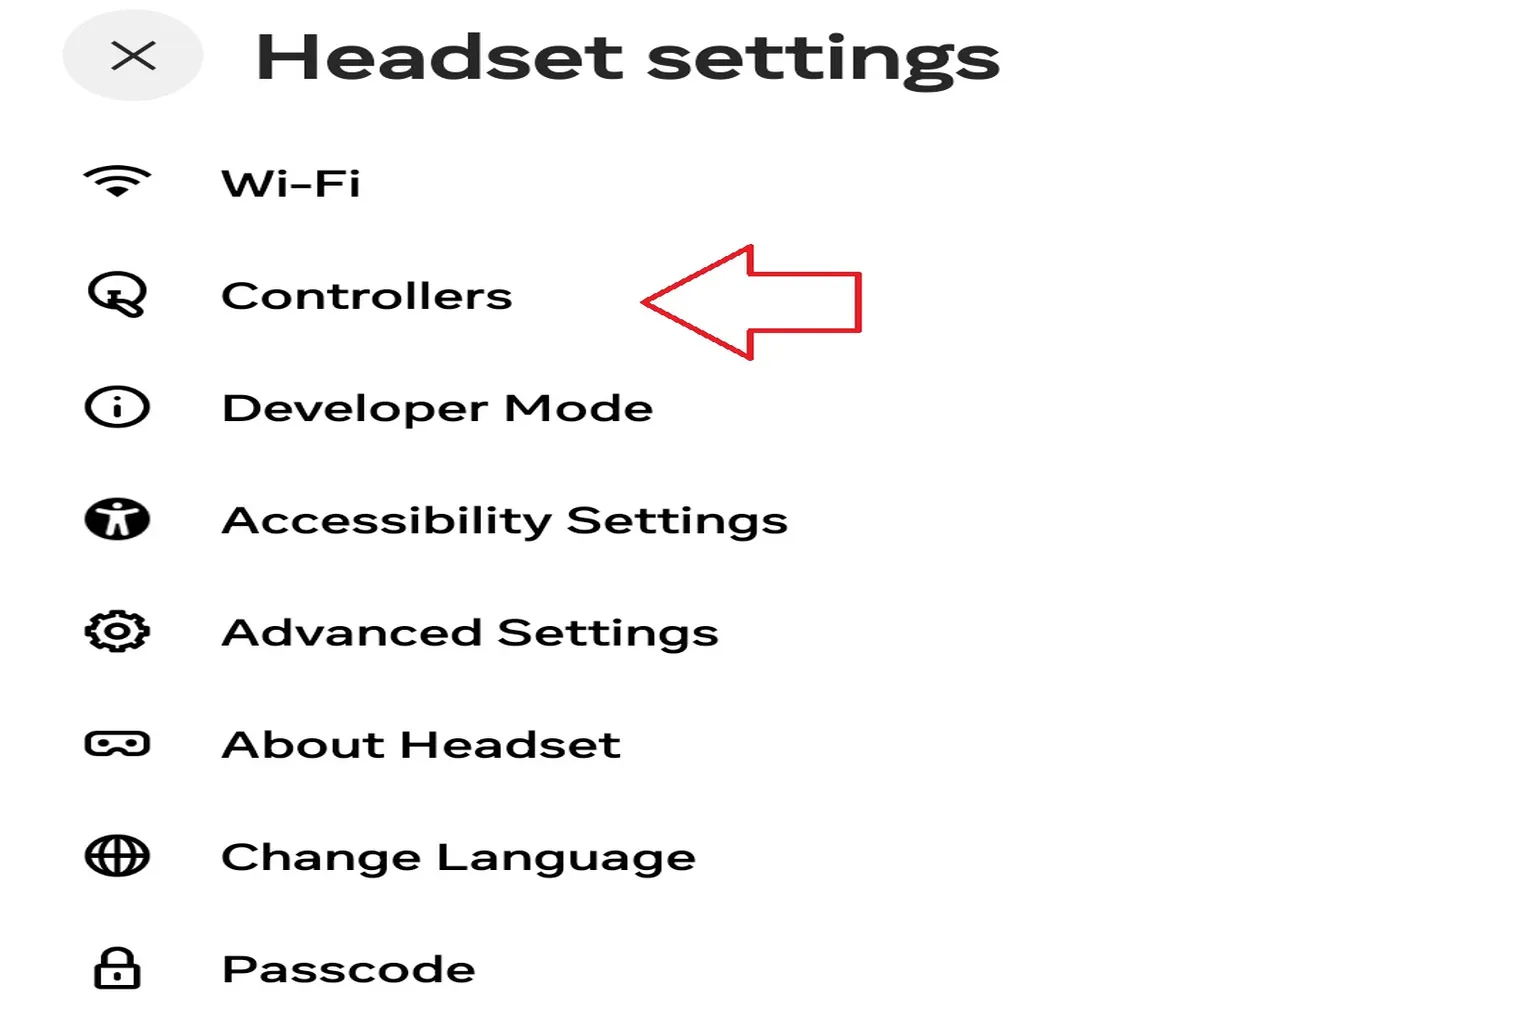
Then select Controllers.
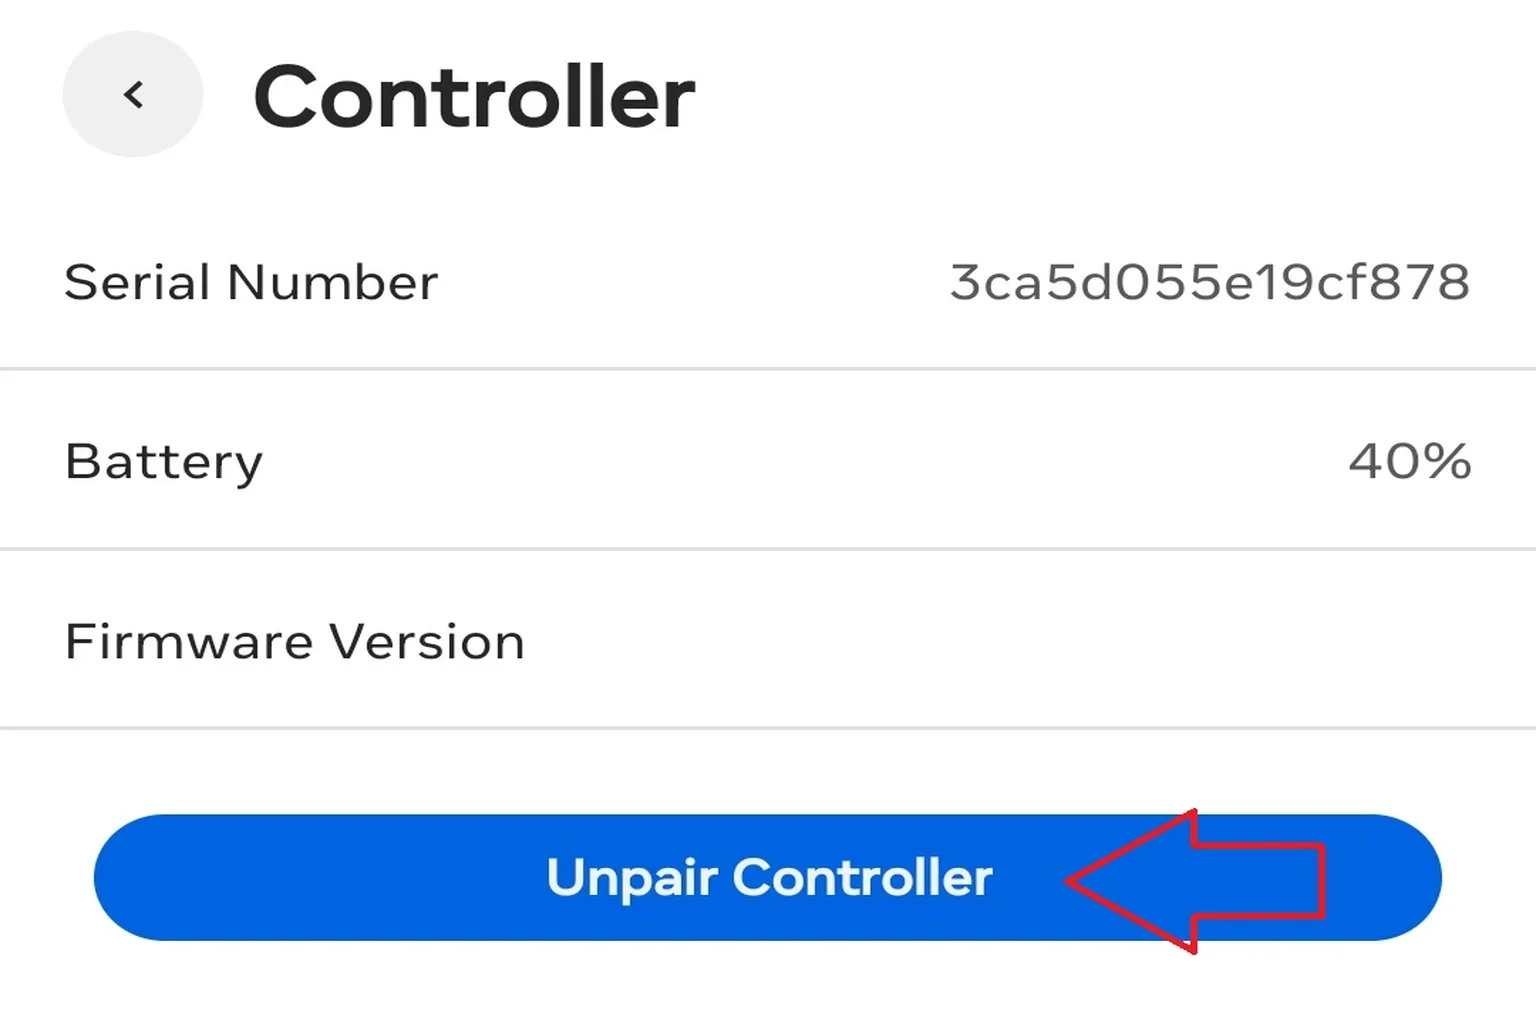
Step 3: Reset the controller
From the list, choose the old controller you want to remove.
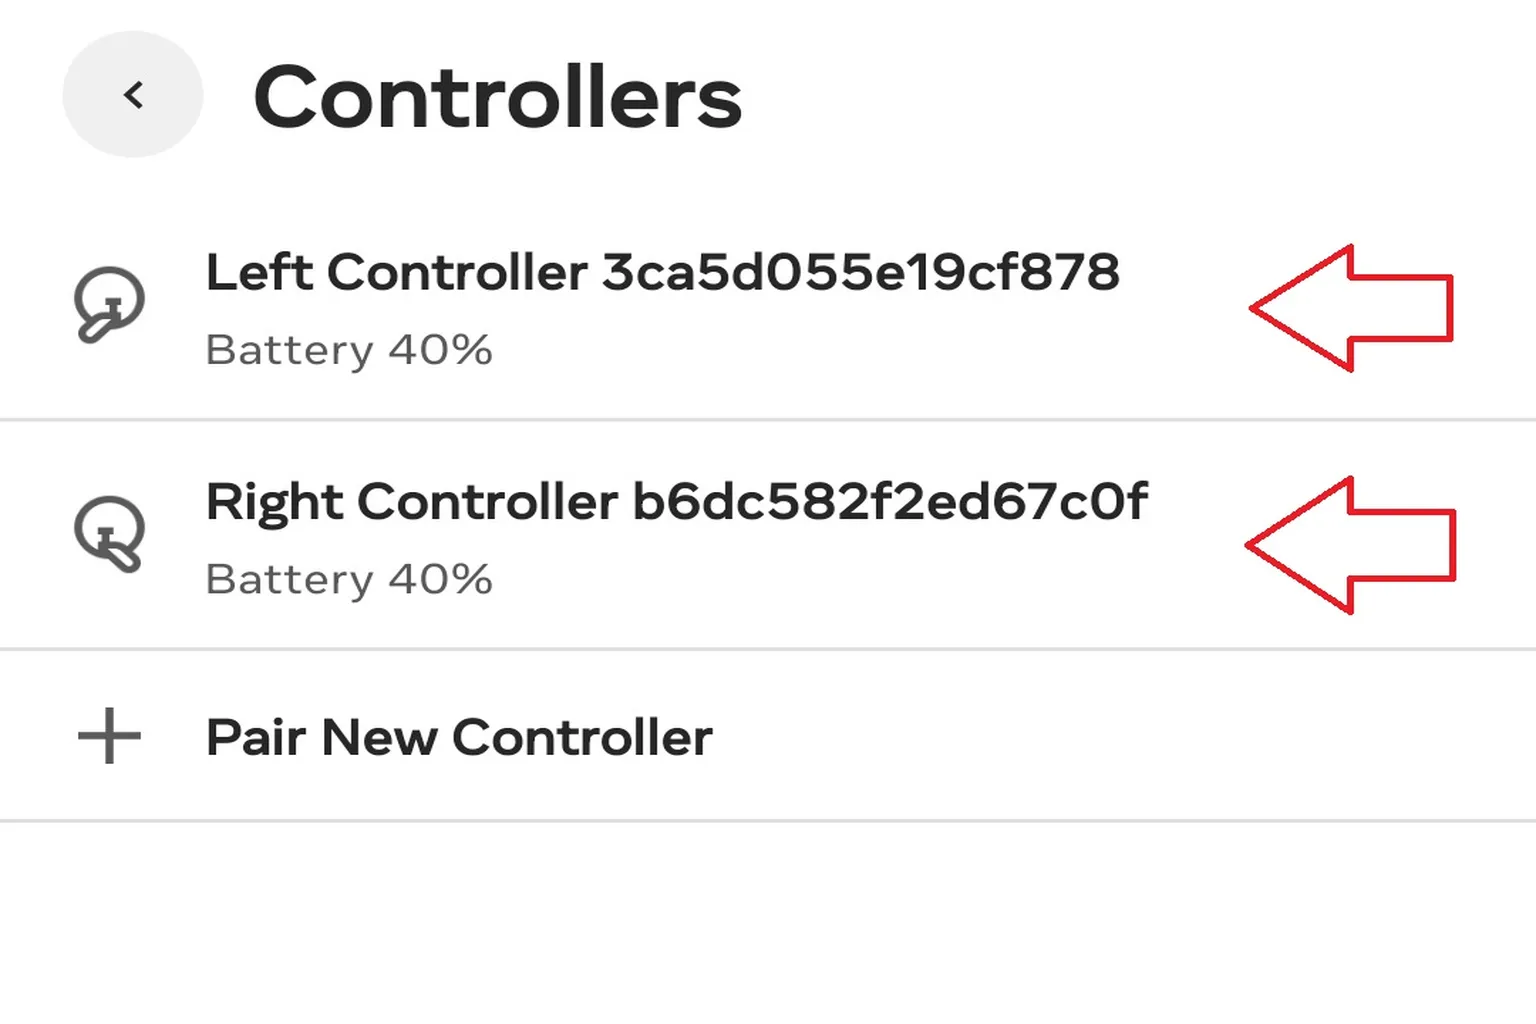
Tap Unpair Controller and you’re done.
This will remove the link between that controller and the headset.
You’ll always see a confirmation screen when removing a controller—just tap Unpair to proceed.
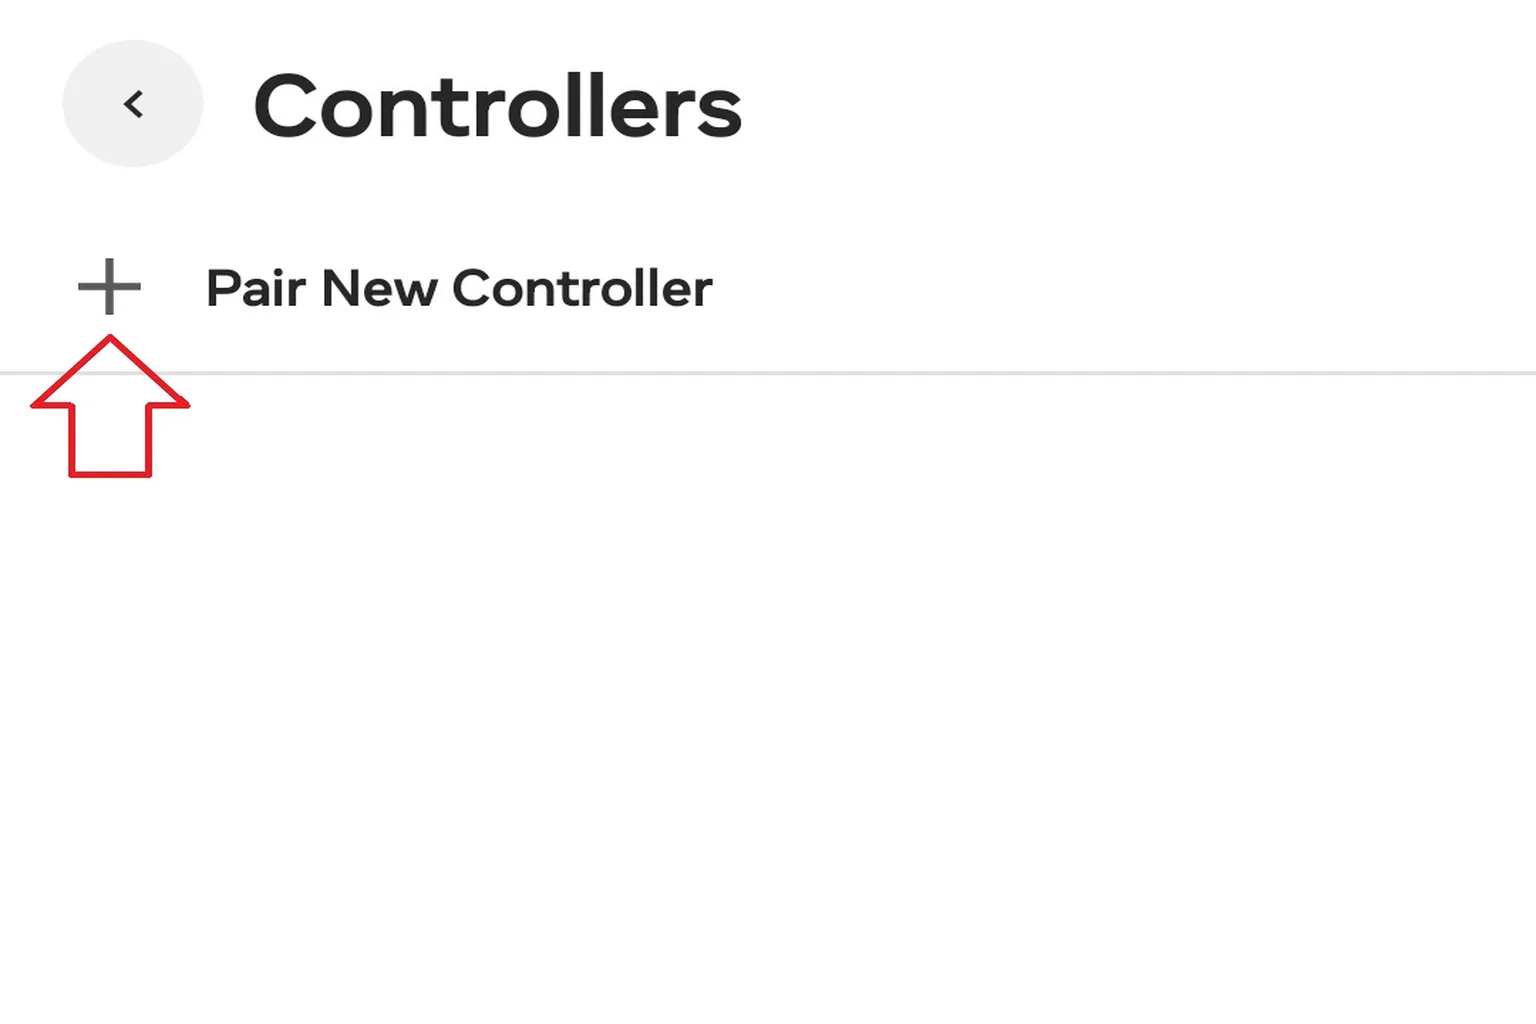
Step 4: Pair the controller
On the Step 3 screen, tap ➕ Pair New Controller.
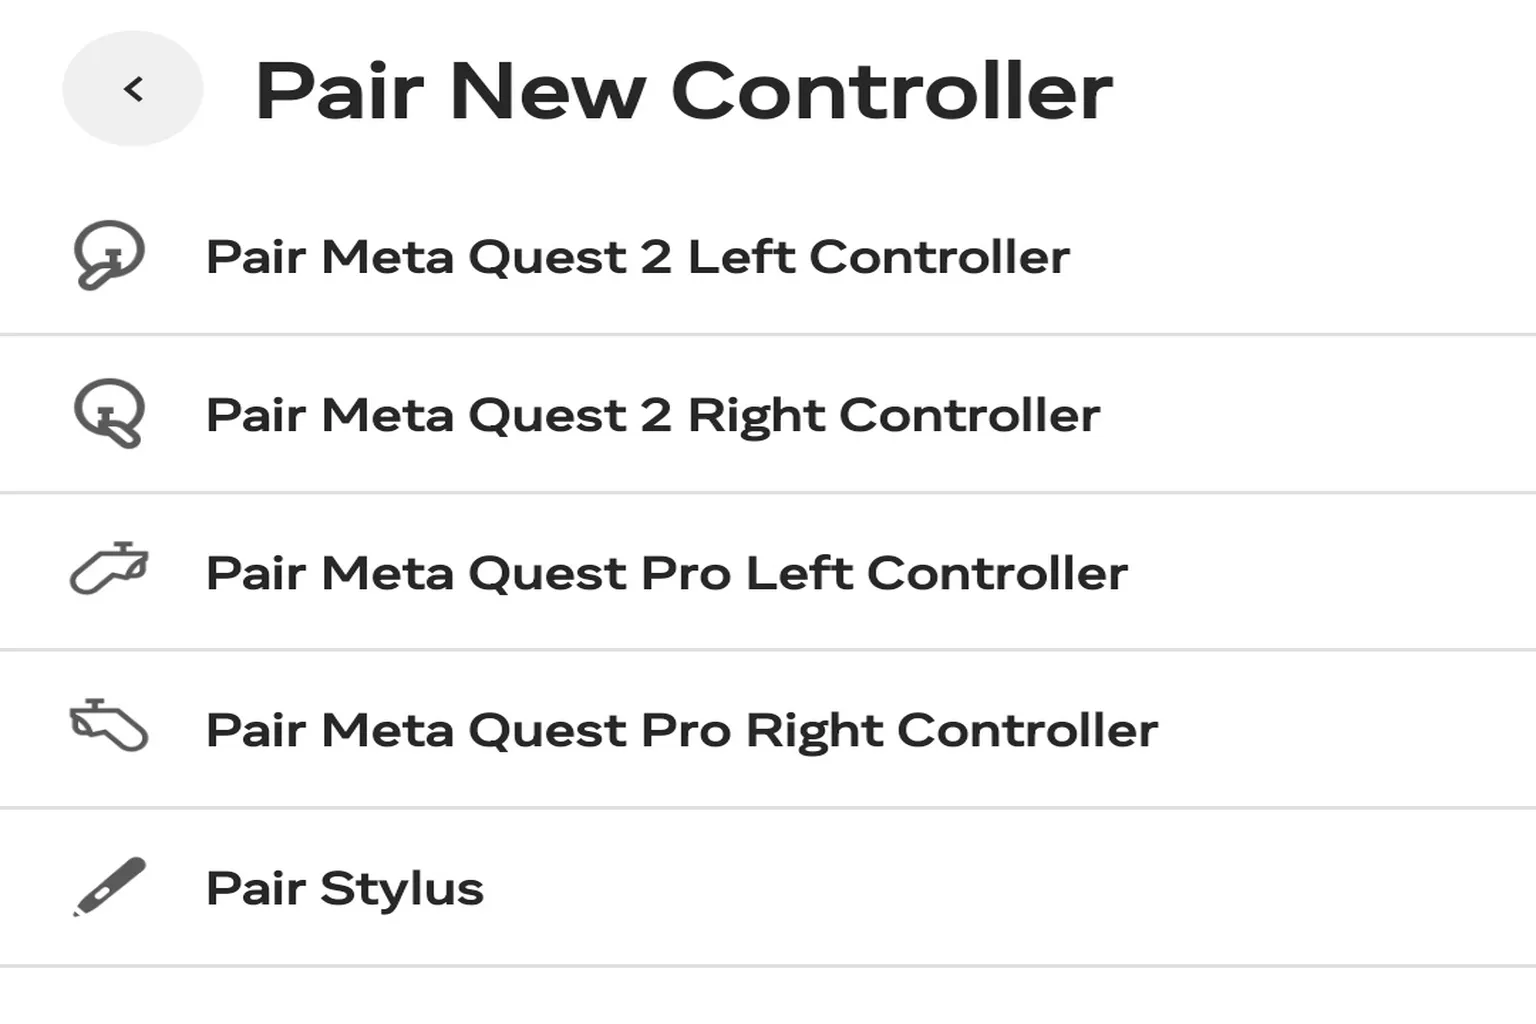
You’ll see a screen to choose the controller type:
- Meta Quest 2: Left / Right controllers for Meta Quest 2
- Meta Quest 3 / 3S / Pro: Left / Right controllers for Meta Quest Pro
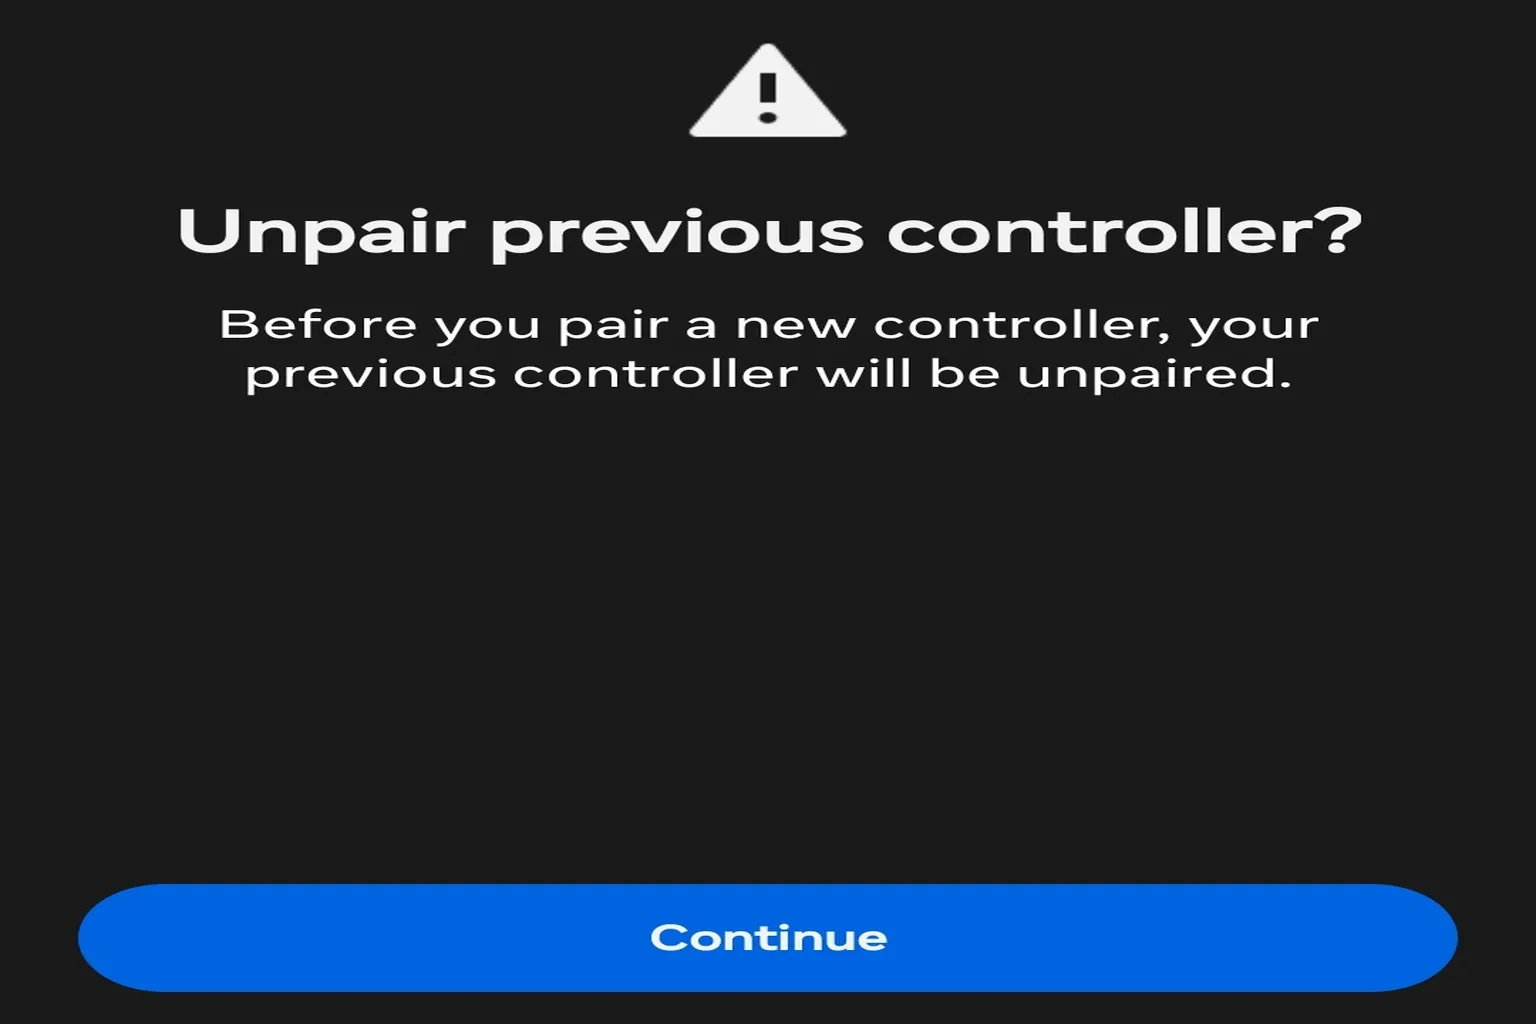
About the error message:
If you try to move on to Step 5 without removing the old controller first, you’ll get an error.
When that happens, delete the old controller first, then start the new controller setup again.
Step 5: Pair the controller
Follow the on-screen instructions and press the buttons on the controller you want to connect.
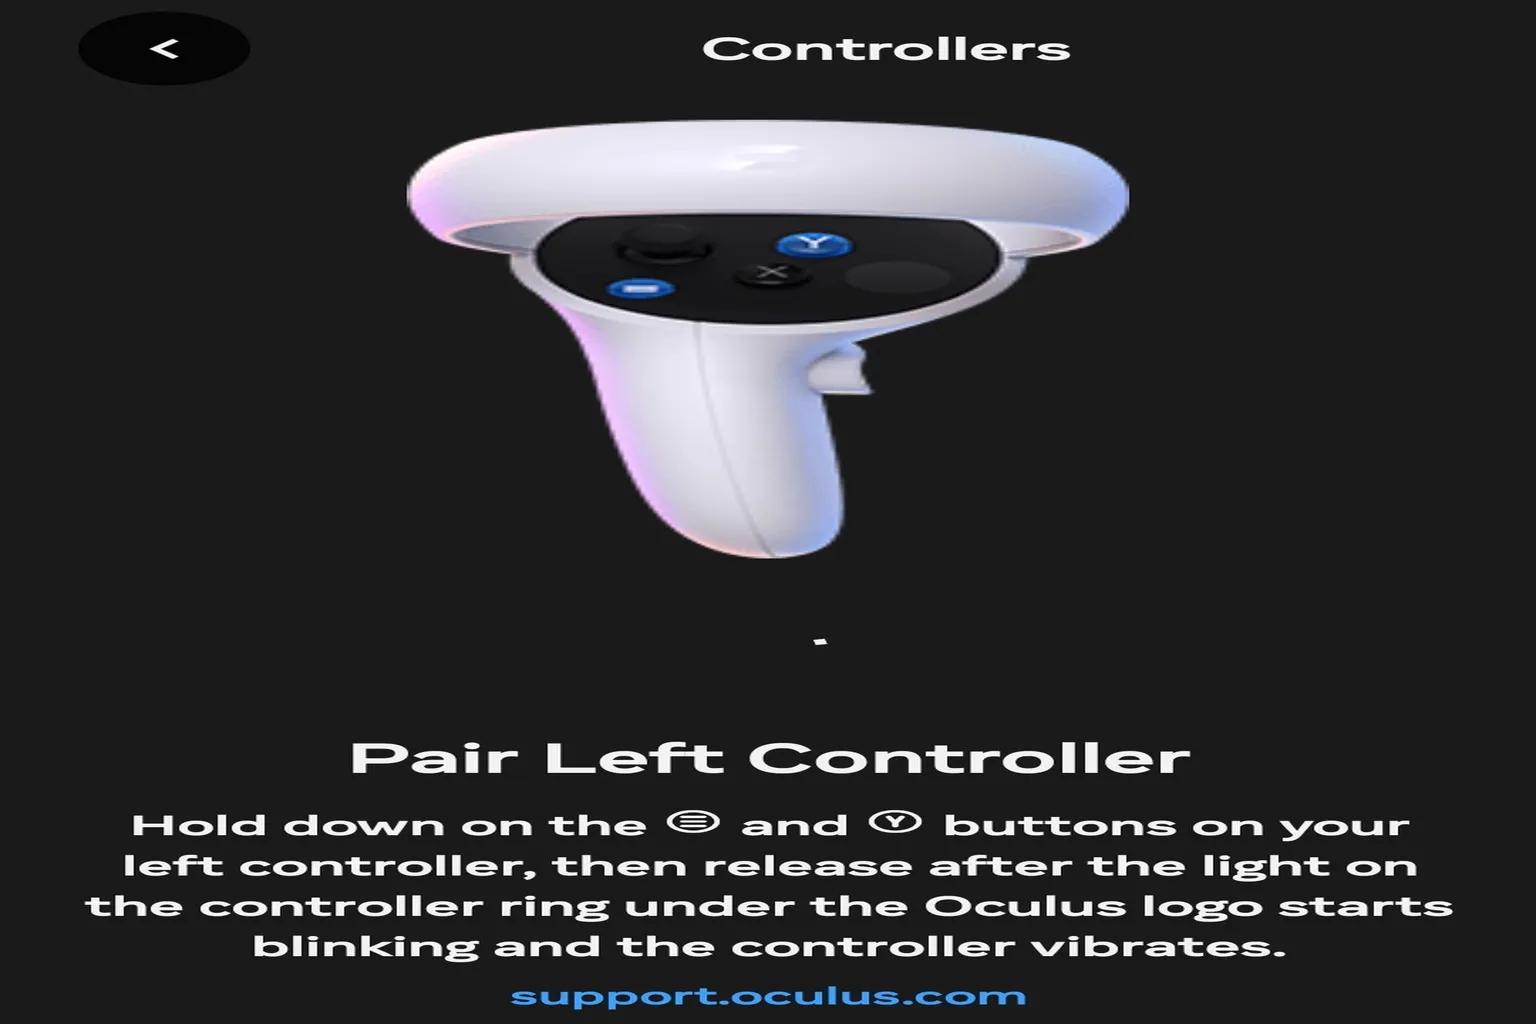
For the left controller, press and hold the ☰ button and the Y button at the same time.
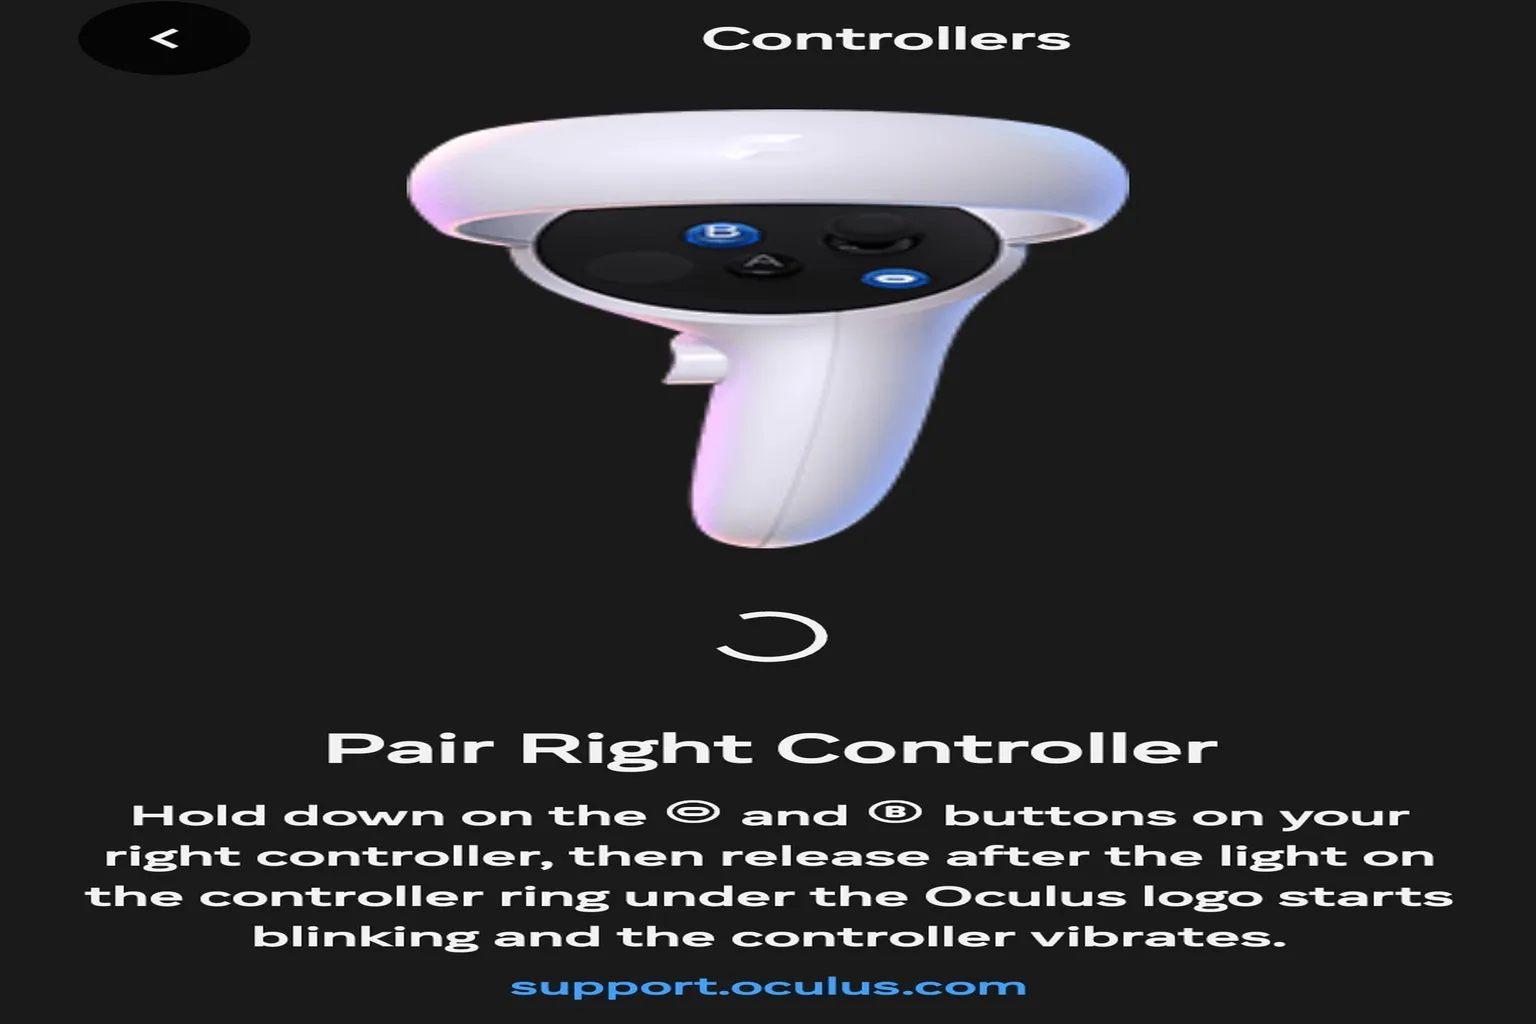
For the right controller, hold the ∞ button (Quest 3 / 3S) or ◉ button (Quest 2) together with the B button at the same time.
Step 6: Controller Update
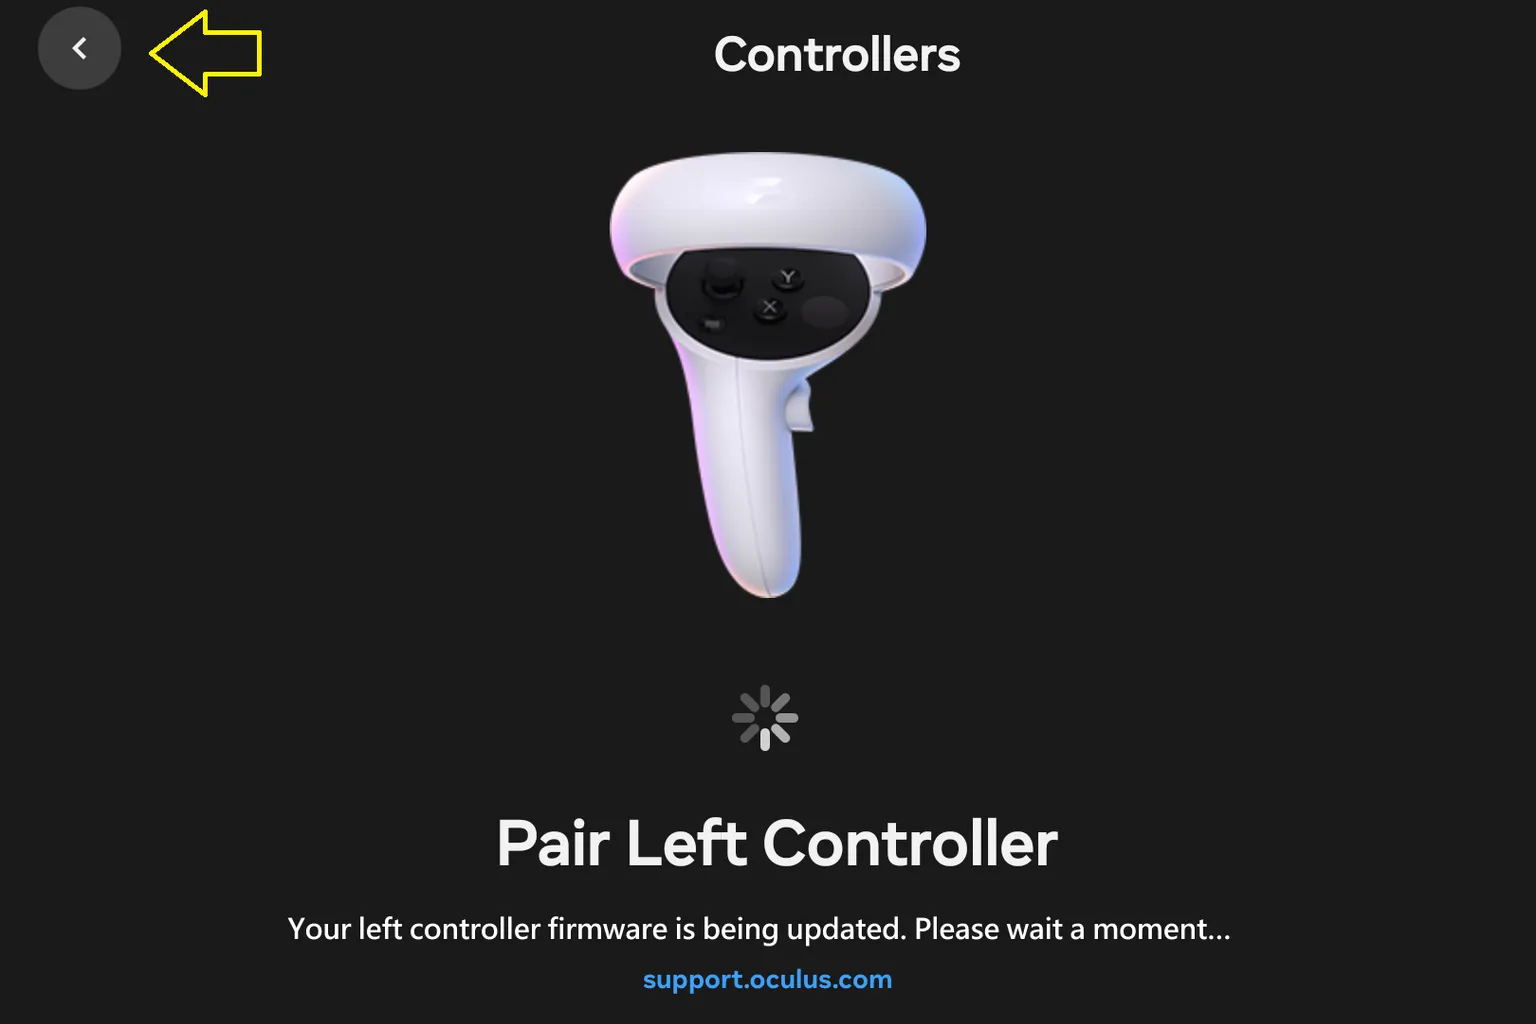
Once the connection is complete, the controller update will start automatically.
That said, sometimes the update screen doesn’t finish even after 10 minutes.
If it seems stuck for too long, try tapping the red-boxed area on the screen to go back to the previous page.
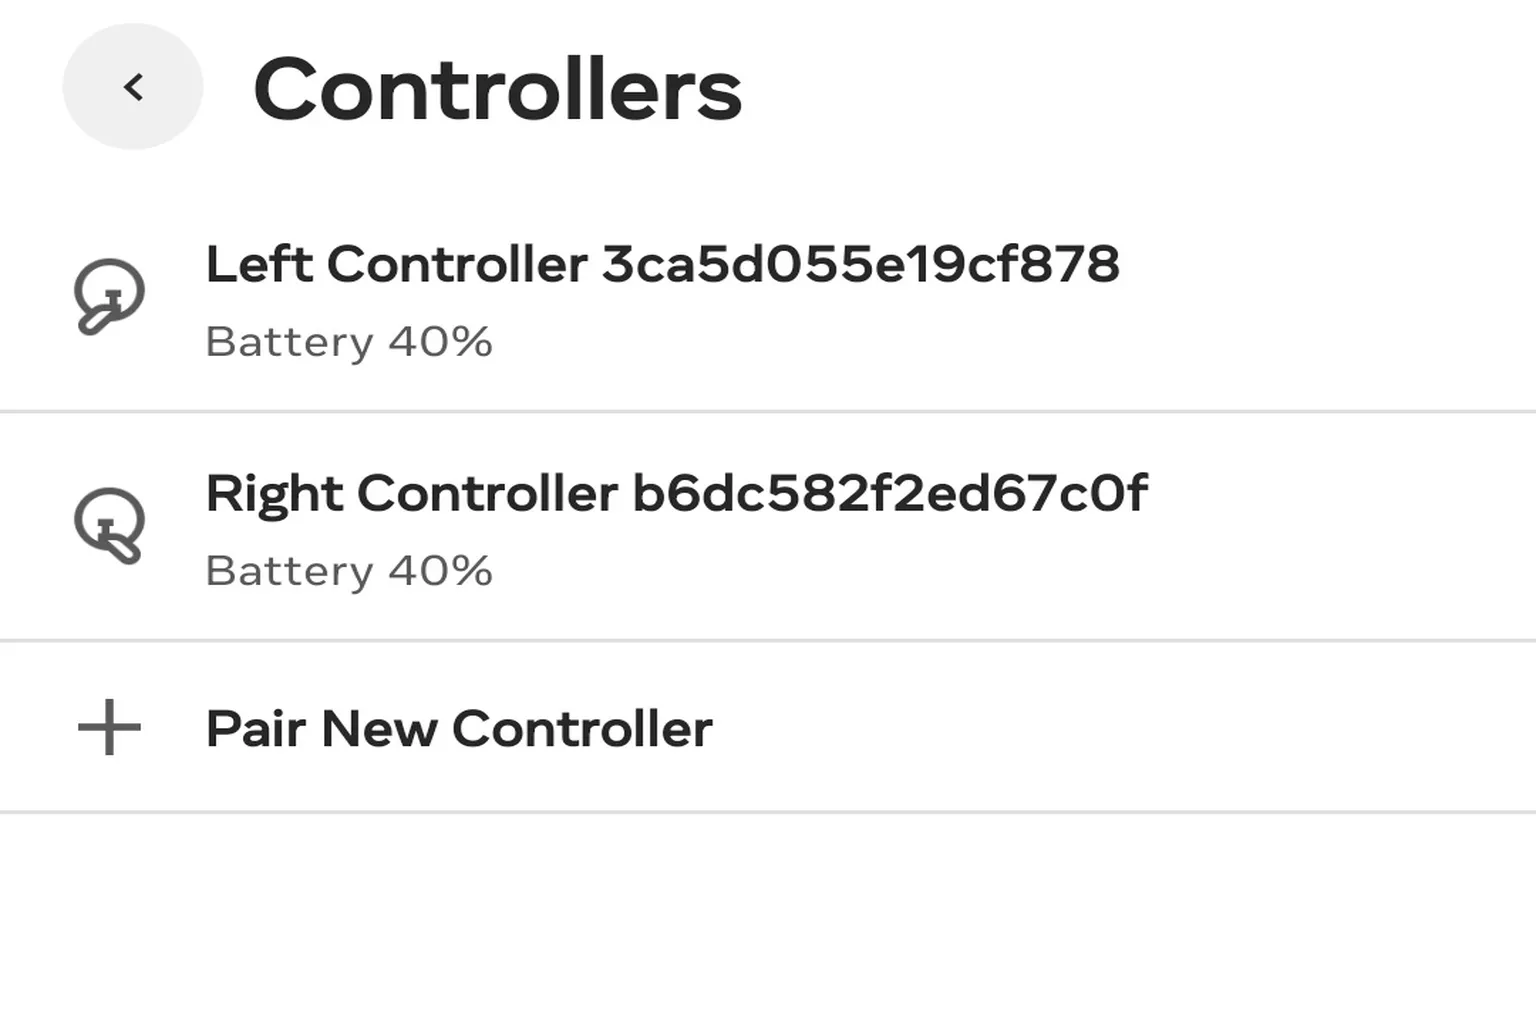
At this point, you should be able to confirm that the controller is properly connected.
And that’s it—setup complete!
Your Meta Quest is fully back in action, ready for games and videos again.
Connection issues caused by firmware version mismatches
There have been real cases where a refurbished headset and controllers couldn’t be paired at all because the firmware version gap was too large.
If that happens, you’ve basically got two options:
- Ask a friend who has the same headset model to pair and update the controllers on their headset first, then reconnect them to your refurbished headset.
- Send it in for repair (replacement) again and have Meta ship you a different unit.
In some cases, after putting on the headset and waiting about 5 minutes, it may automatically enter a forced pairing mode.
Since you’ve gone through all this trouble, you might as well check out some recommended games and video apps next.
Chances are, you’ll want to start enjoying your fresh setup right away.
Meta Quest No-Motion-Sickness VR Games You Gotta Try
Safe Starter Picks for VR Newbies
5 Best Meta Quest VR Video Players Compared
NEX, Moon, Skybox, 4XVR & HereSphere
FAQ – Common Questions
When you send a Meta Quest in for repair, do you get a brand-new unit or a refurbished one?
Meta follows a “no repair, replacement only” policy, so what you receive is a refurbished replacement that’s equivalent to new in both appearance and functionality.
The package label will clearly say refurbished.
Why can’t I control anything even though a new headset and controllers arrived?
Because the headset and controllers haven’t been paired to your account yet.
Follow this guide to unlink the old device and re-pair the new headset and controllers.
If I replaced just the controllers, how do I pair them? Do I need to remove the old ones first?
Yes. First unpair the old controllers, then manually add the new controllers in the Meta Horizon app.
Follow the on-screen instructions and hold the specified buttons to complete pairing.
What if my phone can’t connect to the headset?
Check that Bluetooth is turned on and that the phone and headset are close to each other.
If it still doesn’t work, restart both the Meta Quest headset and the mobile app.
The refurbished controller is stuck on the firmware update screen—what should I do?
Even if it looks like it’s still updating, pairing is often already finished.
Go back one screen and check whether the controller’s battery status is shown to confirm the connection.
If I can’t operate the old headset anymore, how do I unlink it from my account?
Log in to the Meta official website and go to Device Management → select the device → Reset to factory settings to remove the link.
After switching to a replacement headset, my phone won’t connect at all—why?
In most cases, the replacement headset’s firmware is too outdated to pair properly.
When that happens, the fastest solution is to submit another repair request to Meta.