Singapore currently has no major local retail distributor for Meta Quest 3 / 3S, but the official Meta Store does support Singapore orders. If you want to buy a headset, you basically have to go through overseas sellers or parallel imports.
This guide breaks down the five common ways Singapore buyers get a Meta Quest, including local Singapore e-commerce stores, Shopee sellers, Amazon Japan, buying directly in Japan, and ordering from the official Meta website. I’ll compare the actual price, warranty, risk, and who each option is suitable for.
I’ll also explain the regional warranty limits when buying from Japan, the shipping details and things to watch out for on Amazon JP, and the official Meta Store’s unique door-to-door warranty pickup service, plus the 40 SGD Quest Cash creator bonus.
In the later part of the article, I’ll walk through the full official website ordering process, how to deal with card payment failures, how to fix strange currency display issues, and the common problems Singapore buyers usually run into, so you can pick the right buying method without stepping on landmines.
Meta adjusted the global prices of the Quest 3 / Quest 3S on 19 April 2026, so this article uses the latest pricing.
Comparing the different ways to buy a Meta Quest VR headset
Since Singapore currently has no official distributor for the Meta Quest 3 / 3S, there are basically five ways to buy these headsets in Singapore:
- Singapore e-commerce stores, such as Amazon SG or Lazada
- Shopee sellers
- Amazon Japan
- Buying one yourself while travelling in Japan
- Ordering directly from the official Meta website, including the creator bonus
Using the Meta Quest 3 512GB and Quest 3S 128GB as examples, here is a quick overall comparison:
| Buying method | Price (SGD) | Delivery time | Headset source | Warranty | Extra bonus |
| Singapore e-commerce store (Lazada) | Quest 3: 901 Quest 3S: 584 | 2 days 👑 | Japan | 1-year seller warranty After that, you need to handle it yourself | – |
| Shopee sellers | Quest 3: 888 Quest 3S: 588 | 3–5 days | Japan | 1-year seller warranty After that, you need to handle it yourself | – |
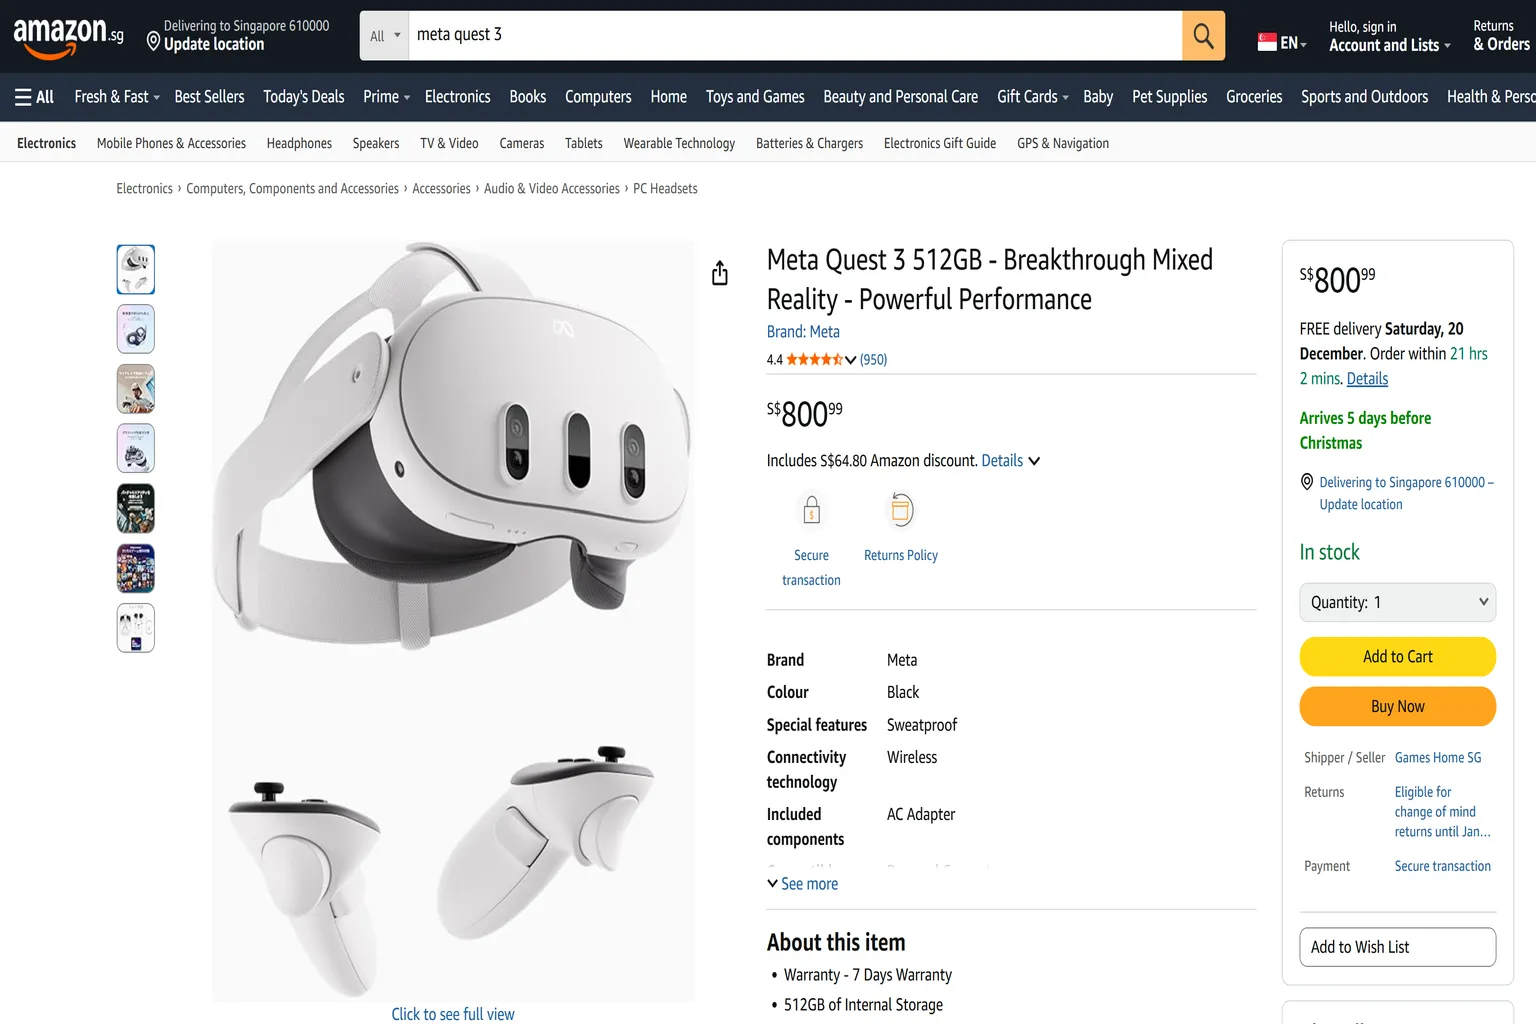
| Amazon SG | Quest 3: 1,053 Quest 3S: 580 | 2 days 👑 | Japan | 7-day seller warranty After that, you need to handle it yourself | – |
| Electronics stores in Japan | Quest 3: 740 👑 Quest 3S: 432 👑 | Pick up on the spot | Japan | You need to ship it back to Japan yourself if there is any issue | – |
| Amazon Japan | Quest 3: 820 Quest 3S: 480 | 4–7 days | Japan | You need to ship it back to Japan yourself if there is any issue | – |
| Meta official website | Quest 3: 850 Quest 3S: 500 | 3–5 days | Meta Singapore official site | Free FedEx door-to-door pickup and return Even after the warranty period, Meta often still offers free refurbished replacements👑 | 40 SGD👑 |
Notes:
For electronics stores in Japan, you need to bring your passport and apply for tax-free purchase. The prices shown in this article are after tax refund.
Amazon Japan currently does not ship Meta Quest to Singapore for now, so you need to use a forwarding service. Shipping is around 25 SGD.
If you want a cheaper price but still want peace of mind, the Meta official website is usually the most stable and easiest choice.
Below, I’ll go through the differences and things to watch out for, one by one.
Overseas exchange rate calculation date: 18 May 2026.
Singapore e-commerce stores
On platforms like Amazon SG, Lazada, and Shopee in Singapore, most sellers are basically bringing in their stock from Japan.
The warranty setup is usually handled through the seller. In most cases, the warranty period is only around 7 days to 1 year. During the warranty period, the platform or seller helps send the headset back to Japan for repair. Once the warranty is over, you have to handle any problems yourself.
In terms of price, these are usually more expensive than buying from the official Meta website. The price gap is around 5–15%.
This buying method is more suitable for:
- Companies that need an invoice for reimbursement
- People who don’t like overseas shopping procedures and just want a simple one-step purchase
But overall, I don’t really recommend buying this way. The price gap is quite big, and the warranty terms are too strict.

Lazada – At Least There’s Some Warranty
Next-day delivery, invoice available, suitable for companies
Quest 3S SGD 584
Japan unit, 1-year warranty; after that, you ship it back to Japan yourself
Shopee – Warranty Depends on the Seller
Around 3-5 days delivery, some sellers provide invoices
Quest 3S 128G SGD 588
Japan unit, seller warranty 6 months; after that, you send it to Japan yourself
Amazon SG – Shockingly Expensive and Basically No Warranty
Two-day delivery, invoice available
Quest 3S 128G SGD 580
Japan unit, seller offers 7 days only, which is basically no warranty
Japanese e-commerce stores and buying directly in Japan
Singaporeans quite like travelling to Japan. Even though the flight takes around 6–7 hours, the travel, shopping, and food are all quite good value.
On top of that, Tokyo and Osaka are safe, the shopping environment is comfortable, and there is plenty of anime and gaming culture. Basically, it is an easy place to enjoy.
Buying a Meta Quest in Japan is usually a bit cheaper than buying in Singapore, mainly because of the weaker yen and tax-free shopping. This applies whether you buy from Amazon JP, or from electronics stores like Yodobashi and Bic Camera.
But if you choose to buy in Japan, you must open the box and check the headset on the spot.
I’ve seen quite a few cases where people only found out the headset had issues after returning to Singapore. Then when they tried to send it for repair, they realised one painful thing:
The headset has to be sent back to Japan for warranty service.
Please remember this:
Meta Quest warranty is regional.
Whether you buy it from a shop in Japan, Amazon Japan, or even an electronics store in Akihabara, if the headset breaks, it has to go through Japan’s local warranty process.
In Singapore, you can basically treat it as having no warranty.
So yes, buying in Japan is a little cheaper. But unless you have friends or family in Japan who can help with after-sales service, it can become very troublesome once something goes wrong.
For most people, I don’t really suggest taking this risk.
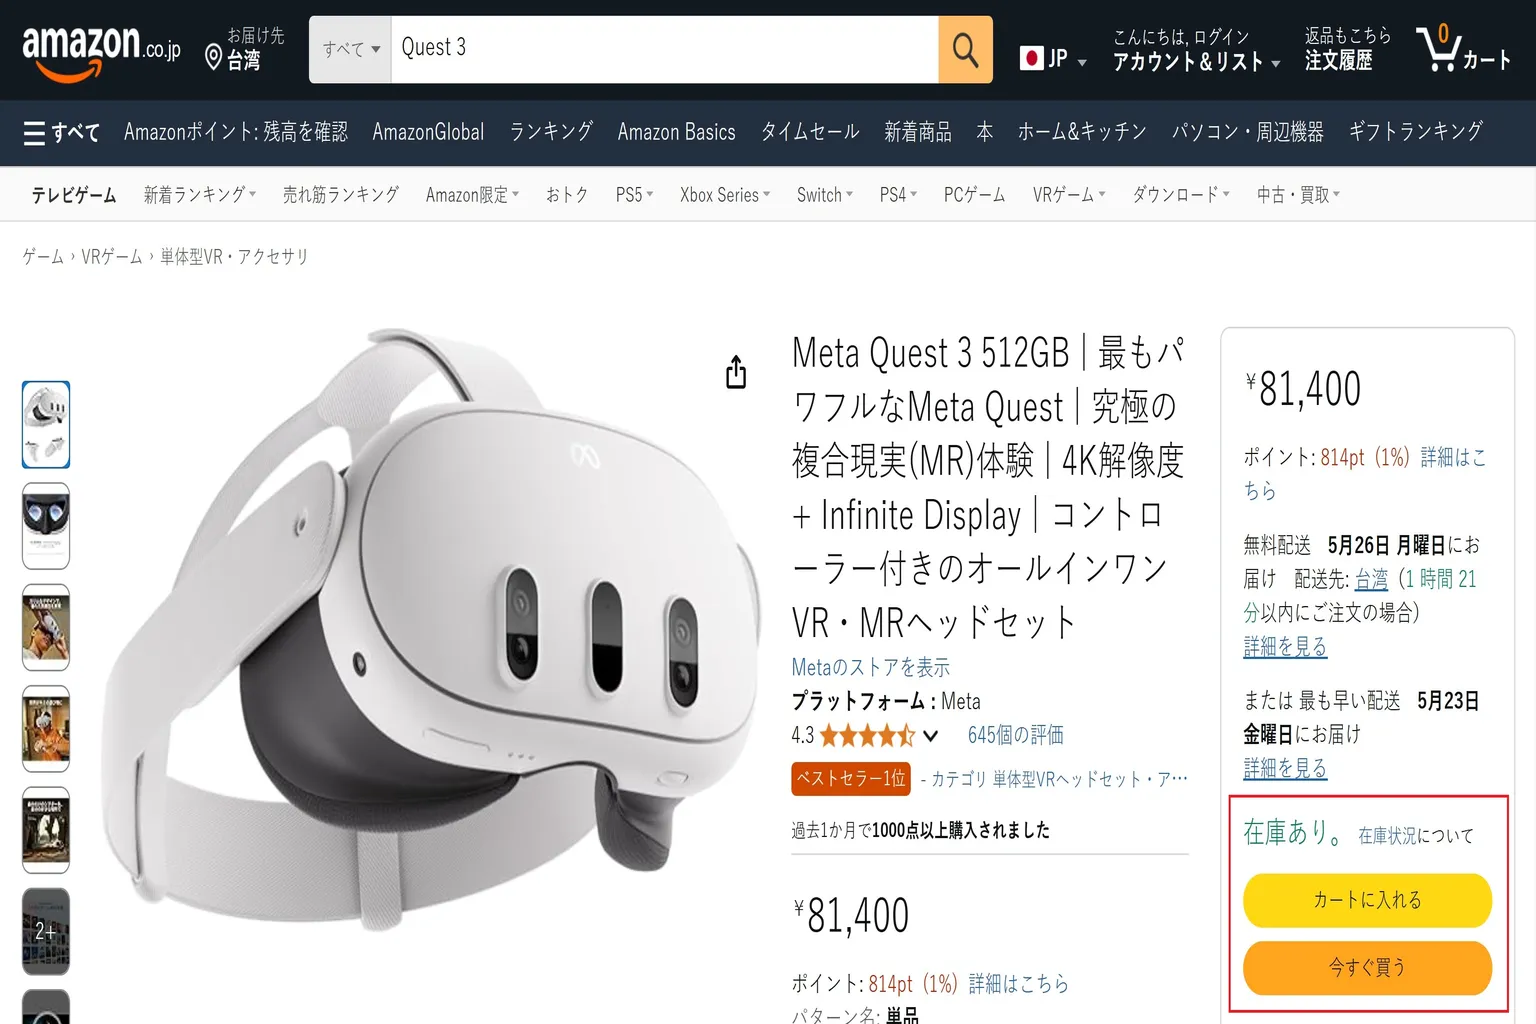
Amazon Japan – Cheaper, Returnable
4–7 days delivery
Quest 3S 128G SGD 480
Japan unit, warranty requires sending it back to Japan yourself
Buy in Japan – Cheaper but No Local Warranty
Buy it yourself or ask a friend to fly to Japan, tax-free price
Quest 3S 128G SGD 432
Japan unit, warranty requires sending it back to Japan yourself
Meta Quest official website
The Meta Quest official website uses Singapore dollars. Shipping and taxes are already included, and the headset is delivered straight to your home. The overall price is actually quite close to buying from Japanese e-commerce stores.
But the biggest difference with the official website is the warranty. It is much more comfortable.
If there is a problem, you just send an email. FedEx will come to your home to collect the headset, then deliver it back to you after service. Within the one-year warranty, that part is expected. But even after the warranty period, I often hear cases where headsets bought from the official website still get free repair or replacement.
The price is only a few dozen dollars more than buying directly in Japan, but in exchange you get proper warranty coverage and door-to-door pickup and return. Personally, I think that is much more worth it.
Also, if you enter “VRPUPU” during checkout, you get an extra 40 SGD in reward credit. After calculating that, the price is almost the same as buying locally in Japan.
For headsets bought from the official website, the warranty is more complete, so the resale price is usually slightly higher than units bought from Singapore e-commerce sellers or Japan.
If you are planning to buy a second-hand unit, I suggest asking the seller where the headset was originally purchased. This helps you judge how easy or troublesome repair will be if the headset has problems later.
How to buy a Meta Quest headset from overseas
If you want to buy a Meta Quest VR headset from overseas, the main options are buying directly in Japan, ordering from Amazon JP, or buying from the official Meta Quest website.
I’ll go through each method below.
Buying directly in Japan
How to fly to Japan probably doesn’t need much explaining. You may even go there more often than me.
To buy a Meta Quest in Japan, just walk into one of their major electronics stores. Places like BIC Camera and Yodobashi usually appear the moment you come out of a train station. No need to specially hunt for them. They are everywhere.
After buying, remember to keep the receipt and apply for tax-free shopping. Buying locally in Japan gives you the 10% tax refund, so this is usually the cheapest way to buy a Meta Quest headset.
But there are two things to watch out for:
Japan units have no warranty in Singapore
So it is best to unbox and test it on the spot. Make sure the display, controllers, and buttons are all working properly.
Logging in while in Japan may tie the account to the Japan region
After returning to Singapore, this can become troublesome. The currency will be different, and buying games may become difficult. I suggest not logging in on the spot. Just confirm the headset works, pack it back, and bring it home.
Although the failure rate for a new headset is really not high, I have still seen one or two unlucky cases.
So if you choose to buy in Japan, I suggest unboxing it on the spot and doing a quick check. The process is simple:
- Open the box and first remove the insulation tabs from the controllers, so you can make sure the controllers power on properly.
- Wear the headset and check whether the display, buttons, and analog sticks are all working normally.
Once these two checks are fine, you can more or less pack it back with peace of mind. No need to log in to any account. Just bring it back to Singapore and set it up there.
If you really run into a problem, don’t worry too much either. Japanese store staff are usually very polite and will normally help you replace it with a new unit right away.
Buying from Amazon Japan
This is one of the overseas e-commerce options Singapore buyers use the most. If Amazon Japan ships directly to Singapore, the checkout page may remove Japan’s local tax and calculate shipping or import fees during checkout.
But if you use a forwarding service, the order is usually treated like a domestic Japan delivery first. In that case, the final cost depends on the listed price, forwarding fee, shipping fee, and Singapore import tax handling.
In the past, Amazon Japan was one of the more convenient overseas options because some listings could ship directly to Singapore.
However, due to the recent Meta Quest price increase, Amazon Japan currently does not ship Meta Quest to Singapore. For now, you need to use a forwarding service if you still want to buy from Amazon Japan.
The only thing to watch out for is this:
Your delivery address must be entered in English, using your Singapore address.
Simple purchase flow:
On Amazon Japan, type Quest 3 or Quest 3S into the search bar, and you should be able to find the headset you want. If you see “在庫あり”, it means the item is in stock.
Click the orange 今すぐ買う button at the bottom right to check out.
Before placing the order, prepare these:
- English name
- English address
- A credit card with overseas transactions enabled
After completing the order, the item usually arrives at your home in around 4–7 days.
How to buy from the official Meta website
The Quest pricing on Meta’s official website is actually not expensive to begin with, and the warranty is very strong.
If the headset has a hardware issue during the warranty period, Meta’s support process is much easier than dealing with a parallel import seller. In many cases, FedEx can collect the headset from your home, and Meta will send back a repaired or replacement unit.
Meta Store hardware purchases generally have a 30-day return window.
If it doesn’t feel right, if VR makes you too dizzy, or if you simply don’t like it, you can return it.
The money will be refunded back to you in full.
Also, there is one offer that only works on the Meta official website: when buying a Meta Quest 3 / 3S headset, enter “VRPUPU” and you can receive an extra 40 SGD in reward credit.
For the detailed usage method, you can refer to this guide.

Meta official website purchase flow
The Singapore Meta website sometimes has a strange currency display issue during checkout. If you are buying on a computer, I suggest using the Firefox browser to avoid this problem.
Step 1: Go to the Meta official website and choose the device you want
For the next example, I’ll walk through the process mainly around how to receive the reward credit worth 40 SGD.
If you want to do it faster, you can also use the creator bonus link I provide. It will take you directly to the purchase page for Quest 3 or Quest 3S.

Select the headset you want to buy on the right side.

Once you are on the Quest 3 product page, click the Buy now button to start placing your order.

Step 2: Choose the headset
After entering the purchase page, first choose the device you want. Once everything looks correct, click Add to bag at the bottom right.
Currently, Meta Quest 3 is only available in 512GB.
For Meta Quest 3S, you need to choose the storage size at this step: 128GB or 256GB.

Step 3: Add accessories and software
If you need official accessories, or you want to buy some software together, you can add them to your cart at this step.
After choosing what you want, click Add to bag. These items will then be checked out together with the headset.
My suggestion is to only add accessories here. Don’t buy games at this step.
Games added at this stage usually do not get any discount. That means you are paying full price, which is the worst deal.
Buy the headset and software separately, so you can make full use of the available offers.

Step 4: Shopping bag and checkout
If you entered through the creator link earlier, you should see “$30 Quest Cash” here, and the right side will also show that “VRPUPU has been applied”.
This means after you receive the headset, Meta will give you an extra 30 USD in reward credit. For Singapore, you receive 40 SGD instead. You can treat it as a hidden official offer.
After confirming that the bonus has been applied, click Checkout.

What if you entered from the official website by yourself and don’t see the reward?
No need to panic. Just enter the promo code manually.
On the right side, click Add promo code, then add the discount code yourself.

Type “VRPUPU” into the input field and apply it.
The bonus will be added back, and you’ll still receive the reward credit.
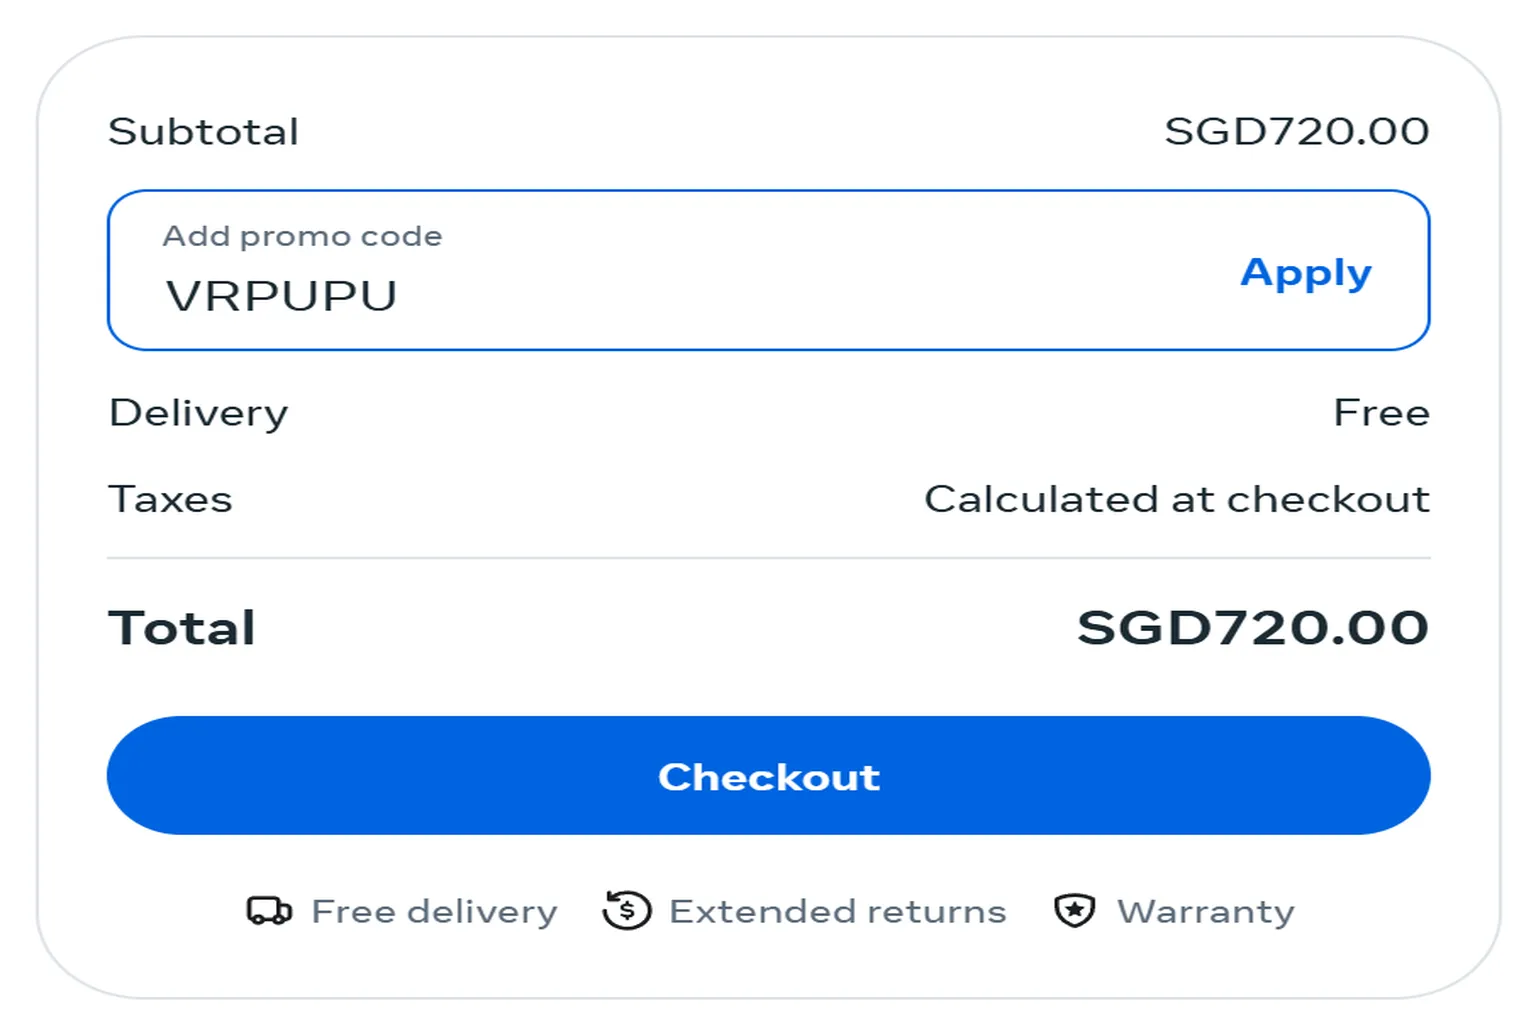
After applying the VRPUPU promo code, you will also receive the same 30 USD Quest Cash.
For Singapore, this is given as 40 SGD.
Step 5: Check before payment
After entering the checkout page, first check the shopping bag details on the right side.
Make sure you can see $30 Quest Cash – Included in headset. This line means the offer has been applied successfully, and you should be able to receive the reward credit later.
Take a screenshot of this page as a record. The shipping invoice will not show the 30 USD Quest Cash, so this screenshot can be used as proof of purchase.

If your screen does not show $30 Quest Cash – Included in headset, it means the offer was not applied successfully.
Go back to Step 4 and do it again.

Sometimes the Meta official website messes up the currency calculation. You may suddenly see some crazy price, like asking you to pay 122,774 USD.
I tested several Meta official websites from different countries myself. As long as the site is not priced in USD, this issue can appear, including Germany, France, and others.
If you run into this screen, close the webpage directly, close the browser as well, then open it again. Sometimes it will return to normal after that.
Do not check out while the price is showing like this.
This problem seems especially common on the desktop versions of Google Chrome, Microsoft Edge, and Opera. These three browsers all have one thing in common: they are based on Google’s Chromium engine.
If you want to avoid this issue from the start, I suggest using Firefox instead. Firefox uses the Gecko engine, and based on my testing so far, it does not show this currency display error.

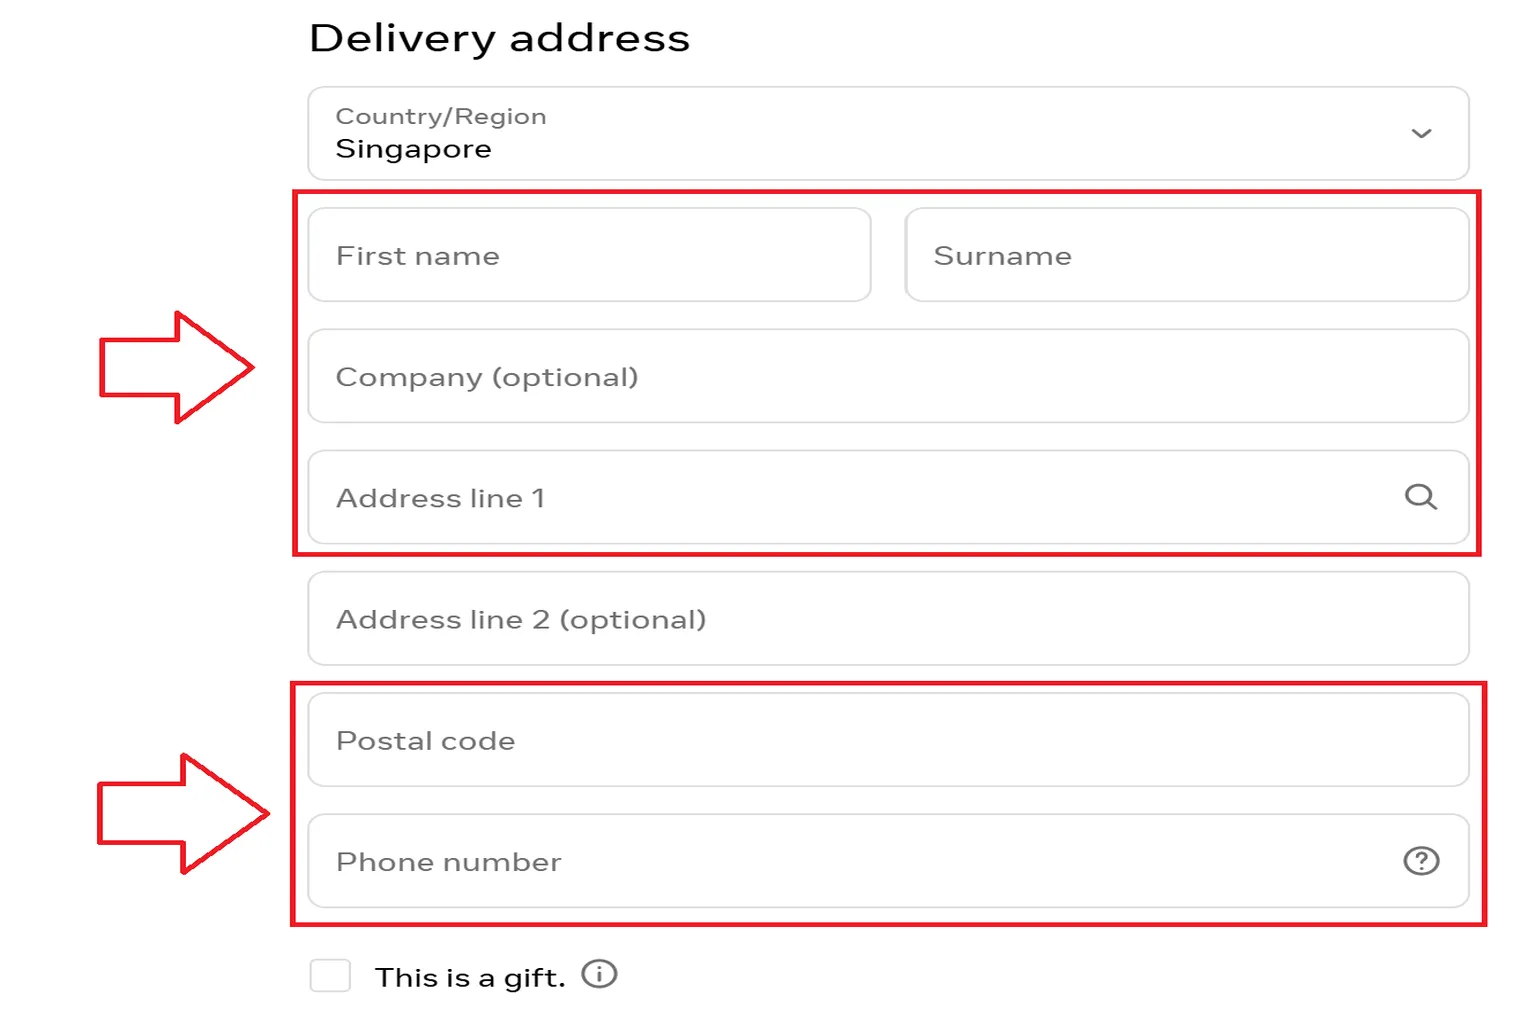
Step 6: Fill in your address and complete payment
On the left side of the screen, enter your delivery details and credit card information. Then click Pay now to complete the order.
If your address is too long and the system shows an error message, move the second half of your address into the Address line 2 field. After that, it should go through normally.
For purchases from the official website, GST is already handled during checkout. You don’t need to pay extra cash or do any separate customs declaration.
After payment is completed, a simple survey will pop up on the page.
If the buying experience felt good this time, giving them a 10 is quite fair too.
What if the card payment fails?
This problem is really common.
When I placed an order for a Quest 3 / Quest 3S on 10 December 2025, I ran into the exact same situation. After pressing the payment button, Meta directly showed a “payment failed” message.
The simplest and fastest fix is to switch to a credit card from another bank and try again.
But what if you only have one card? Then you need to unlock the risk control restriction on that card.
At this point, call the customer service number on the back of your credit card and tell the bank directly:
This is not fraud. You are the one making this purchase.
Then ask them to enable the transaction permission for Meta Store.
The whole process takes some time waiting for customer service, around 20 minutes or so.
Some banks don’t require a phone call. You can unlock it yourself in the bank’s app.
Just follow the instructions to release the transaction block, and the card should work normally after that.
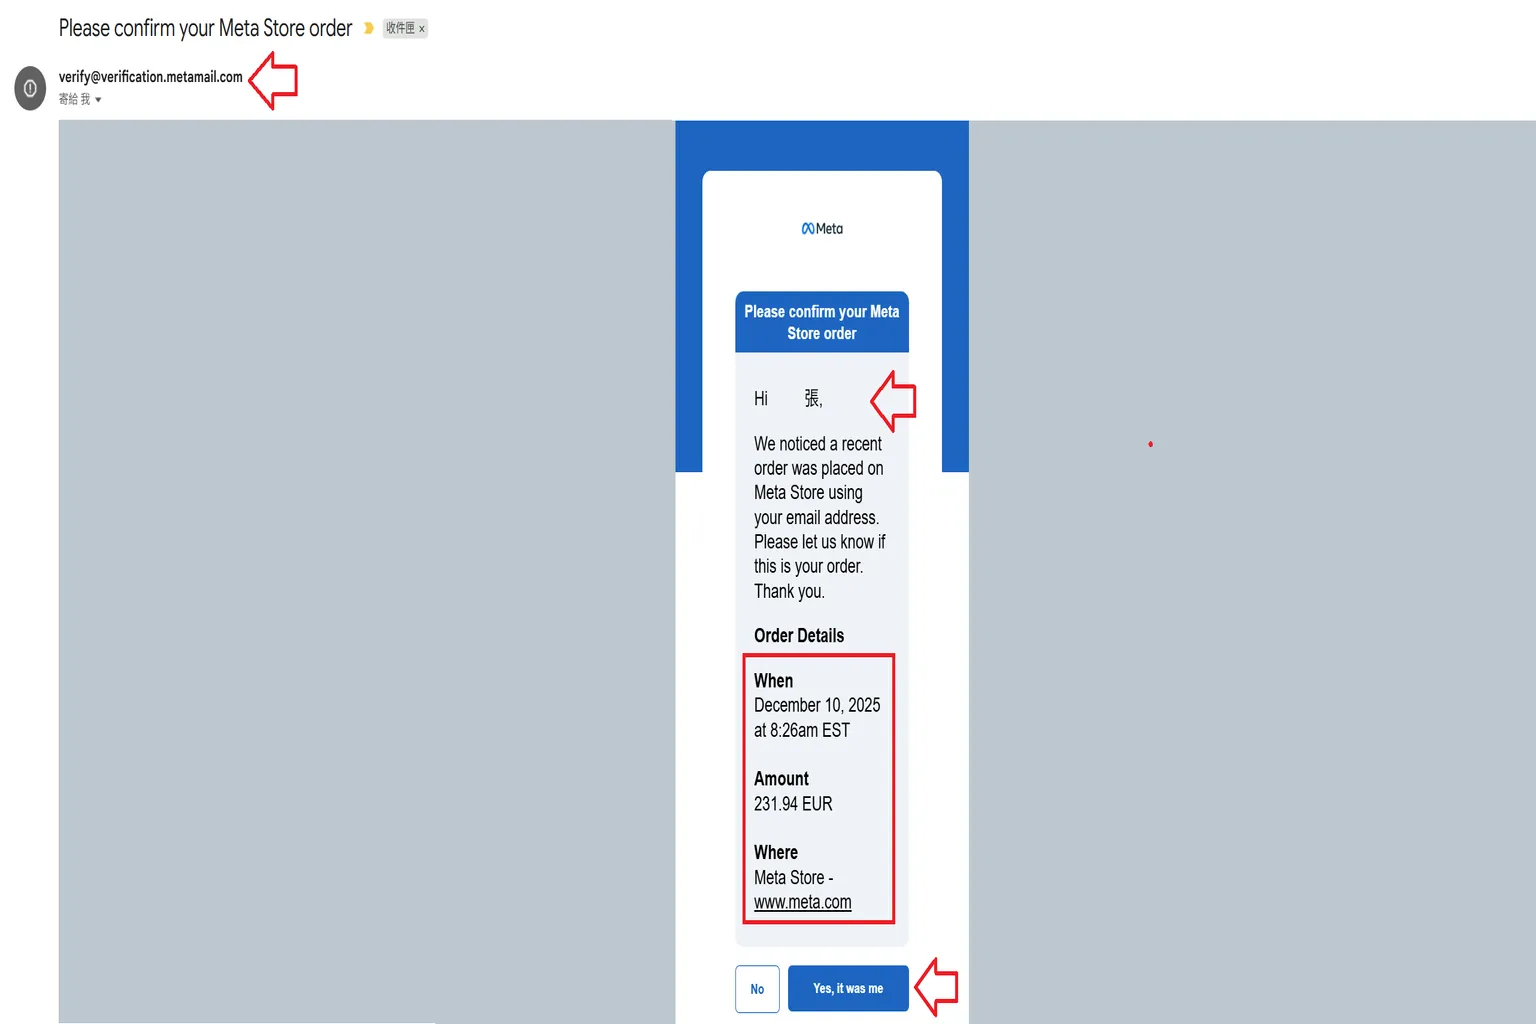
Meta card verification
Sometimes after you buy a headset, Meta will send you another confirmation email. This is mainly for security verification, to confirm that the card payment was really made by you.
This email will include the following information:
Sender: [email protected]
This is Meta’s official security verification system. Emails sent from this address are safe.
Your name: the recipient’s name
Purchase date and time: the time will be 13 hours behind Singapore, because it is shown based on New York time in the United States (UTC–5).
For example, I placed my order at 9:26 PM Singapore time on 10 December.
Price information: we paid in SGD, but Meta’s verification email may show the amount in euros.
The number may look different. This is just the email display format and has nothing to do with the actual payment.
As long as the amount is within the range you expected, it is fine.
After confirming that all the details are correct, click Yes, It was me to complete the verification.
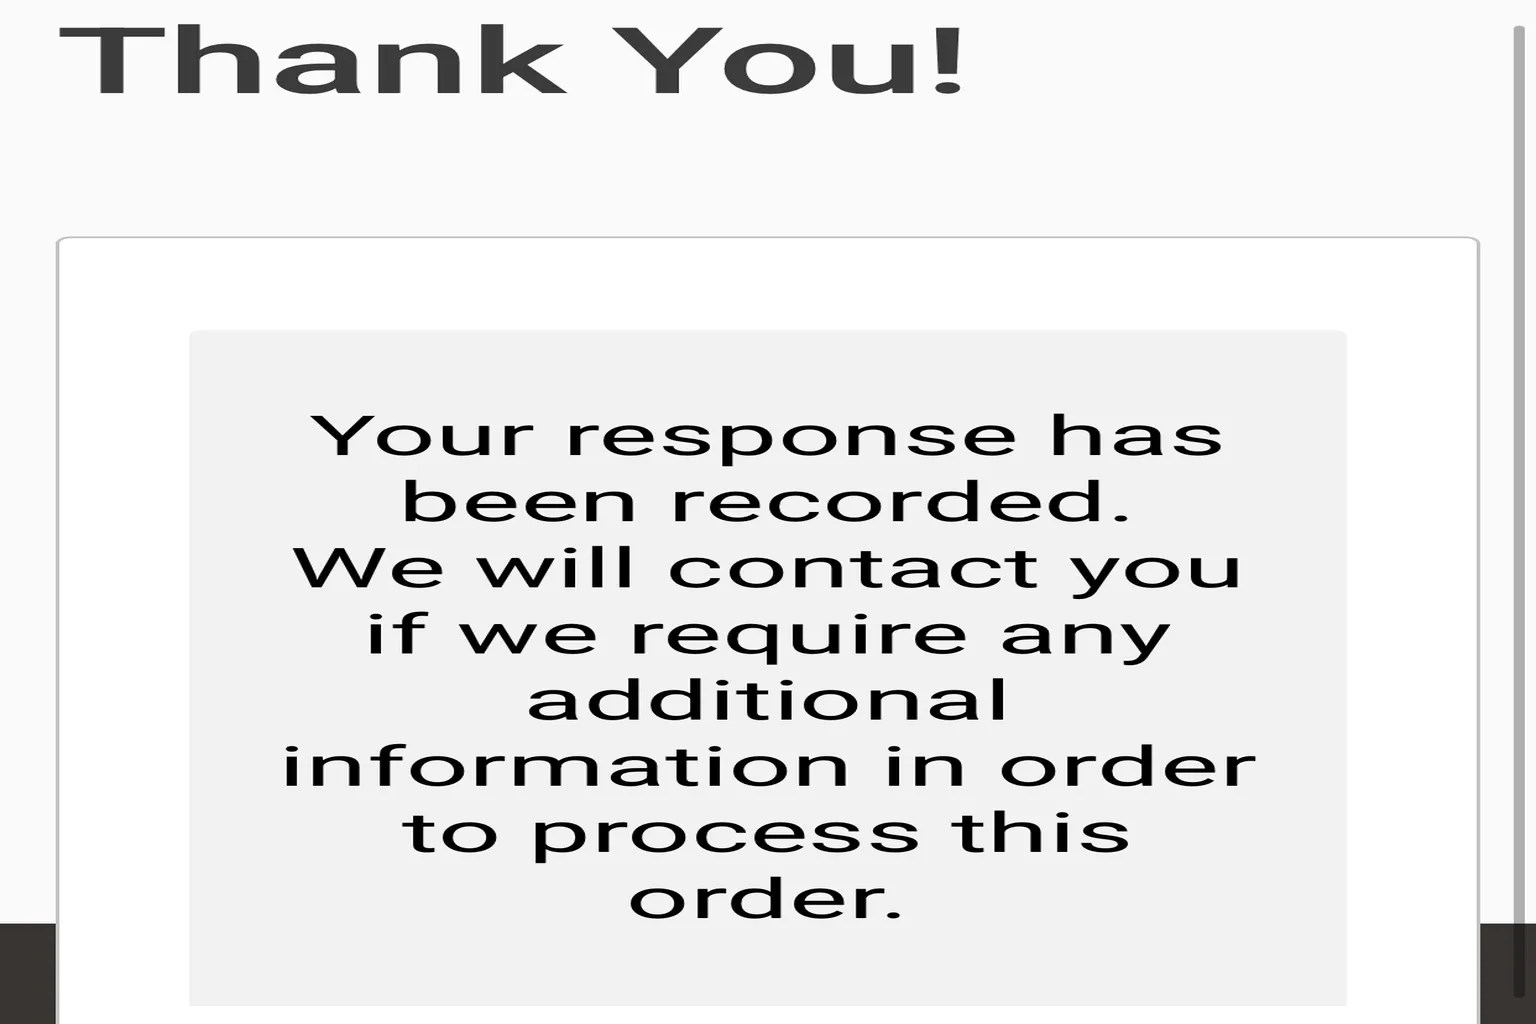
After confirming it, the system will show that the card verification has passed.
After that, you just need to wait for Meta to ship the order.
By the way, after buying the headset, you can start browsing the Meta Store and picking games.
Just remember one important thing: for games that are not already on sale in the store, enter “VRPUPU” before checkout and you can get 10% off. Some DLC and bundles can use it too.
The money you save from the discount is just nice enough to buy one or two more games. Very worth it.
For example, a game like “Beat Saber” normally costs 39.99.
Once you enter the discount code at checkout, the price will directly become 35.99.

After purchase
If you have successfully ordered your Quest 3 from the official website, there is usually a roughly 20-minute “observation period”.
As long as the order does not get cancelled during this period, it is basically stable.
After that, Meta will gradually send you three important emails:
First email: order confirmation
Congratulations, your Meta Quest headset order has been placed successfully.
Second email: shipping notification
This means the item has left the warehouse and is on the way to your home.
Third email: delivery reminder and rating invitation
This tells you the device has arrived, and invites you to rate the overall purchase experience.
FAQ – Common Questions
Why is buying a Meta Quest 3 / 3S in Singapore more expensive?
Because the stock on Shopee, Lazada, and Amazon SG mostly comes from Japan. The price is usually around 5–15% higher than buying directly from overseas.
If the headset has a problem during the warranty period, the seller will help send it back to Japan for repair. But once the warranty is over, you have to handle it yourself.
Is buying a Meta Quest in Japan cheaper? What is the downside?
The biggest issue is the regional warranty limit.
A headset bought in Japan can only be serviced in Japan.
If you only discover a defect after bringing it back to Singapore, you’ll need to ask someone to bring it back to Japan for you.
What are the advantages of buying from the Meta official website?
The warranty is the most convenient.
Meta offers door-to-door pickup and return, repair handling is fast, and I often hear cases where even out-of-warranty units still get free service.
Enter “VRPUPU” and you can also receive 40 SGD in reward credit.
What if card payment keeps failing on the official website?
Changing to another card is the easiest fix.
If you only have one card, you need to call the bank or use the bank’s app to unlock the Visa / Master risk control block.
Between Japan and the Meta official website, which one is more recommended?
If you want a good price and proper warranty → Meta official website is the best choice.
If you want the absolute cheapest price → buy directly in Japan, but you must be able to handle after-sales service.
What if the headset bought from Amazon / Meta official website is faulty after unboxing?
Apply for a return immediately.
Especially for the Meta official website, don’t send it for repair. Just return it and get a new unit. That is the easiest way.
What if a headset bought in Japan turns out to be faulty only after returning to Singapore?
You can only ask someone to bring it back to Japan for return, or ask a friend in Japan with a Japanese address to help apply for Meta Japan warranty service.
Do I need to pay customs duty or GST when buying a Meta Quest in Singapore?
For the Meta official website, GST is already handled during checkout.
When the item arrives, you don’t need to pay extra.
For Amazon Japan, it depends on whether the item can be shipped directly to Singapore. If you use a forwarding service, shipping fees and import tax handling may depend on the forwarder.
If you buy it in Japan and bring it back yourself, technically you should declare it when entering Singapore if it exceeds the duty-free allowance. But in practice, for small quantities and personal use, it usually does not get checked.
What should I watch out for when buying a second-hand Meta Quest in Singapore?
Always confirm the original purchase region.
A Japan unit brought back to Singapore can basically be treated as having no warranty.
A headset bought from the official Meta website has the most convenient after-sales support. A headset bought from the official Meta website usually has the most convenient after-sales path, because support is handled through Meta’s own order and service system.